Acti PMAX-0810 Bruksanvisning
Acti ej kategoriserat PMAX-0810
Läs gratis den bruksanvisning för Acti PMAX-0810 (2 sidor) i kategorin ej kategoriserat. Guiden har ansetts hjälpsam av 24 personer och har ett genomsnittsbetyg på 4.1 stjärnor baserat på 8 recensioner. Har du en fråga om Acti PMAX-0810 eller vill du ställa frågor till andra användare av produkten? Ställ en fråga
Sida 1/2
Quick Installation Guide for PMAX-0810
PMAX-0810 is a mounting accessory converter kit that allows A8x series cameras to be mounted on certain third party mounting
solutions.
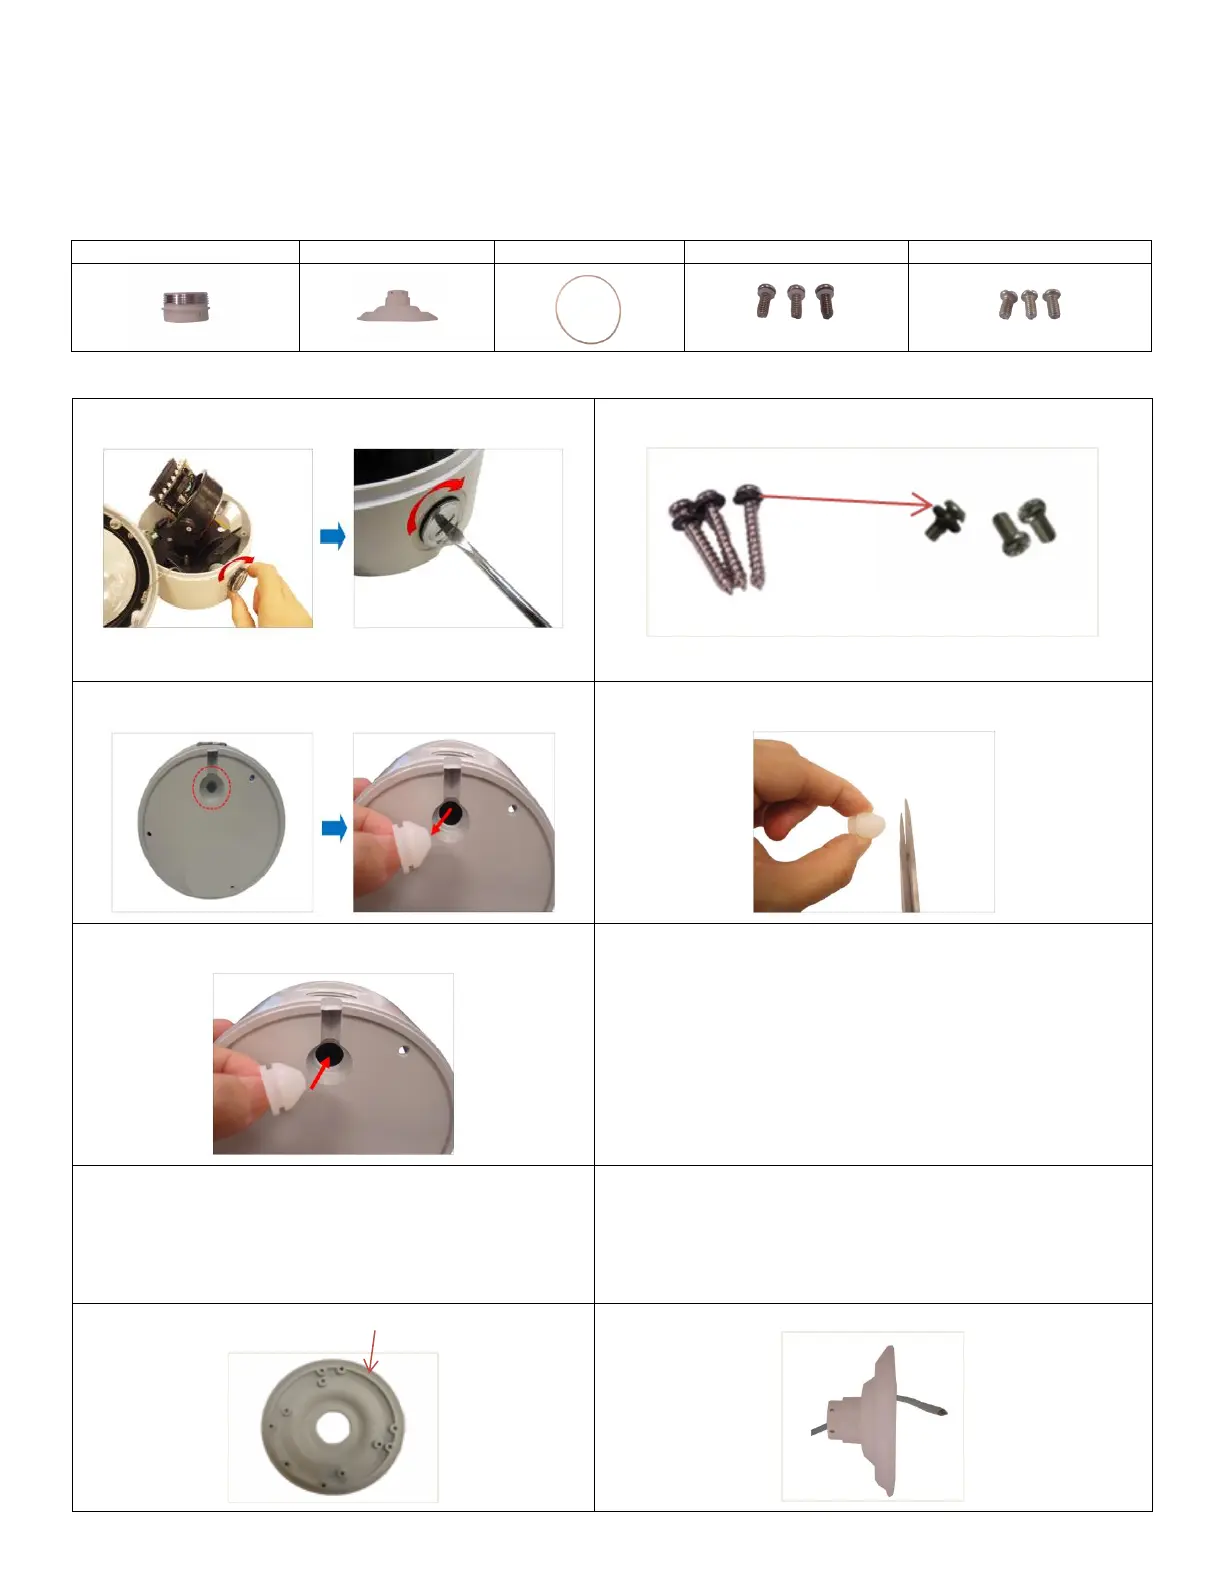
Package Content:
Converter Ring
Mount Kit
Rubber Gasket
Converter Screws
Mount Kit Screws
Installation Instructions:
1. Attach the metal cap that came with the camera on the side
conduit hole.
Note: Ensure the metal cap is tightly secured to avoid
possible water leak.
2. Remove the (3) o-rings from the screws that came with the
camera and put the o-rings on the (3) mount kit screws.
3.Remove the rubber from the bottom cable hole of the
camera.
4. Slightly cut off the tip of the rubber, just enough for the rubber to
expand and let the Ethernet cable to pass through.
5. Insert the rubber back into the camera bottom hole.
6. Install the third party mounting accessory.
Note: Please follow the instructions in the manual for the third
party mounting accessory.
7. Attach the converter ring onto the third party mounting
accessory.
8. Route the cable (without RJ-45 connector) through the third
party mounting accessory.
Note: Make sure there is enough cable length to go through the
mount kit to reach the camera Ethernet port.
9. Place the rubber gasket into the grove going around the
mount kit.
10. Pass the cable through the mount kit.
Produktspecifikationer
| Varumärke: | Acti |
| Kategori: | ej kategoriserat |
| Modell: | PMAX-0810 |
| Modell: | Montera |
| Kompatibilitet: | - A8x |
| Maxvikt: | - kg |
| Produktens färg: | Vit |
Behöver du hjälp?
Om du behöver hjälp med Acti PMAX-0810 ställ en fråga nedan och andra användare kommer att svara dig
ej kategoriserat Acti Manualer

12 Oktober 2025
12 Oktober 2025
12 Oktober 2025
12 Oktober 2025
12 Oktober 2025
12 Oktober 2025
12 Oktober 2025
12 Oktober 2025
12 Oktober 2025
9 Oktober 2025
ej kategoriserat Manualer
Nyaste ej kategoriserat Manualer
3 April 2026
3 April 2026
3 April 2026
3 April 2026
3 April 2026
3 April 2026
3 April 2026
3 April 2026
3 April 2026