Advantech ARES-5221C Bruksanvisning
Advantech ej kategoriserat ARES-5221C
Läs gratis den bruksanvisning för Advantech ARES-5221C (5 sidor) i kategorin ej kategoriserat. Guiden har ansetts hjälpsam av 15 personer och har ett genomsnittsbetyg på 4.6 stjärnor baserat på 2 recensioner. Har du en fråga om Advantech ARES-5221C eller vill du ställa frågor till andra användare av produkten? Ställ en fråga
Sida 1/5
78ORW200102A
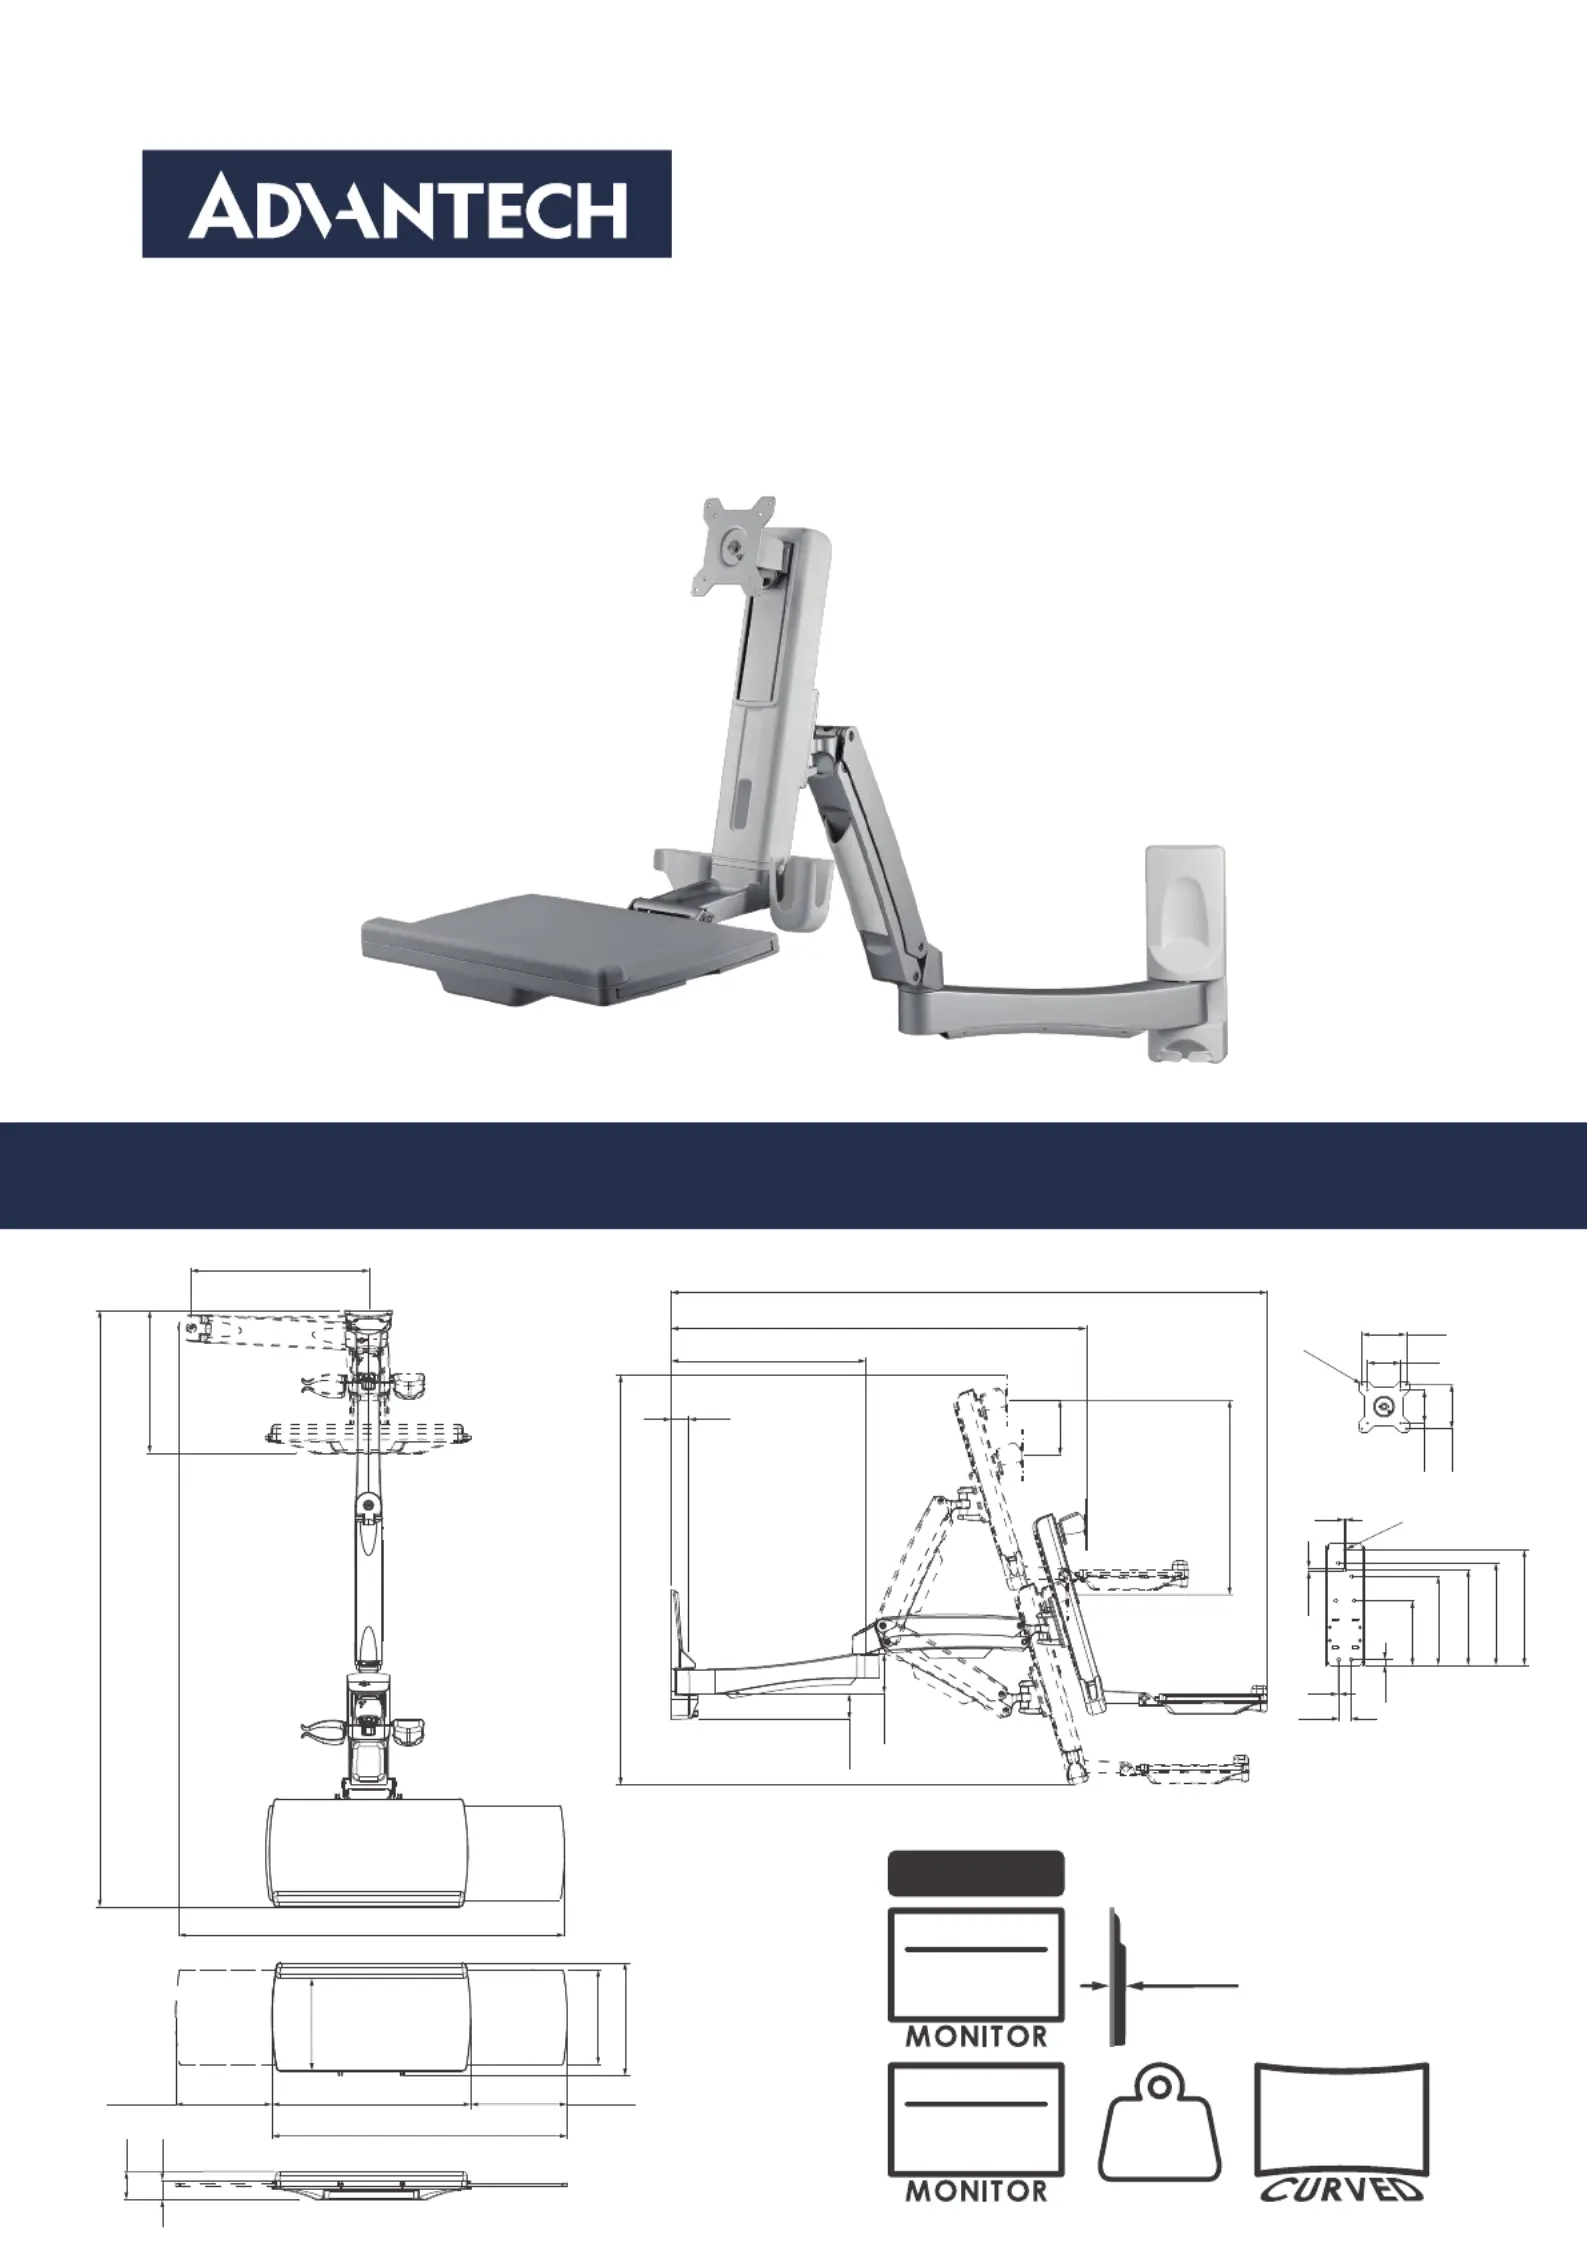
Physical Dimensions (mm)
Installation Manual
ARES-5221C
404
322
1346
871
925.3
58.5
90.5
1346
100
75
100
75
Ø4.5
124
438.7 (hinge)
758.7-937.7
440
40
2
7.5
13
146
201
216
231
261
2
26
Ø7
8-217
64
44
8-217
213
255
449
668
207
5.5 kg
12.13 lb
≤
≤ 27″
2-8 kg
4.41-17.64 lb
≤ 27″
6-12 kg
13.23-26.46 lb
Heavy Duty
≤8.5 cm
Keyboard Tray
2.5 kg
5.51 lb
≤
Produktspecifikationer
| Varumärke: | Advantech |
| Kategori: | ej kategoriserat |
| Modell: | ARES-5221C |
Behöver du hjälp?
Om du behöver hjälp med Advantech ARES-5221C ställ en fråga nedan och andra användare kommer att svara dig
ej kategoriserat Advantech Manualer

1 April 2026
30 Mars 2026
30 Mars 2026
9 Oktober 2025
8 Oktober 2025
8 Oktober 2025
8 Oktober 2025
8 Oktober 2025
7 Oktober 2025
7 Oktober 2025
ej kategoriserat Manualer
Nyaste ej kategoriserat Manualer
3 April 2026
3 April 2026
3 April 2026
3 April 2026
3 April 2026
3 April 2026
3 April 2026
3 April 2026
3 April 2026