Alpine KIT-8A3DF Bruksanvisning
Alpine Inte kategoriserad KIT-8A3DF
Läs gratis den bruksanvisning för Alpine KIT-8A3DF (2 sidor) i kategorin Inte kategoriserad. Guiden har ansetts hjälpsam av 33 personer och har ett genomsnittsbetyg på 4.4 stjärnor baserat på 3 recensioner. Har du en fråga om Alpine KIT-8A3DF eller vill du ställa frågor till andra användare av produkten? Ställ en fråga
Sida 1/2
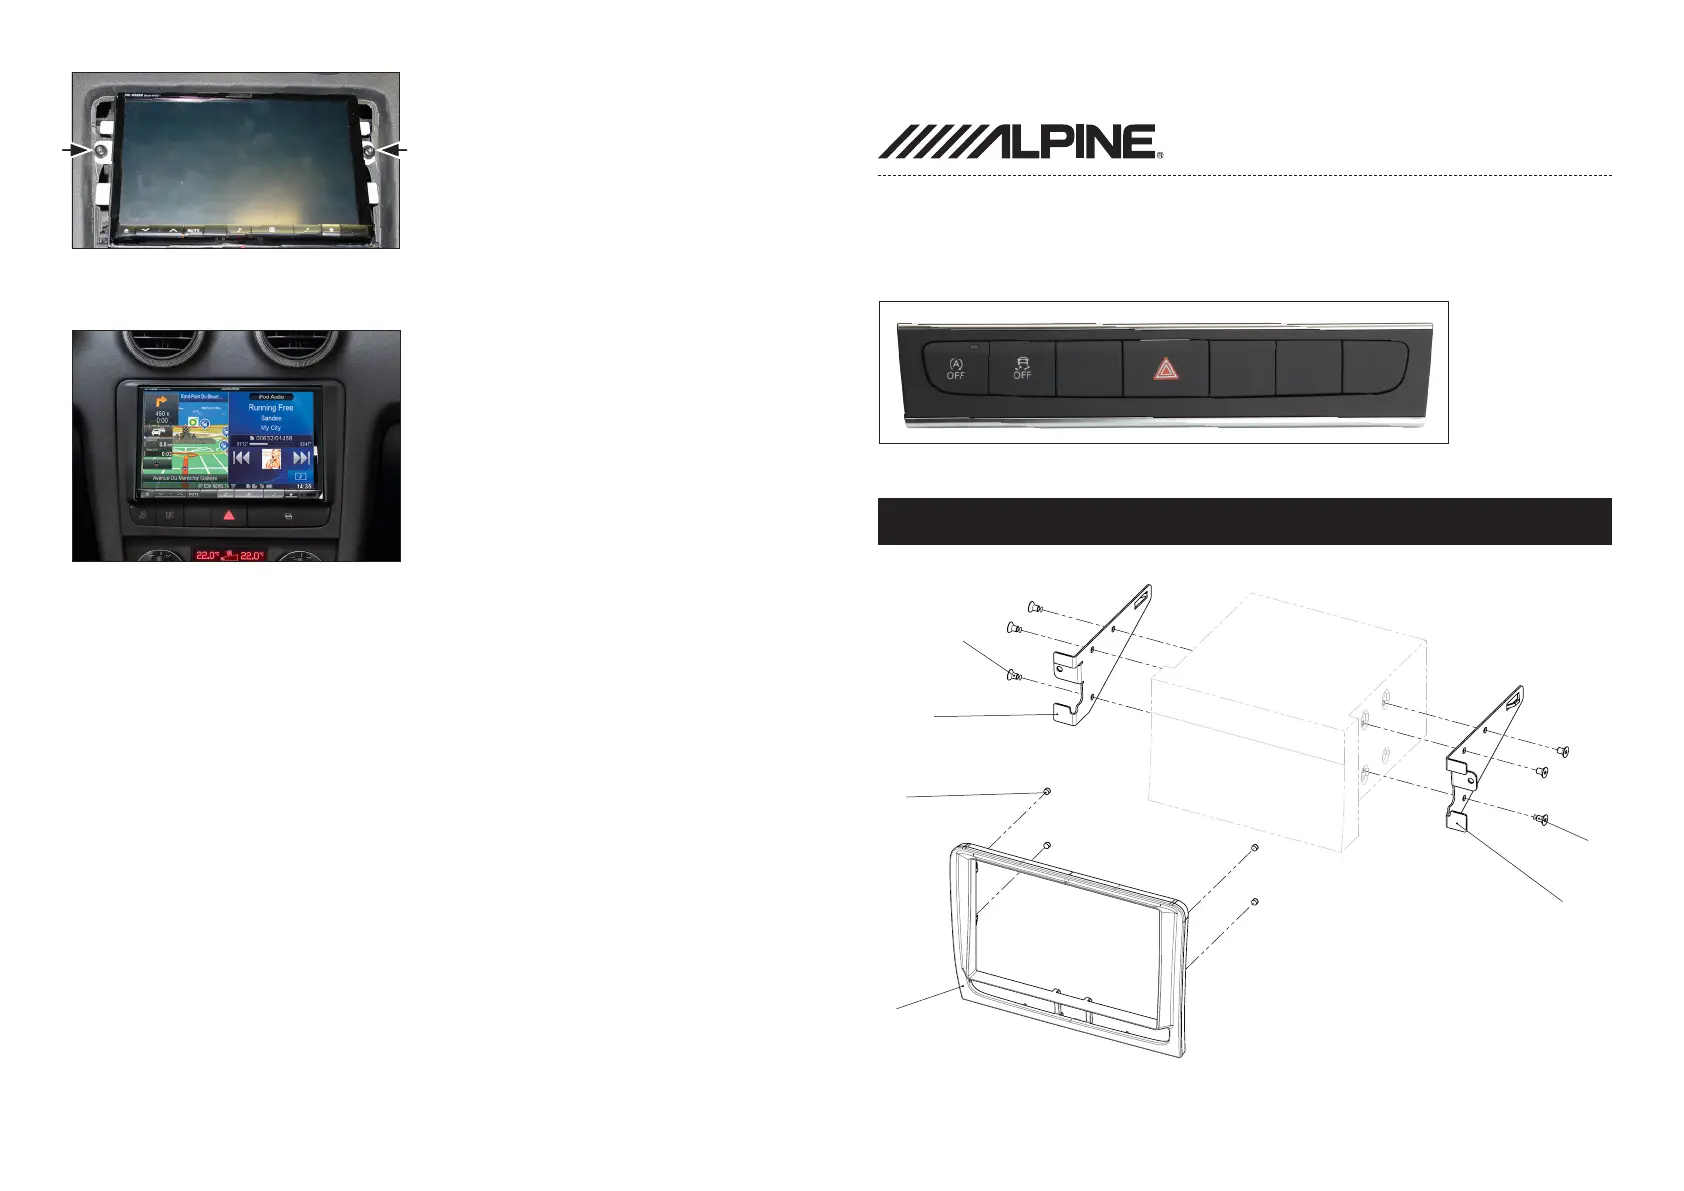
7. Connect switches and place facia
plate to nish installation
• Audi A3 (8P) 07/2008 – 01/2010
(with single switch panel)
Installation Manual
Alpine 8 inch Kit
Compatible with these Alpine navigation devices
Alpine 8 inch
colour / part-no.:
black: KIT-8A3F/FD
1
3
5
2
5
4
This kit can be used for cars which were equipped
with the following factory radios:
• Chorus Gen.II+
• Concert Gen.II+
• Symphony II
• Symphony II+
• RNS-E
• RNS-low (BNS 5.0)
If the car was equipped with a 1 DIN radio like Radio Chorus II, Concert II or
Symphony II, you need to change the center console to 2 DIN.
Your Audi partner can support you.
Double DIN Kit contents
(1) Facia Plate
(2) Mounting Bracket Right
(3) Mounting Bracket Left
(4) Magnet
(5) Hexagon Socket Countersunk Flat Head Screw
6. Connect all required circuit points
Place the Alpine 8 inch unit in
dash board and x it with 2 OEM
Torx screws
Produktspecifikationer
| Varumärke: | Alpine |
| Kategori: | Inte kategoriserad |
| Modell: | KIT-8A3DF |
Behöver du hjälp?
Om du behöver hjälp med Alpine KIT-8A3DF ställ en fråga nedan och andra användare kommer att svara dig
Inte kategoriserad Alpine Manualer

8 April 2025
11 Mars 2025
10 Mars 2025
10 Mars 2025
9 Februari 2025
9 Februari 2025
28 Januari 2025
8 Januari 2025
4 Januari 2025
4 Januari 2025
Inte kategoriserad Manualer
Nyaste Inte kategoriserad Manualer
9 April 2025
9 April 2025
9 April 2025
9 April 2025
9 April 2025
9 April 2025
9 April 2025
9 April 2025
9 April 2025
9 April 2025