Atdec AWM-LR Bruksanvisning
Atdec Inte kategoriserad AWM-LR
Läs gratis den bruksanvisning för Atdec AWM-LR (15 sidor) i kategorin Inte kategoriserad. Guiden har ansetts hjälpsam av 15 personer och har ett genomsnittsbetyg på 4.6 stjärnor baserat på 7 recensioner. Har du en fråga om Atdec AWM-LR eller vill du ställa frågor till andra användare av produkten? Ställ en fråga
Sida 1/15
AWM-LR Page 1 of 4
Installation Guide
AWM-LR
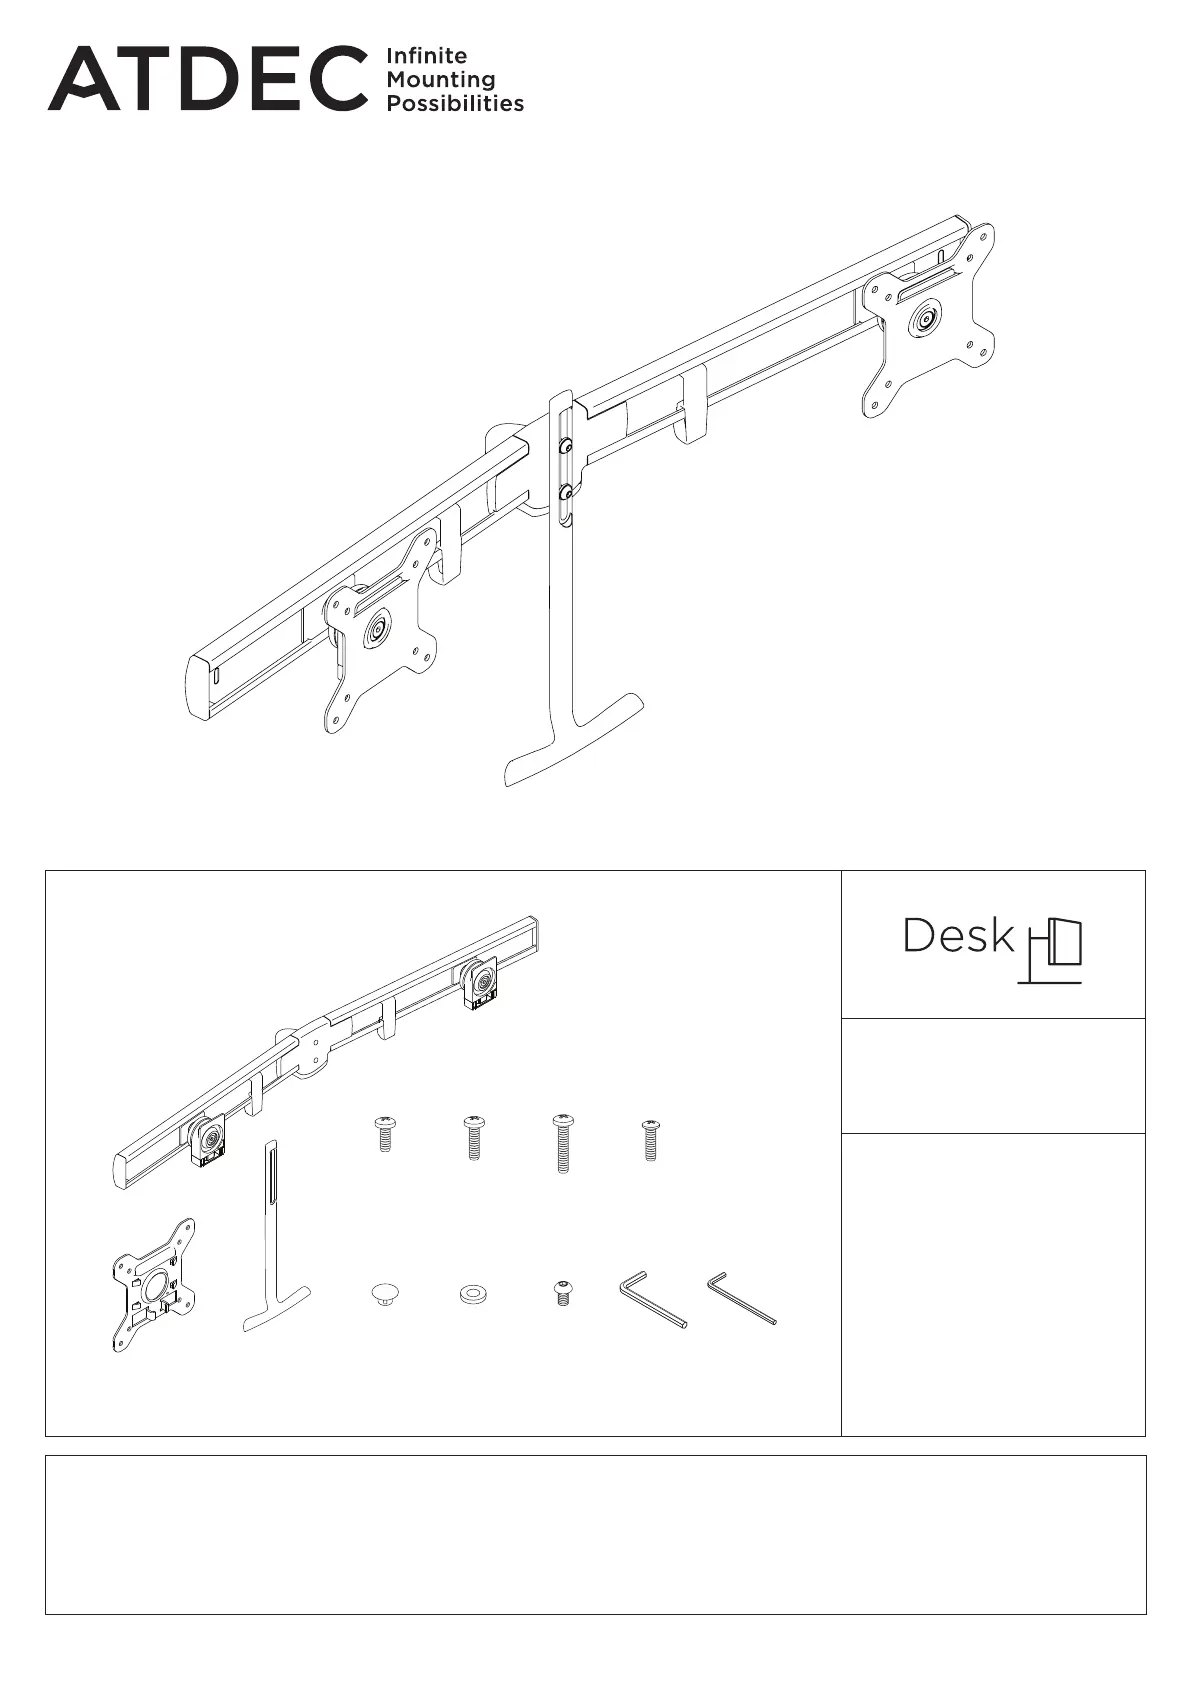
Dual Crossbar
COMPONENT CHECKLIST
REQUIRED TOOLS
• Phillips Head Screwdriver
A
Crossbar
Assembly
(x1)
B
VESA Plate
(x2)
C
Handle
(x1)
D
Screw
M4x10mm
(x8)
E
Screw
M4x12mm
(x8)
F
Screw
M4x16mm
(x8)
I
Plastic
Washer
(x2)
H
Hole
Cap
(x2)
J
Screw
M6x12mm
(x2)
G
Security
Screw
(x2)
K
4mm
Allen Key
(x1)
L
3mm
Allen Key
(x1)
2 - 7kg
(4.5 - 15lbs)
per monitor
WEIGHT RANGE
Monitor weight should be
within the weight range of
all modular elements that
make up the complete
monitor mounting solution.
IMPORTANT INFORMATION
! Please ensure this product is installed as per these installation instructions.
! Curved monitors, deep devices (such as all-in-one PCs) and offset VESA locations exert additional leverage that can exceed
the capacity of the mount even though the monitor weight may be within the stated range.
! The manufacturer accepts no responsibility for incorrect installation.
! This product is compatible with AWM Series monitor arm products.
Produktspecifikationer
| Varumärke: | Atdec |
| Kategori: | Inte kategoriserad |
| Modell: | AWM-LR |
| Produkttyp: | Armfäste för plattskärm |
| Kompatibilitet: | AWM-AHX, AWM-A13, AWM-A46, AWM-A71 |
| Rotationsvinkel: | 180 ° |
| Maximal skärmstorlek: | 27 " |
| Maxvikt: | 7 kg |
| Produktens färg: | Svart |
| Material, hölje: | Gjuten aluminium |
| Gränsssnitt för panelmontering: | 75 x 75, 100 x 100 mm |
Behöver du hjälp?
Om du behöver hjälp med Atdec AWM-LR ställ en fråga nedan och andra användare kommer att svara dig
Inte kategoriserad Atdec Manualer

30 Januari 2025
29 December 2024
7 December 2024
7 December 2024
7 December 2024
20 September 2024
10 September 2024
10 September 2024
10 September 2024
10 September 2024
Inte kategoriserad Manualer
Nyaste Inte kategoriserad Manualer
9 April 2025
9 April 2025
9 April 2025
9 April 2025
9 April 2025
9 April 2025
9 April 2025
9 April 2025
9 April 2025
9 April 2025