Best EB9 Bruksanvisning


Läs gratis den bruksanvisning för Best EB9 (7 sidor) i kategorin ventilationskåpa. Guiden har ansetts hjälpsam av 3 personer och har ett genomsnittsbetyg på 4.7 stjärnor baserat på 2 recensioner. Har du en fråga om Best EB9 eller vill du ställa frågor till andra användare av produkten? Ställ en fråga

Sida 1/7
BEST BY BROAN, P.O. BOX 140 HARTFORD, WI 53027
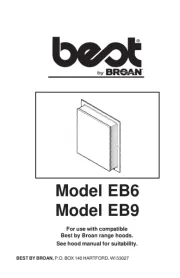
Model EB6
Model EB9
For use with compatible
Best by Broan range hoods.
See hood manual for suitability.
2
READ AND SAVE THESE INSTRUCTIONS
WARNING
5. When cutting or drilling into wall, or ceil-
other hidden utilities.
6. Ducted fans must always be vented to
the outdoors.
7. To reduce risk of fire, use only metal
ductwork.
8. This unit must be grounded.
CAUTION
1. For general ventilating use only. Do not
use to exhaust hazardous or explosive
material and vapors.
2. To avoid motor bearing damage and
noisy and/or unbalanced impellers, keep
drywall spray, construction dust, etc. off
power unit.
3. Please read specification label on prod-
uct for further information and require-
ments.
4. Electrical circuit, including speed con-
minimum for Model EB9 or 3 AMPS
minimum for Model EB6.
WARNING
TO REDUCE THE RISK OF FIRE, ELEC-
TRIC SHOCK, OR INJURY TO PER-
SONS, OBSERVE THE FOLLOWING:
1. Use this unit only in the manner intended
by the manufacturer. If you have ques-
tions, contact the manufacturer at the
address or telephone number listed in
the warranty.
2. Before servicing or cleaning unit, switch
power off at service panel and lock the
service disconnecting means to prevent
power from being switched on acciden-
tally. When the service disconnecting
means cannot be locked, securely fasten
a prominent warning device, such as a
tag, to the service panel.
3. Installation work and electrical wiring must
be done by a qualified person(s) in accor-
dance with all applicable codes and stan-
dards, including fire-rated construction
codes and standards.
4. Sufficient air is needed for proper com-
bustion and exhausting of gases through
the flue (chimney) of fuel burning equip-
ment to prevent backdrafting. Follow the
heating equipment manufacturer's guide-
line and safety standards such as those
published by the National Fire Protection
Association (NFPA), and the American
Society for Heating, Refrigeration and
Air Conditioning Engineers (ASHRAE),
INSTALLER: Leave This Manual With The Homeowner.
HOMEOWNER: Use And Care Information On Page 4.
SPECIFICATIONS
MODEL VOLTS AMPS CFM DUCT SIZE
EB6 120 2.4 600 10 " DIA.
EB9 120 5.7 900 10" DIA.
PLAN THE INSTALLATION
1. Locate the blower so the length of the
duct run and number of elbows are kept
to a minimum.
2. Where possible, blower should be cen-
tered between wall studs or roof rafters.
ALL INSTALLATIONS
PLAN THE INSTALLATION
3. Avoid pipes, wires, or other ductwork that
may be running through the wall.
4. Attach mounting plate to top of hood.
5. Install 10” dia. ductwork and 120 VAC
house wiring between blower location
and hood location.
3
11" dia.
11" dia.
11" dia.
11" dia.
hole
hole
hole
hole
2
2
2
29
9
9
9½
½
½
½"
"
"
"
11" dia.
hole
1¼"
1¼"
1¼"
1¼"
dia.
dia.
dia.
dia. hole
hole
hole
hole
1
1
1
12
2
2
2
7
7
7
7
/
/
/
/
8
8
8
8
"
"
"
"
1
1
1
10
0
0
0¾
¾
¾
¾"
"
"
"
2
2
2
25
5
5
5"
"
"
"
7
7
7
7¼
¼
¼
¼"
"
"
"
7¼"
1¼"
dia. hole
9
9
9
9
1
1
1
1
/
/
/
/
8
8
8
8
"
"
"
"
9
1
/
8
"
Wa
Wa
Wa
Wa l
l
l
ll
l
l
l
S
S
S
Stu
tu
tu
tu d
d
d
d
10¾ "
24¾ "
28¼ "
Wall St u d
12
7
/
8
"
Wa
Wa
Wa
Wa l
l
l
ll
l
l
l
S
S
S
Stu
tu
tu
tu d
d
d
d
Wall St u d
REMOVE
REMOVE
REMOVE
REMOVE
SIDING
SIDING
SIDING
SIDING
REMOVE
SIDING
8
8
8
8½
½
½
½"
"
"
"
8½"
Pilot
Pilot
Pilot
Pilot
Pilot
Hole
Hole
Hole
Hole
Hole
Pilot
Hole
OUTSIDE - W
OUTSIDE - W
OUTSIDE - W
OUTSIDE - WALL VIEW
ALL VIEW
ALL VIEW
ALL VIEWOUTSIDE - WALL VIEW
1. Choose a position on the outside wall.
wires run through the opening area.
2
2
2
20
0
0
0½"
½"
½"
½"
11"
11"
11"
11"
dia.
dia.
dia.
dia.
hole
hole
hole
hole
20½"
1
1
1
10
0
0
0
3
3
3
3
/
/
/
/
8
8
8
8
"
"
"
"
1¼"
1¼"
1¼"
1¼"
dia. h
dia. h
dia. h
dia. hole
ole
ole
ole
10
3
/
8
"
8½"
8½"
8½"
8½"
8½"
2
2
2
20
0
0
0¾"
¾"
¾"
¾"
20¾"
7¼"
7¼"
7¼"
7¼"
7¼"
1¼"
dia. hole
9
9
9
9
1
1
1
1
/
/
/
/
8
8
8
8
"
"
"
"
9
1
/
8
"
REMO
REMO
REMO
REMOVE
VE
VE
VE
SHINGLES
SHINGLES
SHINGLES
SHINGLES
Roof R a f ter
REMOVE
SHINGLES
11"
dia.
hole
Roof R a f ter
Pilot
Pilot
Pilot
Pilot
Pilot
Hole
Hole
Hole
Hole
Hole
Pilot
Hole
OUTSIDE - ROOF
OUTSIDE - ROOF
OUTSIDE - ROOF
OUTSIDE - ROOF VIEW
VIEW
VIEW
VIEW
OUTSIDE - ROOF VIEW
1. Locate the blower on the rear slope of the
roof. Place it in a location to minimize
duct run. The location should be free of
obstacles (T.V. leads, electrical lines,
etc.). Bear in mind, if the blower top is
level with the roof peak, it will not be seen
location in mind as you work from within
the attic.
PREPARE THE
INSTALLATION LOCATION
ROOF INSTALLATIONS
WALL INSTALLATIONS
5. For flat roof installations, build a curb that
2/12. See Figure 2. Discharge end of the
blower should be pointed away from pre-
vailing winds.
Figure 2
Figure 1
From inside the attic space:
2. Drill a PILOT HOLE up through the roof,
8½" from the inside edge of a ROOF
RAFTER.
From outside - on the roof:
3.
Measure and mark the 20¾" x 20½" rect-
angle.
Cut and remove only the shingles
inside this rectangle.
4.
Measure and mark the 11" DIAMETER
HOLE and the 1¼" DIAMETER HOLE.
Cut these holes all the way through the
roof.
PREPARE THE BLOWER
ALL INSTALLATIONS
1. Unpack the blower assembly.
2. Remove the cover and screws.
3. Remove and discard cardboard from blower
wheel.
4. Remove the wiring box cover and screws.
5. Attach an appropriate U.L. approved cable
connector in the hole at the rear of the wiring
box.
PREPARE THE
INSTALLATION LOCATION
Figure 3
From inside the wall:
2. Drill a PILOT HOLE through the wall, 8½"
from the inside edge of a WALL STUD.
From outside - on the wall:
3. Measure and mark the 24¾" x 28¼"
rectangle.
Cut and remove only the sid-
ing inside this rectangle.
4. Measure and mark the 11" DIAMETER
HOLE and the 1¼" DIAMETER HOLE.
Cut these holes all the way through the
wall.
6¾"
2"
28¼"
24¾"
2"


Produktspecifikationer

Varumärke: Best
Kategori: ventilationskåpa
Modell: EB9

Behöver du hjälp?

Om du behöver hjälp med Best EB9 ställ en fråga nedan och andra användare kommer att svara dig