Brother P-touch H200 Bruksanvisning
Brother Etikettskrivare P-touch H200
Läs gratis den bruksanvisning för Brother P-touch H200 (18 sidor) i kategorin Etikettskrivare. Guiden har ansetts hjälpsam av 25 personer och har ett genomsnittsbetyg på 5.0 stjärnor baserat på 9 recensioner. Har du en fråga om Brother P-touch H200 eller vill du ställa frågor till andra användare av produkten? Ställ en fråga
Sida 1/18
GETTING STARTED
NOTE
When using the optional AC adapter (AD-24ESA)
1.Insert adapter cord into the AC adapter socket at the bottom of the label maker.
2.Insert the plug into the nearest standard electrical socket.
For the memory backup feature, use either AAA alkaline batteries (LR03) or Ni-MH batteries (HR03)
together when using the AC adapter.
Power Supply and Ribbon Cassette or Tape Cassette
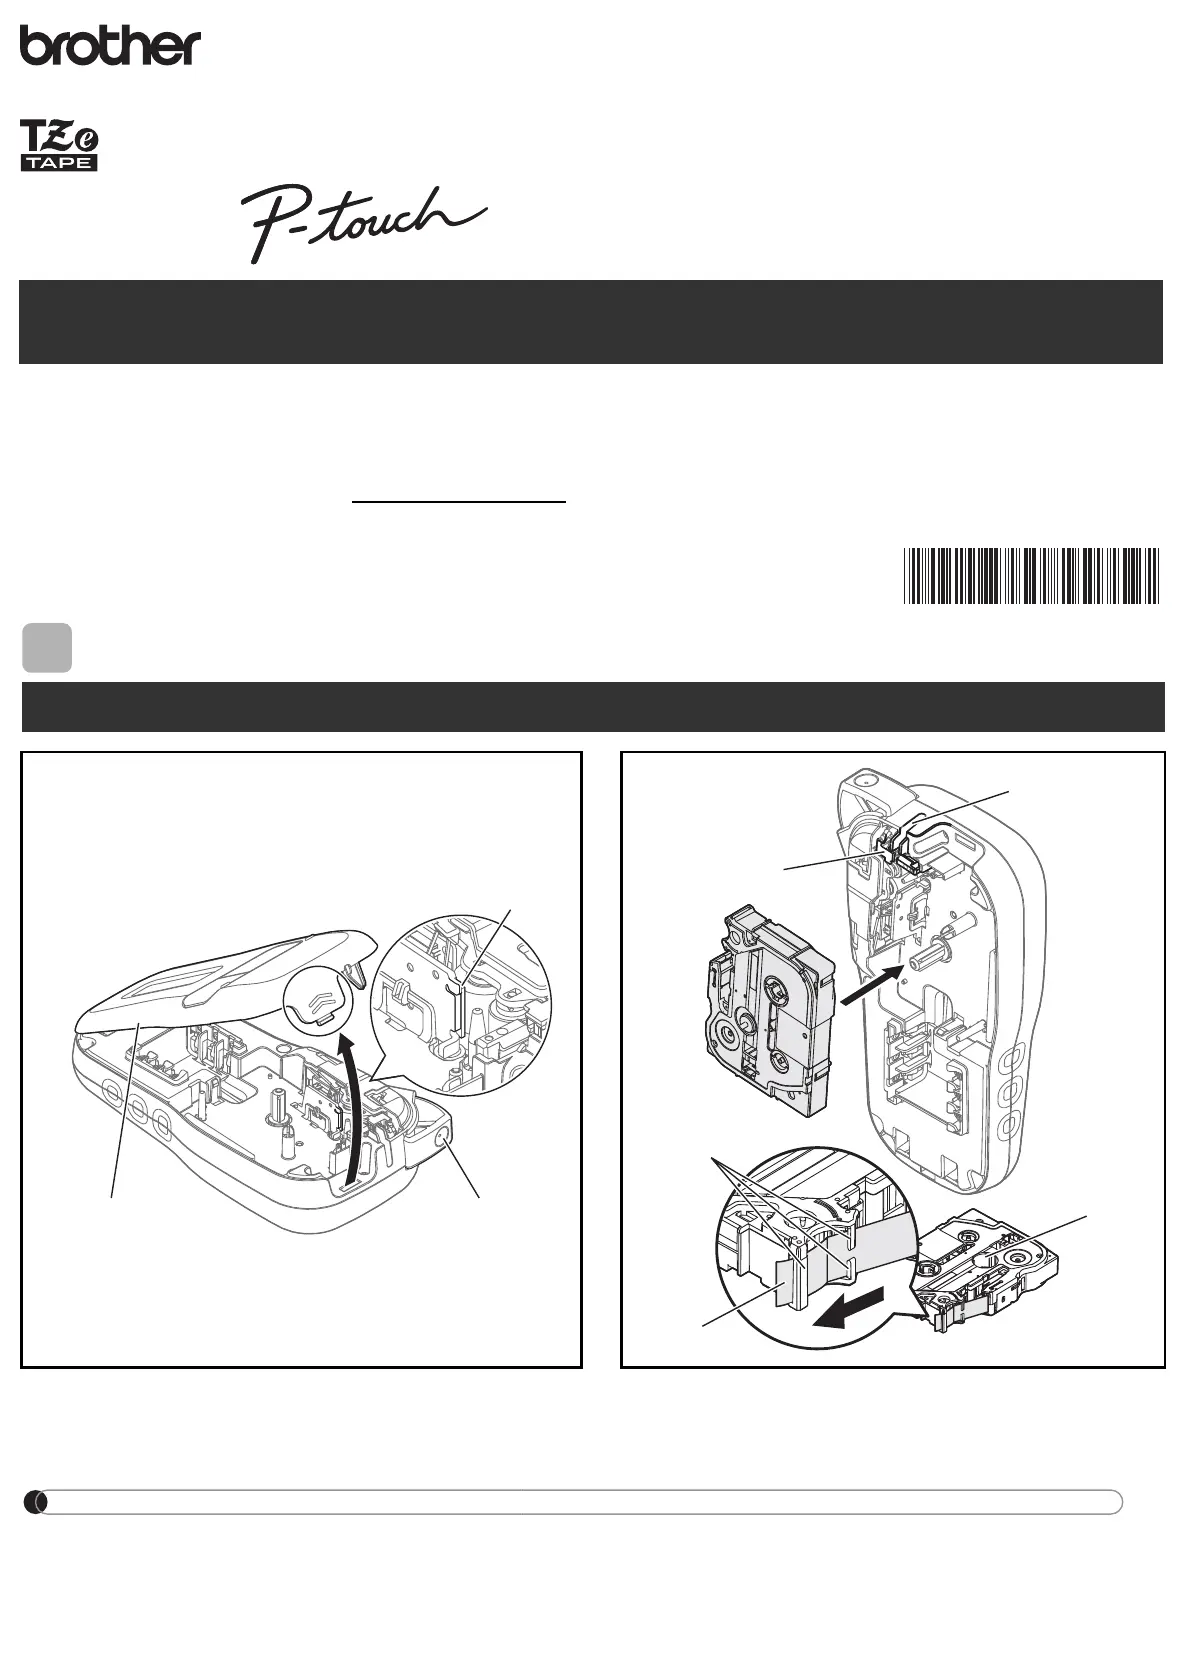
Open the cassette cover by pressing the
highlighted area at the top end of the label maker.
•Make sure you turn the power off when replacing
batteries or ribbon/tape cassettes.
Insert the ribbon or tape cassette, making sure
it locks into place.
•
Make sure the end of the ribbon/tape feeds under the tape guides.
•
Use Genuine Brother P-touch TZe tapes with this label maker.
1
Print head
Tape cutter leverCassette cover
1
Tape exit slot
Toothed wheel
Cutter's edge
End of tape
Tape guides
2
ELECTRONIC LABELING SYSTEM
With your new Brother P-touch label maker, you can create a wide variety of custom, self-adhesive labels and
ribbons. This label maker uses Brother "TZe" tapes from 3.5 mm to 12 mm widths. "TZe" tape cassettes are available
in many colours and sizes. Visit
www.brother.com
for a complete list of tapes that work with your machine.
Read this guide before using this machine. After reading this guide, keep it in a safe place.
English
User’s Guide
PT-H200
D01CHY001
Produktspecifikationer
| Varumärke: | Brother |
| Kategori: | Etikettskrivare |
| Modell: | P-touch H200 |
Behöver du hjälp?
Om du behöver hjälp med Brother P-touch H200 ställ en fråga nedan och andra användare kommer att svara dig
Etikettskrivare Brother Manualer

16 September 2025
16 September 2025
16 September 2025
16 September 2025
16 September 2025
15 September 2025
15 September 2025
15 September 2025
15 September 2025
15 September 2025
Etikettskrivare Manualer
Nyaste Etikettskrivare Manualer
28 Mars 2026
25 Mars 2026
25 Mars 2026
7 Mars 2026
22 Februari 2026
6 Februari 2026
6 Februari 2026
1 Februari 2026
12 Oktober 2025
12 Oktober 2025