Corsair Hydro Series H55 Bruksanvisning

Corsair kylsystem för dator Hydro Series H55

Läs gratis den bruksanvisning för Corsair Hydro Series H55 (10 sidor) i kategorin kylsystem för dator. Guiden har ansetts hjälpsam av 3 personer och har ett genomsnittsbetyg på 5.0 stjärnor baserat på 2 recensioner. Har du en fråga om Corsair Hydro Series H55 eller vill du ställa frågor till andra användare av produkten? Ställ en fråga

Sida 1/10
QUICK START GUIDE
GUIDE DE DÉMARRAGE RAPIDE
SCHNELLSTARTANLEITUNG
GUÍA BREVE DE INICIO
КРАТКОЕ РУКОВОДСТВО
快速门指
TM
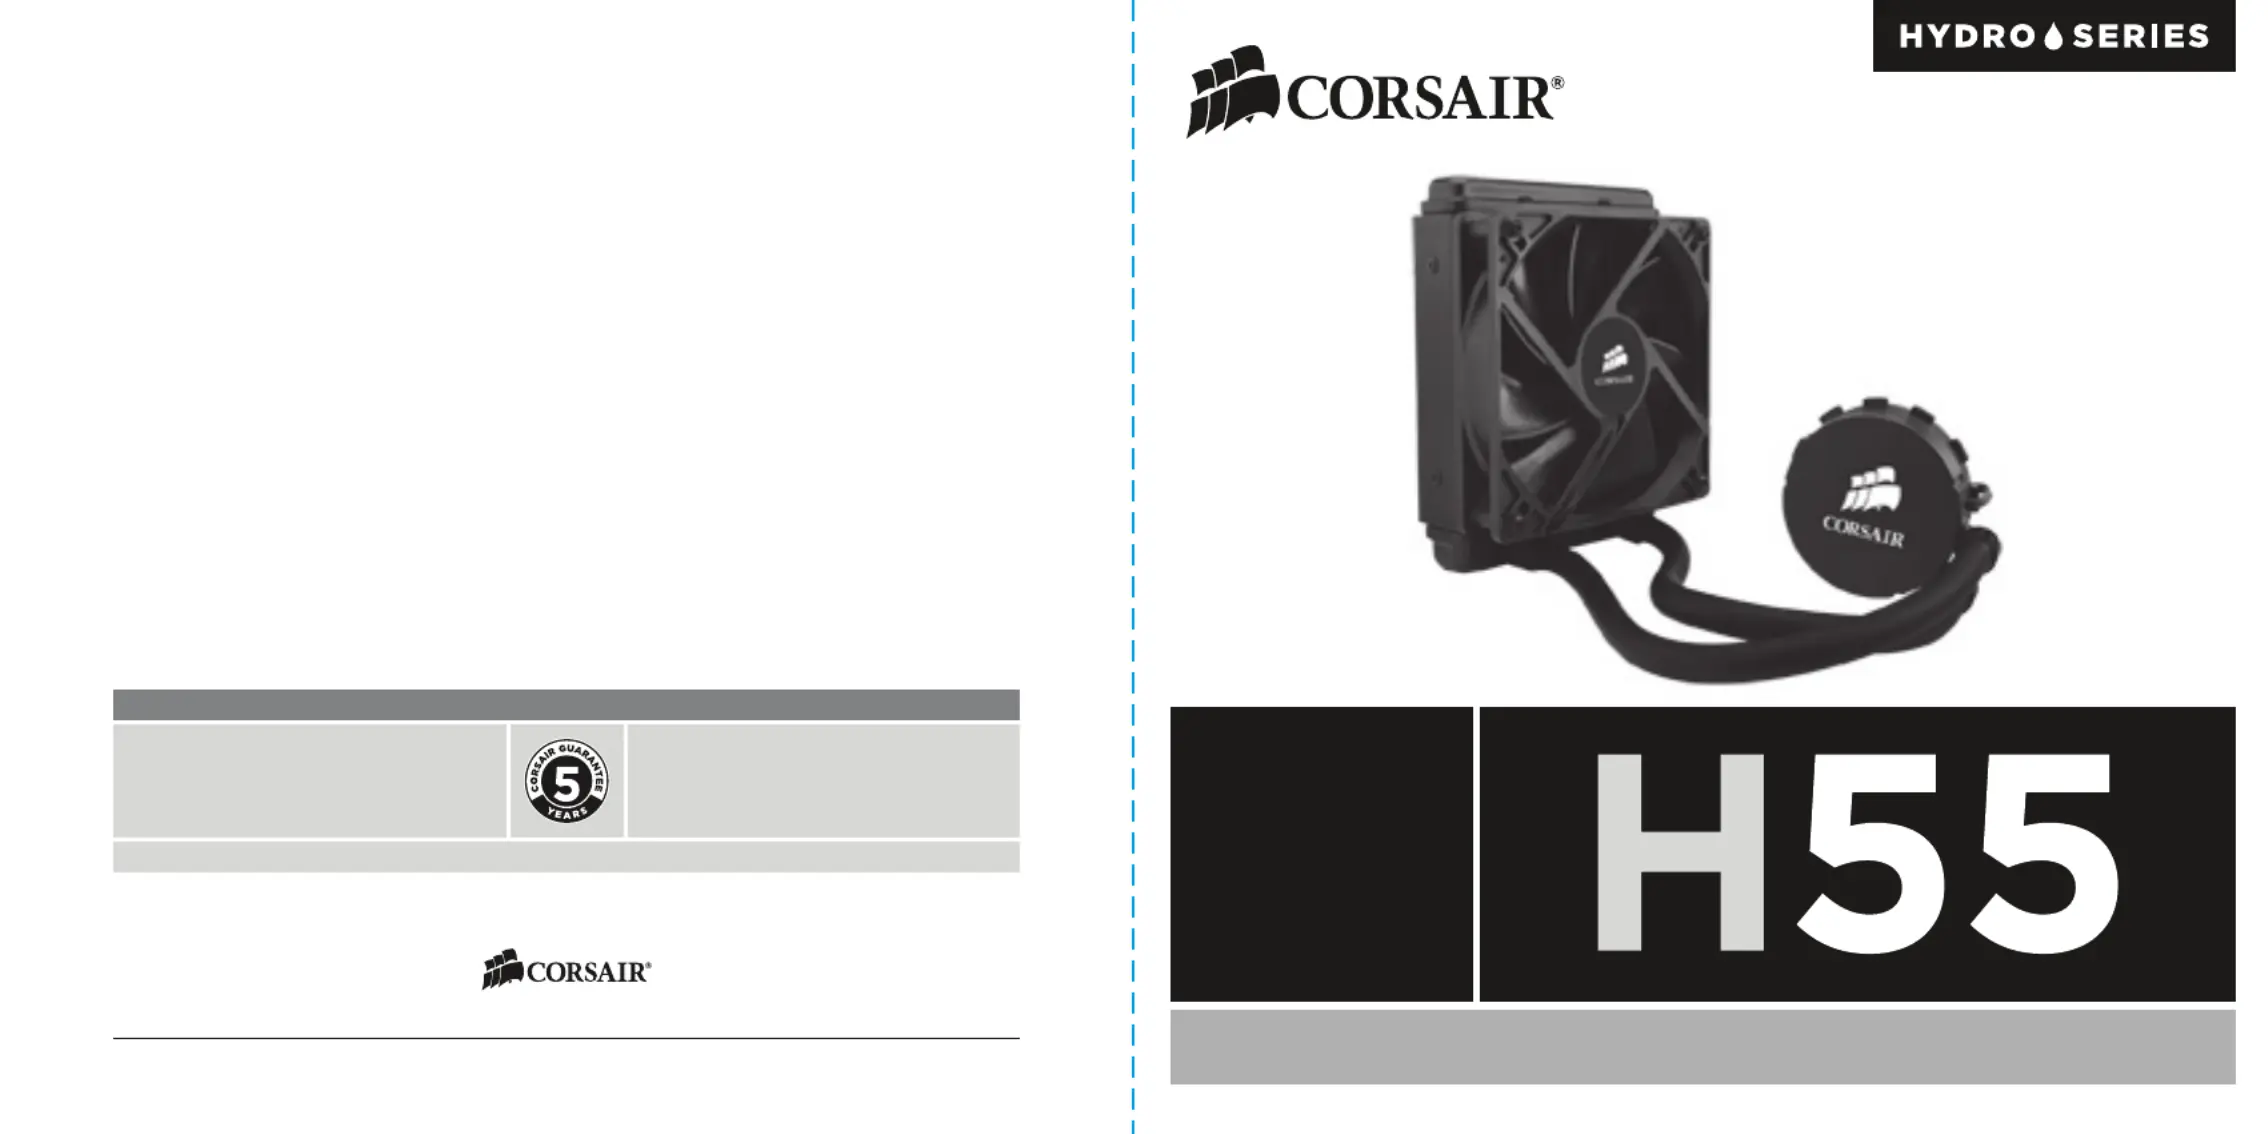
LIQUID CPU COOLING UPGRADE KIT
© 2015 Corsair Components, Inc. All rights reserved. Corsair and the sails logo are registered trademarks, and Corsair is a trademark
in the United States and/or other countries. All other trademarks are the property of their respective owners. Product may vary slightly from those pictured.
Document Number: 49-001170 rev AC
FORUM: forum.corsair.com
TWITTER: twitter.com/corsairmemory
H55 PAGE: corsair.com/h55
EMAIL: support@corsair.com
FACEBOOK: facebook.com/corsairmemory
BLOG: corsair.com/blog/
USA and CANADA: (510) 657-8747 | INTERNATIONAL: (888) 222-4346 | FAX: (510) 657-8748
corsair.com
Note: Most newer PC cases include a CPU cutout to
allow access to the bottom of the motherboard. If
your case does not include a cutout, you will need
to remove your motherboard from the case before
installation.
Remarque : la plupart des nouveaux boîtiers de
PC comportent un accès facilité au processeur qui
permet d'accéder à la base de la carte mère. Si
aucun accès n'est prévu sur votre boîtier, vous
devrez retirer votre carte mère du boîtier avant
de procéder à l'installation.
Hinweis: Bei neueren PC-Gehäusen gibt in der
Regel eine CPU-Önung Zugang zur Unterseite
der Hauptplatine. Falls Ihr Gehäuse keine derartige
Önung aufweist, müssen Sie vor der Installation
die Hauptplatine ausbauen.
Nota: La mayoría de las carcasas de las nuevas
PC incluyen una puerta trasera para el CPU a fin
de permitir el acceso a la parte inferior del mother-
board. Si su carcasa no tiene esta entrada, deberá
retirar el motherboard de la carcasa antes de
la instalación.
Примечание. На большинстве современных корпусов ПК
имеется прорезь для предоставления доступа к нижней
части материнской платы. Если на вашем корпусе нет
такой прорези, то перед установкой необходимо удалить
материнскую плату из корпуса.
大部分型号较新的 机箱都配有 散热器更换口, : PC CPU
可以在不移动主板的情况直接更换 散热器,如果您的机 CPU
箱未预留此空间,需要在水冷安装前取下主板。
Included Hardware
Matériel inclus • Mitgelieferte
Montageteile • Hardware incluido
Включено следующее оборудование
包含的硬件
Highlighted parts for Intel installation only • Les sections en surbrillance concernent
uniquement l'installation Intel • Die markierten Passagen beziehen sich nur auf die Intel
Componentes de instalación solamente para Intel • Части, выделенные цветом, только для установки Intel
突出显示的部分仅限 安装 Intel
x4
I
x2
H
x4
E
FAN
A
INTEL LGA 1150/1155/1156/1366
B
INTEL 1150/1155/1156/1366
C
x4
F
x4 • INTEL 1150/1155/1156/1366
& AMD AM2/AM3
D
x4
G
x4 • INTEL LGA 2011
L
x1
M
AMD AM2/AM3
K
AMD AM2/AM3
J
1
Prepare Retention Ring for Installation
Préparez l'anneau de retenue pour l'installation • Halterungsring für die Installation präparieren
Prepare la anilla de sujeción para su instalación • Подготовьте крепежное кольцо к установке
为安装准备挡圈
2
Assemble and Install Intel Backplate
Assemblez et installez la plaque arrière Intel • Intel-Rückwand zusammenbauen und montieren
Ensamble e instale la placa de soporte Intel • Соберите и установите опорную пластину Intel
组装和安装 背板 Intel
Assemble the retention ring. For Intel 1366/2011 Socket
Follow Fig (A). For Intel 1150/1155/1156 Socket follow Fig (B)
Installez l'anneau de retenue Pour une fiche Intel 1366/2011,
suivez la Figure A. Pour une fiche Intel 1150/1155/1156, suivez
la Figure B.
Bauen Sie den Halterungsring zusammen (s. Abbildung
A für Socket Intel 1366/2011 oder Abbildung B für Socket
Intel 1150/1155/1156).
Monte la anilla de sujeción. Para zócalos Intel 1366/2011,
siga la Figura A. Para zócalos Intel 1150/1155/1156, siga la
Figura B.
Соберите крепежное кольцо. Для процессорного гнезда
Intel 1366/2011 A следуйте Рисунку . Для процессорного
гнезда Intel 1150/1155/1156 B следуйте Рисунку .
组装挡圈。对于 Intel 1366/2011 插槽,请参照图(A)。对于
Intel 1150/1155/1156 插槽,请参照图(B)
Insert the pins (I) into the appropriate location
(LGA 1150/1155/1156/1366) marked on the backplate. Install
and remove the adhesive backing (Figure A). Install the
assembled backplate (Figure B).
Note: Intel LGA 2011 does not require a backplate
Insérez les broches (I) dans l'emplacement approprié
(LGA 1150/1155/1156/1366) marqué sur la plaque arrière.
Installez et retirez la protection adhésive (Figure A).
Installez la plaque arrière assemblée (Figure B).
Remarque : Intel LGA 2011 ne nécessite aucune
plaque arrière
Befestigen Sie die Stifte (I) an der auf der Rückwand
markierten Stelle (LGA 1150/1155/1156/1366). Bringen Sie
die Klebefläche an und ziehen Sie den Schutzfilm ab
(Abbildung A). Montieren Sie die zusammengebaute
Rückwand (Abbildung B).
Hinweis: Der Intel LGA 2011 erfordert keine Rückwand
Introduzca las patillas (I) en el lugar adecuado (LGA
1150/1155/1156/1366) marcado en la placa de soporte.
Realice la instalación y retire la cubierta del adhesivo (Figura
A). Instale la placa de soporte ensamblada (Figura B).
Nota: Los zócalos Intel LGA 2011 no requieren placa
de soporte
Вставьте контакты в соответствующее положение (I)
(LGA 1150/1155/1156/1366), отмеченное на опорной
пластине. Установите и удалите клейкое покрытие
(рисунок ). Установите собранную опорную пластину A
(рисунок ).B
Примечание. Для Intel LGA 2011 опорная пластина
не требуется.
将插针(I)插入背板上标记的适当位置 (LGA
1150/1155/1156/1366) ( )。安装并撕下粘合底布 图A
安装组装好的背板 图B ( )
: Intel LGA 2011 不需要使用背板
F
B
G
Fig. A
Intel 1366/2011
Fig. B
Intel 1150/1155/1156
D
L
INTEL 2011
INTEL
Fig. B
1366
775
1
3
6
6
1
1
5
6
7
7
5
I
Fig. A
C
H
1150/
1155/
1156

Produktspecifikationer

Varumärke: Corsair
Kategori: kylsystem för dator
Modell: Hydro Series H55
Modell: Allt-i-ett vätskekylare
Maximalt luftflöde: 57 cfm
Fläkthastighet (max): 1700 RPM
Fläktdiameter: 120 mm
Ljudnivå Lc IEC: 30.32 dB
Antal fläktar: 1 fläkt/-ar
Lämplig placering: Processor
Stöd för pulsbreddsmodulering (PWM): Nej
Mått, fläkt (B x D x H): 120 x 120 x 25 mm
Kylarbredd: 120 mm
Kylardjup: 152 mm
Kylarhöjd: 27 mm

Behöver du hjälp?

Om du behöver hjälp med Corsair Hydro Series H55 ställ en fråga nedan och andra användare kommer att svara dig