Digital Watchdog MegaPix PTZ DWC-MPTZ830XW Bruksanvisning
Digital Watchdog övervakningskamera MegaPix PTZ DWC-MPTZ830XW
Läs gratis den bruksanvisning för Digital Watchdog MegaPix PTZ DWC-MPTZ830XW (3 sidor) i kategorin övervakningskamera. Guiden har ansetts hjälpsam av 24 personer och har ett genomsnittsbetyg på 4.2 stjärnor baserat på 4 recensioner. Har du en fråga om Digital Watchdog MegaPix PTZ DWC-MPTZ830XW eller vill du ställa frågor till andra användare av produkten? Ställ en fråga
Sida 1/3
1. The mounting surface must withstand five times the camera weight.
2. Do not let the cables get caught in improper places or the electric line
cover can be damaged. This may cause a short or fire.
3. For the installation process, remove the protection film and the tape
from attached the dome camera.
4. A silicone rubber sealant must be applied to seal the housing to
secure waterproofing.
5. Using the mounting template sheet or the camera itself, mark and drill
the necessary holes in the wall or ceiling.
Tel: +1 (866) 446-3595 / (813) 888-9555
Technical Support Hours:
9:00AM – 8:00PM EST, Monday through Friday
digital-watchdog.com
DWC-MPTZ336XWDWC-MPTZ830XW
Quick Start GuideQuick Start Guide
Default Login Information
Username: adminPassword: admin
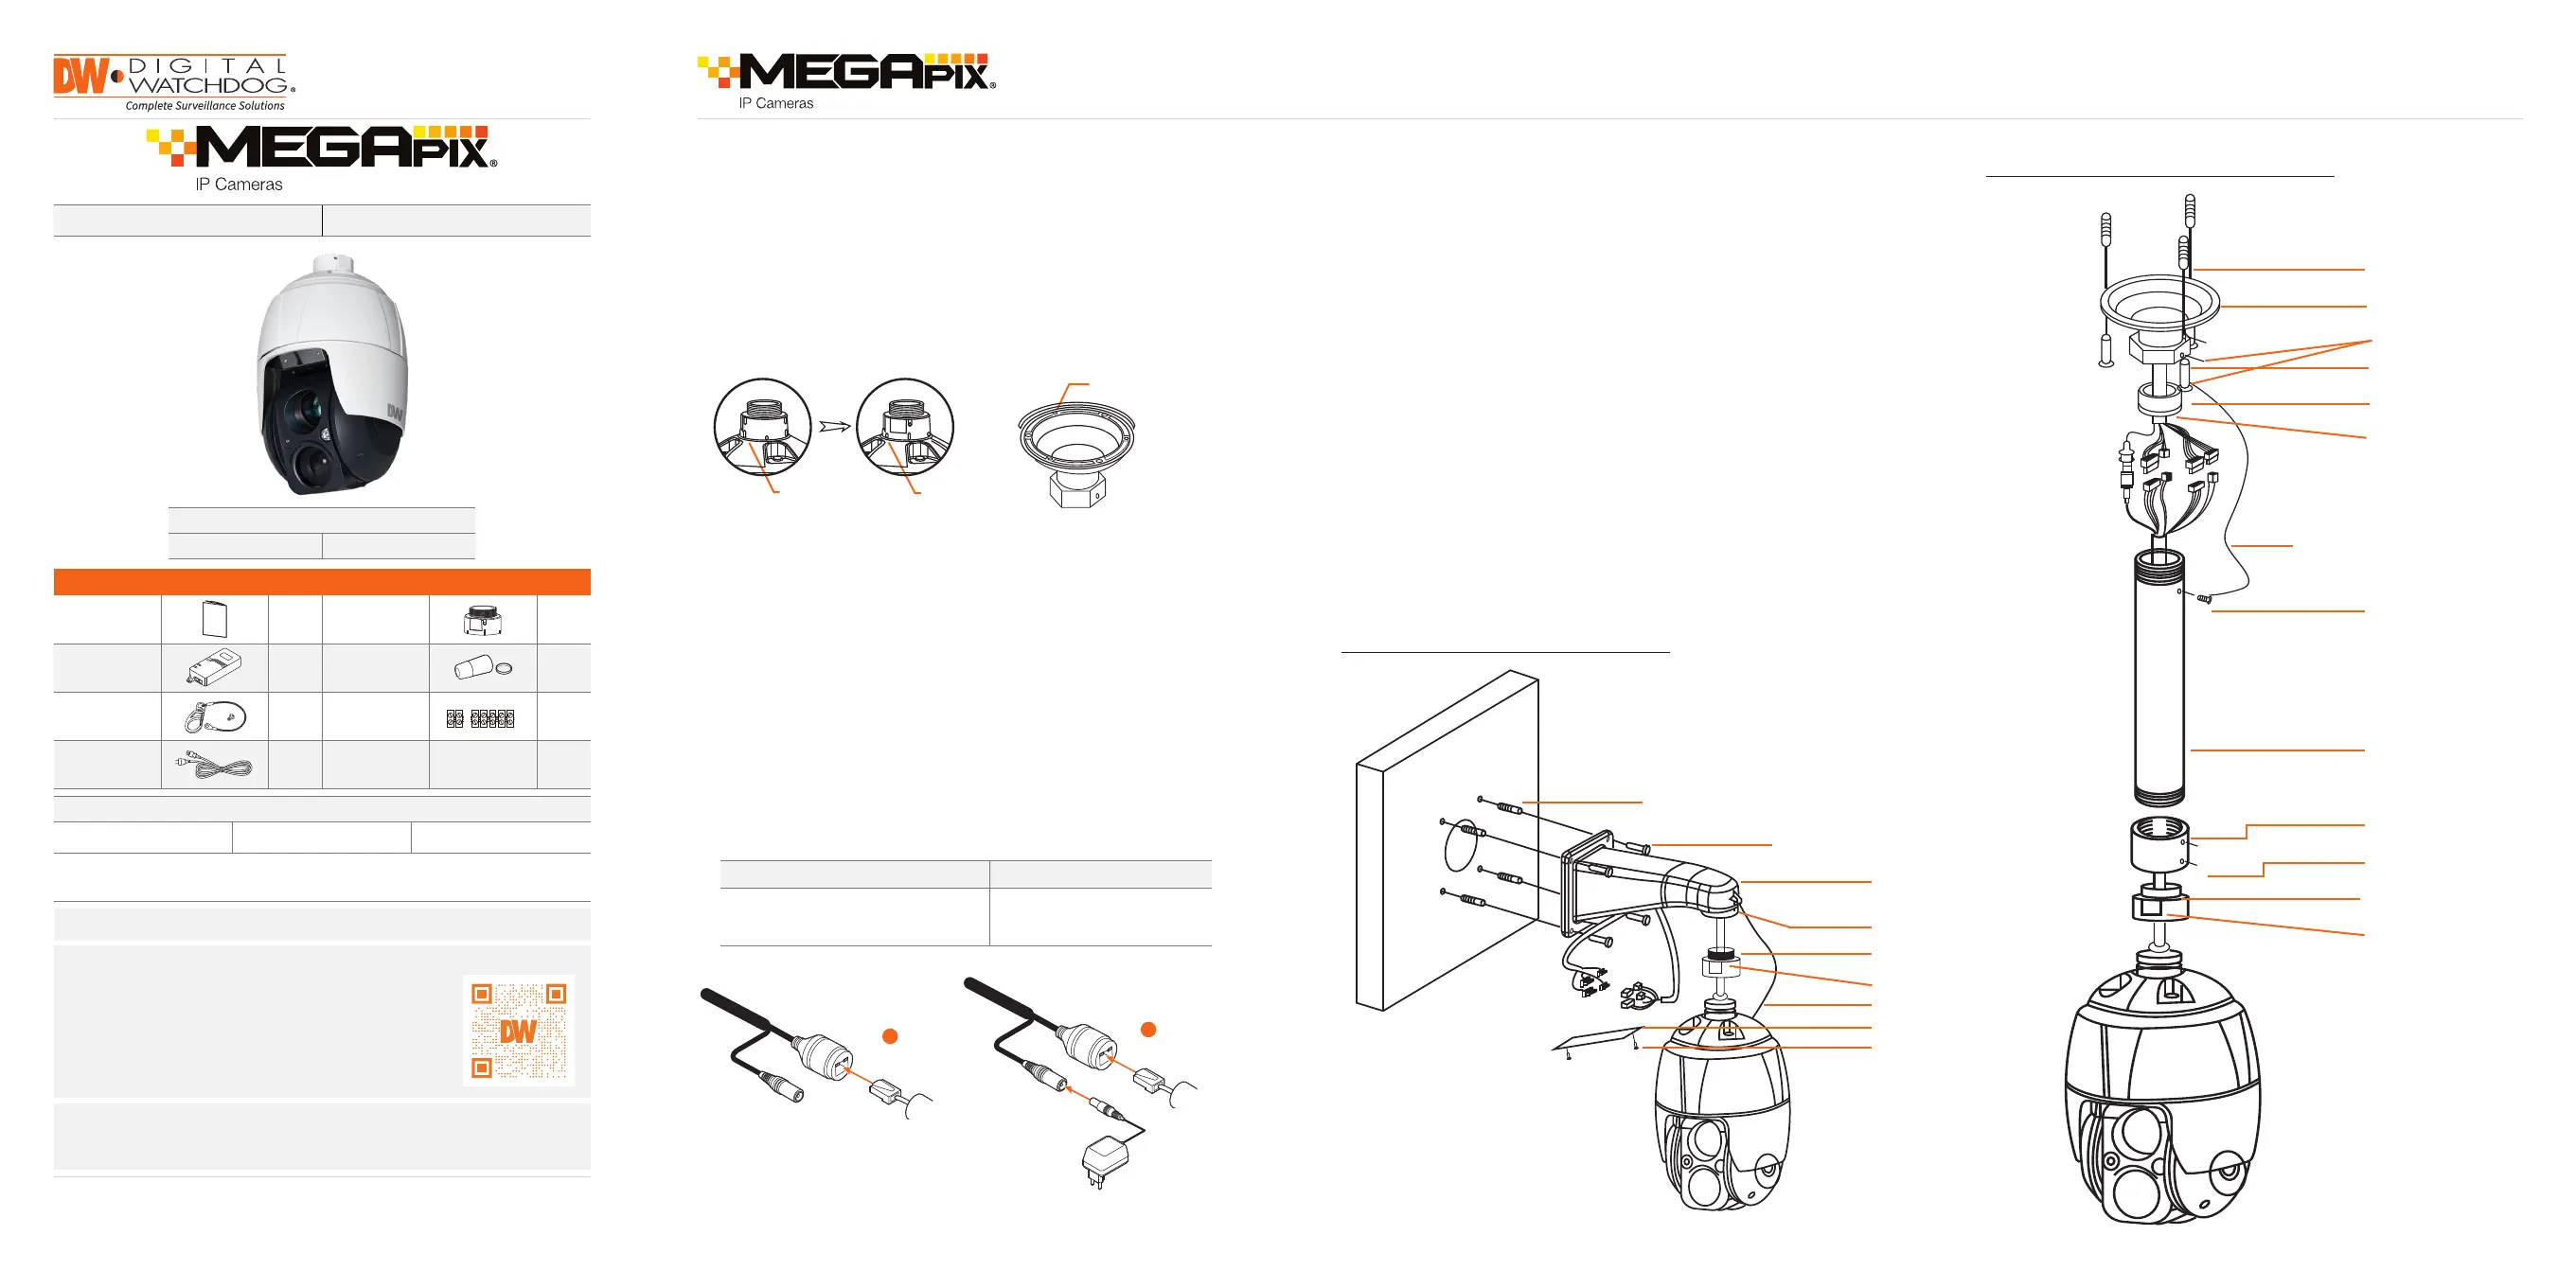
ACCESSORIES REQUIRED TO INSTALL THE CAMERA (SOLD SEPARATELY)
Wall mount bracket:
DWC-P336WMW
Ceiling mount bracket:
DWC-P336CMW
Parapet mount bracket:
DWC-P336PARAMW
For corner and pole mount bracket:
DWC-P30CNMW (must be purchased with DWC-P336WMW)
STEP 3 – INSTALLING THE CAMERA
Installing the camera using a wall mount
STEP 1 – PREPARING TO MOUNT THE CAMERA
NOTE:Mounting accessories are required and sold separately.
WHAT’S IN THE BOX
QSG 1Adapter ring1
PoE injector1
Waterproof
cap
1 set
Safety wire1
2P, 5P
screw-type
connectors
1 set
Power cord1
Installing the camera using a ceiling mount
Attention: This document is intended to serve as a quick reference for the initial
set up. It is recommended that the user read the entire instruction manual for
complete and proper installation and usage.
NOTE:Download all your support materials and tools in one place.
1. Go to: http://www.digital-watchdog.com/resources
2. Search your product by entering the part number in the
‘Search by Product’ search bar. Results for applicable
part numbers will populate automatically based on the
part number you enter.
3. Click ‘Search’. All supported materials, including manuals
and quick start guide (QSGs) will appear in the results.
Plastic anchors (4x)
Tapping screws 8x35 (4x)
Machine screws M3x5 (2x)
Access plate
Safety wire
Set screw (1x)
Adapter PT 1.5 inch (1x)
Mounting bracket (1x sold
separately) PF 1.5 inch
Set screw (1x)
Plastic anchors (3x)
Mounting bracket (1x
sold separately)
Set screws (2x)
Locking nut (1x)
Tapping screws 6x35 (3x)
Socket (1x)
Safety wire (1x)
Machine screw M5x6 (1x)
Pipe (1x)
Set screw (1x)
Set screws (3x)
Pipe socket PF 1.5 incg (1x)
Adapter PT 1.5 inch (1x)
1. Using the mounting template or the mounting accessory itself, mark and drill
the necessary holes in the mounting surface.
2. Pull all cables through the mounting accessory. See STEP 4.
3. Attach the wall mounting bracket to the mounting surface using plastic anchors
and M8x35 screws.
For a ceiling mounting bracket installation, use the plastic anchors to secure it to
the mounting surface.
4. Wind both of the pipe ends thread with Teflon tape about 20 times for sealing.
Use a silicone rubber sealant to seal the area where the mounting bracket and
the pipe meet.
5. Place a bead of silicone sealant around the mounting bracket’s mounting flange,
press it to the surface and line up the flange hole with drilled holes.
6. Open the access plate on the mounting accessory and pull out the cables
through the rectangular access hole.
7. Attach the 1.5” adapter to the mounting bracket and fix it using the set screw.
8. Attach the camera’s safety wire to the mounting bracket and organize the
cables.
9. Connect all the cables to the camera. See STEP 4. Close the access plate o the
mounting bracket.
10. Connect the camera to the mounting bracket by turning it clockwise into the
adapter, and fix it using the set screw of the adapter.
Pass the wires through the mount bracket and make all necessary
connections.
1. NETWORK CONNECTIONS – If you are using the PoE injector
included, connect the camera using an Ethernet cable for both data
and power.
2. NETWORK CONNECTIONS – If you are using a non-PoE switch,
connect the camera to the switch using an Ethernet cable for data
transmission and use a power adapter to power the camera.
STEP 2 – POWERING THE CAMERA
Power requirementsPower consumption
UPoE injector, 12VDC
(PoE injector included, adapter not
included)
PoE: 28W, 500mA
12VDC: 28W, 2.3A
Ethernet
Cable
1
Power
Ethernet
Cable
2
Twist
Start Point
(Long Indicator)
Set Point
(Long Indicator)
Seal using silicone
rubber around the circle
Produktspecifikationer
| Varumärke: | Digital Watchdog |
| Kategori: | övervakningskamera |
| Modell: | MegaPix PTZ DWC-MPTZ830XW |
Behöver du hjälp?
Om du behöver hjälp med Digital Watchdog MegaPix PTZ DWC-MPTZ830XW ställ en fråga nedan och andra användare kommer att svara dig
övervakningskamera Digital Watchdog Manualer

20 Oktober 2025
19 Oktober 2025
Digital Watchdog Star-Light AHD DWC-V7753WTIR Bruksanvisning
6 Oktober 2025 5 Oktober 2025
5 Oktober 2025
5 Oktober 2025
5 Oktober 2025
4 Oktober 2025
4 Oktober 2025
4 Oktober 2025
övervakningskamera Manualer
Nyaste övervakningskamera Manualer
2 April 2026
2 April 2026
1 April 2026
1 April 2026
1 April 2026
31 Mars 2026
31 Mars 2026
31 Mars 2026
30 Mars 2026
30 Mars 2026