Festo CPE14-PRSEO-2 Bruksanvisning
Festo Inte kategoriserad CPE14-PRSEO-2
Läs gratis den bruksanvisning för Festo CPE14-PRSEO-2 (2 sidor) i kategorin Inte kategoriserad. Guiden har ansetts hjälpsam av 12 personer och har ett genomsnittsbetyg på 4.3 stjärnor baserat på 8 recensioner. Har du en fråga om Festo CPE14-PRSEO-2 eller vill du ställa frågor till andra användare av produkten? Ställ en fråga
Sida 1/2
CPE...-PRS
Connection block
Festo SE & Co. KG
Ruiter Straße 82
73734 Esslingen
Deutschland
+49 711 347-0
www.festo.com
Operating instructions
8151076
2021-03g
[8151078]
Translation of the original instructions
© 2021 all rights reserved to Festo SE & Co. KG
1
Applicable documents
All available documents for the product
è
www.festo.com/sp.
2Safety
Safety instructions
Only use the product in original status without unauthorised modifications.
Intended use
The manifold blocks CPE...- PRS connect directional control valves to central
supply ports and are intended for wall or H-rail mounting.
3
Additional information
–Accessories
è
www.festo.com/catalogue.
4
Product overview
Structure
1
23
4
Fig.1
1
Connecting component
2
Valve spool
3
Blind plate
4
Mounting slide
Function
The manifold block CPE...-PRSG-2/-3 (double or triple) connects type CPE 5/2- or
5/3-way valves to central supply ports.
Two additional valves can be supplied with the help of the extension plate CPE...-
PRS-2.
The end plate CPE...-PRS-EP can be used to create different pressure zones or a
two-sided compressed-air supply.
The maximum configuration level is:
6 valves12 valves
–
with one-sided compressed-air supply or
–for every pressure zone
–
with two-sided compressed-air supply
Tab. 1
The CPE-...-PRSO-... have the diaphragms removed.
5Assembly
Preparation
Fig.2
1.Place all manifold blocks in their assembly sequence.
2.Trace the pressure curve, e.g. with a sketch.
When using multiple pressure zones:
NOTICE
•Make sure that the diaphragms at the interface of two pressure zones remain
intact.
Pressed-in diaphragms cannot be closed again. In doing so, consider
removing the diaphragms of the compressed air ducts for an unobstructed
flow rate.
Removing unused diaphragms:
Fig.3
1.
Press in the 3 diaphragms of the compressed air ducts on the manifold block
from the outside inwards in accordance with the pressure curve sketch using
a punch (A)
2.
Deburr fracture margins and
3.
Remove chips.
This time-saving method of operation results in irregular broken edges compared
to precision machining.
Assembly
H-rail mounting:
1.
Place all manifold blocks on the H-rail in accordance with the assembly
sequence.
2.
Press the manifold blocks on the H-rail until the mounting slides engage.5
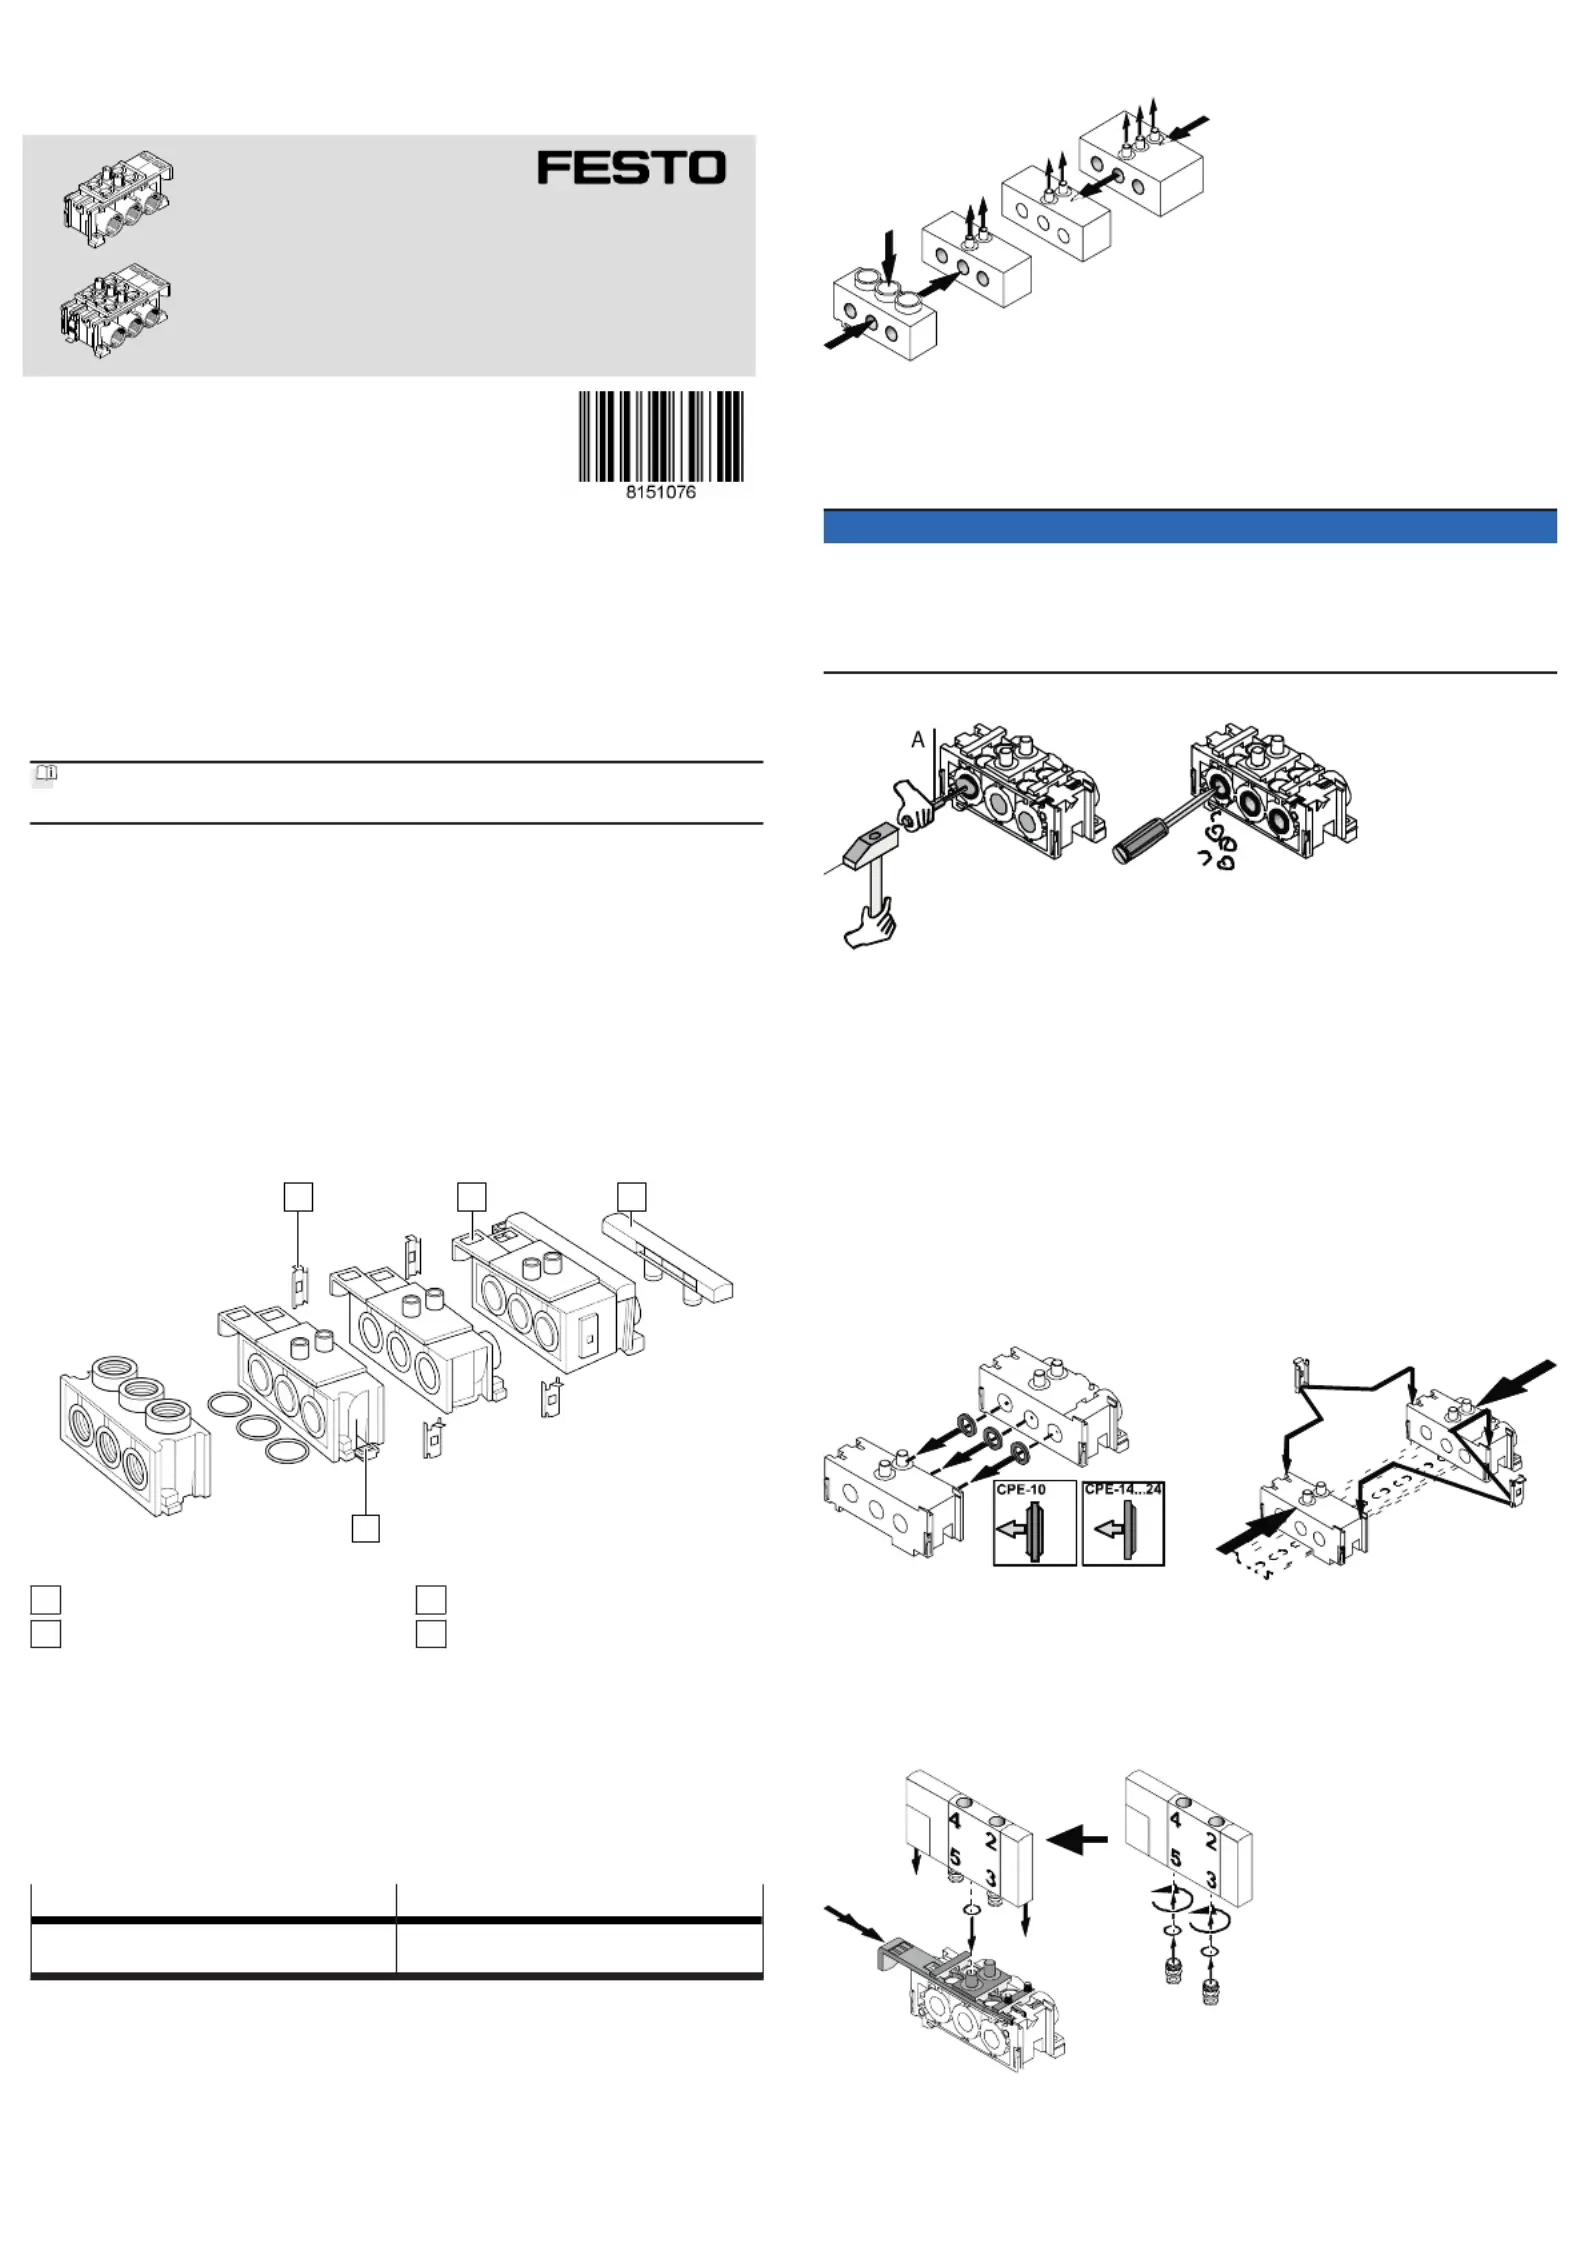
Linking manifold blocks:
Fig.4
1.
Place one sealing ring each between each of the three compressed air ducts
and press the manifold blocks together.
2.
Push a connecting component onto the rail shown on both sides until it1
clicks into place.
Mounting the CPE valves:
Fig.5
1.Insert all valve spools up to the first detent.2
2.
Place a seal on every compressed air outlet.
Produktspecifikationer
| Varumärke: | Festo |
| Kategori: | Inte kategoriserad |
| Modell: | CPE14-PRSEO-2 |
Behöver du hjälp?
Om du behöver hjälp med Festo CPE14-PRSEO-2 ställ en fråga nedan och andra användare kommer att svara dig
Inte kategoriserad Festo Manualer

30 Mars 2025
30 Mars 2025
30 Mars 2025
30 Mars 2025
30 Mars 2025
30 Mars 2025
30 Mars 2025
30 Mars 2025
30 Mars 2025
30 Mars 2025
Inte kategoriserad Manualer
Nyaste Inte kategoriserad Manualer
9 April 2025
9 April 2025
9 April 2025
9 April 2025
9 April 2025
9 April 2025
9 April 2025
9 April 2025
9 April 2025
9 April 2025