Festo PEV-1/4-WD-LED-24 Bruksanvisning
Festo Inte kategoriserad PEV-1/4-WD-LED-24
Läs gratis den bruksanvisning för Festo PEV-1/4-WD-LED-24 (3 sidor) i kategorin Inte kategoriserad. Guiden har ansetts hjälpsam av 18 personer och har ett genomsnittsbetyg på 4.8 stjärnor baserat på 9 recensioner. Har du en fråga om Festo PEV-1/4-WD-LED-24 eller vill du ställa frågor till andra användare av produkten? Ställ en fråga
Sida 1/3
PEV-1/4-WD-LED-24
Angled plug socket
Festo SE & Co. KG
Ruiter Straße 82
73734 Esslingen
Germany
+49 711 347-0
www.festo.com
Assembly instructions
8189936
2023-12
[8189938]
8189936
Translation of the original instructions
© 2024 all rights reserved to Festo SE & Co. KG
1
Applicable Documents
All available documents for the product
è
www.festo.com/sp.
2Safety
2.1
Safety instructions
–Before working on the product: Switch off the power supply, ensure that it is off
and secure it against being switched on again.
2.2Intended use
The angled plug socket is a plug connector that can be assembled and connects
the pressure switch PEV-1/4-B(-OD), PEV-1/4-SC-OD or PEV-1/4-A- SW27-B-OD
with a controller.
2.3Training of qualified personnel
Work on the product may only be carried out by qualified personnel who can
evaluate the work and detect dangers. The qualified personnel are trained in
electrical engineering.
3
Additional information
–Contact the regional Festo contact if you have technical problems
è
www.festo.com.
–Accessories and spare parts
è
www.festo.com/catalogue.
4Product Range Overview
4.1
Scope of delivery
123
4
5
6
Fig.1
1
Pressure screw (1x)
2
Washer (1x)
3
Seal (1x)
4
Central screw (1x)
5
Housing (1x)
6
Contact holder (1x)
with screw terminals,
LEDgreen, LEDyellow
4.2Not in scope of delivery
78
Fig.2
7
Pressure switch (1x)
PEV-1/4-B(-OD),
PEV-1/4-SC-OD
or PEV-1/4-A-SW27-B-OD
8
Cable (1x)
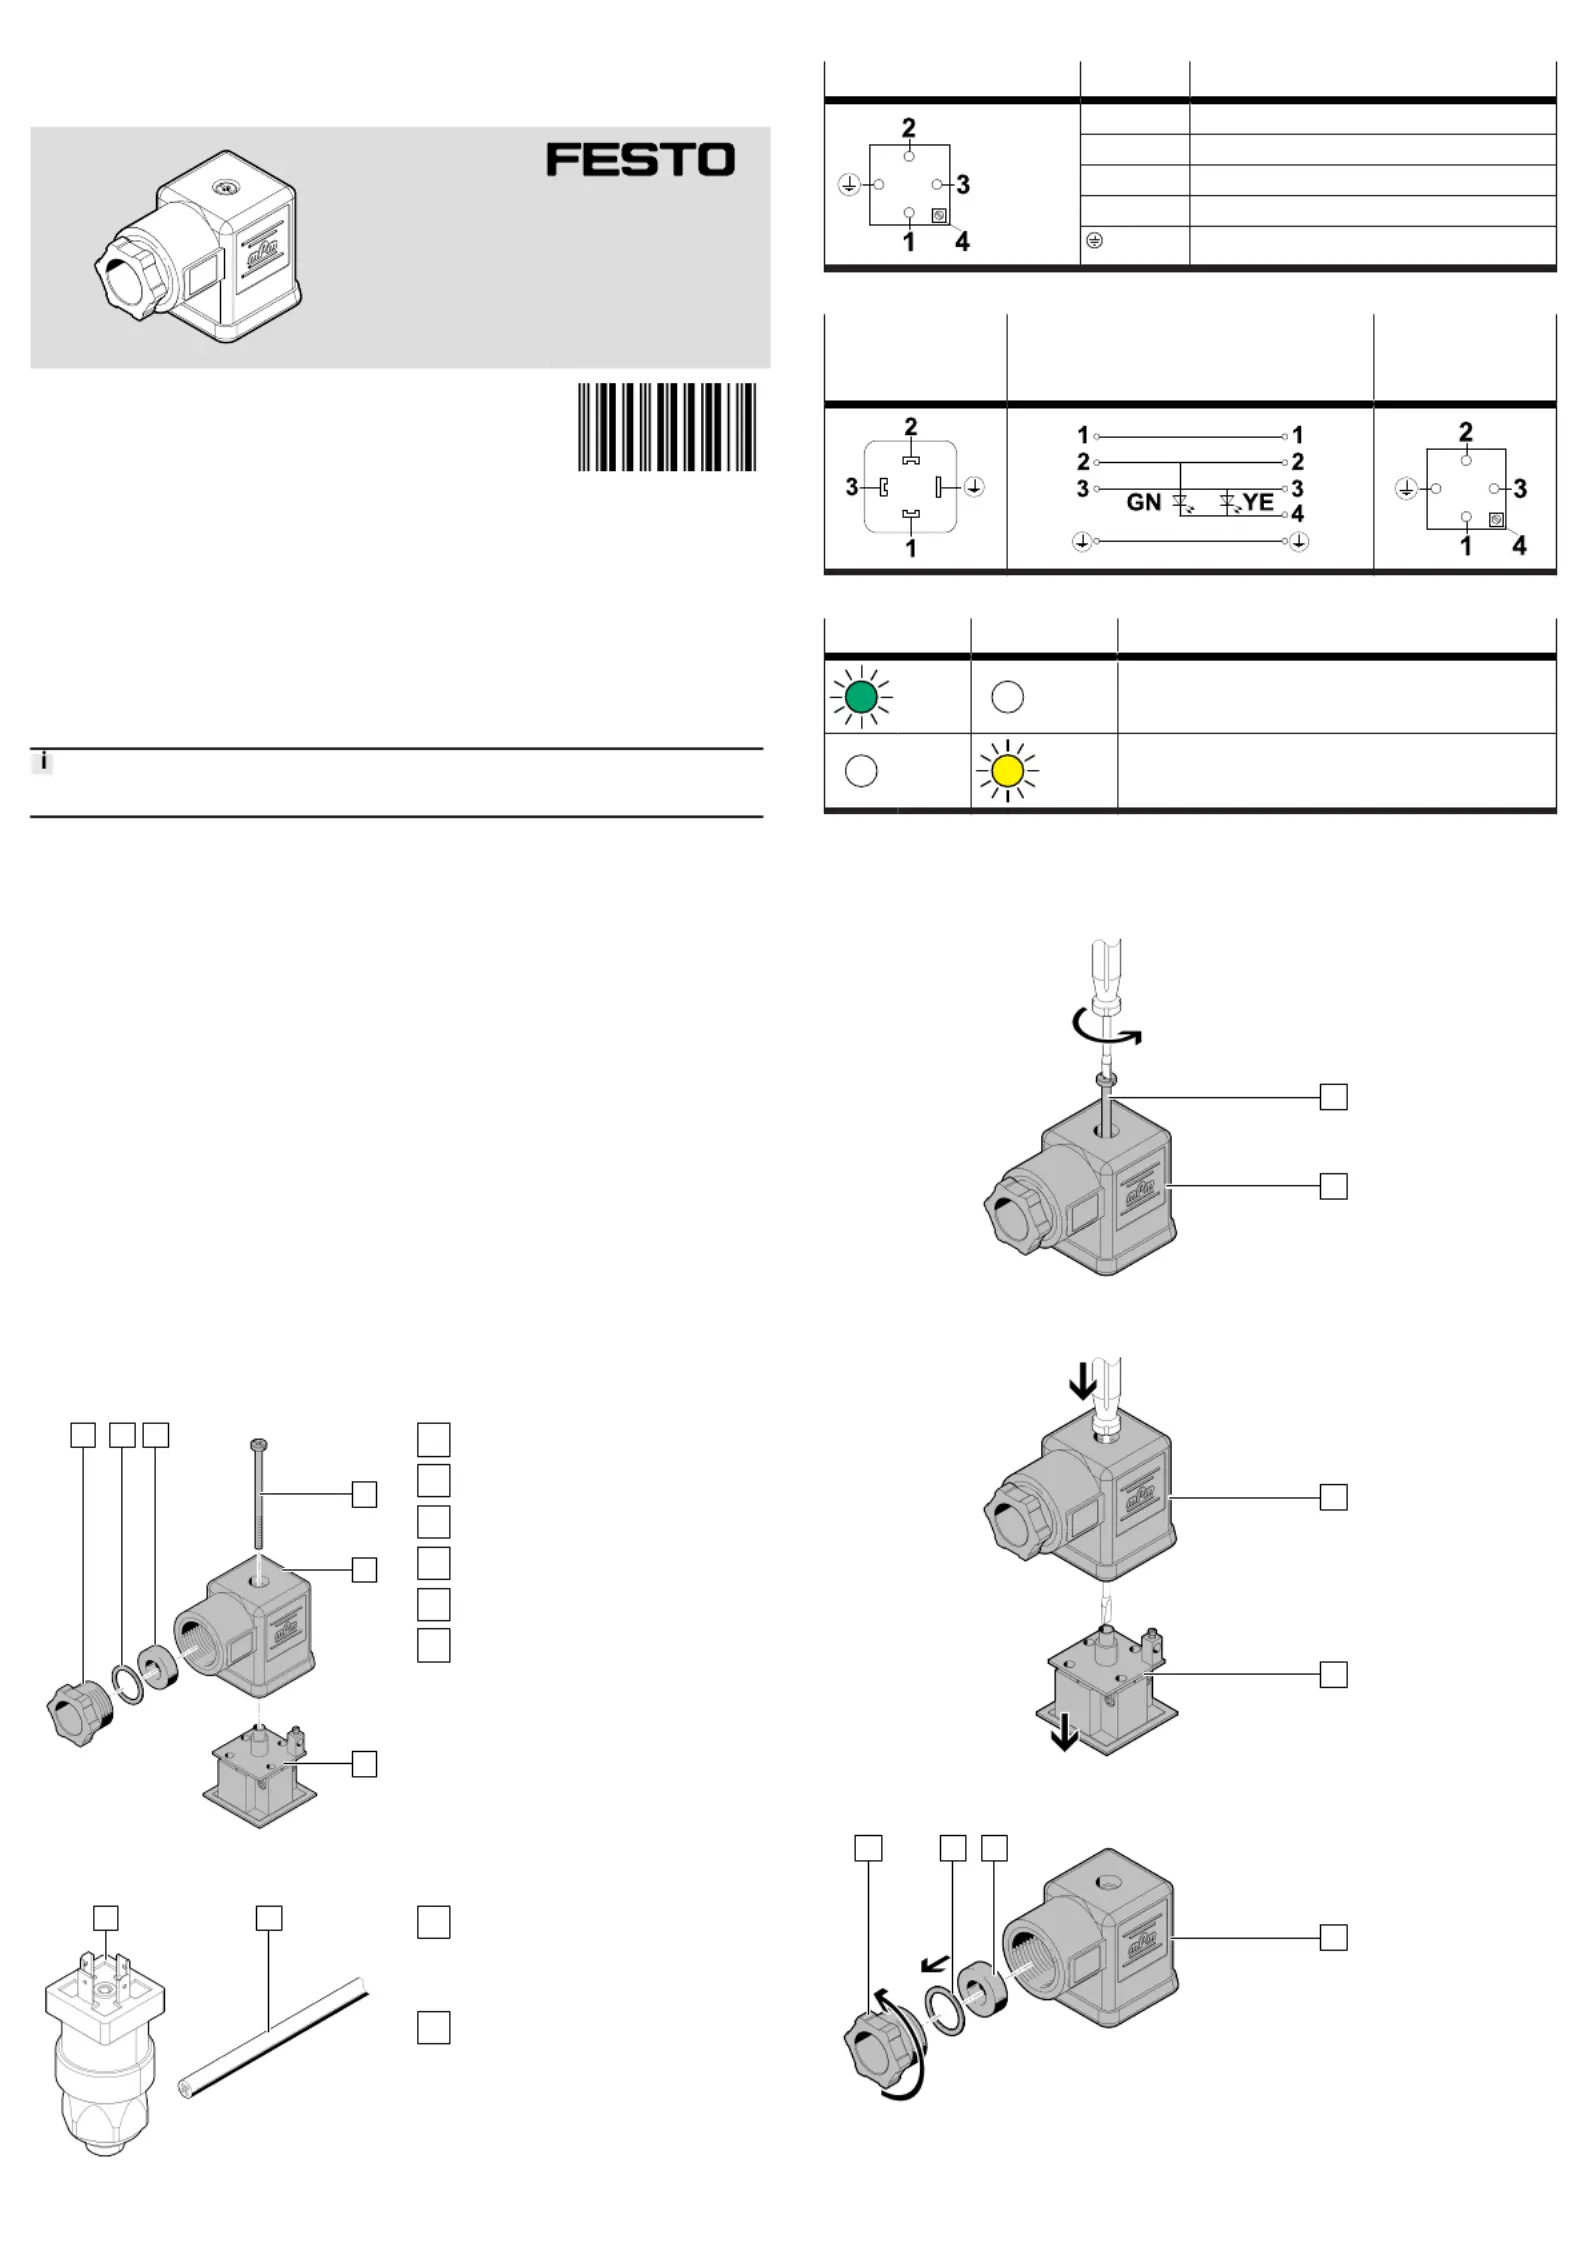
5Contact assignment
Pin allocationPinConnection
1Operating voltage
2N/C contact
3N/O contact
4LED
Earthing
Tab. 1:Contact assignment
Electrical connec-
tion1
Field device side
Circuit diagramElectrical connec-
tion2
Controller side
Tab. 2:Circuit diagram
LED greenYellow LEDMeaning
green
light
offMeasured relative pressure is below the threshold value.
offyellow
light
Measured relative pressure is above the threshold value.
Tab. 3:Switching status indication
6
Assembly
6.1Preparation
4
5
Fig.3
•
Screw the central screw out of the housing.45
5
6
Fig.4
•
Press the contact holder out of the housing.65
123
5
Fig.5
1.Unscrew the pressure screw.1
2.Remove the washer and the seal from the housing.235
Produktspecifikationer
| Varumärke: | Festo |
| Kategori: | Inte kategoriserad |
| Modell: | PEV-1/4-WD-LED-24 |
Behöver du hjälp?
Om du behöver hjälp med Festo PEV-1/4-WD-LED-24 ställ en fråga nedan och andra användare kommer att svara dig
Inte kategoriserad Festo Manualer

30 Mars 2025
30 Mars 2025
30 Mars 2025
30 Mars 2025
30 Mars 2025
30 Mars 2025
30 Mars 2025
30 Mars 2025
30 Mars 2025
30 Mars 2025
Inte kategoriserad Manualer
Nyaste Inte kategoriserad Manualer
9 April 2025
9 April 2025
9 April 2025
9 April 2025
9 April 2025
9 April 2025
9 April 2025
9 April 2025
9 April 2025
9 April 2025