Hotpoint FIT 804 H AN HA Bruksanvisning
Läs gratis den bruksanvisning för Hotpoint FIT 804 H AN HA (16 sidor) i kategorin Ugn. Guiden har ansetts hjälpsam av 12 personer och har ett genomsnittsbetyg på 4.6 stjärnor baserat på 6.5 recensioner. Har du en fråga om Hotpoint FIT 804 H AN HA eller vill du ställa frågor till andra användare av produkten? Ställ en fråga
Sida 1/16

EN
1
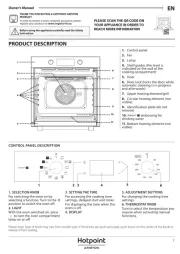
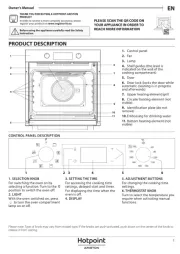
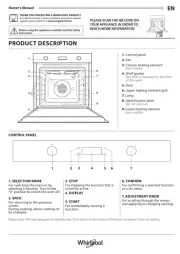
PRODUCT DESCRIPTION
CONTROL PANEL
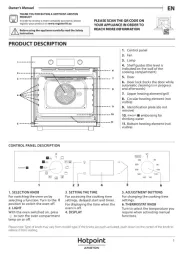
1. Control panel
2. Fan
3. Circular heating element
(not visible)
4. Shelf guides
(the level is indicated on the front
of the oven)
5. Door
6. Upper heating element/grill
7. Lamp
8. Identification plate
(do not remove)
9. Lower heating element
(not visible)
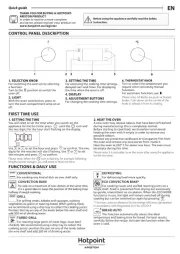
1. SELECTION KNOB
For switching the oven on by
selecting a function. Turn to the
position
to switch the oven off.
2. ANALOG CLOCK
3. THERMOSTAT KNOB
Turn to select the desired
temperature.
4. LED THERMOSTAT /
PREHEATING
Switches on during the heating
process. Switches off once the
desired temperature is reached.
DAILY REFERENCE
GUIDE
Before using the appliance carefully read the Health and Safety guide.
THANK YOU FOR PURCHASING AN
HOTPOINT-ARISTON PRODUCT
To receive more comprehensive help and
support, please register your product at
www. hotpoint. eu/ register
WWW
You can download the Safety Instructions
and the Use and Care Guide by visiting our
website docs . hotpoint . eu and following
the instructions on the back of this booklet.
5
4
3
2
1
5
4
3
2
1
1
2
3
4
5
8
9
7
6
1 2 3 4
Produktspecifikationer
| Varumärke: | Hotpoint |
| Kategori: | Ugn |
| Modell: | FIT 804 H AN HA |
| Inbyggd display: | Ja |
| Vikt: | 35500 g |
| Bredd: | 595 mm |
| Djup: | 564 mm |
| Höjd: | 595 mm |
| Grill: | Ja |
| Sladdlängd: | 0.9 m |
| Typ av klocka: | Mekanisk |
| Konvektionsmatlagning: | Ja |
| Ångkokning: | Nej |
| Rotisserie: | Ja |
| Antal lampor: | 1 lamp(or) |
| Antal ugnar: | 1 |
| Energiförbrukning (konventionell): | 0.91 kWh |
| Ugnsstorlek: | Medium |
| Ugnens termostatområde: | 0 - 250 ° C |
| Självrengörande: | Ja |
| Antal bakplåtar: | 2 |
| Snabb värme: | Nej |
| Rengöringsteknik: | Hydrolys |
| Maximal temperatur (konventionell): | 250 ° C |
| Maximal temperatur (konvektion): | 250 ° C |
| Bakplåt: | Ja |
| Avkalkningsfunktion: | Nej |
| Produktens färg: | Antracit |
| Skärmtyp: | Analog |
| Kontrolltyp: | Rotations- |
| Ugnstyp: | Elektrisk ugn |
| Typ av strömkontakt: | Utan stickkontakt |
| Ugnens nettokapacitet: | 73 l |
| Rengöringstyp: | Hydrolys |
| AC-inspänning: | 220 - 240 V |
| Lamptyp: | halogen |
| Apparatens placering: | Inbyggd |
| Växelström Frekvens: | 50 - 60 hz |
| Återuppvärmningsfunktion: | Nej |
| Gångjärnssida: | Ned |
| Energieffektivitetsskalning: | A+++ till D |
| Ström: | 13 A |
| Installationsfack, bredd: | 568 mm |
| Installationsfack, djup: | 550 mm |
| Installationsfack, höjd: | 600 mm |
| Ansluten effekt: | 2600 W |
| Grill styrka: | 2450 W |
| Inbyggd lampa: | Ja |
| Manöverplats: | Framsida |
| Klocka: | Ja |
| Totalt ugn (er) invändig kapacitet: | 73 l |
| Topp och undervärme: | Ja |
| Upptiningsfunktion i ugnen: | Ja |
| Antal galler: | 1 |
| Normalkokning: | Ja |
| Interiör material: | Emalj |
| Energiförbrukning (påtvingad konvektion): | 0.82 kWh |
| Mikrovågsugnsfunktion: | Nej |
| Hålla sig varm funktion: | Nej |
| Grillgaller ingår: | Ja |
| Grill, hela ytan: | Ja |
| Stektermometer: | Nej |
| Grill, hela ytan + Konvektion (enkelt läge): | Ja |
| Brödbakningsförmåga: | Nej |
| Pizzatillagningsfunktion: | Nej |
| Grillfunktion med fläkt: | Ja |
| Monteringsutrymme, bredd (min): | 560 mm |
| Spillbricka: | Nej |
| Bakplåtshandtag: | Ja |
| Desinfektion: | Nej |
Behöver du hjälp?
Om du behöver hjälp med Hotpoint FIT 804 H AN HA ställ en fråga nedan och andra användare kommer att svara dig
Ugn Hotpoint Manualer
1 Oktober 2025
18 Augusti 2025
18 Augusti 2025
18 Augusti 2025
14 Augusti 2025
5 Augusti 2025
4 Augusti 2025
4 Augusti 2025
4 Augusti 2025
4 Augusti 2025
Ugn Manualer
- Arcelik
- Koenig
- Bertazzoni
- Amica
- Robinhood
- Classique
- Sam Cook
- Veripart
- Bora
- Lacunza
- Gorenje
- Jata
- Siemens
- Zephir
- Thermarest
Nyaste Ugn Manualer
21 Oktober 2025
20 Oktober 2025
20 Oktober 2025
20 Oktober 2025

19 Oktober 2025
19 Oktober 2025

18 Oktober 2025
18 Oktober 2025
18 Oktober 2025
17 Oktober 2025