Intermatic EI500C Bruksanvisning
Intermatic Inte kategoriserad EI500C
Läs gratis den bruksanvisning för Intermatic EI500C (6 sidor) i kategorin Inte kategoriserad. Guiden har ansetts hjälpsam av 19 personer och har ett genomsnittsbetyg på 4.7 stjärnor baserat på 6 recensioner. Har du en fråga om Intermatic EI500C eller vill du ställa frågor till andra användare av produkten? Ställ en fråga
Sida 1/6
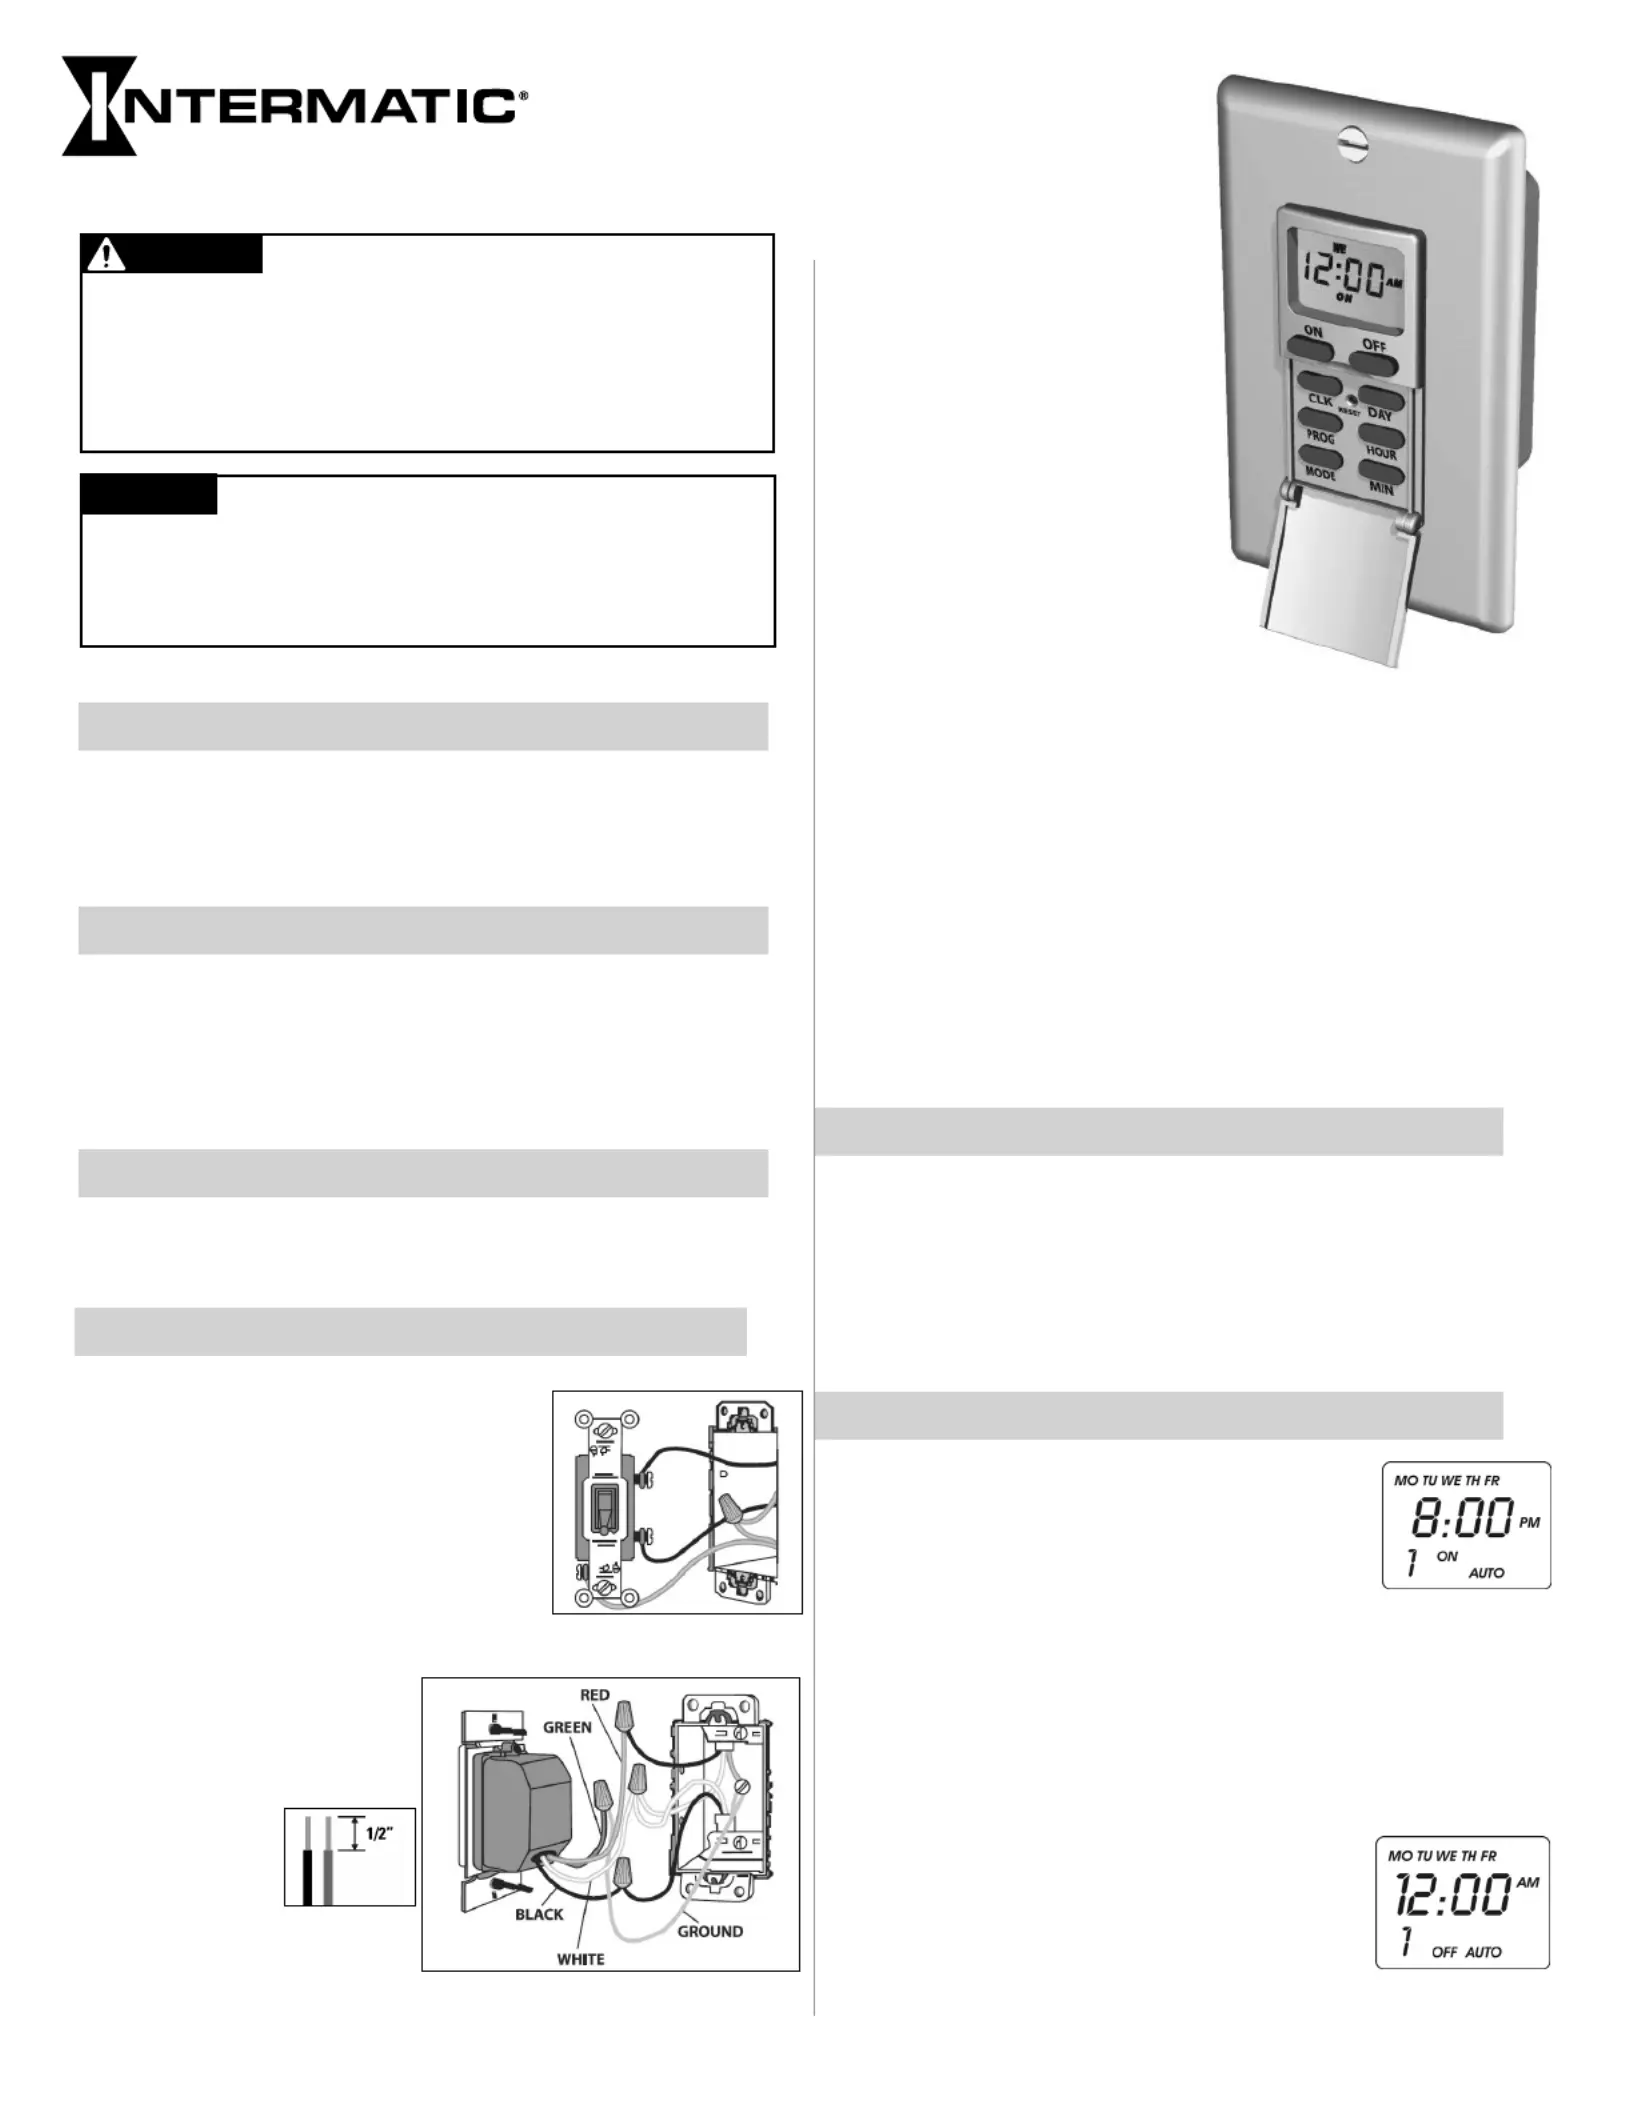
Electronic
7-Day
In-Wall
Time Switch
MODEL EI500 Series
1.Remove wall plate and disconnect
existing light switch.
2.Make sure both “hot” and
“neutral” wires are present in the
junction box. If both wires are not
present, additional wiring will be
necessary before installation can be
completed.
3.Connect red timer wire to wire from
fixture using wire connector.
4.Connect black timer
wire to the “hot” (usually
black or red) wire in
junction box using wire
connector.
5.Cut white
wire in
junction
box (or
open splice) and strip
½” of insulation on both
wires.
Installation Instructions
•All Ratings 125 VAC, 60 Hz
•15 A / 1875 W Resistive / Heater
•15 A, General Purpose
•8 A / 1000 W Tungsten
•8 A / 1000 VA Inductive / STD Ballast
•500 VA Electronic Ballast
•1/4 HP Motor
Installation and User Instructions
•7-Day Control Schedule
•Up to 7 ON and 7 OFF Events per day
•Works with multiple load types including: incandescent,
compact fluorescent, HID, motors, and heaters
•Available in White, Ivory, and Light Almond
Ratings
Features
•Black = Line
•White = Neutral
•Red = Load
•Green = Ground
Leads
6.Connect white timer wire to white wires in junction box
using wire connector.
7.If the wall switch you are replacing had separate grounding
conductors connected to the GREEN screw on the switch,
make sure to connect these to the green wire from the timer
with a wire connector.
8.Check that all wire connections are secure.
9.Place all wires inside junction box.
10.Fit timer into junction box and install using two (2) mounting
screws (furnished).
11.Reconnect the electrical power.
Setting the Clock
1.Press and the (Clock) button.HOLDCLK
2.Press the button until the display shows the current day.DAY
3.Press the HOUR button until the display shows the current
hour.
4.Press the MIN (Minute) button until the display shows the
current minute.
Setting Programs
1.Press the (Program) button once. ThePROG
display will look as shown at the right.
You will now set up the time in which you
want your device turned ON.
The number 1 in the lower left hand corner
indicates that you are now programming
EVENT 1.
2.Press the button repeatedly until the display shows theDAY
day(s) when you want the timer to turn on. The options are:
-All days of the week (MO TU WE TH FR SA SU)
-Individual days of the week (MO etc.)
-Weekdays only (MO TU WE TH FR)
-Weekends only (SA SU)
3.Press the and (Minute) buttonsHOURMIN
to set the time when you want the timer to
turn on.
4.Press the (Program) button again. ThePROG
display reads as shown at the right.
•Disconnect power at the circuit breaker(s) or disconnect
switch(es) before installing or servicing.
•Installation and/or wiring must be in accordance with national and
local electrical code requirements.
•Use COPPER conductors ONLY.
WARNING
Risk of Fire or Electric Shock
•No user-serviceable parts.
•The internal battery requires up to 30 minutes to charge. If the
battery is not charged and power is lost, schedule information
may have to be re-configured.
NOTICE
Produktspecifikationer
| Varumärke: | Intermatic |
| Kategori: | Inte kategoriserad |
| Modell: | EI500C |
Behöver du hjälp?
Om du behöver hjälp med Intermatic EI500C ställ en fråga nedan och andra användare kommer att svara dig
Inte kategoriserad Intermatic Manualer

8 April 2025
8 April 2025
8 April 2025
8 April 2025
8 April 2025
8 April 2025
8 April 2025
8 April 2025
8 April 2025
8 April 2025
Inte kategoriserad Manualer
Nyaste Inte kategoriserad Manualer
9 April 2025
9 April 2025
9 April 2025
9 April 2025
9 April 2025
9 April 2025
9 April 2025
9 April 2025
9 April 2025
9 April 2025