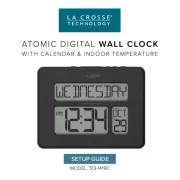
La Crosse Technology WT-3108-BBB Bruksanvisning
La Crosse Technology
klocka
WT-3108-BBB
Läs gratis den bruksanvisning för La Crosse Technology WT-3108-BBB (2 sidor) i kategorin klocka. Guiden har ansetts hjälpsam av 13 personer och har ett genomsnittsbetyg på 4.1 stjärnor baserat på 7 recensioner. Har du en fråga om La Crosse Technology WT-3108-BBB eller vill du ställa frågor till andra användare av produkten? Ställ en fråga
Sida 1/2

WWVB Radio Controlled Analog Bathroom Clock
FUNCTION:
Time (WWVB RC Time)
Indoor temperature
QUICK SETUP:
1. Remove back cover to expose movement
2. Select time zone and DST setting.
3. Insert 1 AA alkaline battery.
4. THAT’S IT!
DETAILED SETUP:
Twist the back counter-clockwise to remove from the radio controlled bathroom clock.
Select your Move time zone switch to appropriate zone: P (UTC-8 Pacic Time), M (UTC-7 Mountain Time), C (UTC-6 Central Time), E (UTC-5 Eastern Time) time zone.
Select the Auto Adjust feature. Move Time feature is disabled w Daylight Saving Time the DST switch to “ON” or “OFF”. The Daylight Saving hen the switch is “OFF”.
Insert 1 new AA, LR6 1.5 volt ALKALINE in the analog clock battery compartment according to the polarity marked on the case. battery
With the battery is installed, the and the second, minute and h r hands will automatically move to the 12:00 position. radio reception mode is activated ou
Once the hands are in the 12:00 position, the movement will search for the WWVB radio signal. The clock will search for 3 to 10 minutes after all hands have set to the
12:00 position.
When the signal is found within the rst 3 to 10 minutes, the clock will set to the correct time.
If the clock does not receive a radio signal soon after activated, this case, do not the clock will start running from the 12:00 position and will continue to run. In
attempt to manually set the hands, even though the time displayed on the clock is incorrect. The clock is synchronizing to the WWVB signal and once the radio signal is
decoded, the hands will automatically adjust to the correct time.
Allow up to 5 nights for signal reception.
Internal Synchronization: Once the clock has been set correctly by the radio signal, the clock’s CPU operates continuously. To ensure accuracy, the clock synchronizes
the position of the second and minute hands to the time calculated by the CPU every day. Second hand synchronization occurs at 1:30 a.m. and 9:30 a.m. and minute hand
synchronization occurs between 1:50 and 2:01 am every day.
Signal Interference: In some cases, the signal can be aected by weather conditions and electrical interferences, or the location of the clock itself may result in poor
reception. If the clock has not synchronized to the correct time within a few days of activation, move the clock to a dierent location. Place the clock near an outside wall
closest to the direction of Colorado. Avoid placing the clock near electrical items such as TVs, microwave ovens and computers.
INDOOR TEMPERATURE: Displayed in the LCD at the bottom of the clock.
The surrounding temperature is displayed immediately after inserting the battery.
The radio controlled bathroom clock can be used at a permanent ambient temperature between 32°F to 122°F.
Important: Do not touch the LCD temperature board or wires on the back of the clock. This may cause permanent damage. The temperature is adjustable. not
MOUNT THE CLOCK: Before mounting the clock on the wall, be sure the cover is snugly screwed on the back of the clock. This protects the clock from moisture and provides a
secure mount. There is a gasket to prevent moisture where the cover screws onto the clock. The radio controlled bathroom clock can be mounted with suction cups or with the
hanging hole.
Mount with suction cups: The suction cups of your radio controlled bathroom clock are used for attachment to surfaces such as tiles (the tiles should be polished, the smooth
suction cups do not adhere to matte tiles), mirrors and glass surfaces etc. Textured surfaces will not allow proper vacuum and the suction cups will not hold.
1. befo attaching them to improve suction. Moisten the suction cups re
2. Press the clock rmly to the smooth surface.
Important:
The suction cups adhere only to smooth surfaces.
Since the suction cups, similar to all other suction cups, can detach after a while, occasionally press them firmly against the surface and check the adherence of the radio
controlled bathroom clock.
Do not attach your radio controlled bathroom clock to an area where it will receive direct water contact since the clock is protected only against moisture. Intensive contact
with water could lead to malfunctions.
Clean the surface where you mount your radio controlled bathroom clock. The surface must be free of dust and grease.
Mount your radio controlled bathroom clock in a place where nothing could be damaged if the clock detaches itself and falls down. Please note that glass breakage is not
covered by the warranty.
Do not attach one of the suction cups directly over a tile joint, since no vacuum can develop and the suction cup does not hold.
Detach suction cups from wall: When you want to detach the radio controlled bathroom clock from a surface, please lift the suction cups at the edge one by o while holding ne
the clock. This enables air to enter underneath the suction cup and it will detach from the surface.
Note: Do not pull directly at the clock to detach it to avoid damage to the unit or the surface.
Mount with hanging hole:
A hanging hole is available on the back cover to mount the clock in addition to or instead of the suction cups (suction cups are not removable).
Install a mounting screw (not included) into a wall leaving approximately ½ inch to 1 inch extended from the wall.
Place the atomic clock onto the screw, using the hanging hole on the backside.
Gently pull the atomic clock down to lock the screw into place. Always ensure that the atomic clock locks onto the screw before releasing.
Note: Suction cups are not removable.
WWVB RADIO CONTROLLED TIME
The NIST radio station, WWVB, is located in Ft. Collins, Colorado and transmits the exact time signal continuously throughout the United States at 60 kHz. The signal can be
received up to 2,000 miles away through the internal antenna in the Atomic Clock. However, due to the nature of the Earth’s Ionosphere, reception is very limited during daylight
hours. The Atomic Clock will search for a signal every night when reception is best. The WWVB radio station derives its signal from the NIST Atomic Clock in Boulder, Colorado.
BATTERY “AA”
DST ON/OFF
SET
RESET
WAVE
TIME ZONE
WWVB
LACRO
Hanging hole
Suction cups
(not removable)
Cover
Moisture seal gasket
Lock threads for cover
(Four around outer edge)
LCD temperature board
Produktspecifikationer
| Varumärke: | La Crosse Technology |
| Kategori: | klocka |
| Modell: | WT-3108-BBB |
Behöver du hjälp?
Om du behöver hjälp med La Crosse Technology WT-3108-BBB ställ en fråga nedan och andra användare kommer att svara dig
klocka La Crosse Technology Manualer

12 Oktober 2025

12 Oktober 2025

11 Oktober 2025

11 Oktober 2025

18 Augusti 2025

14 Augusti 2025

10 Augusti 2025

9 Augusti 2025

9 Augusti 2025

7 Augusti 2025
klocka Manualer
- TFA Dostmann
- Mebus
- BBrain
- Mondaine
- Technoline
- Davis
- Karlsson
- Ecom
- Pyramid
- Elation
- Tronic
- Lotus
- Valcom
- Weinberger
- Holzkern
Nyaste klocka Manualer

20 Oktober 2025

20 Oktober 2025

20 Oktober 2025

20 Oktober 2025

20 Oktober 2025

20 Oktober 2025

19 Oktober 2025

19 Oktober 2025

19 Oktober 2025

19 Oktober 2025