Mitsubishi SLZ-KF25VAD Bruksanvisning
Mitsubishi
Luftkonditionering
SLZ-KF25VAD
Läs gratis den bruksanvisning för Mitsubishi SLZ-KF25VAD (25 sidor) i kategorin Luftkonditionering. Guiden har ansetts hjälpsam av 16 personer och har ett genomsnittsbetyg på 3.9 stjärnor baserat på 8.5 recensioner. Har du en fråga om Mitsubishi SLZ-KF25VAD eller vill du ställa frågor till andra användare av produkten? Ställ en fråga
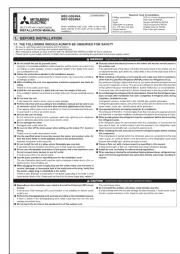
Sida 1/25

Air Conditioners
SLZ-KF25, KF35, KF50, KF60VA3
INSTALLATION MANUAL
For safe and correct use, please read this manual and the outdoor unit installation manual thoroughly before install-
ing the air-conditioner unit.
English
FOR INSTALLER

2
Contents
1. Safety precautions 2 .........................................................................................
2. Selecting the installation location 2 ...................................................................
3. Installation diagram 3 ........................................................................................
4. Installing the indoor unit 3 .................................................................................
5. Refrigerant piping work 5 ..................................................................................
6. Drainage piping work 7 .....................................................................................
7. Electrical work 8 ................................................................................................
8. Test run 15 ........................................................................................................
9. System control 17 .............................................................................................
10. Installing the grille 17 ........................................................................................
11. Easy maintenance function 20 ..........................................................................
1. Safety precautions
• Besuretoread“Safetyprecautions”beforeinstallingtheairconditioner.
• Besuretoobservethecautionsspeciedhereastheyincludeimportant
itemsrelatedtosafety.
• Theindicationsandmeaningsareasfollows.
Warning:
Couldleadtodeath,seriousinjury,etc.
Caution:
Couldleadtoseriousinjuryinparticularenvironmentswhenoperatedincor-
rectly.
• Afterreadingthismanual,besuretokeepittogetherwiththeinstruction
manualinahandyplaceonthecustomer’ssite.
: Indicates a part which must be grounded.
Warning:
Carefullyreadthelabelsaffixedtothemainunit.
Installtheindoorunitatleast2.5mabovefloororgradelevel.
Forappliancesnotaccessibletothegeneralpublic.
Warning:
• Donotinstallitbyyourself(customer).
Incompleteinstallationcouldcauseinjuryduetore,electricshock,theunit
fallingorleakageofwater.Consultthedealerfromwhomyoupurchasedthe
unitorspecialinstaller.
• Installtheunitsecurelyinaplacewhichcanbeartheweightoftheunit.
When installed in an insufcient strong place, the unit could fall causing
injured.
• Usethespeciedwirestoconnecttheindoorandoutdoorunitssecurelyand
attachthewiresrmlytotheterminalboardconnectingsectionssothestress
ofthewiresisnotappliedtothesections.
Incompleteconnectingandxingcouldcausere.
• Donotuseintermediateconnectionofthepowercordortheextensioncord
anddonotconnectmanydevicestooneACoutlet.
Itcouldcauseareoranelectricshockduetodefectivecontact,defective
insulation,exceedingthepermissiblecurrent,etc.
• Checkthattherefrigerantgasdoesnotleakafterinstallationhascompleted.
• Performtheinstallationsecurelyreferringtotheinstallationmanual.
Incomplete installation could cause a personal injury due to re, electric
shock,theunitfallingorleakageofwater.
• Performelectricalworkaccordingtotheinstallationmanualandbesureto
useanexclusivecircuit.
Ifthecapacityofthepowercircuitisinsufcientorthereisincompleteelectri-
calwork,itcouldresultinareoranelectricshock.
• Theusershouldneverattempttorepairtheunitortransferittoanotherloca-
tion.
• Theapplianceshallbeinstalledinaccordancewithnationalwiringregula-
tions.
• Ifthesupplycordisdamaged,itmustbereplacedbythemanufacturer,its
serviceagentorsimilarlyqualiedpersonsinordertoavoidahazard.
• Attachtheelectricalpartcovertotheindoorunitandtheservicepaneltothe
outdoorunitsecurely.
Iftheelectricalpartcoverintheindoorunitand/ortheservicepanelinthe
outdoorunitarenotattachedsecurely,itcouldresultinareoranelectric
shockduetodust,water,etc.
• Besuretousethepartprovidedorspeciedpartsfortheinstallationwork.
Theuseofdefectivepartscouldcauseaninjuryorleakageofwaterduetoa
re,anelectricshock,theunitfalling,etc.
• Ventilatetheroomifrefrigerantleaksduringoperation.
If the refrigerant comes in contact with a ame, poisonous gases will be
released.
• Wheninstallingorrelocating,orservicingtheairconditioner,useonlythe
speciedrefrigerant(R410A)tochargetherefrigerantlines.Donotmixitwith
anyotherrefrigerantanddonotallowairtoremaininthelines.
Ifairismixedwiththerefrigerant,thenitcanbethecauseofabnormalhigh
pressure in the refrigerant line,and may result in an explosion and other
hazards.
Theuseofanyrefrigerantotherthanthatspeciedforthesystemwillcause
mechanical failure or system malfunction or unit breakdown. In the worst
case,thiscouldleadtoaseriousimpedimenttosecuringproductsafety.
Caution:
• Performgrounding.
Donotconnectthegroundwiretoagaspipe,waterpipearresterortelephone
groundwire.Defectivegroundingcouldcauseanelectricshock.
• Donotinstalltheunitinaplacewhereaninammablegasleaks.
Ifgasleaksandaccumulatesintheareasurroundingtheunit,itcouldcause
anexplosion.
• Installagroundleakagebreakerdependingontheinstallationplace(where
itishumid).
If a ground leakage breaker is not installed, it could cause an electric
shock.
• Perform the drainage/piping work securely according to the installation
manual.
Ifthereisadefectinthedrainage/pipingwork,watercoulddropfromtheunit
andhouseholdgoodscouldbewetanddamaged.
• Fastenaarenutwithatorquewrenchasspeciedinthismanual.
Whenfastenedtootight,aarenutmaybrokenafteralongperiodandcause
aleakageofrefrigerant.
• Iftheunitisrunforlonghourswhentheairabovetheceilingisathightem-
perature/highhumidity(dewpointabove26ºC),dewcondensationmaybe
producedintheindoorunitortheceilingmaterials.Whenoperatingtheunits
inthiscondition,addinsulationmaterial(10-20mm)totheentiresurfaceof
theunitandceilingmaterialstoavoiddewcondensation.
2. Selectingtheinstallationlocation
2.1. Indoorunit
• Whereairowisnotblocked.
• Wherecoolairspreadsovertheentireroom.
• Whereitisnotexposedtodirectsunshine.
• Atadistance1mormoreawayfromyourTVandradio(topreventpicturefrom
being distorted or noise from being generated).
• Inaplaceasfarawayaspossiblefromuorescentandincandescentlights(sothe
infrared remote control can operate the air conditioner normally).
• Wheretheairltercanberemovedandreplacedeasily.
Warning:
Mounttheindoorunitintoaceilingstrongenoughtowithstandtheweightof
theunit.
2.2.
Wirelessremotecontrollermounting(ForSLP-2FAL*)
• Placeofmounting
• Whereitiseasytooperateandeasilyvisible.
• Wherechildrencannottouch.
• Mounting
Selectapositionabout1.2mabovetheoor,checkthatsignalsfromtheremote
controlleraresurelyreceivedbytheindoorunitfromthatposition(‘beep’or‘beep-
beep’receivingtonesounds).Afterthat,attachremotecontrollerholdertoapillar
or wall and set the wireless remote controller.
In rooms where inverter type uorescent lamps are used, the signal from the
wirelessremotecontrollermaynotbereceived.
Note:
Thephrase“Wiredremotecontroller”inthisinstallationmanualrefersonlytothePAR-33MAA.Ifyouneedanyinformationfortheotherremotecontroller,
pleaserefertoeithertheinstallationmanualorinitialsettingmanualwhichareincludedintheseboxes.

3
(576) C
(576) C
J
625 D
408
88 525 B
570 A
150
313
576 - 610 C
408
576 - 610 C
625 D
I
570 A
525 B
481
208
245
127
18952
50 - 92
10
*1
37 +5
0
K
FEG
3. Installationdiagram
3.1. Indoorunit(Fig.3-1)
A Ceiling
B Grille
C Obstacle
D Min.1000mm
E Min.500mm(Entireperiphery)
If setting the maintenance space for E,besuretoleaveisaminimumof700mm.
Warning:
Mounttheindoorunitonaceilingstrongenoughtowithstandtheweightof
theunit.
3.2. Outdoorunit
Refer to the outdoor unit installation manual.
(mm)
Fig.3-1
Fig.4-1
4. Installingtheindoorunit
4.2. Ceilingopeningsandsuspensionboltinstallation
locations(Fig.4-2)
Caution:
Installtheindoorunitatleast2.5maboveoororgradelevel.
Forappliancesnotaccessibletothegeneralpublic.
• Usingtheinstallationtemplateandthegauge(suppliedasanaccessorywiththe
grille),makeanopeningintheceilingsothatthemainunitcanbeinstalledasshown
inthediagram.(Themethodforusingthetemplateandthegaugeareshown.)
* Before using, check the dimensionsof template and gauge, because they
changeduetouctuationsoftemperatureandhumidity.
* The dimensions of ceiling opening can be regulated within the range shown in
followingdiagram;socenterthemainunitagainsttheopeningofceiling,en-
suringthattherespectiveoppositesidesonallsidesoftheclearancebetween
them becomes identical.
• UseM10(3/8")suspensionbolts.
*Suspensionboltsaretobeprocuredattheeld.
• Installsecurely, ensuringthatthereisno clearancebetween theceiling panel&
grille,andbetweenthemainunit&grille.
A Outer side of main unit
B Bolt pitch
C Ceiling opening
D Outer side of Grille
E Grille
F Ceiling
G Min.500mm(Entireperiphery)
If setting the maintenance space for G,be
suretoleaveisaminimumof700mm.
H Maintenancespace
I Fresh air intake
J Angle
K Electriccomponentbox
* Leavethemaintenancespaceattheelectriccomponentboxend.
*1When installing inan existingceiling unitlocation or applyingadditional heatinsulation,
ensure a minimum space of 25 mm.
Fig.4-2
(mm)
24510
625
625
C
D
E
A
B
1 2
34
5 6
4.1. Checktheindoorunitaccessories(Fig.4-1)
The indoor unit should be supplied with the following accessories.
Accessoryname Q’ty
1Installation template 1
2Washers(withinsulation)
Washers(withoutinsulation)
4
4
3
Pipecover(forrefrigerantpipingjoint)
smalldiameter(liquid)
largediameter(gas)
1
1
4
Band(large)
Band(middle)
Band(small)
6
2
2
5Drain socket 1
6Insulation 1
7.5-24.57.5-24.5
Min.450H
Floor
7.5-24.57.5-24.5
Min.5
Min.2500
Min.450H
Produktspecifikationer
Varumärke: | Mitsubishi |
Kategori: | Luftkonditionering |
Modell: | SLZ-KF25VAD |
Behöver du hjälp?
Om du behöver hjälp med Mitsubishi SLZ-KF25VAD ställ en fråga nedan och andra användare kommer att svara dig
Luftkonditionering Mitsubishi Manualer
27 Mars 2025
27 Mars 2025
27 Mars 2025
27 Mars 2025
19 Februari 2025
8 Februari 2025
6 Februari 2025
27 Januari 2025
9 Januari 2025
9 Januari 2025
Luftkonditionering Manualer
- Anslut
- G3 Ferrari
- Inventor
- Prime3
- Akai
- Climadiff
- Cecotec
- Profile
- Universal Blue
- Candy
- Kenmore
- Sanus
- Airlux
- Amana
- Camry
Nyaste Luftkonditionering Manualer
15 Juni 2025
14 Juni 2025
13 Juni 2025
13 Juni 2025
13 Juni 2025
12 Juni 2025
12 Juni 2025
12 Juni 2025
12 Juni 2025