Moultrie Game Spy M100 Bruksanvisning
Moultrie fotokamera Game Spy M100
Läs gratis den bruksanvisning för Moultrie Game Spy M100 (8 sidor) i kategorin fotokamera. Guiden har ansetts hjälpsam av 53 personer och har ett genomsnittsbetyg på 4.0 stjärnor baserat på 8 recensioner. Har du en fråga om Moultrie Game Spy M100 eller vill du ställa frågor till andra användare av produkten? Ställ en fråga
Sida 1/8
THANK YOU for your purchase of the M100 GameSpy Digital Camera. Please
read this booklet before using the unit. If you should have any questions about this
product or any other Moultrie product, please contact us using the information on
the back of this booklet. Please register your camera at www.moultriefeeders.com
to activate your warranty.
Instructions for M100
GameSpy Digital Camera
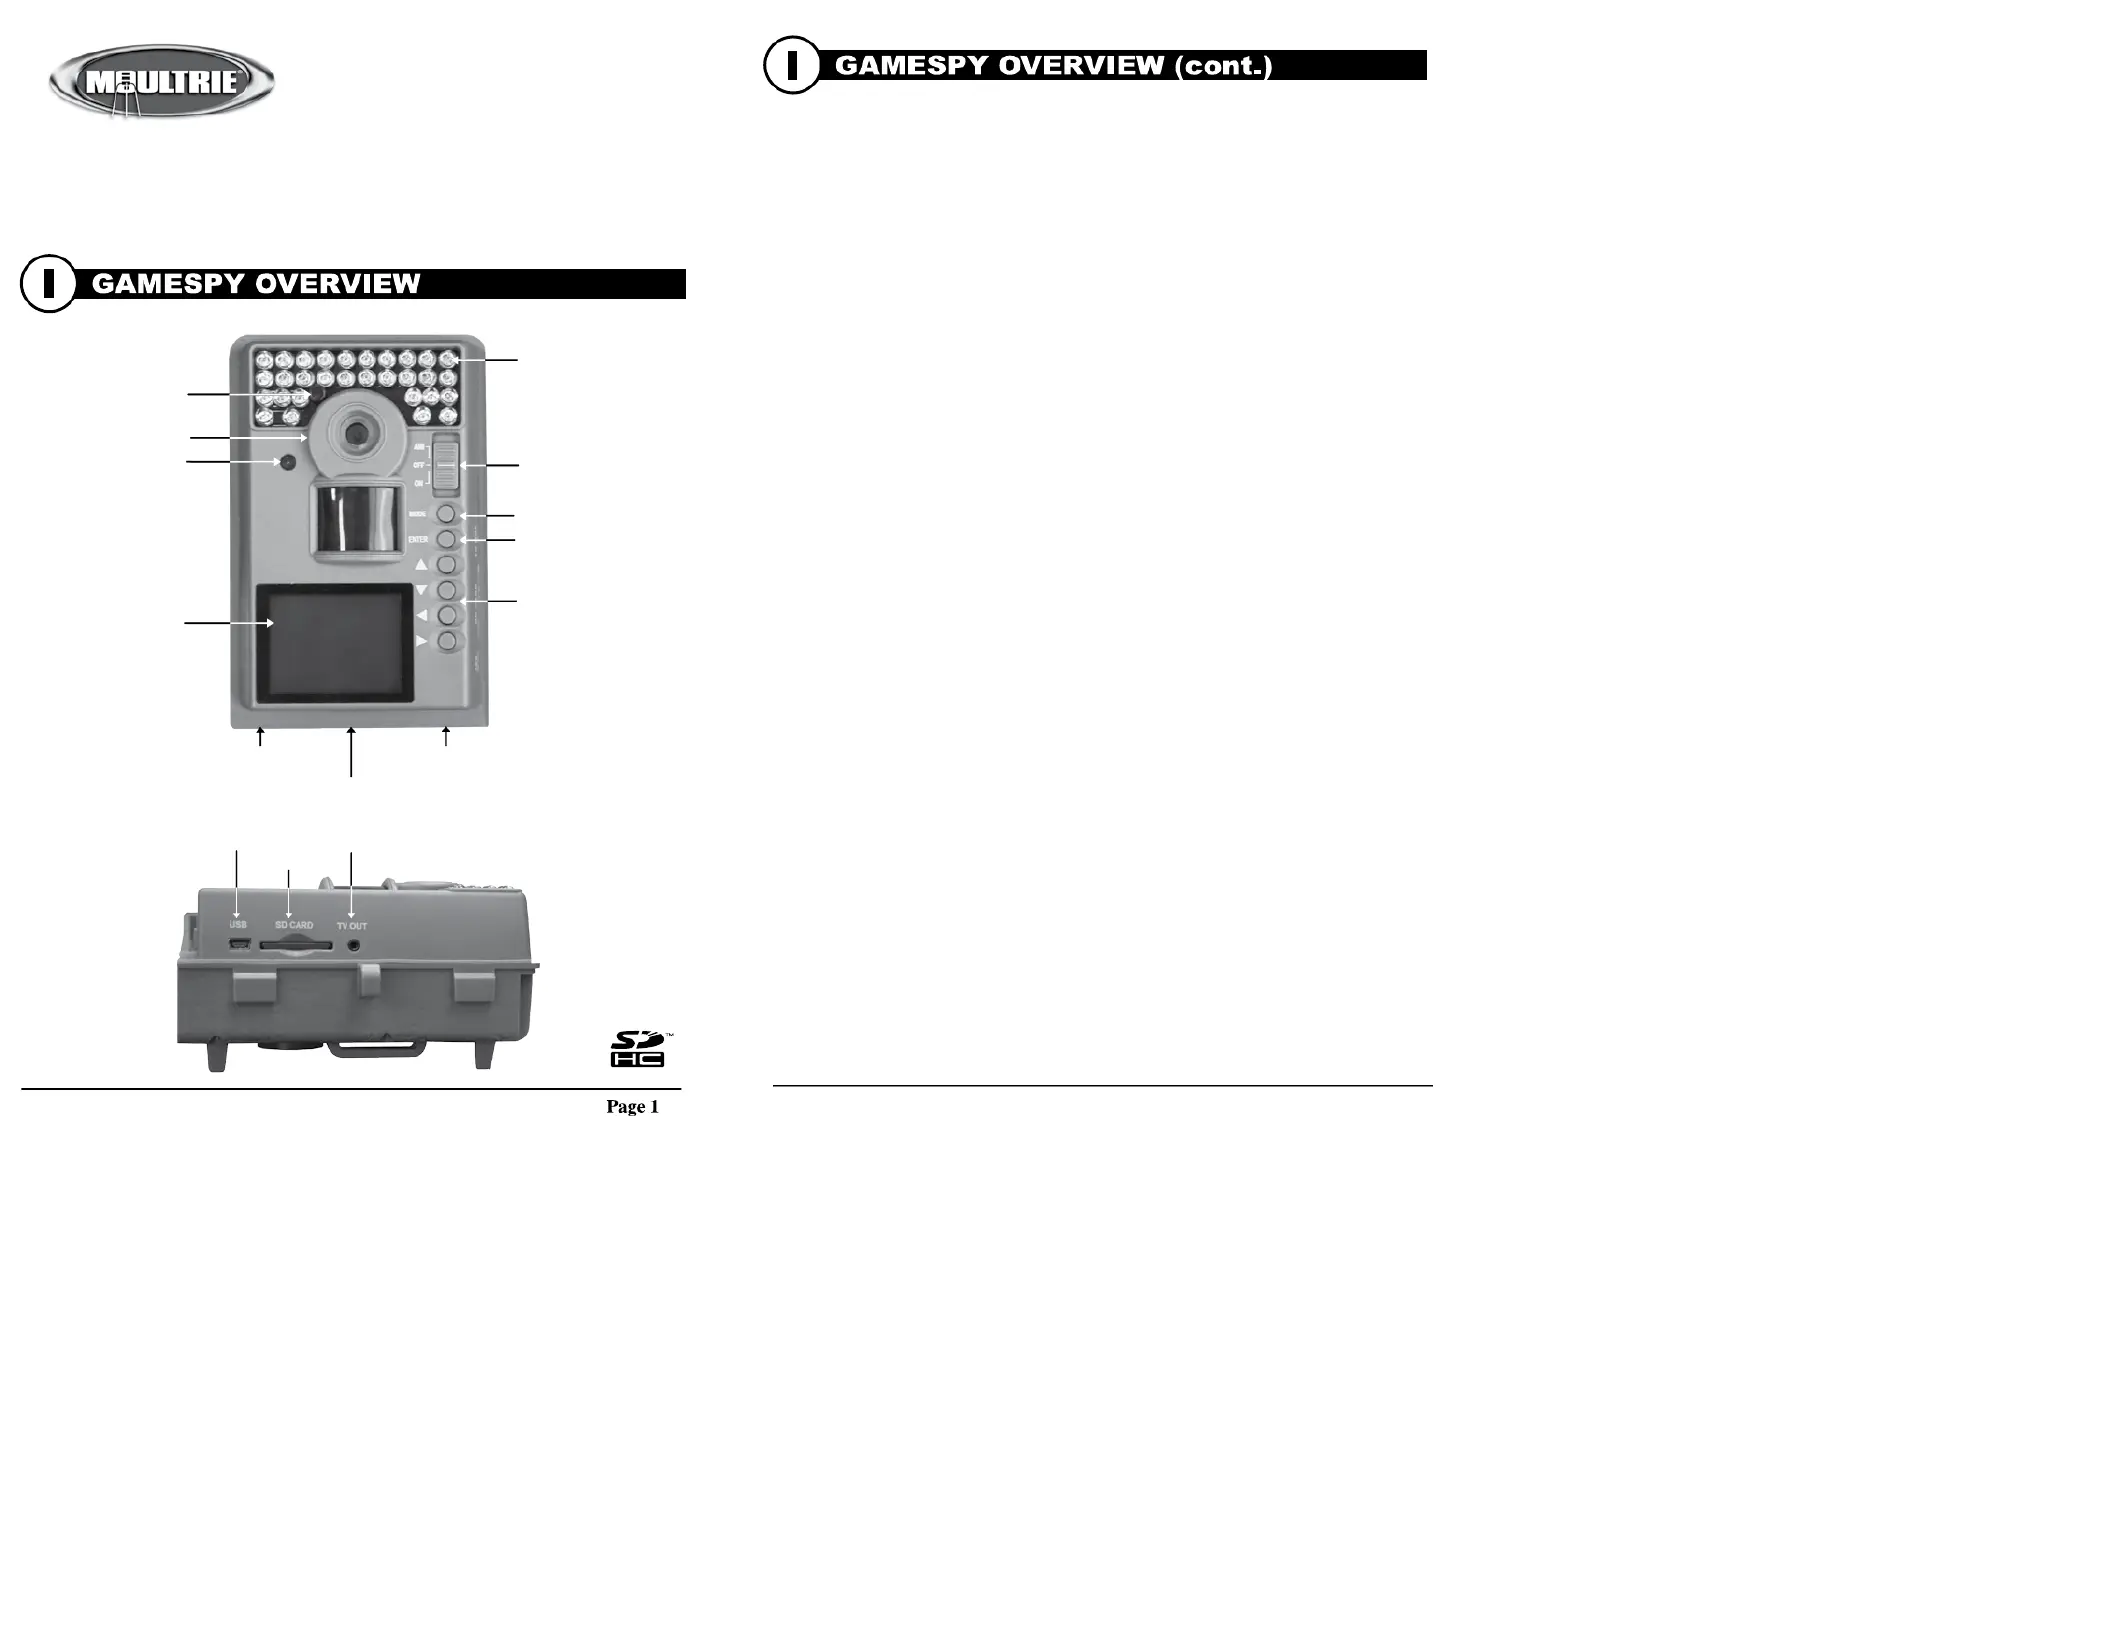
ON/OFF/AIM
LCD Display
Navigation Buttons
Camera Lens
Aim LED
LED Flash
TV Out
USB Port
SD Card Slot
Power Panel Port
M100 GameSpy Digital Camera
Enter Button
Mode Button
Light Sensor
FRONT VIEW
SIDE VIEW
Unlock for slide-out battery compartment
Microphone
ON / OFF / AIM SWITCH
Used for turning On, turning Off, or Aiming the camera. When in AIM position the
red LED light on the front of the camera will illuminate. To help find the center field
of view for the camera, stand out in front of the camera and move left or right as you
observe the AIM LED - as you walk away from direct center the LED light will be
less bright. As you walk towards center the LED will appear brighter.
MODE BUTTON
The Mode Button selects the 3 modes of the camera - Camera Setup Photo Review or
Main Screen . When camera mode is selected, the UP and DOWN buttons navigate
through the menu options. The Mode Button is also used to wake-up the camera and
turn on the display when the camera is in a power saving mode
.
ENTER, UP/DOWN and LEFT/RIGHT BUTTONS
The ENTER button selects the item to be changed. The UP/DOWN and LEFT/RIGHT
buttons are used to step through the menu options. Pressing the ENTER button again,
selects the option indicated on the display. The ENTER button is also used to
manually take a picture.
PHOTO REVIEW
To view pictures use the RIGHT or LEFT button to sequence to the next/previous
captured picture or video clip. The camera’s menu display shows the picture number
being viewed. To delete current picture or video, press the DOWN button.
BATTERY COMPARTMENT
The Camera is powered by four(4) or eight(8) AA size alkaline or lithium batteries.
Slide the Unlock switch to the right and grab the small handle under the switch to
slide-out the battery compartment tray.
NOTE: It is recommended to use lithium batteries for best performance.
SD CARD SLOT
Accepts up to a 32GB SD Card for photo and video storage. Note: An SD Card
must be installed for the camera to operate (sold separately).
USB PORT
Download still pictures and video onto your computer by connecting provided cable.
POWERPANEL PORT
Accepts the Moultrie PowerPanel accessory (sold separately) only. Refer to
www.moultriefeeders.com for more information.
TV OUT JACK
View still pictures and videos on your TV by connecting a 2.5mm video cable
(separately).
M100 GameSpy Digital Camera
Page 2
Produktspecifikationer
| Varumärke: | Moultrie |
| Kategori: | fotokamera |
| Modell: | Game Spy M100 |
Behöver du hjälp?
Om du behöver hjälp med Moultrie Game Spy M100 ställ en fråga nedan och andra användare kommer att svara dig
fotokamera Moultrie Manualer

6 Oktober 2025
10 September 2025
10 September 2025
10 September 2025
10 September 2025
10 September 2025
10 September 2025
9 September 2025
9 September 2025
9 September 2025
fotokamera Manualer
Nyaste fotokamera Manualer
1 April 2026
30 Mars 2026
27 Mars 2026
25 Mars 2026
18 Mars 2026
11 Mars 2026
10 Mars 2026
7 Mars 2026
6 Mars 2026
5 Mars 2026