Pantech Slate C530 Bruksanvisning
Pantech
Smartphone
Slate C530
Läs nedan 📖 manual på svenska för Pantech Slate C530 (306 sidor) i kategorin Smartphone. Denna guide var användbar för 18 personer och betygsatt med 4.5 stjärnor i genomsnitt av 2 användare
Sida 1/306

Alguna de los contenidos de este manual puede tener variaciones
con el telefono dependiendo del software o de proveedor de servicio.
© 2008 AT&T Knowledge Ventures. Las empresas subsidiarias y afiliadas
de AT&T Inc. proporcionan productos y servicios utilizando la marca de AT&T.
Some of the contents in this manual may differ from your phone
depending on the software of the phone or your service provider.
© 2008 AT&T Knowledge Ventures. All rights reserved. Subsidiaries and
affiliates of AT&T Inc. provide products and services under the AT&T brand.
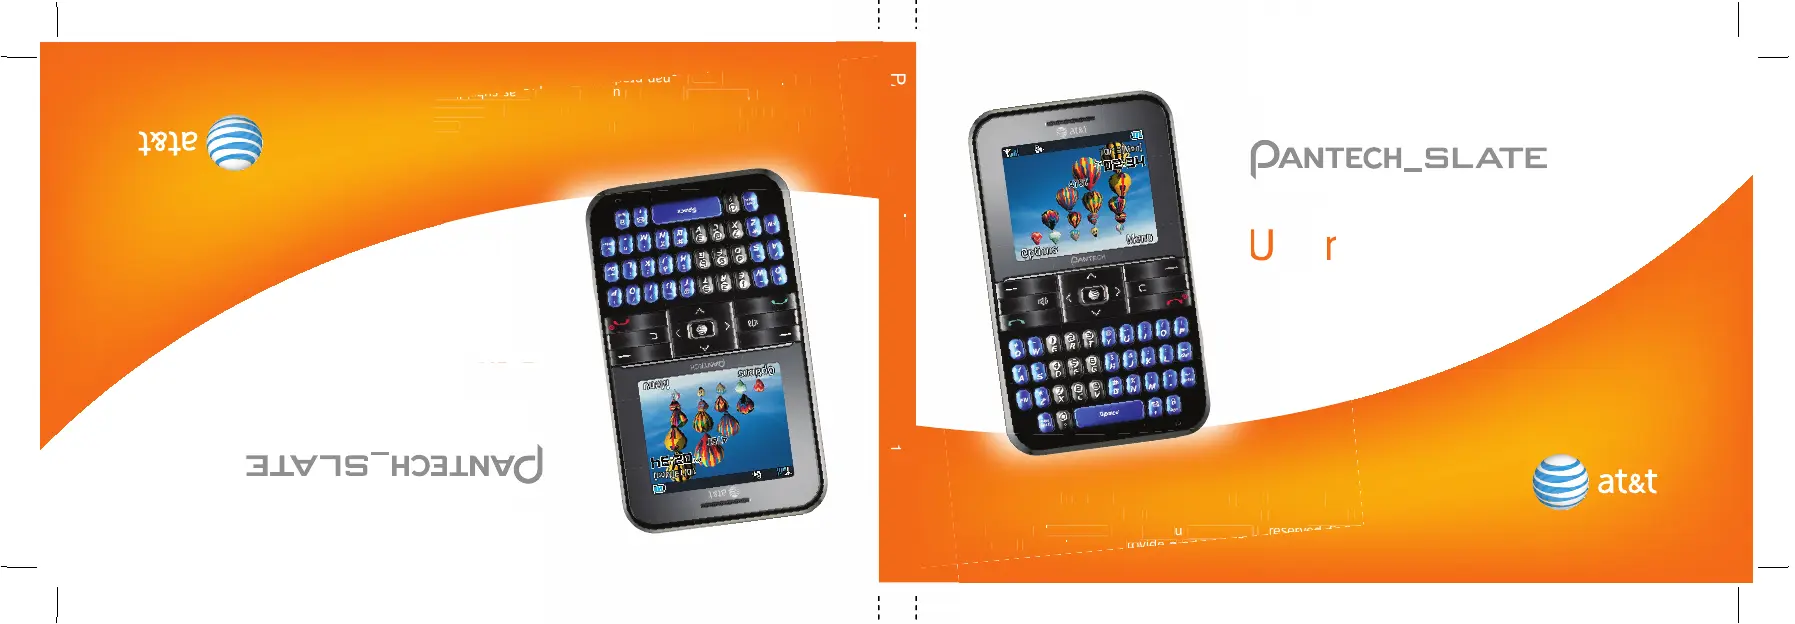
PANTECH_SLATE
User Guide
5U000143C0A REV00
5U000143C0A REV00
Guía del usuario
User Guide
C530
Som
e of t
he
c
on
t
en
t
s i
n this manua
l m
a
y d
if
f
er
f
r
om
y
our
ph
dep
ending on the s
oft
w
a
r
e of the phone
or
y
our se
rvi
c
e p
r
o
v
© 2
008
A
T&T
Kn
ow
A
l
edg
e
V
en
t
u
r
es.
All r
igh
t
s
r
ese
r
v
ed
S
b i
a
ffi
lia
t
es
of
A
T&T
In
c.
p
A
r
o
vid
e p
d
U
U
U
U
se
r
C
C
53
0
A
l
gun
a d
e
l
os
c
on
t
eni
dos de
es
t
e m
anual pue
de
t
ene
r
v
ari
ac
c
on
el
t
e
l
e
f
ono dependiendo del s
oft
w
a
r
e o de
p
r
o
v
eed
or
de
© 2
008
A
T&T
Kn
ow
A
A
l
edg
e
V
en
t
u
r
es.
L
as
emp
r
esa
s s
ubs
idi
de
A
T&T
Inc.
p
A
A
r
opo
r
cio
nan
p
r
odu
G
G
uí
a
P
ANTECH SL
A
TE
A
A
User Guide
5U00
0
1
43C0A RE
V00
C530


Your phone is designed to make it easy for you to access a wide variety of content. For your protection, we want you to be aware that
some applications that you enable may involve the location of your phone being shared. For applications available through AT&T, we
offer privacy controls that let you decide how an application may use the location of your phone and other phones on your account.
However, the AT&T privacy tools do not apply to applications available outside of AT&T. Please review the terms and conditions
and the associated privacy policy for each location-based service to learn how location information will be used and protected. In
addition, your AT&T phone may be used to access the Internet and to download, and/or purchase goods, applications, and services
from AT&T or elsewhere from third parties. AT&T provides tools for you to control access to the Internet and certain Internet content.
These controls may not be available for certain devices which bypass AT&T controls.


Pantech_SLATE™
User Manual
Thank you for choosing the Pantech Slate (C530), our latest EDGE
mobile phone.
The Pantech Slate has many features designed to enhance your
mobile experience. From its sleek, stylish design, we know you will
enjoy the entire Slate experience.
This User Guide contains important and useful information that
will maximize your familiarity with all that the Pantech Slate has
to offer.
™


2
Specications
Design
Bar type phone with single display and QWERTY keypad
Displays
• 260k colors TFT LCD with 2.2” internal display
• 176x220 resolution
• 7 lines for text in basic mode with 16-point font
• Two soft keys and four-way scroll and selection
@
keys
Melodies
MP3, AAC, AAC+, WMA, AMR-NB, MIDI, SP-MIDI
Camera
Integrated 1.3M CMOS Camera
• Resolution up to 1280 x 960 (1,228,800 pixels))
• Mpeg4 Video recording/playing up to 15f/s (QCIF size)
• Self-timer function (5 seconds or 10 seconds)
• Photo album and video album
Dimensions & Weight
• Weight: 132g (with standard battery)
• Dimensions: 107 mm x 64 mm x 9.9 mm
Power Management (Performance)
Battery Type Capacity Standby Time Talk Time
Standard
Lithium-Ion
(Li-ion)
Up to
930 mAh
Up to
250 hours
Up to
3 hours
Operating Frequency
• GSM 850Mhz, GSM 900Mhz, DCS 1800Mhz, and PCS
1900Mhz networks in North America, South America, Europe,
Africa, and Asia-Pacic where these networks are supported.
• Automatic band switching.


3
Earpiece
Display
Left/Right Soft key
Perform the functions shown
at the bottom line of the display
OK key
or access
MEdia Net
Press to enter menu system
Clear key
Returns to previous screen
or deletes characters in text
mode.
Power on&off/Menu exit
key/End key
Turns phone on/off, ends calls,
exits menus
Microphone
Menu features
Email & IM Messaging
YELLOWPAGES.COM
MEdia Net MEdia Mall Games & Apps
My Stuff Address Book Settings
note:
Holding device at internal
antenna area might affect call quality
reception.
Charger slot/Ear mic
Side key
Camera
Internal antenna
Navigation key
Scroll through the
menu options
Speaker key
Send key
Prex
International
call key
Vibrate mode
Camera
key
Phone overview
Number pad view
Message


4
QWERTY keyboard view
Left/Right Soft key
Perform the functions
shown at the bottom line of
the display.
Function key
To enter a number or a symbol,
press the function key, and press
the corresponding key.
CAPS/Shift key
To type a single uppercase letter,
press this key then a letter
Clear/Back key
Returns to previous screen or
deletes characters in text mode.
Delete key
Press to delete a number or letter.
Enter key
Press to create new line while
writing a message.
Space key
Press to enter a space.


5
Numbered menu items, such as menus, sub-menus, and
options can be quickly accessed by using their shortcut
numbers. In Menu mode, Main Menus can be accessed by
pressing the number keys (1 to 9) corresponding to their
location on the screen.
Example: Accessing the
Language menu.
1. Press the Menu
.
2. Press the
9
for Settings.
3. Press the
4
for Phone.
4. Press the
1
for Language.
5. Press Select for Screen Text .
6. Press the
U
or
D
scroll key to display the list of available
languages.
Using shortcuts Menu overview
Email & IM
Mobile Email
IM
Messaging
Create Message
Inbox
Sent
Outbox
Drafts
Voice Mail
Templates
Settings
Memory Info


6
MEdia Mall
Shop Tones
Shop Games
Shop Graphics
Shop Multimedia
Shop Applications
MEdia Net
Games & Apps
Games
Applications
YELLOWPAGES.COM MEdia Net
MEdia Net Home
Bookmarks
Go to URL
Proles
Options
Security
Version


7
My Stuff
Audio
Graphics
Video
Tools
Other Files
Memory Info
Address Book
Contacts
New Contact
Speed Dial
Groups
My Business Card
Memory in Use
Delete All
Copy All
My Phone Number
Memory Info
Service Numbers
S
Settings
Sounds & Alerts
Display
Call
Phone
Flight Mode
Connectivity
Security
S
Software Version
Reset
TTY
S
SIM dependent
N Network dependent


8
Quick & easy
Keys Functions
< > Perform the functions shown at the bottom line of the display by using these soft keys.
Scroll through the menu options in Menu mode. In standby mode,
Left: Access Mobile Email menu
Right: Access IM menu
Up: Access Create Message menu
Down: Access Contacts menu
@
Select a menu function or store user-input information, such as names.
Also use this key for conrmation as the [OK] key.
Launch the
MEdia Net directly if pressed in standby mode.
NTurn the speaker mode on.
CDelete characters from the display, or return to previous menu.
SMake or receive a call. Show the recent call list in standby mode.
Re-dial the last call number if pressed and held in standby mode.
EComplete the current call. Turn on/off the phone if pressed and held.
Cancel user input and return to main screen while in Menu mode.


02
05
04
03
06
08
07
9
01
Getting Started
Keys Functions
,Access to message if pressed and held in standby mode.
A Z~ Enters numbers, letters or special characters. Go to the dial screen if pressed in standby mode.
ZEnter or exit from vibrate mode if pressed and held in standby mode.
qEnter a prex international dialling.
FChange various text input modes if pressed at the text-editing screen.
Enter numbers or symbols if pressed and held at the text-editing screen.
Adjust the earpiece volume while making a call.
Control the Ringtone volume, vibrate mode and silent all mode in standby mode.
Mute the ringtone of an incoming call.
Reject the incoming call if pressed and held when you receive an incoming call.
Turn camera capture mode on.


Contents
Contents
Business card ................................48
Memory information .......................48
6. Connectivity
Bluetooth .......................................52
Using the browser .........................53
Profiles setting...............................54
7. Settings
Language ......................................58
Time and date ...............................58
Ringtones .....................................58
Decorating the display ...................58
Locks .............................................59
To enable fixed dialing .................59
Reset .............................................59
TTY ................................................60
8. Appendix
Alert message ...............................64
Troubleshooting checklist ..............64
Safety information .........................65
Safety precautions .........................65
About the battery usage ................66
FCC Hearing-Aid Compatibility
(HAC) Regulations for Wireless
Devices ..........................................67
FCC Regulatory Compliance ........68
Warranty ........................................69


C530
1


Getting Started
Calls and address book
Messaging
Multimedia
Useful Features
Connectivity
Settings
Appendix 08
07
06
05
04
03
02
01
SIM card and battery
Turn on/off the phone
Keypad lock
Essential display indications
Assigning the menu
Using the QWERTY key pad
MEdia Mall
Getting Started


14
SIM card and battery
About your SIM card
When you subscribe to your network operator, you receive
a SIM (Subscriber Identity Module) card containing your
registration information, PIN code, etc.
Like a credit card, it should be kept secure and handled
carefully. Do not bend, scratch or expose it to moisture. Avoid
static electricity.
To avoid corrupting your SIM card’s memory, always switch off
your phone before removing or inserting your SIM card
About your battery
Your phone uses a Li-Ion battery. Make sure to use an
authorized battery and charger only. For more details, please
inquire at your nearest dealer.
note:
Your phone is powered by a Lithium Ion (Li-Ion)
battery. This means that, unlike other forms of battery
technology, you can recharge your battery while some
charge remains without reducing your phone’s autonomy
due to the “battery memory effect” inherent in those
technologies.
Installing/removing SIM card and battery
1. Remove the battery cover from the
unit. To fit the battery cover, put it on
the guide rail and push up.
2. Insert the SIM card first into the slot.
The gold contacts of the SIM card
should go against the metal contacts
of the phone. After inserting the SIM
card, put the contacts of the battery
into the hole located at the right of the
unit (1) and press the left side (2) of
the battery until you hear the “click”.
3. To remove the battery pull the left
side of the battery to upwards (1) and
remove (2) the battery. After removing
the battery, remove the SIM card in
the arrow direction as shown.
note:
Data will be loose if the SIM card
is removed while the phone is turned on.


02
05
04
03
06
08
07
15
01
Getting Started
Keypad lock
Locking the keypad
1. Press and hold
l
to lock.
Unlocking the keypad
1. Press Unlock >
Z
within 3 seconds to unlock.
Essential display indications
Signal strength. The greater the number of bars, the stronger
the signal. When network is in searching mode, is displayed.
A call is being made. When you are in no service area is
displayed.
Call forwarding
N
is active
Incoming calls set to ring only (
Normal )
Incoming calls set to Vibration and Ring
Incoming calls set to Vibrate Only
Incoming calls set to Silent
Flight Mode is active
Received one or more text messages
Received one or more multimedia messages
To charge your battery
1. To charge, open the protective cover on the
top left side and connect the charger adapter.
2. To remove the adapter connection press
the adapter’s side buttons (1) and pulling
the adapter away (2).
Turn on/off the phone
To turn on
1. Press and hold
E
.
To turn off
1. Press and hold
E
.


16
Received one or more WAP push messages
Received one or more other messages
Received one or more voice messages
A message is being sent
A message is being received
An alarm is set
Bluetooth is active
Headset is connected
TTY is active
An EDGE signal is available. It is displayed when there is an
active EDGE session
A GPRS signal is available. It is displayed when there is an
active GPRS session
WAP is connected. When the security is set is displayed.
Battery strength. When the battery charge is low, is
displayed and blink
Available, Away, Invisible Status of AIM
Online, Away, Busy, Offline Status of MSN
Available, Busy, Invisible Status of YAHOO
You have received one or more IM messages
NNetwork dependent
Assigning the menu
You can set the most commonly used menu in Options in
standby mode.
1. Press Options in standby mode > select Unassigned.
2. Press Options > .Edit
3. Select the menu and sub menu.
note:
User can change Options menu except My Account.
Using the QWERTY key pad
Your phone has QWERTY keypad which provides a
superior typing experience on a small handheld for easy and
comfortable text writing. You can use all of the phone functions
with the QWERTY keypad.


02
05
04
03
06
08
07
17
01
Getting Started
Key Function
<
/
<
Perform the functions shown at the bottom line of the
display by using these soft keys.
m
Press to change ab Ab AB at the text editing screen.
ab
AB
AB
(all small caps / first letter caps /
all caps)
F
Press to type a special character or number, at the
applicable key pad. To enter symbols and numbers
continually, press until
FN
displays.
[
x
]Enter the space character in text input mode.
T
Insert a carriage return in text input mode.
s
Delete a character to the left of the text cursor in text
editing screen.
F+l
Press to type a special character that is not placed on
the keypad.
MEdia Mall
Shopping tones
1. Press Menu MEdia Mall Shop Tones > > .
Shopping Games
1. Press Menu MEdia Mall Shop Games > > .
Shopping Graphics
1. Press Menu MEdia Mall Shop Graphics > > .
Shopping Multimedia
1. Press Menu MEdia Mall Shop Multimedia > > .
Shopping Applications
1. Press Menu MEdia Mall Shop Applications > > .
MEida Net home
1. Press Menu MEdia Mall MEdia Net > > .


C530
2


08
07
06
05
04
03
Getting Started
Calls and address book
Messaging
Multimedia
Useful Features
Connectivity
Settings
Appendix
02
01
Calls and address book
Making, receiving and ending a call
Options during a call
Call Setting
Checking all calls
Speed dialing
Using address book
Caller identification
Using your headset
Service number and fixed dialing


20
Making, receiving and ending
a call
Making a call
1. Enter the area code and phone number.
2. Press
S
key.
Answering a call
1. Press
S
.
Ending a call
1. Press
E
.
Once the call is completed, a call summary is displayed.
Rejecting a call
1. Press
E
or Ignore.
Making a call using call list
Your phone logs up to 20 dialed, received and missed call
numbers.
1. Press
S
to display the Recent Calls list.
2. Select All Calls , Missed Calls Received Calls Dialed, , or
Calls pressing the
L/R
.
3. Select a number.
4. Press
S
to dial the selected number.
note:
To redial the last number in the Recent Calls list,
press
S
.
Making a call during a call
1. Enter the phone number or look it up in Address Book.
2. Press
S
to dial the second call. The first call is
automatically put on hold.
Switching between two calls
1. Press Swap.
Making an international call
1. Press
q
key for the international.
2. Type the country code, area code and phone number.
3. Press
S
.
Making an emergency call
You can make emergency calls even if your phone does not
have a SIM card.
1. Press Emergency Number, or press SOS if your phone
does not have a SIM card.


05
04
03
06
08
07
21
01
02
Calls & address book
2. Select 911 or 112.
3. Press
S
.
Replying to a missed call
N
1. Press View to display the list of missed calls.
2. Select a number to call by pressing the
U/D
key.
3. Press
S
.
Answering a second call
N
1. Press
S
. The first call is automatically put on hold.
2. Press
E
to end the second call.
The call on hold is automatically reconnected.
Options during a call
Microphone off and on
Switching your phone’s microphone off
1. Press Options > [ ].Mute
Switching your phone’s microphone back on
1. Press Unmute.
Talking on speaker
1. Press
N
.
Putting a call on hold and return
N
Putting a call on hold
1. Press Options > or pressHold
S
.
Returning to a held call
1. Press Retrieve or press
S
again.
Multi-party calls
N
You can talk with more than one person or conference call.
Making a multi-party call
1. Call the first participant.
2. Call the second participant. The first call is automatically
put on hold.
3. Press Options > Join All.
Having a private conversation with one participant
1. Press Options > Private.
2. Select the participant and press
@
.
All of the multi-party call participants can now hear each other.


22
Removing one participant from a multi-party call
1. Press Options > End Call.
2. Select the participant and press
@
.
The call ends with that participant, but you can continue to talk
with other participants.
Searching a number in address book during a call
1. Press
D/R
or press Options > Contact Search.
2. Select a number >
S
.
Searching for a name or group in address book
Enter the first letters of the name for Name Search. The entries
are displayed starting with the first entry matching your input.
Finding a name manually in address book
1. Press the
U/D
key.
Viewing the details of highlighted entry in address
book
1. Press
@
.
For details on address book, see page 24.
Reading a message during a call
1. Press Options > Messaging.
2. Press Inbox > select a message.
Writing a message during a call
1. Press Options > Messaging.
2. Press Create Message.
For details on creating a text message, see page 31.
note:
During the call, you can only send text messages.
Multimedia messages cannot be sent, but can be saved.
Call Setting
Setting auto redial
1. Press Menu > Settings Call Auto Redial > > .
2. Select On or Off.
Answering with any key press
1. Press Menu > Settings Call Answer Type > > .
2. Select Any Key.
note:
you can answer with any key except
E
and Ignore.


05
04
03
06
08
07
23
01
02
Calls & address book
Checking all calls
You can view information about all Recent Calls. For more
options for all, missed, received and dialed calls press Options.
You can also view the all Recent Calls simply by pressing
S
.
Viewing missed calls
1. Press Menu My Stuff > > Tools > Recent Calls > Missed
Calls.
Viewing received calls
1. Press Menu My Stuff > > Tools > Recent Calls >
Received Calls.
Viewing dialed calls
1. Press Menu My Stuff > > Tools > Recent Calls > Dialed
Calls.
Deleting call logs
1. Press Menu My Stuff > > Tools > Recent Calls > Delete
Call Logs.
2. Select All Calls Yes> .
note:
If no logs exist, the message “List Empty” appears.
Viewing call time
1. Press Menu My Stuff > > Tools > Recent Calls > Call
Time.
2. Press
U/D
to view Last Call Received Calls Dialed , ,
Calls, and Total Calls.
Resetting all call times
1. Press Menu My Stuff > > Tools > Recent Calls > Call
Time Reset Call Times> .
2. Enter password >
@
.
note:
The default password is ‘1234’.
Viewing data transmitted information
1. Press Menu My Stuff > > Tools > Recent Calls > Packet
Counter.
•
Current Info: You can view transmitted data in the current
session in Kbytes. Sent Received, and information Total
is also available.
•
Last Info: You can view , Sent Received, and Total
transmitted in previous sessions in Kbytes.


24
•
Total Info: You can view all , Sent Received, and Total
transmitted data in Kbytes.
•
Clear Logs: You can clear all logs.
Speed dialing
You can dial quickly using speed dialing. Up to 8 phone
numbers can be programmed using numbers 2 to 9.
1
: Voice mail
q
: Prefix for international call
0
: Question mark
Setting speed dial
1. Press Menu Address Book > > Speed Dial.
2. Select an empty entry and press Add.
3. Select a person and press
@
or Options > Select.
Changing speed dialing person
1. Select a number >
@
or Options > Edit.
2. Select a person >
@
or Options > Select.
Removing from speed dial
1. Select a number > Options > Remove.
Using address book
You can save names, phone numbers, and information on the
SIM or phone. Entries can depend on the capacity of the SIM
card.
Viewing contact list
1. Press
D
or press Menu > Address Book Contacts > .
Searching for a phone number
1. Press
D
or press Menu > Address Book Contacts > .
2. Input the first letter or two of the person’s name and scroll
with
U/D
.
3. Press
@
to view detail information.
4. To update information press Options > Edit.
Calling from contact list
1. Press
D
or press Menu > Address Book Contacts > .
2. Select a person to call.
3. Press
S
.
Forwarding contact details
1. Press
D
or press Menu > Address Book Contacts > .
2. Select a contact > Options > Forward Contact Info.


05
04
03
06
08
07
25
01
02
Calls & address book
3. You can send the information Send as Multimedia
Message or Send via Bluetooth.
Deleting a contact
1. Press
D
or press Menu > Address Book > Contacts.
2. Select a contact > Options > Delete.
Adding a contact
1. Press Menu Address Book New Contact > > .
2. Select SIM Card Phone or .
3. Input the fields.
4. Press
@
or Options > Save.
Making a groups
1. Press Menu Address Book Groups > > .
2. To add new group press Options New > .
3. To edit group press Options > . You can also set Select
a specific ringtone by selecting Options Group Ring >
tones >
@
> select the ringtone.
Caller identification
N
1. Press Menu Settings > > > Call Caller ID.
2. Select Send or Hide My No. > Select.
Using your headset
You can send or receive a call using your headset.
When you connect your headset to the jack the button on the
headset works as follows.
note:
You need to use the headset designed for this device
and it is optional item. Also not every headset has a button.
While in standby mode
1. Press the button once to list recent calls.
2. Press and hold the button to redial the last call.
Service number and fixed dialing
Calling your service numbers
S
You can see the service number to reach the service provider.
1. Press Menu > Address Book > Service Numbers.
2. Select a number > press
S
.
Viewing fixed dialing list
Fixed dialing is a service that limits your access to specific


26
numbers in the address book list recorded on the SIM. Input the
PIN2 to set up or cancel this service.
1. Press Menu Settings > > Security > Fixed Dialing >
Fixed Dial List.
2. Select a number > press
S
.
note:
PIN2 must be correctly entered within 3 attempts. If
you input incorrect code three times in a row the PIN2 code
will be blocked. If the PIN2 code is blocked please contact
your service provider. PIN2 code supplied with SIM card.


05
04
03
06
08
07
27
01
02
Calls & address book


C530
3


08
07
06
05
04
02
01
Getting Started
Calls and address book
Messaging
Multimedia
Useful Features
Connectivity
Settings
Appendix
Messaging
Entering text
Messaging
Receiving message
Creating and sending text message
Creating a multimedia message
Message template
Message settings
Setting voice message
Email
Using instant messenger
03


30
Entering text
You can enter text with multi-tap, numeric or symbol.
Useful keys
[
x
] Adding space
F
Press to change
ab
,
FN
and
FN
.
m
Press to change capital mode.
Press to change
ab
AB
and
AB
.
Multi-tap
ab
AB
and
AB
(all small caps / first
letter caps / all caps)
1
~
9
and
0
Press and hold to enter numbers
F
+
l
Symbols
Sym
Alphabet input mode
Press the key labeled with the target letter once.
1. Press
A
to
Z
to input text.
2. To enter all characters with upper cases, press
m
to
change the mode to
AB
. Press
A
to
Z
.
Numeric mode
You can input numbers in this mode.
1. Press
F
to change the mode
FN
.
2. Press
1
to
9
and
0
to input numbers.
3. To enter numbers continually, press and hold
F
to change
the mode to
FN
. Press
1
to
9
and
0
.
Symbol mode
You can input symbols.
1. Press
F
and
l
to view the symbols.
2. Using the
U/D/L/R
to select symbol and press Insert.
Messaging
You can send, receive and save the text message and
multimedia message.
Managing memory
When the message box is full the messages full icon will appear.
When It means
Text message is full
Multimedia message is full
Moving a message to SIM
1. Press Menu Messaging > > Inbox.
2. Select a message > Options Move > to SIM .


02
05
04
06
08
07
31
01
03
Messaging
Deleting a message in a mailbox
1. Select a message > Options > Delete > .Yes
Replying to a message
1. Select a message > Options > Reply.
Viewing memory space information
1. Press Menu Messaging > > Memory Info.
2. Press
L/R
to view and SIM Phone memory.
Receiving message
Viewing a new message
1. Press View or press
@
.
Reading a message from the inbox
1. Press Menu Messaging Inbox > > .
2. Select a received message >
@
.
Saving number or e-mail from received message
1. Select a received message > Options > orView
@
.
2. Press Options > Save Number & Email from received
message.
3. Select Options > Save > New Contact or Update
Existing.
Saving the object in the received multimedia
message
1. Open the multimedia message.
2. Press Options > Save Objects.
3. Select an object > Save or
@
.
4. Edit the filename > Options > Save or
@
.
It will be saved in one of the categories in the My Stuff folder.
For details on photo album, see page 40.
Listening to voice message
1. Press and hold
1
or press Menu > Messaging > Voice
Mail.
It will automatically call the voice mail center.
Creating and sending text
messages
Sending new text message
1. Press
U
or press Menu > Messaging > Create Message
> Text Message.


32
2. Write the message.
3. Press Options > Send to.
4. Select a person or persons or Options Enter Number, >
Enter Email Call Log, or Groups.
5. Select Send.
6. To view sent message press Menu Messaging Sent > > .
note:
All successfully sent messages will be saved in Sent
while the messages that failed to be sent will be saved in the
Outbox.
Finding all sent messages
1. Press Menu Messaging Sent > > .
Creating a multimedia message
You can create new multimedia message. Capacity is 600Kb
and will alert you once that is exceeded via error message.
Adding saved picture to the message
1. Press Menu Messaging Create Message > > >
Multimedia Message.
2. Write a message.
3. Press Options > Add Object > Add Image.
4. Press Photo Video, or Images >
@
.
5. Select the folder >
@
> choose a file.
6. To preview the whole message, press Options Preview >
>
@
.
7. To edit the text message, press Options > Edit Text.
8. Press Options > Send to.
Adding new picture to the message
1. Press Menu Messaging Create Message > > >
Multimedia Message.
2. Write a message.
3. Press Options > Add Object > Add Image Take a >
Photo.
4. Focus on the object >
@
> Insert.
5. Press Options > Send to.
For the taking a picture, see page 39.
Adding recorded voice memo to the message
1. Press Menu Messaging Create Message > > >
Multimedia Message.
2. Write a message.


02
05
04
06
08
07
33
01
03
Messaging
3. Press Options > Add Object > Add Sound Voice >
Memo.
4. Select the file.
5. To listen select the recorded memo, press Play.
6. To stop listening, press
D
.
7. To select other recorded memo press Back and select
other memo.
8. Press Options > Send to.
Adding new voice memo to the message
1. Press Menu Messaging > > Create Message >
Multimedia Message.
2. Write a message.
3. Press Options > Add Object > Add Sound New Voice >
Memo.
4. Record the sound.
5. To stop and save press
@
.
6. Press Options > Send to.
For the recording voice memo, see page 47.
Adding saved video to the message
1. Press Menu Messaging > > Create Message >
Multimedia Message.
2. Write a message.
3. Press Options > Add Object > Add Image Video> .
4. Select a video > Options Select > .
5. To preview the whole message press Options > Preview.
6. To pause press .Pause
7. Press Options > Send to.
Adding new video to the message
1. Press Menu Messaging > > Create Message >
Multimedia Message.
2. Write a message.
3. Press Options > Add Object > Add Image Take a >
Video.
4. Focus on the object >
@
.
5. To stop recording and save press
@
.
6. Press Options > Send to.
For the recording video, see page 40.
Adding other file to the message
1. Press Menu Messaging > > Create Message >
Multimedia Message.
2. Write a message.
3. Press Options > Add Object Add Other Files> .


34
4. Select the file > Options Select > .
5. Press Options > Send to.
Message template
When you often use the same phrases, you can save the
message under template messages.
Using the template
1. Press Menu Messaging Templates > > .
2. Select the template > Options Text Message > or
Multimedia Message.
3. Write message and send message.
Creating a template
1. Press Menu Messaging Templates > > .
2. Press Options > Create Message.
3. Select Text Message or Multimedia Message.
4. Write often used message.
5. Press Options Save > .
6. To edit, press Options > View > Options > Edit.
7. To delete, press Options > Delete.
note:
Delete All will only delete templates with [ ]
icon is displayed.
Message settings
Setting message center for text message
1. Press Menu Messaging Settings > > .
2. Press Text Message Message Center > .
3. Enter new center address.
4. To save press Select.
Setting profiles for multimedia message
1. Press Menu Messaging Settings > > .
2. Press Multimedia Message Profiles > .
3. Select a profile > Select.
Setting message center for multimedia message
1. Press Menu Messaging Settings > > .
2. Press Multimedia Message Message Center > .
3. Enter new center address.
4. Press Options > . Save


02
05
04
06
08
07
35
01
03
Messaging
Setting sending multimedia message
1. Press Menu Messaging > > Settings.
2. Press Multimedia Message.
3. You can set for Delivery Reports Read Reports , and
Message Life Time.
Setting e-mail gateway for text message
1. Press Menu Messaging > > Settings.
2. Press Text message Email Gateway> .
3. Enter new gateway for receiving e-mail.
4. To save press Select.
Setting receiving notice for push message
1. Press Menu Messaging > > Settings.
2. Press Push Message Receive> .
3. Select On Prompt Off, or modes.
Setting voice message
Setting receiving voice message
1. Press Menu Messaging > > Settings.
2. Press Voice Mail.
3. Enter the number of the voice mail center > Select.
note:
This number may be pre-configured by the service
provider upon activation.
Email
You can receive email from your service provider.
Receiving an email
1. Press Menu Email &IM Mobile Email > > .
2. Select an email >
@
.
Using instant messenger
Use Instant Messenger (IM) to send and receive short, simple
messages that are delivered immediately.
Starting an instant messenger
1. Press Menu Email &IM IM > > .
2. Select the IM application > Select.
3. Enter logon and password > Sign On.
Viewing the conversation log
You can view the log of your conversations in the Instant
Messenger Saved History.


C530
4


08
07
06
05
03
02
01
Getting Started
Calls and address book
Messaging
Multimedia
Useful Features
Connectivity
Settings
Appendix
04
Multimedia
Camera
Photo album
Image album
Video album
Audio album
Other files
Managing the memory
Playing games


38
Camera
You can take pictures and record movies using the built-in
camera. The photos and video clips can be saved and sent via
multimedia message.
In options menu for camera
Icons Name Description
Image Size
1280x960 ( ), 1024x768 ( ),
800x600 ( ), 640x480 ( ),
320x240 ( ), 220x176( )
Image Quality High ( ), Medium ( ), Low ( )
Effects Nomal, Sepia, Monochrome, Nagative,
Embossing
White Balance Auto ( ), Sunlight ( ), Cloudy ( ),
Fluorescent ( ), Incandescent ( )
Multi-Shot
Off, 4EA ( ), 6EA ( ), 9EA ( )
Self Timer Off, 5 secs (
), 10 secs (
)
Display Icons On, Off
Shutter Sound On, Off
In options menu for video camera
Icons Name Description
Video Size 176x144 ( ), 128x96 ( )
Video Quality Low ( ), High ( )
Video mode
Recording
time
Remain
Setting camera settings
1. Press Menu My Stuff Tools > > .
2. Press Camera Take a photo> .
3. Press Options to change settings prior to taking a picture.
Camera mode
Brightness
White Balance
Self Timer
Multi-shot
Record Type
Quality
Size
Zoom


02
05
03
06
08
07
39
01
04
Multimedia
Record Type For Msg ( ), Unlimited ( )
Effects Nomal, Sepia, Monochrome, Nagative,
Embossing
Display Icons On, Off
Zoom in and out
1. Press
U/D
. It ranges from p42-x1 to x4.
Increasing or decreasing the brightness
1. Press
L/R
. It ranges from -3 to +3.
Taking a picture
1. Press Options > Camera in standby mode or press Menu
> My Stuff Tools Camera > > > Take a Photo.
2. Focus on the object >
@
or press Options Take a >
Picture.
note:
Your photo will be saved automatically to My Stuff >
Camera > Photo.
Changing to video camera mode
1. Press Options > Camera in standby mode or press Menu
> My Stuff Tools Camera > > > Take a Photo.
2. Press Options while camera mode is activated.
3. Press Take a Video.
Viewing the taken picture
1. Press Options > Camera in standby mode or press Menu
> My Stuff Tools Camera > > > Take a Photo.
2. Press Options View Photos> .
3. Select the picture >
@
.
After taking pictures
To Press
Send a multimedia
message
Options > Send as Multimedia
Message
Send using Bluetooth Options > Send via Bluetooth
Upload photos on the web Options Send to HP’s Snapfish >
Set as wallpaper Options Set as > > Wallpaper
Set as address book > Options Set as Address Book>
Delete > Options Delete
Rename Options Rename >


40
Recording a video
1. Press Menu > My Stuff Tools Camera > > > Take a
Video.
2. Focus on the object >
@
or press Options > Take a
Video.
3. Press
@
to stop.
4. Press Play to play the video clip.
5. Press Back to go back to preview mode.
6. Press
@
to save the video clip.
note:
Your video will be saved to My Stuff > Video.
Changing to camera mode
1. Press Menu > My Stuff Tools Camera > > > Take a
Video.
2. Press Options while video camera mode is activated.
3. Press Take a Photo.
For details on taking a picture, see page 39.
Viewing the recorded video clip
1. Press Menu > My Stuff Tools Camera > >
2. Press Video.
3. Select the video clip >
@
.
After saving recorded video clips
To Press
Send a multimedia message Options > Send as Multimedia
Message
Send using Bluetooth Options Send via Bluetooth >
Delete > Options Delete
Rename Options Rename >
During recording a video
To Press
Receive an incoming call
S
Stop recording
@
Photo album
You can view, send, save to your phone and also delete
photos. JPEG format is supported, and other formats are saved
in the Camera folder.
Viewing the saved pictures
1. Press Menu > My Stuff.
2. Press Tools > Camera Photo> .
3. Select a picture >
@
or press Options > View.


02
05
03
06
08
07
41
01
04
Multimedia
Setting as wallpaper in the display
1. Press Menu My Stuff > .
2. Press Tools Camera > > Photo.
3. Select a picture > Options > Set as > Wallpaper.
Sending pictures using multimedia message
1. Press Menu My Stuff > .
2. Press Tools Camera > > Photo.
3. Select a picture.
4. Press Options > Send as Multimedia Message.
For details on creating a multimedia message, see page 32.
Uploading pictures on the web
1. Press Menu My Stuff > .
2. Press Tools Camera > > Photo.
3. Select a picture > Options > Send to HP’s Snapsh.
Deleting multiple pictures
1. Press Menu My Stuff > .
2. Press Tools Camera > > Photo.
3. Press Options > Multi-Select.
4. Press
@
to select more than one picture.
5. Press
@
to unselect.
6. Press
Delete.
Viewing le information
1. Press Menu My Stuff > .
2. Press Tools Camera > > Photo.
3. Select a picture.
4. Press Options > File Info.
Images album
You can play, send and delete the saved images. The
supported formats are JPG, GIF, BMP, and PNG.
To view the saved image
1. Press Menu My Stuff > > Graphics Images> .
2. Select an image > Options View > .
To set as wallpaper in display
1. Press Menu My Stuff > > Graphics Images> .
2. Select an image >
Options > Set as Wallpaper .
Video album
You can view, send, save and delete videos.


42
Playing the saved video clips
1. Press Menu > My Stuff.
2. Press Tools > Camera Video> .
3. Select a video clip >
@
or press Options > Play.
Using video player controls
To Press
Pause
@
Play
@
Rewind Hold
L
Fast forward Hold
R
Control volumeSide key up/down or
U/D
Mute Mute
Sending video clip using multimedia message
1. Press Menu > My Stuff.
2. Press Tools > Camera Video> .
3. Select a video.
4. Press Options > Send as Multimedia Message.
For details on creating a multimedia message, see page 32.
Deleting multiple video clips
1. Press Menu > My Stuff.
2. Press Tools > Camera Video> .
3. Press Options > Multi-Select.
4. Press
@
to select more than one video.
5. Press
@
to unselect.
6. Press Delete.
Audio album
You can play, send, delete the saved sounds. The supported
formats are MP3, AAC, AAC+, and WMA.
To listen the saved sound
1. Press Menu > My Stuff Audio > .
2. Select a sound > Options > Play.
To use sound controls
To Press
Play & Pause
@
Play previous clip
L
Play next clip
R
Control volume Side key/Navi key up or down


02
05
03
06
08
07
43
01
04
Multimedia
To set as a ringtone
1. Press Menu My Stuff > > Audio.
2. Select a sound > Options Set as Ringtone > .
To send sound le using multimedia message
1. Press Menu My Stuff > > Audio.
2. Select a sound le.
3. Press Options > Send as Multimedia Message .
Other les
You can manage les in unsupported formats saved on your
phone. It also lists les received via Bluetooth from other
devices.
Viewing the list of the les
1. Press Menu My Stuff > > Other Files.
2. Press Options > .View
Managing the memory
Viewing memory status
1. Press Menu My Stuff > .
2. Press Memory Info.
3. Use
U/D
to view the information.
Playing games
You can download games to play with. It is easy to download
and you can preview them beforehand. You will only be able to
view games that are available on your mobile.
Shop games
1. Press Menu Games & Apps > .
2. Select Games > Shop Games Select > .
3. Play the demo and press to download the complete BUY
game.


C530
5


08
07
06
04
03
02
01
Getting Started
Calls and address book
Messaging
Multimedia
Useful Features
Connectivity
Settings
Appendix
05
Useful Features
Alarms
Calendar
Notepad and voice memo
Calculator, converter and stopwatch
Business card
Memory information


46
Alarms
Setting an alarm
1. Press Menu My Stuff Tools Alarms > > > .
2. Press New for new alarm for the rst time.
3. Set the , Cycle Time Alarm Sound Save and > .
note:
The alarm will ring, even if you set the phone to
Vibrate Only or Silent. The alarm will ring during the phone
is turned off.
Viewing the saved alarms
1. Press Menu My Stuff Tools Alarms > > > .
Editing existing alarms
1. Press Menu My Stuff Tools Alarms > > > .
2. Select an alarms > Options Select > .
3. Select an alarms >
Options > Delete to delete an alarm.
Calendar
Calendar helps you manage your schedule including your time
for calls or special days. You can set a reminder on any given
date with this function.
Viewing calendar
1. Press Menu My Stuff > >
Tools > Calendar.
note:
Monthly view is displayed
as default.
In the monthly view
To Press
Move to another day
L
for Previous
R
for Next
Move to another week
U
for Previous
D
for Next
View other monthSide key up for Previous
Side key down for Next
Creating a new event and edit
1. Select a day > Options > New Event.
2. Set
Event, Start Time Stop Time Reminder Phone , , ,
Number, Location and Memo.
3. Input the events > .Save
note:
You can create up to 50 scheduled events.
note:
You can create events for dates from 01/01/2000 to
12/31/2049.


02
04
03
06
08
07
47
01
Useful Features
05
Notepad and voice memo
Using notepad
1. Press Menu My Stuff > > Tools Notepad> .
2. Press New for the rst time. To add new note press
Options > Create New .
3. To edit memo press Options > Edit.
4. Press Options > to save.Save
Recording voice memo
1. Press Menu My Stuff > > Tools
> Voice .Memo
2. Press New for the rst time. To
add new note press Options >
Create New.
3. Press
@
to stop recording.
4. Press Re-rec to re-record. Press Pause to pause
recording.
5. Press Play to listen.
6. Press
@
[ ] to save.
Listening the recorded sound
1. Press Menu My Stuff > > Tools > Voice Memo.
2. Select a memo>
Options > Select.
Using sound controls
To Press
Pause
@
Play
@
Stop
D
Rewind
L
Fast Forward
R
Control volume Side key up/down
Calculator, converter and
stopwatch
Using the calculator
1. Press Menu My Stuff > > Tools
> Calculator.
2. Use
L/R/U/D
/
@
to
calculate.
3. Press C to reset.
4. Press
C
to delete one
number at a time.


48
5. Press [ . ] to use the decimal point.
Using the converter
1. Press Menu My Stuff Tools> >
> Converter.
2. Select the categories.
3. Select current unit and enter
gure.
4. Select the unit to be changed.
Using stopwatch
1. Press Menu My Stuff > > Tools
> Stopwatch.
2. Press
@
to start.
3. Press
@
to stop.
4. Press Reset to clear.
5. Press Lap to list lap time. It can
only list 4 different lab times.
Business card
You can send your information by sending it as multimedia
message.
Creating your own business card
1. Press Menu Address Book > > My Business Card .
2. Edit the elds > Options Save > or press
@
.
Forwarding
1. Press Menu Address Book > > My Business Card .
2. Press Options > Send via Bluetooth.
3. Press Options > Send as Multimedia Message.
4. Write a message for Multimedia Message.
5. Press Options > Send to.
Updating information
1. Press Menu Address Book > > My Business Card .
2. Press Options > .Edit
3. Update information.
4. Press Options > .Save
Memory information
You can view the information of your phone, for
Free Games, ,
Audio, Graphics Photo Video Message Others System., , , , ,
Viewing the information
1. Press Menu My Stuff > > Memory Info.


02
04
03
06
08
07
49
01
Useful Features
05


02
05
04
03
08
07
53
01
06
Connectivity
The received le will be saved in each place. For example, if
you received contacts information from the sender, it will be
saved in your phone’s memory.
Setting the visibility
1. Press Menu Settings > > Connectivity > Bluetooth >
Visibility .
2. Select Hidden or Show to All.
Naming the phone
1. Press Menu Settings > > Connectivity > Bluetooth >
Name .
2. Edit the led > Options Save > .
note:
This is what others will see in their device’s display
for your phone when searching for your device.
Using the browser
Accessing browser
1. Press
@
in standby mode or press Menu MEdia Net > >
MEdia Net Home .
note:
It will access provider’s homepage.
Viewing bookmarks
1. Press Menu MEdia Net > > Bookmarks.
2. To open the site, press Options Select> .
3. To send via text message, press Options Send >
Message.
Setting new bookmarks
1. Press Menu MEdia Net > > Bookmarks.
2. Press Options > .Add
3. Enter the elds > Options Edit Name > .
4. Enter the new name > Options > .Save
Entering address
1. Press Menu MEdia Net> > Go to URL > Enter New
URL.
2. Enter the web address > Options Go > to URL .
Setting options
1. Press Menu MEdia Net> > Options.
2. Select the category > Select > select the option.

02
05
04
03
08
07
55
01
06
Connectivity


Produktspecifikationer
Varumärke: | Pantech |
Kategori: | Smartphone |
Modell: | Slate C530 |
Behöver du hjälp?
Om du behöver hjälp med Pantech Slate C530 ställ en fråga nedan och andra användare kommer att svara dig
Smartphone Pantech Manualer

12 Oktober 2024

29 Augusti 2024

27 Augusti 2024

25 Augusti 2024

24 Augusti 2024

23 Augusti 2024

21 Augusti 2024

21 Augusti 2024

20 Augusti 2024

19 Augusti 2024
Smartphone Manualer
- Smartphone Sony
- Smartphone Samsung
- Smartphone Xiaomi
- Smartphone LG
- Smartphone AEG
- Smartphone Huawei
- Smartphone Brondi
- Smartphone HP
- Smartphone Philips
- Smartphone Panasonic
- Smartphone Garmin
- Smartphone Gigaset
- Smartphone Motorola
- Smartphone Medion
- Smartphone Nokia
- Smartphone Toshiba
- Smartphone Wiko
- Smartphone Yarvik
- Smartphone Acer
- Smartphone Aiwa
- Smartphone Alcatel
- Smartphone Albrecht
- Smartphone Alecto
- Smartphone Aligator
- Smartphone Allview
- Smartphone Apple
- Smartphone Amazon
- Smartphone Amplicomms
- Smartphone Amplicom
- Smartphone Archos
- Smartphone Alcatel-Lucent
- Smartphone Prestigio
- Smartphone Google
- Smartphone BenQ
- Smartphone Lexibook
- Smartphone Sharp
- Smartphone Telefunken
- Smartphone Silvercrest
- Smartphone Nedis
- Smartphone Thomson
- Smartphone Manta
- Smartphone Asus
- Smartphone OK
- Smartphone Hisense
- Smartphone Hyundai
- Smartphone Sony Ericsson
- Smartphone Trekstor
- Smartphone Vestel
- Smartphone Micromax
- Smartphone Kodak
- Smartphone Bush
- Smartphone RCA
- Smartphone Sonim
- Smartphone Sencor
- Smartphone Overmax
- Smartphone Blaupunkt
- Smartphone TP Link
- Smartphone Lenovo
- Smartphone Energy Sistem
- Smartphone Polaroid
- Smartphone Doro
- Smartphone Sagem
- Smartphone Lava
- Smartphone Blu
- Smartphone Easypix
- Smartphone Denver
- Smartphone Intex
- Smartphone ZTE
- Smartphone Sanyo
- Smartphone Konrow
- Smartphone Brigmton
- Smartphone Sunstech
- Smartphone TCL
- Smartphone Gigabyte
- Smartphone Mitsubishi
- Smartphone Aspera
- Smartphone Microsoft
- Smartphone Nec
- Smartphone Swissvoice
- Smartphone Sunny
- Smartphone Nordmende
- Smartphone Haier
- Smartphone Krüger And Matz
- Smartphone Binatone
- Smartphone Blackberry
- Smartphone KPN
- Smartphone HTC
- Smartphone Vivo
- Smartphone Olympia
- Smartphone Razer
- Smartphone Mio
- Smartphone Wolder
- Smartphone Audioline
- Smartphone NGM
- Smartphone Goclever
- Smartphone Profoon
- Smartphone Vodafone
- Smartphone NGS
- Smartphone Dell
- Smartphone Hammer
- Smartphone Switel
- Smartphone InFocus
- Smartphone GreatCall
- Smartphone XD
- Smartphone Alba
- Smartphone Honor
- Smartphone RugGear
- Smartphone Umidigi
- Smartphone CAT
- Smartphone Intermec
- Smartphone AT&T
- Smartphone Mpman
- Smartphone Trevi
- Smartphone Tesla
- Smartphone Bury
- Smartphone Logicom
- Smartphone Karbonn
- Smartphone Vivax
- Smartphone Emporia
- Smartphone Hannspree
- Smartphone Phicomm
- Smartphone Nevir
- Smartphone Kyocera
- Smartphone Crosscall
- Smartphone Plum
- Smartphone Infinix
- Smartphone OnePlus
- Smartphone Keneksi
- Smartphone Klipad
- Smartphone Iget
- Smartphone T-Mobile
- Smartphone JCB
- Smartphone CRUX
- Smartphone Geemarc
- Smartphone Unnecto
- Smartphone Wileyfox
- Smartphone ITT
- Smartphone MyPhone
- Smartphone Avus
- Smartphone Wolfgang
- Smartphone Oppo
- Smartphone BQ
- Smartphone ORA
- Smartphone Danew
- Smartphone Echo
- Smartphone Primux
- Smartphone Tiptel
- Smartphone UTStarcom
- Smartphone Zipy
- Smartphone Mediacom
- Smartphone Beafon
- Smartphone SPC
- Smartphone Billow
- Smartphone Telstra
- Smartphone Ulefone
- Smartphone ToughGear
- Smartphone Benefon
- Smartphone Komu
- Smartphone Doogee
- Smartphone Energizer
- Smartphone Tremay
- Smartphone Realme
- Smartphone Kurio
- Smartphone Piranha
- Smartphone Coolpad
- Smartphone TAG Heuer
- Smartphone Mobistel
- Smartphone Itel
- Smartphone Garmin-Asus
- Smartphone Handheld
- Smartphone Fero
- Smartphone AT Telecom
- Smartphone Xtreamer
- Smartphone O2
- Smartphone General Mobile
- Smartphone Mustang
- Smartphone Syco
- Smartphone Kogan
- Smartphone Maxcom
- Smartphone I.safe Mobile
- Smartphone Pharos
- Smartphone Storex
- Smartphone Fairphone
- Smartphone Freeman
- Smartphone HomTom
- Smartphone EVOLVEO
- Smartphone Auro
- Smartphone Maxx
- Smartphone ITTM
- Smartphone Verykool
- Smartphone Cyrus
- Smartphone Posh Mobile
- Smartphone THL
- Smartphone NGM-Mobile
- Smartphone Media-tech
- Smartphone Nothing
- Smartphone Oukitel
- Smartphone Lark
- Smartphone NUU Mobile
- Smartphone Senifone
- Smartphone Tecno
- Smartphone Telme
- Smartphone UMi
- Smartphone Olitech
- Smartphone Mobiola
- Smartphone Meizu
- Smartphone Neffos
- Smartphone Gionee
- Smartphone TIM
- Smartphone Cubot
- Smartphone Leotec
- Smartphone Leagoo
- Smartphone NTech
- Smartphone Majestic
- Smartphone Nubia
- Smartphone LeEco
- Smartphone Best Buy
- Smartphone GSmart
- Smartphone Bea-fon
- Smartphone Opticon
- Smartphone EStar
- Smartphone Saiet
- Smartphone Facom
- Smartphone Bluebird
- Smartphone Jitterbug
- Smartphone Custom
- Smartphone CSL
- Smartphone POCO
- Smartphone Tecdesk
- Smartphone Aplic
- Smartphone HMD
- Smartphone Opis
- Smartphone Volla
- Smartphone Nothing Tech
- Smartphone Maxwest
- Smartphone Krüger&Matz
- Smartphone Kalley
Nyaste Smartphone Manualer

2 April 2025

30 Mars 2025

10 Mars 2025

7 Mars 2025

6 Mars 2025

5 Mars 2025

3 Mars 2025

2 Mars 2025

26 Februari 2025

26 Februari 2025