Philips HTL4080 Bruksanvisning
Läs gratis den bruksanvisning för Philips HTL4080 (1 sidor) i kategorin Soundbar. Guiden har ansetts hjälpsam av 47 personer och har ett genomsnittsbetyg på 4.4 stjärnor baserat på 8 recensioner. Har du en fråga om Philips HTL4080 eller vill du ställa frågor till andra användare av produkten? Ställ en fråga
Sida 1/1
Warranty
1. Proof of purchasesotompied with this warranty rd. i n accanca
2. The warranty card is not completed immediately after purchase.
3. The apparatus is not used according to this user manual.
4. Defectsreused due toproper or reckless use. a ca im
5. Any repairs are done by persons other than Philips authorized service centre.
6. The serial number is tampered with.
7. Defects due touses beyond ca control like lightg,bnormaloltage or while trsit to the nin a v inan
purchaser’s residence.
Product Sl. No.
Model No.
Invoice Number
Date of Purchase: / /
Customer’s Name and address:
PIN:
Always there to help you!
Visit us at www.support.philips.com
Helpline: 1800 425 6396
Email: india.callcentr[email protected]
(10 a.m. to 9 p.m. Mondays to Saturdays & 10
a.m. to 6 p.m. on Sundays)
Dealr eName& S:tamp
This Philips soundbar is warranted against any defect due to defective materials or workmanship for 12 months
from the date of purchase, should a defect develop during the warranty, TPV Technology India Pvt. Ltd.,
its authorized service center in India.
FREE OF CHARGE at any of
System sipotioning :
The subwoofer is recommended to be put
Helpful Hint:
- To avoid magnetic interference, do not position
the speakers, too close to your TV.
Playing the speakers and suboowfer
Audio source / player
SOUNDBAR
The soundbar is recommended to be put on
the at desktop to get a better acoustic eect.
PAIR
MUTE
EQ
VOL+
VOL-
AUD
USB
BT
ARC
OPT
1098711
总尺寸:660x173mm
工艺:风琴折 105G铜版纸 双面印刷
成品尺寸:110x86.5mm
料号:30709L029601-002
成品正面:成品背面:
SOUNDBAR
HTL40
User maalnu
SOUNDBAR
HTL4080
User manual
General information
Safety instructions
Plea r carefully t safety mark on back sideseeadhethe
This mark is intended to alert the user from
the non isolated dangerous voltage within the
constitute a risk of electric shock to persons.
This mark is intented to alert the user for
important operating and servicing instruction.
Warnings
•
Avoid sustained periods on high-volume use, and
do not turn the volume to maximum level while using
high output signal, such as Mobile Phone or DVD,
etc., as this will cause distortion and may damage the
loudspeaker cones.
•
when not in use.
• Do not open the cover or back panel to avoid
electrical shock or any other accidents. No user-
serviceable parts are inside.
• Only for indoor use.
• Plug the system to the AC outlet with the right voltage
marked on the back panel of the Subwoofer.
•The MAINS plug is used as the disconnect device, the
disconnect device shall remain readily operable.
Remark: please unscrew the plastic wall mount and use metal one, if the soundbar need to be hung on the wall.
Accessories
The product shall not be exposed to dripping or splashing
be placed on the product.
•
ItemRemote controlUser manual
Quantity1
Audio-2RCA cable
11
Optical cable
1
Wall mount
2
Power cord
1
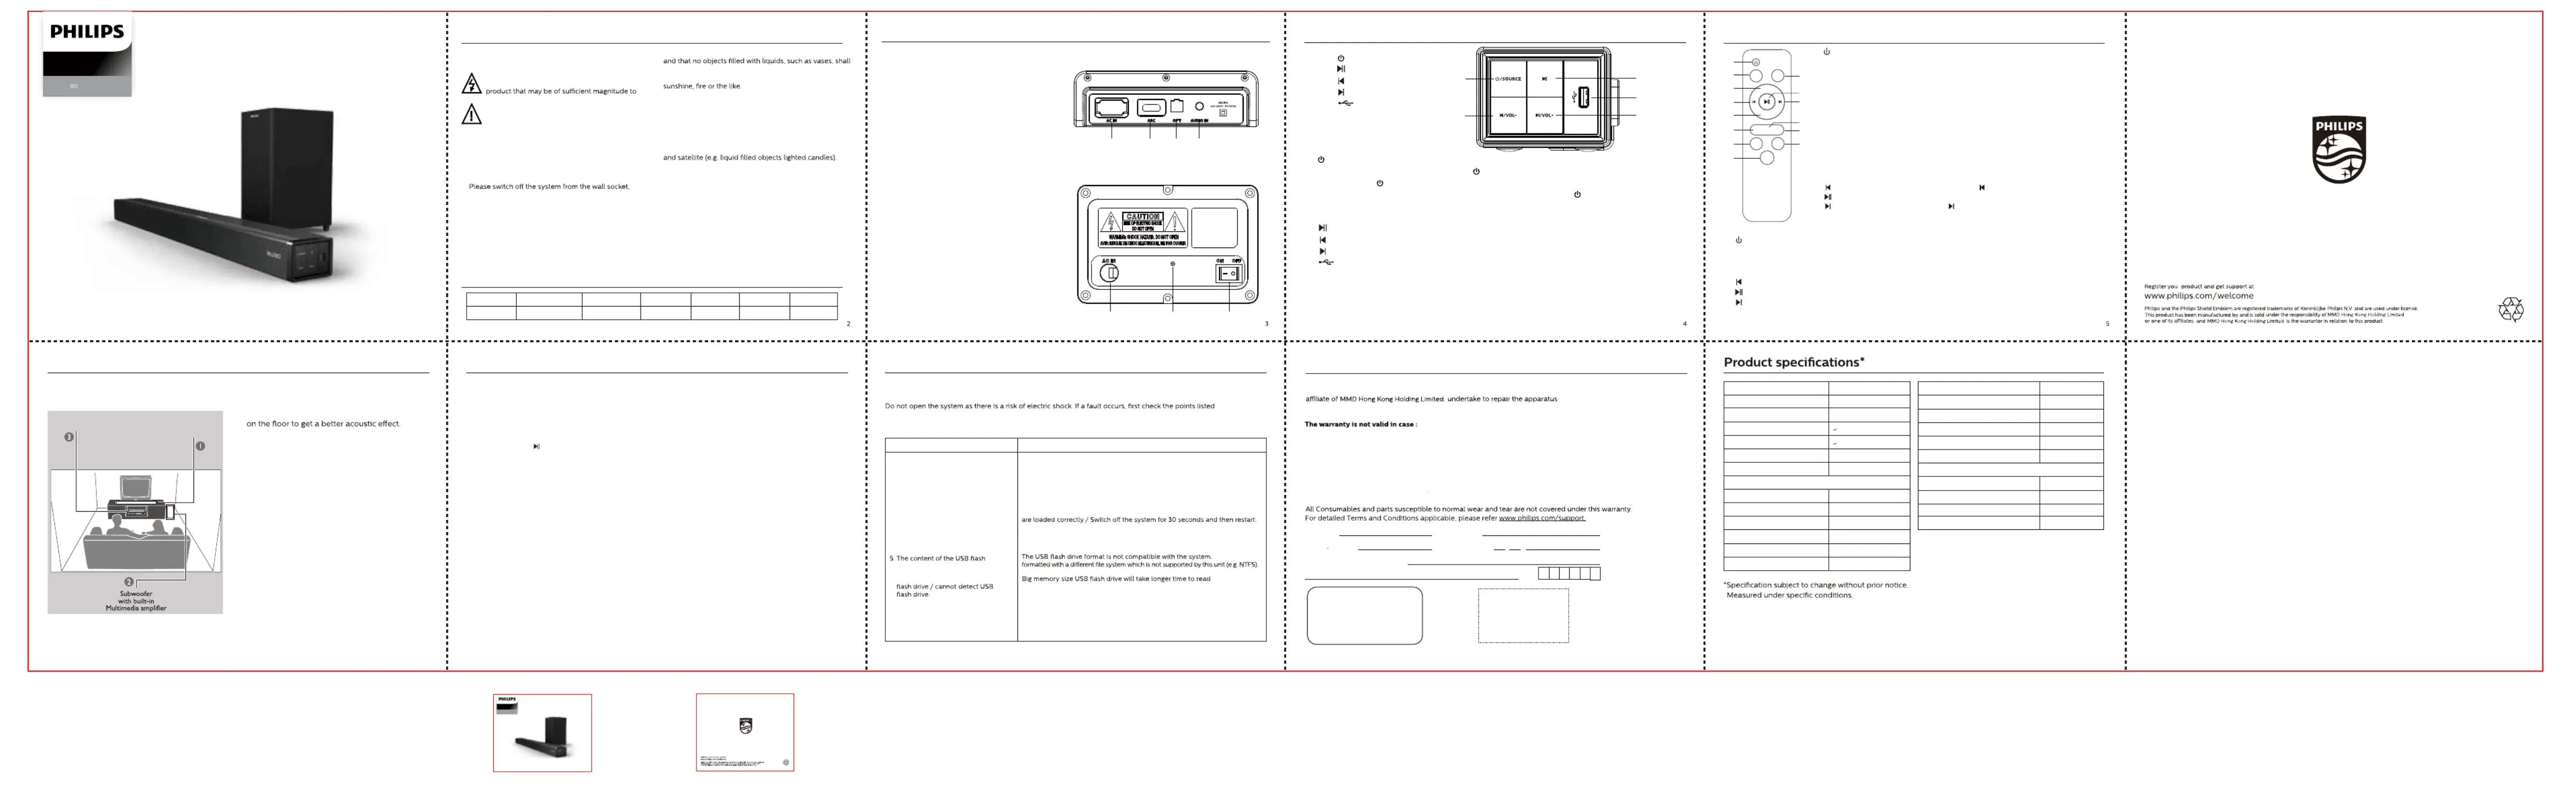
Connections
Soundbar back panel
Subwoofer back panel
Top panel operation
Remote controls
* AVAILABLE IF CONNECTED* AVAILABLE IF CONNECTED
Troubleshooting
ProblemSolution
1. No power.
2. No sound or distorted sound.
3. The remote control does not
function properly.
4. Low hum or buzz sound.
drive cannot be read.
6. Slow operation of the USB
Check if the AC power cord is properly inserted into the AC mains socket.
Adjust the volume / select the correct source to choose the equipment
that you want to hear through the system.
Reduce the distance between the remote control and the system. Replace
the batteries with new ones / Point the remote control directly towards the
IR sensor (located on front panel of the subwoofer) / Check that the batteries
Place the product as far away as possible from electrical devices that may be
causing interference / Check power supply voltage and consult electrician.
Drive is
7. BT not working.Reduce the distance or device is not paired.
Warning -
Under no circumstances should you try to repair the system yourself, as this will invalidate the warranty.
below before taking the system for repair. If you are unable to remedy the problem by following hints
mentioned in below table.
and play. / Take out USB drive and insert it again properly.
Total system power80W RMS
Soundbar power 20W p1-x2 RMS
Subwoofer power 40W RMS
Separation
SNR
Audio input socket
Audio-2RCA cable
Power consumption
18.9 W
Subwoofer1 Way
Speaker size6.5 inches
Impedance4 Ohm
Frequency range45Hz - 150Hz
Dimension (mm) W x H x D
370 x 260 x 360
Weightkg3.17
Soundbar
Speaker size
Impedance
Frequency range
Product DensiomW Dimn (m) xH x
Net Weight
BTversioV5. n0
960x 70 x 92
2 Way
2.25 inches * 2
8 Ohm
140Hz - 20KHz
2.25 kg
BT range
USB max capacity
playability
Up to 32GB
Up to 10 meters
MP3 track
>55db
>40db
1.
2. PAIR
3. MUTE
4. VOL+
5.
6.
7.
8. VOL-
9. BT
10. ARC
11. OPT
12. AUD
13. USB
14. EQ
(1)
(2)
(8)
(4)
(5)
(9)
(14)
(12)
(3)
(7)
(10)
(11)
(13)
(6)
1. AC Power cord.
2. HDMI ARC Input.
3. Optical Input.
4. Input Connect to sound sources
such as computer, CD player, MP3, etc.
5. AC IN: AC Power cord.
6. LED: Solid red when not connected,
Solid blue when connected.
7. ON/OFF
To turn on the subwoofer for wireless pairing,
To turn o the subwoofer.
(5)(7)(6)
(2)(1)(3)(4)
(2)
(4)
(5)
(1)
1. /SOURCE
2.
3. /VOL-
4. /VOL+
5.
(3)
Remark:
In order not to disturb in the dark, the LED display of soundbar is set to be dim after
30 seconds if there is no operation, and display o after another 90 seconds.
You can press any button to resume.
Remark:
In order not to disturb in the dark, the LED display of soundbar is set to be dim after
30 seconds if there is no operation, and display o after another 90 seconds.
You can press any button to resume.
1. : Power ON or Standby modes.
2. PAIR:
Turn both soundbar and subwoofer on, they will pair automatically.
a. In case they don't get paired, press "MUTE" and hold 5 seconds to reset,
then short press "PAIR" continuously until "1d" show on display, switch
the subwoofer of and red & blue light will ash alternately after restart,
press “PAIR” to conrm the connection, the subwoofer LED will go to
solid blue when successfully connected.
b. How to change frequency ID: “CHxx” will show on display after long
press “PAIR”, press again to select the ID, subwoofer blue LED will ash
and stay solid blue once successfully paired.
Though there are 5 ID available for pairing, we would suggest not to
change the ID if speaker system is working ne.
3. MUTE: Turn volume o, short press again to activate.
4. VOL+: To increase the Volume by short or long press VOL+.
5. : Play the previous song by pressing “ ” but not in audio mode.
6. : Play/pause in USB/BT mode and MUTE in audio mode.
7. : Play next song by pressing “ ”, but not in audio mode.
8. VOL-: To decrease the Volume by short or long press VOL-.
9. BT: Bluetooth mode.
10. ARC: ARC mode.
11. OPT: Optical mode.
12. AUD: Audio input mode.
13. USB: USB* mode.
14. EQ: POP, ROCK, JAZZ, CLASSIC, COUNTRY, NORMAL.
Care and safety information
Avoid high temperatur, moture, water and stesisdu
•
Apparatus should not be exposed to dripping or
splashing of liquid.
• Do not place any source of danger on the Subwoofer,
• Do not install near heat sources.
Do not block any ventilation opening
•
Place the apparatus in a location with adequate
ventilation to prevent internal heat build up. Allow at
least 10cm (4 inches) of free space all around the
apparatus for adequate ventilation.
• At high volume the back cover of Subwoofer becomes
hot. Do not touch it.
Care of the cabinet
•
Use a soft cloth slightly moistened to clean the cabinet.
Do not use a solution containing alcohol, spirits,
ammonia or abrasives.
•
Attentioshould be drawto the environmental n n
aspects of batterdisposal.y
• Batteries shall not be exposed to eessive heat suchs xc a
1. /SOURCE: The Speaker system is in stand by mode when power on, with
white LED “----”. Short press the “ /SOURCE” to select appropriate source.
Keeping the “ /SOURCE” key pressed for long will go back to stand by mode.
You can toggle through the input modes by pressing the “ /SOURCE ” key,
“bt” denotes Bluetooth Mode, “Hd” denotes HDMI ARC Mode,
“OP” denotes Optical Mode, “AU” denotes Audio Mode, “Ud” denotes USB* mode.
2. : Play/Pause the songs.
3. /VOL-: Long press for volume decrease/ short press for prev track.
4. /VOL+: Long press for volume increase/ short press for next track.
5. : USB* Slot.
Blueteraooth Opting Instruction
1. Rm Press SOUCE key fro soundbar orreote mcontrol to Bluetooth mode;
2.the When selecting Bluetooth “bt.” indisplaymode. “.” of will start bliking and you hear nwillan audio
n toe which Bluetooth pairing indicates mode.
3.obile mFor pairing with phodevne or other Bluetoothices, sethe devmed “Pharch ice nailips HTL4080an” d
pair it. Once paired, “.” of “bt.” slowly ash and come up with another audio tone. “.” of “bt.” will stop ash
when playing music.
4. n Press ad hold“ conncon ” for 3 seds from remote control i order to force disnect the
. Bluetooth connection
Note:While using Bluetooth,if externalcall comes, then speaker s ystem goes in mutemodein
order cy m ato protect privaof obilephone user. Opertionce s resumes onthe c ialldisonected.cn
Produktspecifikationer
| Varumärke: | Philips |
| Kategori: | Soundbar |
| Modell: | HTL4080 |
Behöver du hjälp?
Om du behöver hjälp med Philips HTL4080 ställ en fråga nedan och andra användare kommer att svara dig
Soundbar Philips Manualer

16 September 2025
9 September 2025
18 Augusti 2025
18 Augusti 2025
24 Juni 2025
18 Februari 2025
14 Januari 2025
22 September 2024
22 September 2024
22 September 2024
Soundbar Manualer
Nyaste Soundbar Manualer
19 Mars 2026
18 Mars 2026
12 Mars 2026
11 Mars 2026
8 Mars 2026
7 Mars 2026
5 Mars 2026
3 Mars 2026
3 Februari 2026
1 Februari 2026