Phoenix Data Combi DS2502K Bruksanvisning
Läs gratis den bruksanvisning för Phoenix Data Combi DS2502K (3 sidor) i kategorin Valv. Guiden har ansetts hjälpsam av 11 personer och har ett genomsnittsbetyg på 4.9 stjärnor baserat på 8 recensioner. Har du en fråga om Phoenix Data Combi DS2502K eller vill du ställa frågor till andra användare av produkten? Ställ en fråga
Sida 1/3
Ph Sf Cpny r eac n s gurte
Thank you for purchasing a Phoenix Safe.
OPENING SAFE
Please insert one of the two keys supplied into the key hole and turn
clockwise. Push handle down then pull the door to open.
Your safe is ready prepared for base xing. To base x your safe, follow
the instructions below.
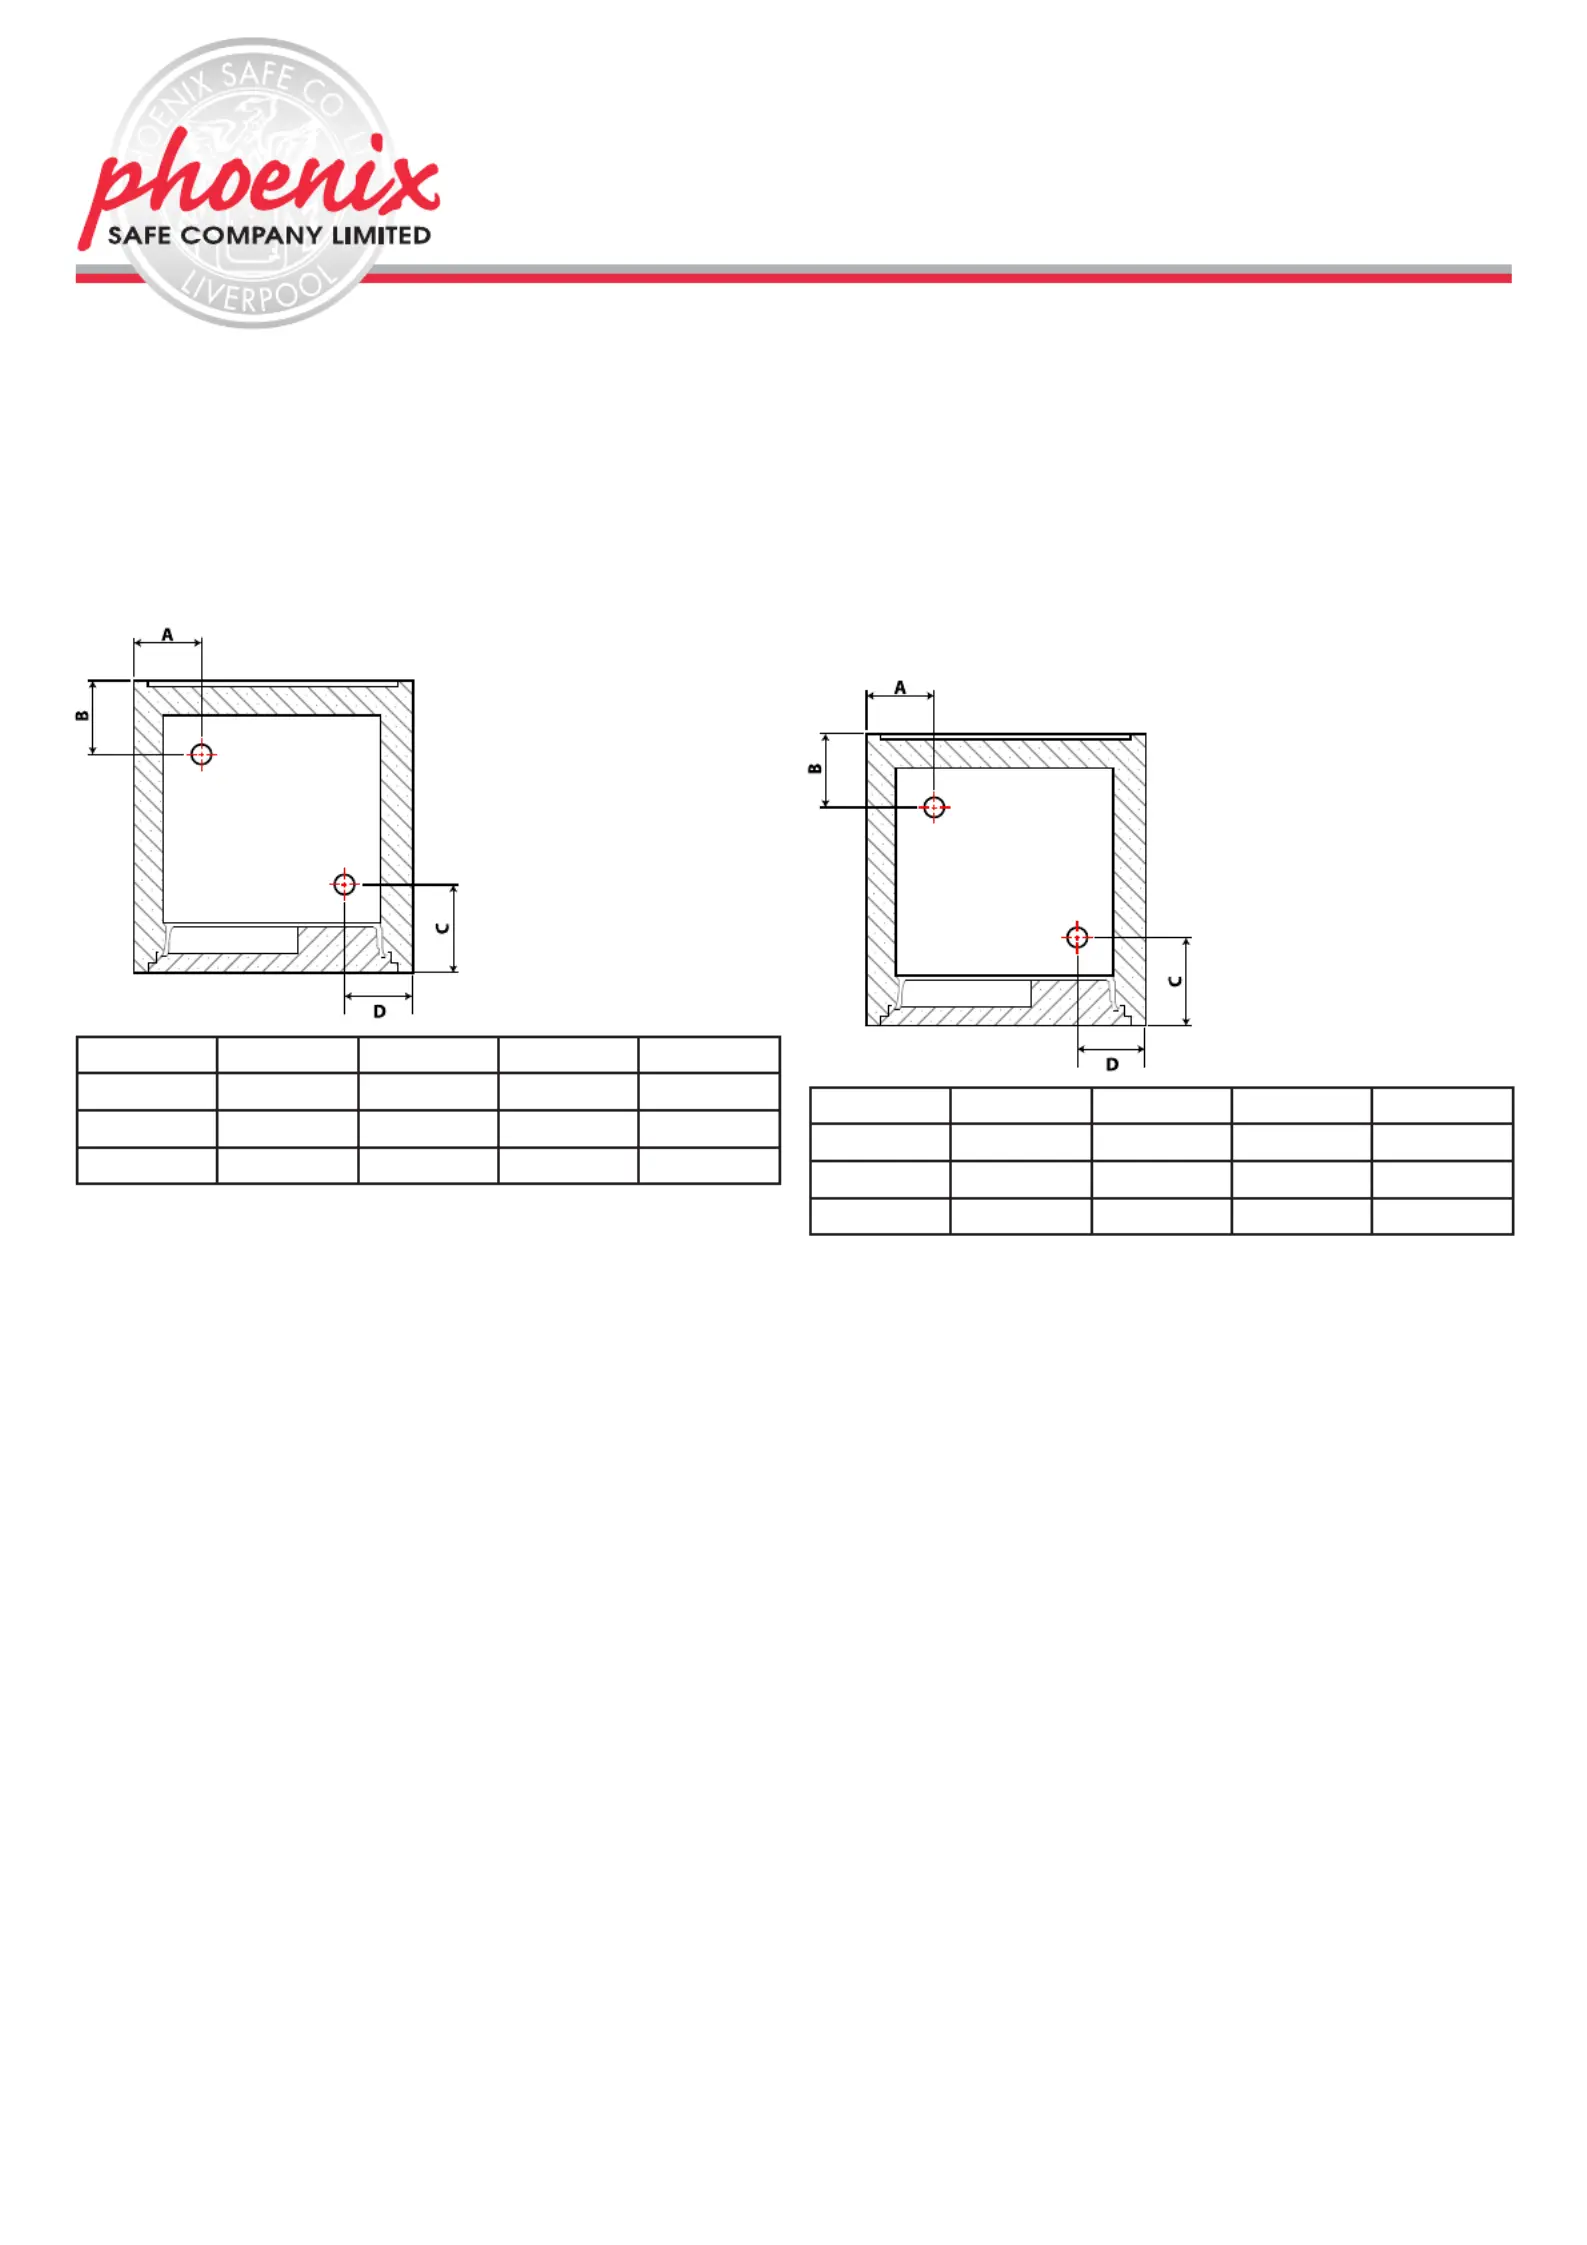
DS2500 BASE FIXING INSTRUCTIONS
MODELABCD
DS2501123143149131
DS2502123143149131
DS2503180180220180
CHOOSING A PLACE TO INSTALL YOUR SAFE
1. Look for a place that does not restrict access and the swing of the
door.
2. Ensure that the oor is level.
3. For best results a concrete oor is preferable.
DRILLING & BOLTING
1. Manoeuvre the safe into the required position. Now with the pencil
mark the oor around the safe.
2. Open the safe door.
3. Using the pencil, mark the positions on the oor for drilling through
holes in the base of the safe.
4. Now move the safe to one side, giving you access to the markings on
the oor.
5. Before using the drill bit. With the ruler measure 60mm from the tip of
the bit and put a piece of adhesive tape around the bit to ensure you
do not drill too deep.
6. Drill the 12mm holes in the oor until you reach your 60mm marker.
7. Clean the oor around the holes.
8. There are three parts to your bolts:
a. A coach screw
b. A plastic expanding sleeve
c. A steel washer
9. Insert the plastic expanding sleeves into the drilled holes.
10. Place the safe back into position, insert the coach screws, including
the washers, through the base of the safe, into the oor and tighten
until you can not tighten them any further.
YOUR SAFE IS NOW BASE FIXED.
SECURING THE DATABOX INTO THE SAFE
Using the 2 adhesive strips provided, attach these to the back of the
Databox. Position the box into the bottom of the safe, axing it to the back
wall.
Nous vous remercions pour l’achat d’un core Phoenix Safe.
OUVERTURE DU COFFRE
Veuillez insérer l’une des deux clefs fournies dans la serrure puis tourner
la dans le sens horaire.
Veuillez pousser la poignée vers le bas ensuite, tirez la porte pour l’ouvrir.
Votre core est prêt pour être xé au sol, pour cela veuillez suivre les
instructions ci-dessous.
MODE D’EMPLOI DE FIXATION AU SOL DS2500
MODELABCD
DS2501123143149131
DS2502123143149131
DS2503180180220180
CHOISIR UN ENDROIT POUR INSTALLER VOTRE
COFFRE-FORT
1. Cherchez un endroit qui ne limite pas l’accès et l’ouverture de la porte.
2. Assurez-vous que le sol soit de niveau.
3. Pour de meilleurs résultats, un sol en béton est préférable.
PERÇAGE & BOULAGE
1. Manœuvrez le core-fort dans la position requise. Maintenant, avec le
crayon marquez le sol autour du core-fort
2. Ouvrez la porte du core.
3. À l’aide du crayon, marquez les positions sur le sol pour percer au
travers des trous de la base du core-fort.
4. Déplacez le core-fort d’un côté, vous donnant accès aux marques
sur le sol.
5. Avant d’utiliser le mèche. Avec la règle mesurez 60mm de la pointe de
la mèche et mettre un morceau de ruban adhésif autour du bout pour
vous assurer de ne pas percer trop profondément.
6. Percez les trous de 12 mm dans le sol jusqu’à ce que vous atteigniez
votre marqueur de 60 mm.
7. Nettoyez le sol autour des trous.
8. Vos boulons sont en 3 parties . Une vis . Un manchon d’expansion en
plastique. Une rondelle en acier .
9. Insérez les manchons d’expansion en plastique dans les trous percés.
10. -Remettre le core-fort en place, insérez les vis , y compris les ron
delles, à travers la base du core-fort, dans le sol et serrez jusqu’à ce
que vous ne puissiez plus les serrer.
VOTRE COFFRE-FORT EST MAINTENANT FIXE AU SOL.
SÉCURISER LA BOITE POUR DONNEES DANS LE
COFFRE
En utilisant les 2 bandes adhésives fournies, xez-les à l’arrière de la
Databox. Placez la boîte dans le fond du core-fort, en l’apposant sur le
mur arrière.
V1 MAY 2018
FRENCH
DS2500K INSTRUCTIONS &
GUARANTEE REGISTRATION
Produktspecifikationer
| Varumärke: | Phoenix |
| Kategori: | Valv |
| Modell: | Data Combi DS2502K |
Behöver du hjälp?
Om du behöver hjälp med Phoenix Data Combi DS2502K ställ en fråga nedan och andra användare kommer att svara dig
Valv Phoenix Manualer

7 Januari 2025
27 Oktober 2024
15 Oktober 2024
15 Oktober 2024
15 Oktober 2024
14 Oktober 2024
5 Oktober 2024
5 Oktober 2024
17 September 2024
10 September 2024
Valv Manualer
Nyaste Valv Manualer
1 April 2025
1 April 2025
1 April 2025
1 April 2025
1 April 2025
27 Mars 2025
1 Februari 2025
9 Januari 2025
1 Januari 2025
31 December 2025