Rane MP 22x Bruksanvisning
Rane blandningskonsoler MP 22x
Läs gratis den bruksanvisning för Rane MP 22x (6 sidor) i kategorin blandningskonsoler. Guiden har ansetts hjälpsam av 15 personer och har ett genomsnittsbetyg på 4.6 stjärnor baserat på 4 recensioner. Har du en fråga om Rane MP 22x eller vill du ställa frågor till andra användare av produkten? Ställ en fråga
Sida 1/6
Manual-1
OPERATORS MANUALMP 22x
DJ MIXER
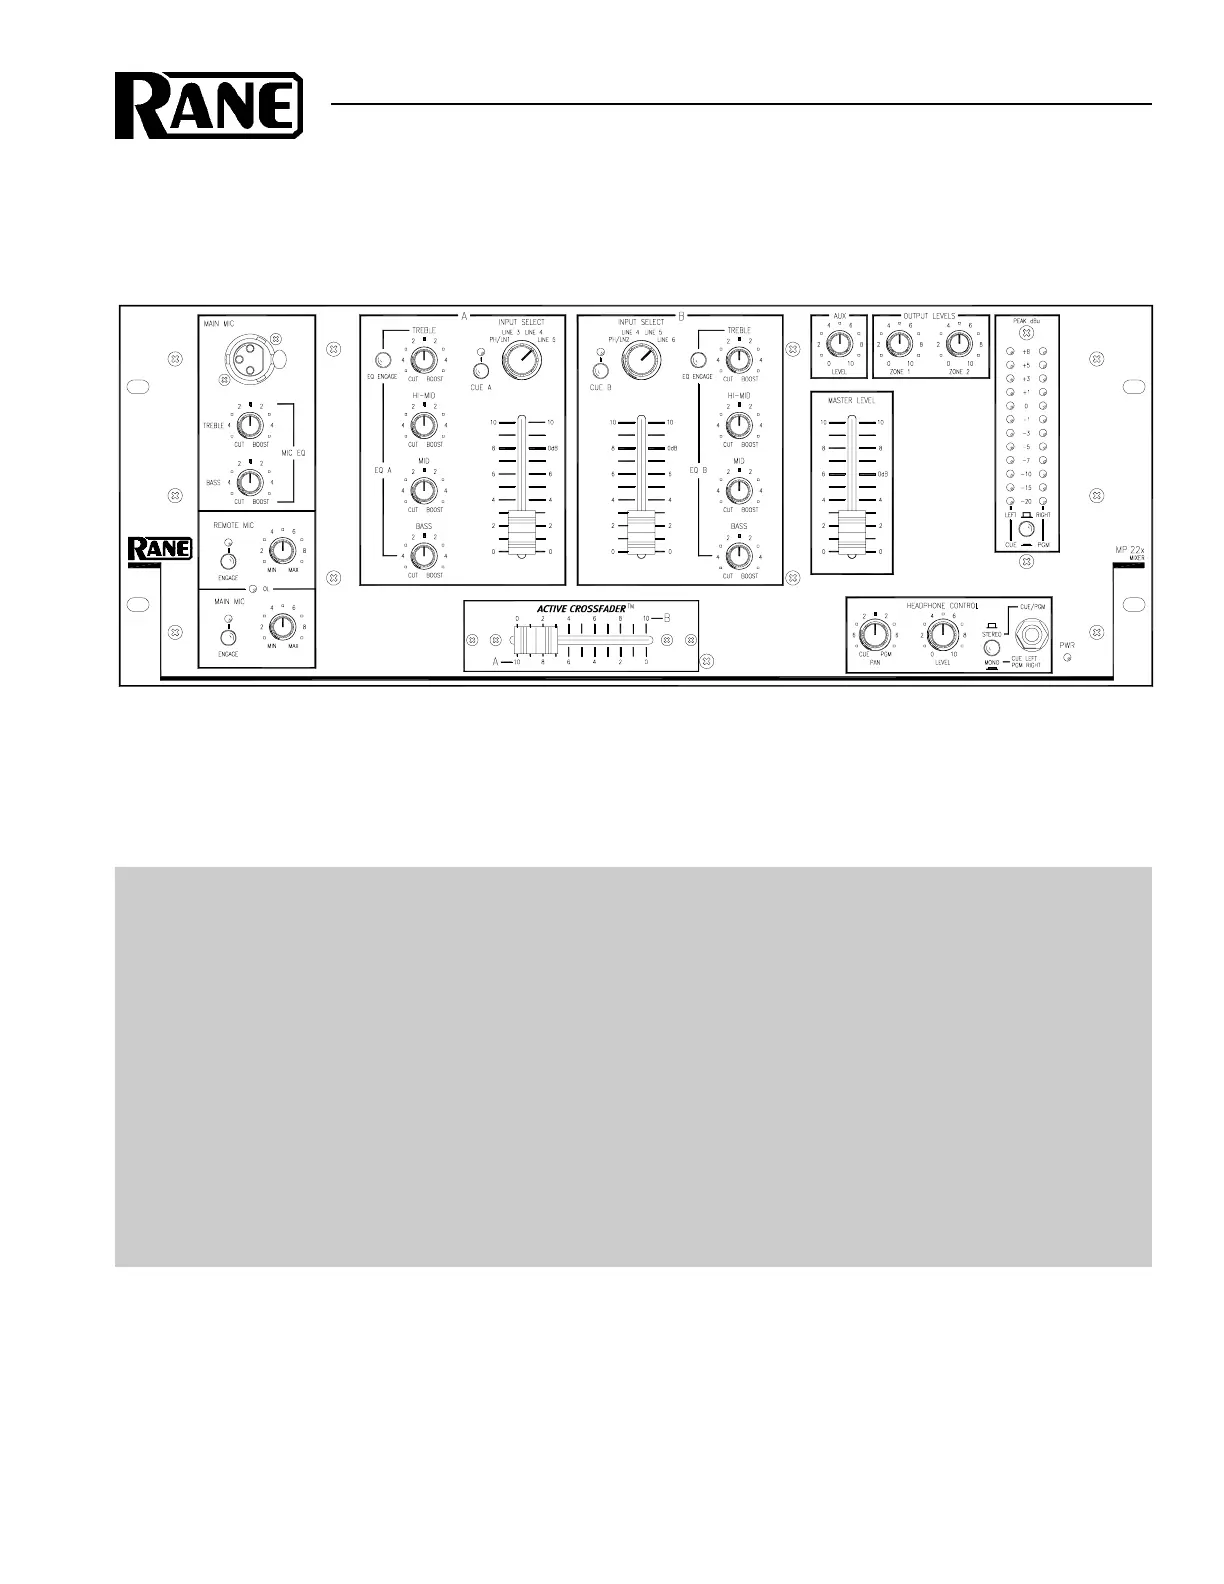
QUICK START
If you won’t read the manual (we know how it is) here are a few basic “plug it in and get signal thru it” facts. The
MP 22x has all unbalanced RCA connectors, except for the XLR & ¼" Mic Inputs, ¼" Mic Loop, and the balanced ¼" TRS
Master Outputs. Be sure your amplifier is off while making connections. On the front panel, set all controls to the middle of
their travel. Set all pushbuttons to their out position, slide the MASTER LEVEL all the way down. Turn the INPUT
SELECT switch for Channel A or B to an Input with material playing. Turn your amplifier on. Now slowly turn up the
MASTER LEVEL and see the material on the meters and hear it from the MASTER OUTPUT jacks.
There are two places where you can get lost. If you bring a phono signal into PH/LN 1 or 2 be sure to keep the LINE/
PHONO switch set to PHONO; likewise when using a CD player be sure this switch is set to LINE. If you plug into the
MASTER LOOP RETURN the signal path thru the unit is broken, since these are switching jacks. They are looking for
the return from an outside device that got its signal from the MASTER LOOP SEND, so only use these when you can
make a complete loop. Now that was a pretty quick start, right?
Never connect anything except a Rane RS 1 to the thing that looks like a red telephone jack on the rear of the
MP 22x. This is an AC supply and requires some special attention if you do not have an operational power supply exactly
like the one that came with your unit. Consult the Rane factory for a replacement or substitution.
Produktspecifikationer
| Varumärke: | Rane |
| Kategori: | blandningskonsoler |
| Modell: | MP 22x |
Behöver du hjälp?
Om du behöver hjälp med Rane MP 22x ställ en fråga nedan och andra användare kommer att svara dig
blandningskonsoler Rane Manualer

12 September 2025
11 September 2025
10 September 2025
10 September 2025
10 September 2025
10 September 2025
10 September 2025
10 September 2025
10 September 2025
10 September 2025
blandningskonsoler Manualer
Nyaste blandningskonsoler Manualer
3 April 2026
2 April 2026
31 Mars 2026
29 Mars 2026
28 Mars 2026
19 Mars 2026
18 Mars 2026
14 Mars 2026
10 Mars 2026
25 Februari 2026