Sanus SOA-EDM1 Bruksanvisning
Sanus Inte kategoriserad SOA-EDM1
Läs gratis den bruksanvisning för Sanus SOA-EDM1 (2 sidor) i kategorin Inte kategoriserad. Guiden har ansetts hjälpsam av 38 personer och har ett genomsnittsbetyg på 4.0 stjärnor baserat på 3 recensioner. Har du en fråga om Sanus SOA-EDM1 eller vill du ställa frågor till andra användare av produkten? Ställ en fråga
Sida 1/2
6901-602184 00
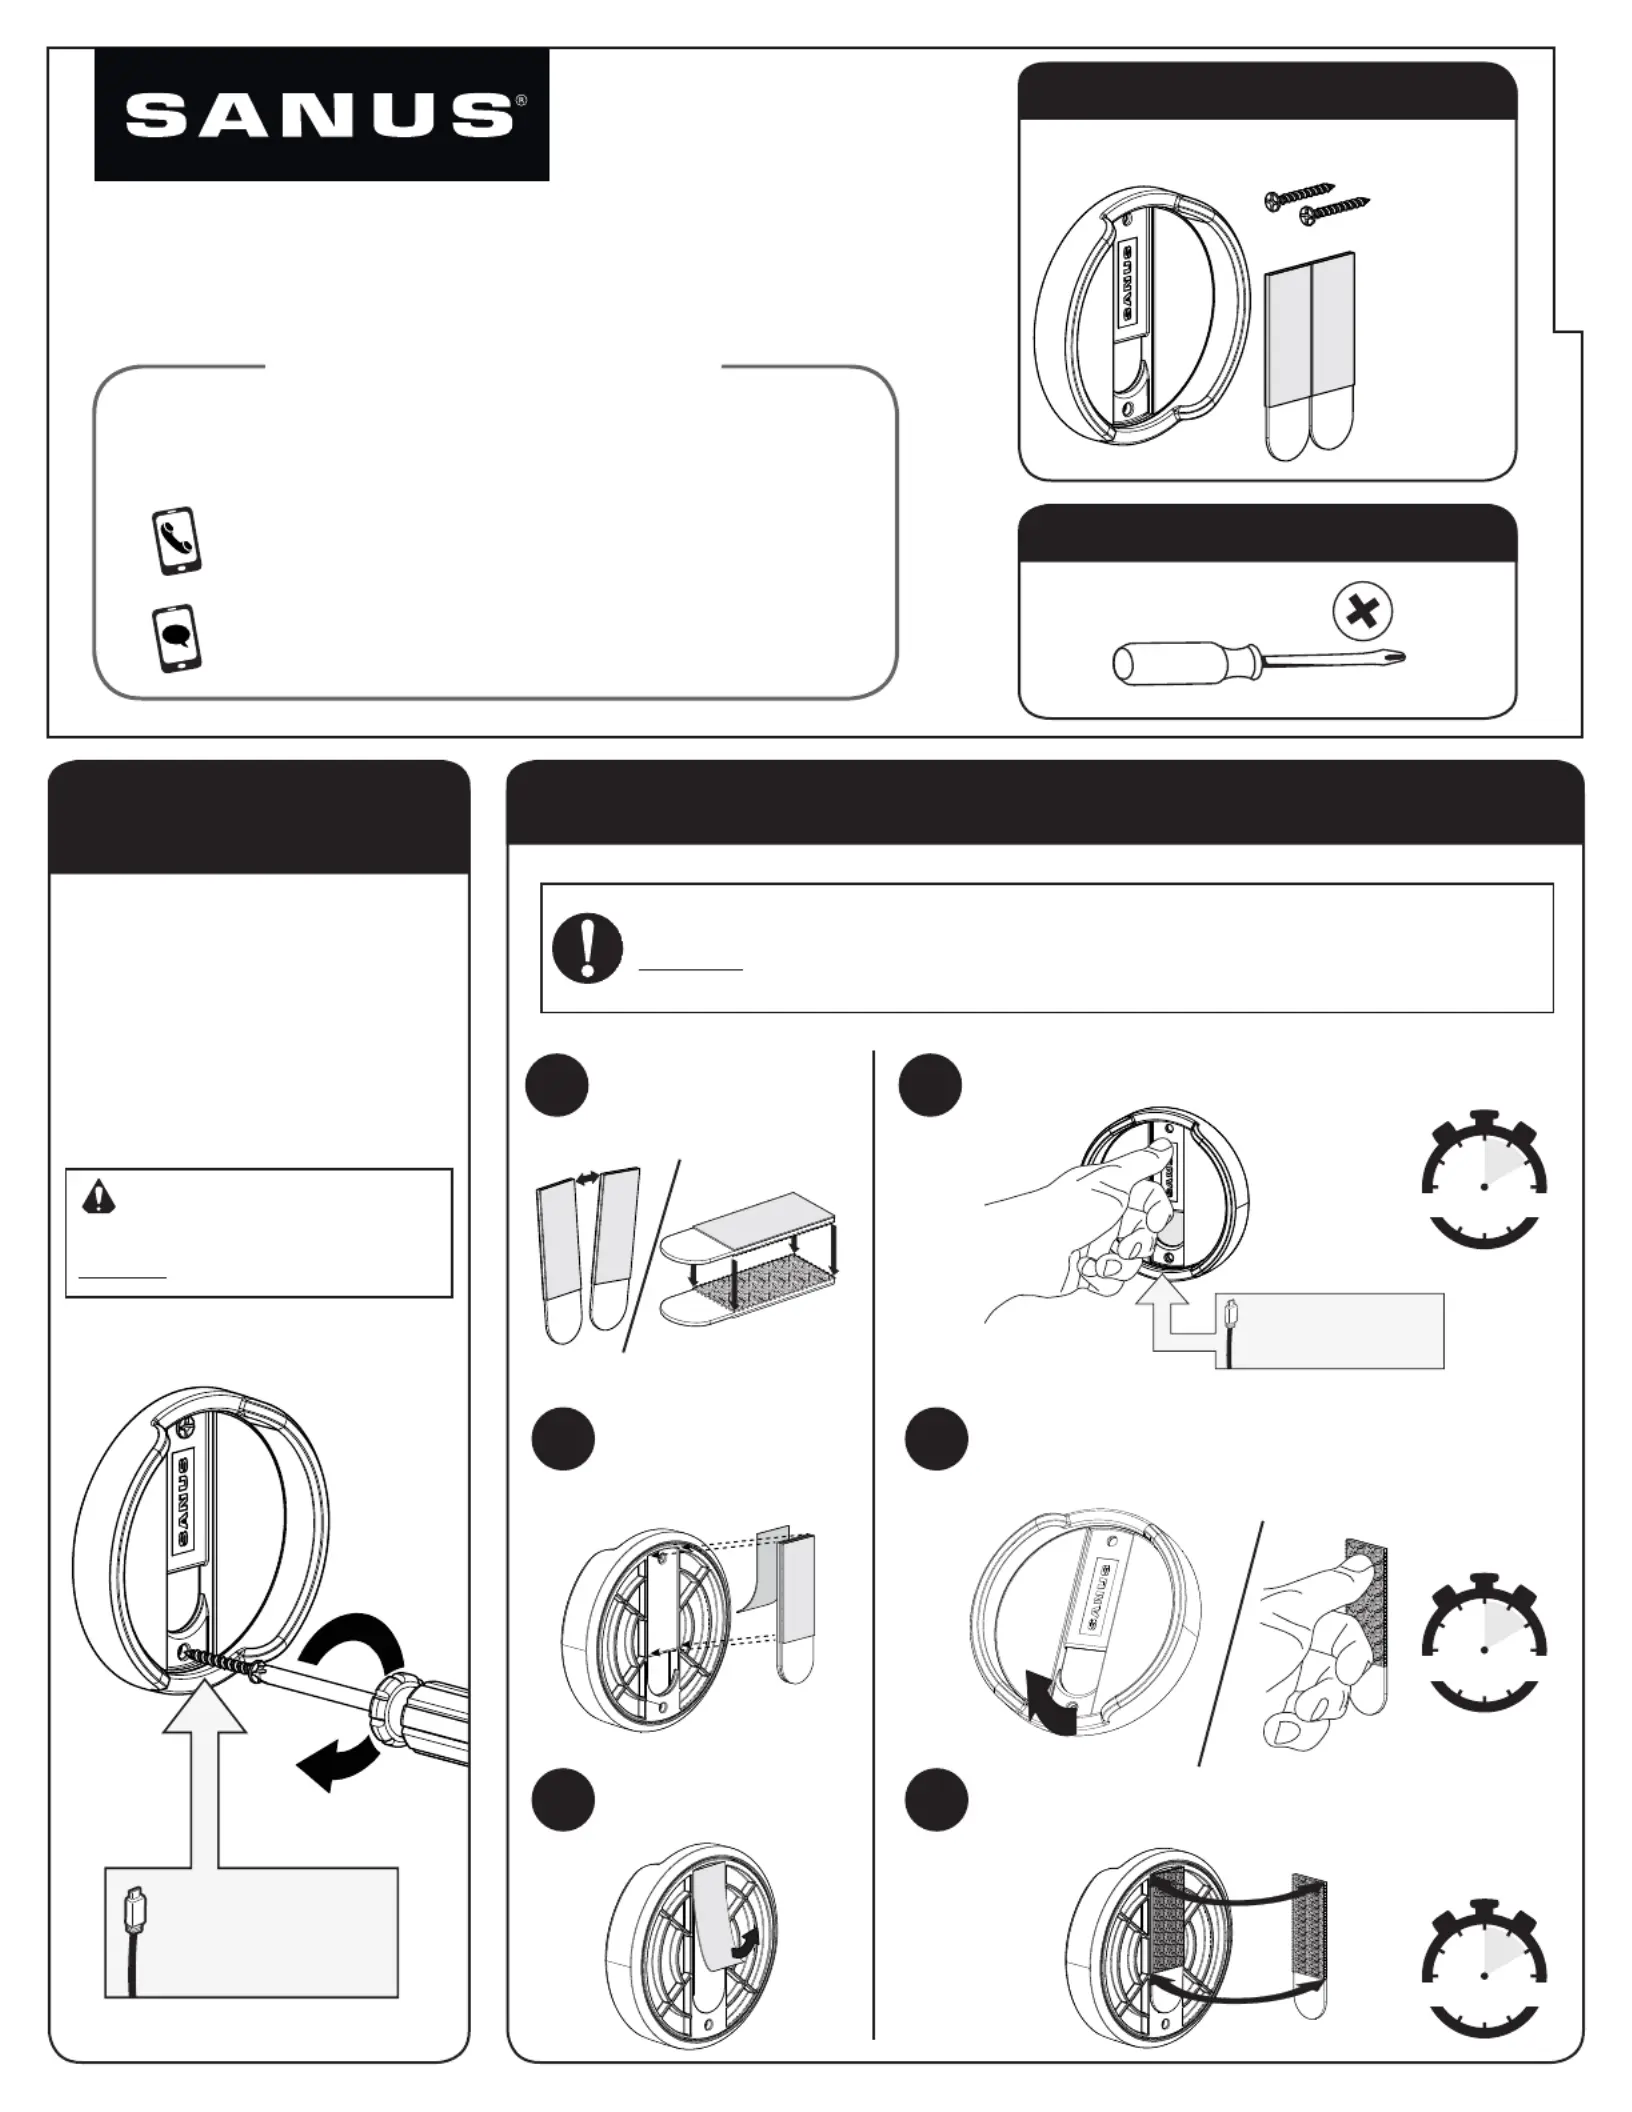
OPTION 1:
Mount with Screws
OPTION 2: Mount with Command
™
Picture Hanging Strips from 3M
®
Align the channel
for plug insertion.
Align the channel
for plug insertion.
TOOL NEEDED (for Option 1 Install)
Phillips Screwdriver
SOA-EDM1 INSTALLATION INSTRUCTION
WALL side
WALL side
WALL side
WALL side
WALL side
WALL side
WALL side
WALL side
WALL side
WALL side
WALL side
WALL side
WALL side
WALL side
WALL side
WALL side
WALL side
WALL side
WALL side
WALL side
WALL side
WALL side
WALL side
WALL side
WALL side
WALL side
WALL side
WALL side
Base
Screws (Option 1 Install)
Command
™
Picture
Hanging Strips
from 3M
®
(Option 2 Install)
PARTS INCLUDED
WE’RE HERE TO HELP
Call us at: 800-359-5520
Or, chat at: SANUS.com/chatSO
Our US-based install experts are standing by to help.
Contact us: Weekdays 8-9 CT, Weekends10:30-7 CT
30 seconds
30 seconds
1 hour
WALL side
WALL side
WALL s
ide
WALL side
WALL side
WALL side
W
ALL side
WALL side
W
ALL sid
e
WALL side
W
ALL side
WALL side
W
ALL side
WALL side
WALL side
WALL side
WALL side
WALL side
WALL side
WALL side
WALL side
W
ALL side
WALL side
WALL side
WALL side
WALL side
WALL side
WALL side
WALL side
WALL side
WALL side
WALL side
WALL side
W
ALL side
WALL
side
WALL side
WALL side
WALL side
W
ALL side
WALL side
WALL side
WALL side
Secure the base in place using
the two screws provided.
The screws are designed to
work with wood stud or drywall
only, without anchors. Predrilling
is not necessary.
CAUTION:
Avoid damage to the base.
DO NOT overtighten the screws.
WALL side
WALL side
WALL side
WALL side
WALL side
WALL side
WALL side
WALL side
WALL side
WALL side
WALL side
WALL side
WALL side
WALL sid
WALL side
WALL side
WALL side
WALL side
WALL side
WALL side
WALL side
WALL side
WALL side
WALL side
WALL side
WALL side
WALL side
WALL side
Lightly clean both wall and dot mount surfaces with isopropyl alcohol.
DO NOT use household cleaners as they may leave behind residues
which can affect adhesion.
Remove one liner and
press the pair of strips
onto the back of the base.
Separate the strips and
press together until
they click.
Remove the other liner.
Press the base firmly against the surface for 30 seconds.
Remove the base by lifting up at the bottom of the base.
Now press the strip on the wall for 30 seconds to ensure
adhesive hold.
Wait 1 hour before reattaching the base. Line up
the strips and press until they click.
AD
BE
CF
Produktspecifikationer
| Varumärke: | Sanus |
| Kategori: | Inte kategoriserad |
| Modell: | SOA-EDM1 |
Behöver du hjälp?
Om du behöver hjälp med Sanus SOA-EDM1 ställ en fråga nedan och andra användare kommer att svara dig
Inte kategoriserad Sanus Manualer

2 April 2025
2 April 2025
8 Januari 2025
5 Januari 2025
5 Januari 2025
5 Januari 2025
5 Januari 2025
29 December 2024
29 December 2024
29 December 2024
Inte kategoriserad Manualer
Nyaste Inte kategoriserad Manualer
9 April 2025
9 April 2025
9 April 2025
9 April 2025
9 April 2025
9 April 2025
9 April 2025
9 April 2025
9 April 2025
9 April 2025