Solac Minilux FL6405 Bruksanvisning
Läs nedan 📖 manual på svenska för Solac Minilux FL6405 (61 sidor) i kategorin Fritös. Denna guide var användbar för 10 personer och betygsatt med 4.5 stjärnor i genomsnitt av 2 användare
Sida 1/61

FREIDORA INSTRUCCIONES DE USO
DEEP FAT FRYER INSTRUCTIONS FOR USE
FRITEUSE MODE D’EMPLOI
FRITTEUSE GEBRAUCHSANLEITUNG
FRITADEIRA INSTRUÇÕES DE USO
FRIGGITRICE ISTRUZIONI PER L’USO
FRITEUSE GEBRUIKSAANWIJZING
FRITOVACÍ HRNEC NÁVOD K POUZITÍ
FRYTKOWNICA INSTRUCJA OBSLUGI
FRITOVACÍ HRNIEC NÁVOD NA POUZITIU
OLAJSÜTŐ HASNÁLATI UTASÍTÁS
ФРИТЮРНИК инструкция за употреба
FRITEZA UPUTE ZA UPOTREBU
FRITEUZĂ INSTRUCŢIUNI DE UTILIZARE
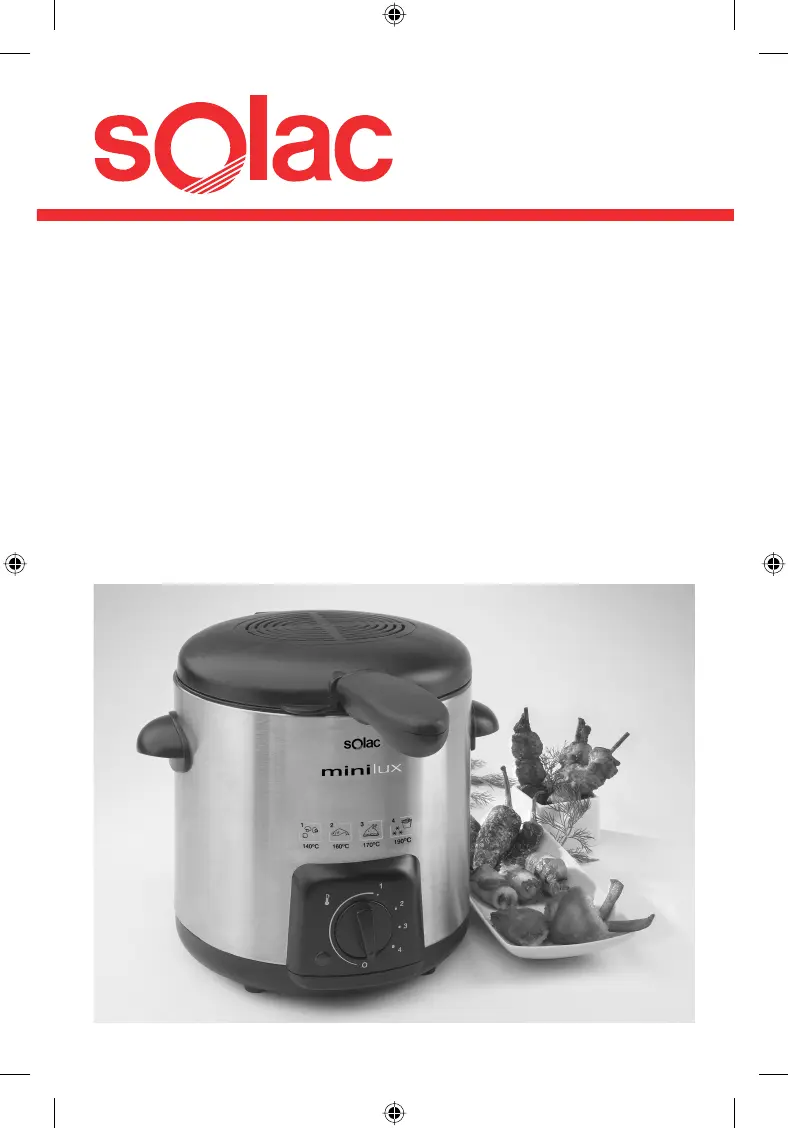
MOD. FL6405
Solac is a registered Trade Mark 10/06
Freidora FL 6405 2 15/11/06, 10:43:10

5- 8 • ESPAÑOL
9-12 • ENGLISH
13-16 • FRANÇAIS
17-20 • DEUTSCH
21-24 • PORTUGUÊS
25-28 • ITALIANO
29-32 • NEDERLANDS
33-36 • ČESKY
37-40 • POLSKA
41-44 • SLOVENSKY
45-49 • MAGYAR
50-53 • българск
54-56 • HRVATSKA
57-60 • ROMANA
Freidora FL 6405 3 15/11/06, 10:43:16

7
6
Fig.1
1
2
11
3
4
5
10
9
Freidora FL 6405 3 15/11/06, 10:43:17

8
después con un paño y asegúrese de que esté completamente seco antes
de usar de nuevo la freidora.
• IMPORTANTE: Nunca debe sumergir en agua la freidora.
CONSEJOS PRÁCTICOS
• Los alimentos deben estar perfectamente secos antes de sumergirlos en
aceite o grasa.
• Para evitar que las patatas se peguen, lávelas antes de freírlas.
• Si la freidora no va a ser utilizada de forma continuada, es conveniente que
el aceite o la grasa líquida se guarde en recipientes bien cerrados en el
frigorífico o en un lugar fresco. Antes de ello extraiga las partículas sueltas
que de los alimentos fritos hayan podido desprenderse y estén en el aceite
valiéndose de un colador.
• Sustituya el aceite cuando presente una coloración oscura, mal olor o mal
sabor en los alimentos. No añada nunca aceite o grasa frescos al p8-ya usado.
• No deje el aceite/grasa a una temperatura elevada más tiempo de lo nece-
sario.
• Guarde siempre la freidora con la tapa cerrada para evitar que el polvo u
otros elementos deterioren el aceite o grasa.
• El aceite o grasa desechados no deben ser arrojados por el WC o el frega-
dero. Deposítelos en un recipiente cerrado y llévelos a un contenedor de
basuras adecuado.
Freidora FL 6405 8 15/11/06, 10:43:32

11
1) (11). Place the basket on the draining position Fig. 1 (8b) to drain the oil
from the food.
• Once the food is drained, take the basket out of the deep fat fryer and
empty it. Next, unplug the deep fat fryer.
• When the oil is cold, place the basket inside the deep fat fryer and put the
handle (11) inside. If you were using solid fat, leave it to solidify in the vat
and store the deep fat fryer with the fat in it.
• The basket handle has two different positions to make its use more comfort-
able:
- When you use the basket, press the metal rods of the handle towards the
interior and move the plastic piece towards the exterior, to obtain a major
length of the handle; it will be more comfortable to use. (Fig. 4a)
- If you want to place the basket handle inside the oil tank, press again the
rods and move the plastic piece towards the basket, (Fig.4b), to shorten
the handle and allow you to close the lid of the deep fryer.
USE WITH SOLID FAT
If you use solid fat for frying (when not previously used), you must take the
following precautions:
- Melt the pieces of new solid frying fat in a pan at a low heat. Watch over
the pan at all times and keep it out of the reach of children.
- Turn off the heat as soon as the fat has melted. Place the deep fat fryer in
the kitchen sink and very carefully pour the melted fat into the vat.
- Remember not to go over the maximum level indicated in the vat.
• If you are going to use fat that is in the deep fat fryer, left over from a
previous frying session, make holes in the fat with the help of a fork. Close
the deep fat fryer cover to avoid spatters and turn the temperature regulat-
ing control Fig. 1 (3) to 160º so that the fat slowly softens. If you wish, you
can increase the temperature once the fat has melted.
CLEANING AND MAINTENANCE
• Wait until the oil has completely cooled before proceeding to clean your
deep fat fryer. Unplug the deep fat fryer.
• The basket and the cover can be washed with hot soapy water. To dismantle
the cover, put it in a vertical position and pull it out. Clean the outside cas-
ing with a damp cloth.
• Empty the oil from the vat, through the oil draining area Fig. 1 (9).
• When you change the oil, take advantage to also clean the inside of the vat
using a cloth dampened with hot soapy water. Then dry it with a cloth and
make sure it is completely dry before using the deep fat fryer again.
• IMPORTANT: Never submerge the deep fat fryer in water.
Freidora FL 6405 11 15/11/06, 10:43:42

12
PRACTICAL HINTS
• Food items must be completely dry before you place them in oil or fat.
• In order to prevent potatoes from sticking together, wash them before you
fry them.
-If the fryer is not going to be used continuously, it is best for the oil or
liquid fat to be kept in the refrigerator or in a cool place in tightly closed
containers. Beforehand, using a strainer, remove all the loose particles that
the fried food may have released into the oil.
• Change the oil when it looks dark, smells bad or the food tastes bad. Never
add fresh oil or fat to used oil or fat.
• Do not leave oil/fat at a high temperature for longer than necessary.
• Always store the fryer with its lid closed to prevent dust or other products
from deteriorating the oil or fat.
• The discarded oil or fat must not be thrown down the WC or the sink. Put
them into a closed container and take them to an appropriate rubbish con-
tainer.
Freidora FL 6405 12 15/11/06, 10:43:43

15
• Faites descendre le couvercle (Fig. 1(1) pour éviter les fumées et les odeurs.
Le panier doit pour cela être placé de façon à ce que la poignée soit placée
dans l’espace prévu à cet effet sur le couvercle. Fig. 3
• Lorsque vous aurez terminé de faire frire les aliments, tournez la commande
de réglage de la température Fig. 1 (3) jusqu’à la position d’arrêt (0). Ouvrez
le couvercle en utilisant la poignée Fig.1 (11). Placez le panier en position
égouttage Fig. 1 (8b) pour que l’huile coule des aliments.
• Une fois les aliments égouttés, retirez le panier de la friteuse et retirez les
aliments. Débranchez ensuite la friteuse.
• Lorsque l’huile est froide, placez le panier à l’intérieur de la friteuse et tour-
nez la poignée (11) vers l’intérieur. Si vous avez utilisé de la graisse solide,
laissez-la se solidifier dans la cuve et rangez la friteuse avec la graisse à
l’intérieur.
• Le manche du panier a deux positions différentes afin de faciliter son utili-
sation :
- Quand vous voulez utiliser le panier, pressez les tiges de la poignée vers
l’intérieur, et tirez la pièce en plastique vers l’extérieur pour obtenir une plus
grande longueur de manche, et vous faciliter ainsi son utilisation (Fig. 4a)
- Quand vous souhaitez garder la poignée du panier dans la cuve, pressez
à nouveau les tiges et approchez la partie plastique vers le panier (Fig.4b)
afin de raccourcir le manche, et vous permettre ainsi de fermer le couver-
cle de la friteuse.
UTILISATION AVEC DE LA GRAISSE SOLIDE
• Si vous utilisez de la graisse solide pour la friture (la première fois), vous
devez prendre les précautions suivantes :
- Faites fondre les morceaux de graisse solide à frire dans une casserole à
feu doux. Surveillez en permanence la casserole et maintenez-la hors de
la portée des enfants.
- Éteignez le feu lorsque la graisse est fondue. Placez la friteuse dans l’évier
et versez la graisse fondue à l’intérieur de la cuve en prenant toutes les
précautions nécessaires.
- Veillez à ne pas dépasser le niveau maximum indiqué dans la cuve.
• Si vous utilisez la graisse solide déjà utilisée et présente dans la friteuse,
percez-la à l’aide d’une fourchette. Fermez le couvercle de la friteuse pour
éviter les éclaboussures, et tournez la commande de réglage de la tempéra-
ture Fig. 1 (3) sur 160º pour que la graisse fonde lentement. Si vous le sou-
haitez, vous pouvez augmenter la température lorsque la graisse a fondu.
NETTOYAGE ET ENTRETIEN
• Attendez que l’huile ait complètement refroidi avant de procéder au net-
toyage de votre friteuse. Débranchez la friteuse.
Freidora FL 6405 15 15/11/06, 10:43:54

20
• Leeren Sie das Öl über den Ölausguss aus dem Frittierbehälter Abb. 1 (9)
• Reinigen Sie beim Wechsel des Öls auch das Innere des Behälters mithilfe
eines mit warmem Wasser und Spülmittel befeuchteten Tuchs. Anschließend
trocknen Sie den Behälter mit einem Tuch. Bevor Sie die Fritteuse erneut
benutzen, stellen Sie sicher, dass der Behälter vollständig trocken ist.
• WICHTIG: Tauchen Sie die Fritteuse niemals in Wasser.
PRAKTISCHE TIPPS
• Das Frittiergut muß vollständig trocken sein, bevor es in Öl oder Fett ge-
taucht wird.
• Um das Verkleben von Kartoffelscheiben zu vermeiden, sollten Sie sie vor
dem Frittieren waschen und gut trocknen.
• Bewahren Sie das Öl oder flüssige Fett in gut verschlossenen Behältern im
Kühlschrank oder an einem kühlen Ort auf, wenn Sie die Fritteuse längere
Zeit nicht benutzen. Zuvor sollten Sie die Partikel, die sich vom Frittiergut
abgelöst haben, mit einem Sieb herausfiltern.
• Ersetzen Sie das Öl, wenn es eine dunkle Färbung oder einen unangeneh-
men Geruch aufweist oder Sie einen schlechten Geschmack bei dem Frittier-
gut feststellen . Mischen Sie niemals frisches Öl oder Fett mit bereits benutz-
tem.
• Setzen Sie das Öl/Fett niemals länger als erforderlich hohen Temperaturen
aus.
• Bewahren Sie die Fritteuse stets mit geschlossenem Deckel auf, um zu ver-
hindern, dass Staub oder sonstige Elemente das Öl bzw. Fett verderben.
• Altes Öl bzw. Fett nicht über das WC oder den Ausguss entsorgen. Sammeln
Sie es in einem geschlossenen Behälter und entsorgen Sie es über einen
dafür vorgesehenen Abfallcontainer.
Freidora FL 6405 20 15/11/06, 10:44:06

23
• Quando tiver terminado de fritar os alimentos, gire o comando regulador
da temperatura Fig.1 (3) até à posição de desligado (0). Abra a tampa com
a ajuda da asa Fig.1 (11). Coloque o cesto na posição de escorrer Fig.1 (8b)
para que os alimentos escorram bem o óleo.
• Depois de escorridos, retire o cesto da fritadeira e esvazie os alimentos. A
seguir, desligue a fritadeira da rede eléctrica.
• Quando o óleo estiver frio coloque o cesto no interior da fritadeira e coloque
o cabo (11) dentro. Se tiver utilizado gordura sólida, deixe que solidifique
no depósito e guarde a fritadeira com a gordura nela.
• A pega do cesto tem duas posições diferentes para facilitar o uso
- Quando quiser utilizar o cesto pressione as varinhas metálicas e puxe para
fora para conseguir uma maior extenção da pega o que se torna mais
cómodo. (Fig. 4a).
- Quando quiser guardar a pega do cesto dentro da cuba volte a pressionar
as varinhas e recolhas para dentro da pega plastica assim a pega fica mais
curta o que permite fechar a tampa da fritadeira. (Fig. 4b).
UTILIZAÇÃO COM GORDURA SÓLIDA
• Se utilizar gordura sólida para fritar (não anteriormente utilizada) deve to-
mar as seguintes precauções:
- Derreta os pedaços da nova gordura sólida para fritar numa caçarola em
lume brando. Vigie sempre a caçarola e mantenha-a fora do alcance das
crianças.
- Apague o lume quando a gordura tiver derretido. Coloque a fritadeira na
pia da banca e, com muito cuidado, deite a gordura derretida no interior
da cuba.
- Tenha cuidados para não ultrapassar o nível máximo indicado na cuba.
• Se vai utilizar a gordura sólida que se encontra na fritadeira, utilizada numa
fritura anterior, faça buracos na gordura com a ajuda de um garfo. Feche a
tampa da fritadeira, para evitar salpicos, e rode o comando regulador da
temperatura Fig.1 (8) para 160º para que a gordura amoleça lentamente. Se
desejar, pode subir a temperatura quando a gordura tiver derretido.
LIMPEZA E MANUTENÇÃO
• Espere que o óleo arrefeça completamente antes de proceder à limpeza da
sua fritadeira. Desligue a fritadeira da rede.
• O cesto e a tampa podem lavar-se com água com detergente. Para desmon-
tar a tampa coloque-a verticalmente e puxe-a para fora. Limpe a parte ex-
terior com um pano húmido.
• Esvazie o óleo da cuba, pela zona do bico de óleo Fig.1 (9)
• Aproveite a mudança de óleo para limpar também o interior da cuba utili-
zando para isso um pano humedecido com água quente e detergente. Se-
Freidora FL 6405 23 15/11/06, 10:44:16

25
• ITA LIANO
ATTENZIONE
• Leggere attentamente le presenti istruzioni prima di utilizzare l’elettrodomesti-
co e conservarle per poterle consultare in futuro, se necessario.
• Utilizzare l’apparecchio solo per scopi domestici e per gli usi descritti nel
presente manuale.
• Non collegarlo all’alimentazione elettrica senza aver prima verificato che la
tensione dell’impianto domestico corrisponda a quella riportata sulla tar-
ghetta delle specifiche.
• Non collegare mai la friggitrice se l’olio contenuto nel deposito non supera
il livello minimo o oltrepassa quello massimo.
• Nella friggitrice utilizzare esclusivamente olio.
• Non immergere mai la friggitrice in acqua o altro liquido .
• Verificare che la base della spina disponga di una messa a terra adeguata.
• Dopo averla utilizzata, staccare la spina della friggitrice dalla presa di corrente.
• Tenere lontano dalla portata dei bambini.
• Non lasciare la friggitrice in funzione senza sorveglianza.
• La friggitrice viene fornita con un dispositivo di sicurezza termico. In caso
di guasto al termostato, la corrente si interrompe automaticamente. Ciò
evita che l’apparecchio si surriscaldi e che insorgano rischi di altra natura.
• Non spostare la friggitrice quando è in funzione.
• Non utilizzare l’apparecchio se la spina o il cavo è danneggiato. In questo
caso, richiederne la sostituzione a un centro di assistenza autorizzato.
• La superficie dell’apparecchio raggiunge temperature elevate, pertanto è
necessario maneggiarla con attenzione.
• Electrodomésticos Solac S.A. declina ogni responsabilità per danni a perso-
ne, animali o cose dovuti al mancato rispetto delle presenti avvertenze.
ATTENZIONE: non smaltire MAI l’apparecchio insieme ai rifiuti dome-
stici. Portarlo presso il CENTRO DI SMALTIMENTO o di raccolta più
vicino perché possa essere smaltito adeguatamente. In questo modo
si contribuirà alla tutela dell’ambiente.
COMPONENTI PRINCIPALI FIG. 1 1
1.- Coperchio (smontabile)
2.- Filtro antiodore e antigrasso
3.- Regolatore della temperatura
4.- Spia luminosa (riscaldamento)
Freidora FL 6405 25 15/11/06, 10:44:18

27
l’aiuto del manico Fig. 1 (11). Collocare il cestello nella posizione di scolo
Fig. 1 (8b) affinché l’olio scorra bene dagli alimenti.
• Al termine, rimuovere il cestello dalla friggitrice e svuotarlo. Staccare quindi
la friggitrice dalla presa di corrente.
• Non appena l’olio si è raffreddato, riporre il cestello all’interno della friggi-
trice e portare il manico (11) all’interno. Se si utilizza del grasso solido, la-
sciare che si solidifichi nel deposito e conservare la friggitrice con il grasso
all’interno.
• La maniglia del cestino ha due posizioni differenti per rendere il relativo uso
più comodo:
- O Se voi usano il cestino, premono i coni retinici del metallo della maniglia
verso l’interiore e spostano la parte di plastica verso l’esterno, per ottene-
re una lunghezza importante della maniglia; starà più bene usare. (Fig.
4a)
- O Se voi desider per dispor cestino maniglia all’interno olio carro armato,
prem ancora asta e spost di plastica parte verso cestino, (Fig.4b), per ridur
maniglia e consent voi per chiud coperchio profondo friggitrice.
UTILIZZO DELLA FRIGGITRICE CON GRASSO SOLIDO
• Se si utilizza del grasso solido per friggere (non utilizzato in precedenza),
prendere le seguenti precauzioni:
- Fondere in una padella a fuoco lento i pezzi di grasso solido per frittura.
Controllare la padella e tenere lontano dalla portata dei bambini.
- Spegnere il fuoco una volta che il grasso si è fuso. Porre la friggitrice sul
lavello e, facendo molta attenzione, versare il grasso fuso all’interno della
vaschetta.
- Fare in modo che il grasso non superi il livello massimo indicato nella
vaschetta.
• Se si utilizza del grasso solido già presente nella friggitrice da una prece-
dente frittura, punzecchiarlo con una forchetta. Chiudere il coperchio della
friggitrice per evitare schizzi e portare il regolatore della temperatura Fig. 1
(3) a 160° per consentire al grasso di sciogliersi lentamente. Se necessario,
è possibile aumentare la temperatura dopo che il grasso si è fuso.
PULIZIA E MANUTENZIONE
• Attendere che l’olio si sia raffreddato completamente prima di pulire l’appa-
recchio. Staccare la friggitrice dalla presa di corrente.
• È possibile lavare il cestello e il coperchio con acqua calda e sapone. Per
smontare il coperchio, posizionarlo verticalmente e tirarlo verso l’esterno.
Pulire l’esterno con un panno umido.
• Eliminare l’olio dalla vaschetta utilizzando il beccuccio dell’olio Fig. 1 (9).
Freidora FL 6405 27 15/11/06, 10:44:27

34
3.- Ovladač pro regulaci teploty
4.- Kontrolka (ohřev)
5.- Nádrž (1 l)
6.- Koš (450 g)
7.- Rukojeť koše
8.- Opora pro koš
8.a – Poloha pro fritování
8.b – Poloha pro okapávání
9.- Výpust oleje
10.- Rukojetě
11.- Rukojeť víka
OBSLUHA
• Před prvním použitím fritovacího hrnce vám doporučujeme umýt nádrž, obr.
1 (5) a koš, obr. 1 (6) pomocí vlhké látky a poté je řádně vysušit.
• Zařízení umístěte na vodorovný, plochý a stabilní povrch bez hran a nedo-
volte, aby kabel přečníval přes hrany stolu nebo pracovní plochy, nebo aby
přišel do styku s horkým povrchem.
• Otevřete víko (Obr.1) (1).
• Ke koši Obr. 1 (7) připojte rukojeť obr.1 (6). Uděláte to tak, že konce rukojetě
vsunete do koše, dokud nejsou v poloze, která je zobrazena na obrázku 2
• Do fritovacího hrnce nalijte olej nebo tekutý tuk a nezapomínejte, že hladi-
na oleje se musí nacházet nad značkou minima a pod značkou maxima. Tyto
značky jsou zobrazené uvnitř nádrže.
• Fritovací hrnec připojte k síti. Když se ovladač pro regulaci teploty, obr. 1 (3)
vypne (0), kontrolka, obr. 1 (4) se vypne taky. Otočte ovladač pro regulaci
teploty, obr. 1 (3) a zvolte požadovanou teplotu v závislosti na jídle, které
chcete smažit. Červená kontrolka připravenosti, obr. 1 (4) bude poté svítit a
zobrazovat, že fritovací hrnec ohřívá olej. Když olej, nebo tekutý tuk dosáh-
nou požadovanou teplotu, kontrolka, obr. 1 (4) se vypne. Během vaření se
bude kontrolka vypínat a zapínat a bude tak signalizovat, že termostat je v
provozu a neustále reguluje správnou teplotu.
• Během vaření se bude kontrolka při regulaci teploty vypínat a zapínat.
• Jídlo vložte do koše obr. 1 (6), když je mimo fritézu. Když se kontrolka, obr.
1 (4) vypne, zlehka vložte do fritovacího hrnce koš, v poloze fritování, obr. 1
(8a). Jídlo by mělo být vždy ponořené v oleji.
• Víko zavřete obr. 1 (1) abyste předešli dýmu a pachu. Proto musíte koš vložit
správně, aby rukojeť zapadla uvnitř otvoru v krytu. obr. 3
• Když už jste jídlo usmažili, otočte ovladač pro regulaci teploty, obr. 1 (3) do
vypnuté polohy (0). Pomocí rukojetě otevřete kryt (obr. 1) (11). Koš dejte do
odkapávací polohy, obr. 1 (8b), aby z jídla okapal olej.
• Když olej z jídla okapal, vyjměte koš z fritovacího hrnce a vyprázdněte jej.
Poté odpojte fritovací hrnec od napájení.
Freidora FL 6405 34 15/11/06, 10:44:49
Produktspecifikationer
Varumärke: | Solac |
Kategori: | Fritös |
Modell: | Minilux FL6405 |
Behöver du hjälp?
Om du behöver hjälp med Solac Minilux FL6405 ställ en fråga nedan och andra användare kommer att svara dig
Fritös Solac Manualer

13 September 2024

13 September 2024

13 September 2024

13 September 2024

13 September 2024

13 September 2024

13 September 2024

13 September 2024

13 September 2024

13 September 2024
Fritös Manualer
- Fritös Electrolux
- Fritös Xiaomi
- Fritös AEG
- Fritös Philips
- Fritös Panasonic
- Fritös BEKO
- Fritös Delonghi
- Fritös Daewoo
- Fritös Grundig
- Fritös Inventum
- Fritös Krups
- Fritös Miele
- Fritös Medion
- Fritös Quigg
- Fritös Siemens
- Fritös Unold
- Fritös Zanussi
- Fritös Tefal
- Fritös Alpina
- Fritös Ambiano
- Fritös Akai
- Fritös Afk
- Fritös American Range
- Fritös Ariete
- Fritös Arendo
- Fritös Arcelik
- Fritös Aroma
- Fritös Bartscher
- Fritös Morphy Richards
- Fritös GE
- Fritös Orbegozo
- Fritös Salton
- Fritös Princess
- Fritös Klarstein
- Fritös Fagor
- Fritös Brandt
- Fritös Severin
- Fritös Smeg
- Fritös Gorenje
- Fritös Neff
- Fritös Silvercrest
- Fritös Baumatic
- Fritös Nedis
- Fritös Thomson
- Fritös Saturn
- Fritös Black And Decker
- Fritös Breville
- Fritös Innoliving
- Fritös Tristar
- Fritös Domo
- Fritös Trisa
- Fritös Gaggenau
- Fritös Waring Commercial
- Fritös Tomado
- Fritös Maestro
- Fritös Livoo
- Fritös OBH Nordica
- Fritös OK
- Fritös Hyundai
- Fritös Bestron
- Fritös Bellini
- Fritös Oster
- Fritös Westinghouse
- Fritös ECG
- Fritös Moulinex
- Fritös Sinbo
- Fritös Jata
- Fritös Melissa
- Fritös Magic Chef
- Fritös Swan
- Fritös Emerio
- Fritös Clatronic
- Fritös Fritel
- Fritös Taurus
- Fritös Russell Hobbs
- Fritös Sencor
- Fritös Midea
- Fritös Cuisinart
- Fritös Concept
- Fritös Sunbeam
- Fritös Logik
- Fritös Teesa
- Fritös Gemini
- Fritös Beper
- Fritös Imperial
- Fritös Hendi
- Fritös Mellerware
- Fritös JET FRYER
- Fritös Heinner
- Fritös Termozeta
- Fritös Bella
- Fritös Vitek
- Fritös Palson
- Fritös Eldom
- Fritös Philco
- Fritös Guzzanti
- Fritös Ninja
- Fritös DCG
- Fritös Blokker
- Fritös Trebs
- Fritös First Austria
- Fritös Bourgini
- Fritös Nordmende
- Fritös Koenic
- Fritös Haier
- Fritös H.Koenig
- Fritös Steba
- Fritös Costway
- Fritös Exquisit
- Fritös Elba
- Fritös Proline
- Fritös Zelmer
- Fritös Ardes
- Fritös Nutrichef
- Fritös Sage
- Fritös ETA
- Fritös SEB
- Fritös Champion
- Fritös Bomann
- Fritös Hamilton Beach
- Fritös Novy
- Fritös Kuppersbusch
- Fritös Buffalo
- Fritös Continental Edison
- Fritös Limit
- Fritös Ufesa
- Fritös Rommelsbacher
- Fritös Wilfa
- Fritös Presto
- Fritös George Foreman
- Fritös Brabantia
- Fritös Camry
- Fritös Arzum
- Fritös Jocel
- Fritös FriFri
- Fritös Nova
- Fritös Proctor Silex
- Fritös Primo
- Fritös Tower
- Fritös Comfee
- Fritös Clas Ohlson
- Fritös Gastroback
- Fritös Saro
- Fritös MPM
- Fritös Rotel
- Fritös Becken
- Fritös Tesla
- Fritös Sogo
- Fritös Mx Onda
- Fritös Igenix
- Fritös Harper
- Fritös RGV
- Fritös Mestic
- Fritös Petra
- Fritös Team
- Fritös Privileg
- Fritös Gallet
- Fritös ProfiCook
- Fritös Vivax
- Fritös Cosori
- Fritös Nevir
- Fritös Prime3
- Fritös CaterChef
- Fritös Kambrook
- Fritös G3 Ferrari
- Fritös Magimix
- Fritös Gourmetmaxx
- Fritös Bimar
- Fritös Steinberg
- Fritös Kunft
- Fritös Caso
- Fritös Montana
- Fritös Molino
- Fritös Molino Home
- Fritös Koenig
- Fritös Hestan
- Fritös Comelec
- Fritös CRUX
- Fritös Grunkel
- Fritös Nesco
- Fritös Waves
- Fritös Coline
- Fritös Veripart
- Fritös Home Electric
- Fritös Elta
- Fritös Optimum
- Fritös Tchibo
- Fritös Cecotec
- Fritös Livington
- Fritös Instant
- Fritös Micromaxx
- Fritös Dash
- Fritös Eurochef
- Fritös Weasy
- Fritös Chefman
- Fritös Kalorik
- Fritös Gutfels
- Fritös Turbotronic
- Fritös Eden
- Fritös Mia
- Fritös Galanz
- Fritös Khind
- Fritös Orava
- Fritös Globe
- Fritös Herman Den Blijker
- Fritös CombiSteel
- Fritös NutriBullet
- Fritös Domoclip
- Fritös Rival
- Fritös Duronic
- Fritös Dean
- Fritös Magnani
- Fritös Avalon Bay
- Fritös Wells
- Fritös Kogan
- Fritös Lenoxx
- Fritös Cecilware
- Fritös PowerXL
- Fritös Vulcan
- Fritös Emeril Lagasse
- Fritös Carnival King
- Fritös Flama
- Fritös BCC
- Fritös APW Wyott
- Fritös Mistral
- Fritös Fryclone
- Fritös Homie Airfryer S7
- Fritös Prixton
- Fritös Hatco
- Fritös Paragon
- Fritös High One
- Fritös Zeegma
- Fritös Lund
- Fritös Perfect Fry
- Fritös WestBend
- Fritös JAP
- Fritös DistinQ
- Fritös Just Perfecto
- Fritös Petra Electric
- Fritös Bakers Pride
- Fritös Monzana
- Fritös Casselin
- Fritös Create
- Fritös Girmi
- Fritös Commercial Chef
- Fritös Kleva
- Fritös BioChef
- Fritös Cosmo
- Fritös Swiss Diamond
- Fritös Elements
- Fritös AutoFry
- Fritös Sierra Range
- Fritös Baccarat
- Fritös IHarbor
- Fritös Anets
- Fritös Beautiful
- Fritös Roller Grill
- Fritös DPM
- Fritös Germanica
- Fritös Catler
- Fritös Royal Catering
- Fritös Haden
- Fritös Atosa
- Fritös Stilfer
- Fritös Auspure
- Fritös Brentwood
- Fritös Kitchen Couture
- Fritös Ultenic
- Fritös Lauben
- Fritös Electroline
- Fritös Healthy Choice
- Fritös Bass Polska
- Fritös Aconatic
- Fritös Imarflex
- Fritös Mayer
- Fritös Masterpro
Nyaste Fritös Manualer

6 April 2025

5 April 2025

5 April 2025

4 April 2025

4 April 2025

4 April 2025

4 April 2025

4 April 2025

3 April 2025

2 April 2025