SoundTube STNet Switch II Bruksanvisning
Läs gratis den bruksanvisning för SoundTube STNet Switch II (2 sidor) i kategorin mottagare. Guiden har ansetts hjälpsam av 21 personer och har ett genomsnittsbetyg på 4.5 stjärnor baserat på 5 recensioner. Har du en fråga om SoundTube STNet Switch II eller vill du ställa frågor till andra användare av produkten? Ställ en fråga
Sida 1/2
Quick Start Guide
Login from Web Browser
orseethereverseofthispagetologinwithInstallWizard
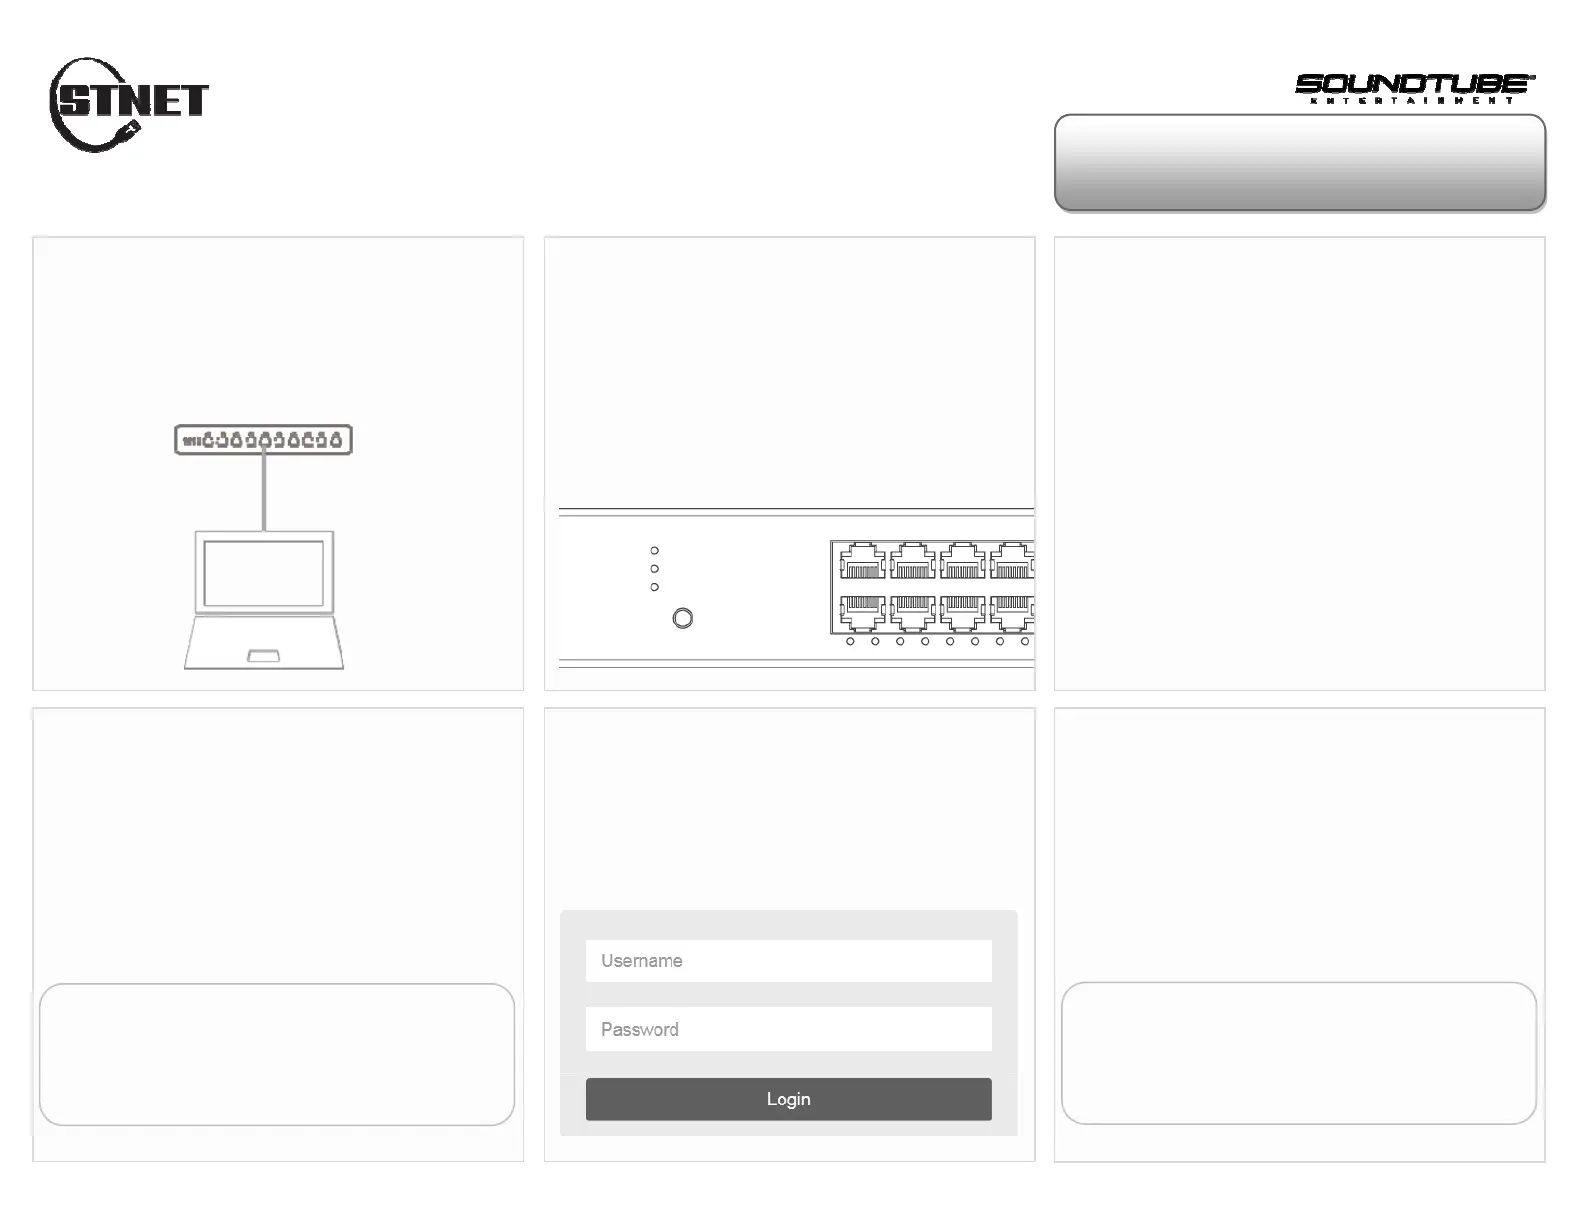
Connect Switch to PC
Power up the switch and connect it via Ethernet LAN
cable to the Ethernet RJ45 connector on PC.
Check the LED Status
Step 1: Power up the switch and connect it to the
PC using an Ethernet cable.
Step 2: If the port LED is blinking, the switch is
ready.
Set Up IP Address of PC
Step 1: Press WinKey+R and type ”ncpa.cpl”command.
Step 2: Right-click on your local adapter and select Properties
Step 3: In the Local Area Connection Properties window
highlight Internet Protocol Version 4 (TCP/IPv4) then
click the Properties button.
Step 4:Select the radio button Use the following IP
address and enter in the IP for the PC (in between
192.168.1.2 and 192.168.1.254), Subnet Mask (e.g.
255.255.255.0), and Default Gateway that corresponds
with your network setup. Then enter your Preferred and
Alternate DNS server addresses.
Step5:Click OK to change the PC’s IP address.
Login Page
If your PC is configured correctly, you will see the
login page of the switch below.
Enter the Factory Default IP
Run your Web browser on the PC, enter the factory
default IP address, so as to access the switch’s Web
interface.
Default IP 192.168.1.1
Subnet Mask 255.255.255.0
Login to the Switch
Enter the factory default username and
password in login page. Click “Login” to log
into the switch.
Default Username admin
No Factory Default Password
Produktspecifikationer
| Varumärke: | SoundTube |
| Kategori: | mottagare |
| Modell: | STNet Switch II |
Behöver du hjälp?
Om du behöver hjälp med SoundTube STNet Switch II ställ en fråga nedan och andra användare kommer att svara dig
mottagare SoundTube Manualer

31 Januari 2025
28 Januari 2025
28 Januari 2025
28 Januari 2025
28 Januari 2025
28 Januari 2025
28 Januari 2025
28 Januari 2025
28 Januari 2025
28 Januari 2025
mottagare Manualer
Nyaste mottagare Manualer
2 April 2026
2 April 2026
1 April 2026
1 April 2026
31 Mars 2026
31 Mars 2026
29 Mars 2026
29 Mars 2026
28 Mars 2026
28 Mars 2026