Thames & Kosmos I Dig It! Sealife - Ocean Life Bruksanvisning
Thames & Kosmos ej kategoriserat I Dig It! Sealife - Ocean Life
Läs gratis den bruksanvisning för Thames & Kosmos I Dig It! Sealife - Ocean Life (4 sidor) i kategorin ej kategoriserat. Guiden har ansetts hjälpsam av 17 personer och har ett genomsnittsbetyg på 5.0 stjärnor baserat på 3 recensioner. Har du en fråga om Thames & Kosmos I Dig It! Sealife - Ocean Life eller vill du ställa frågor till andra användare av produkten? Ställ en fråga
Sida 1/4
Dear Parents and Supervising Adults,
SAFETY INFORMATION
HOW TO EXCAVATE THE SEA CREATURES
2. Proceed with the excavation as a
paleontologist would. A paleontologist is
a scientist who studies the history and
process of evolution by examining the
preserved traces of animals and plants,
often by digging up fossilized remains.
Divide your site into squares with the
help of the dry sponge. Use the chisel
and ruler to scratch a grid pattern into
the surface. The individual squares
should be about the size of the sponge.
2
1
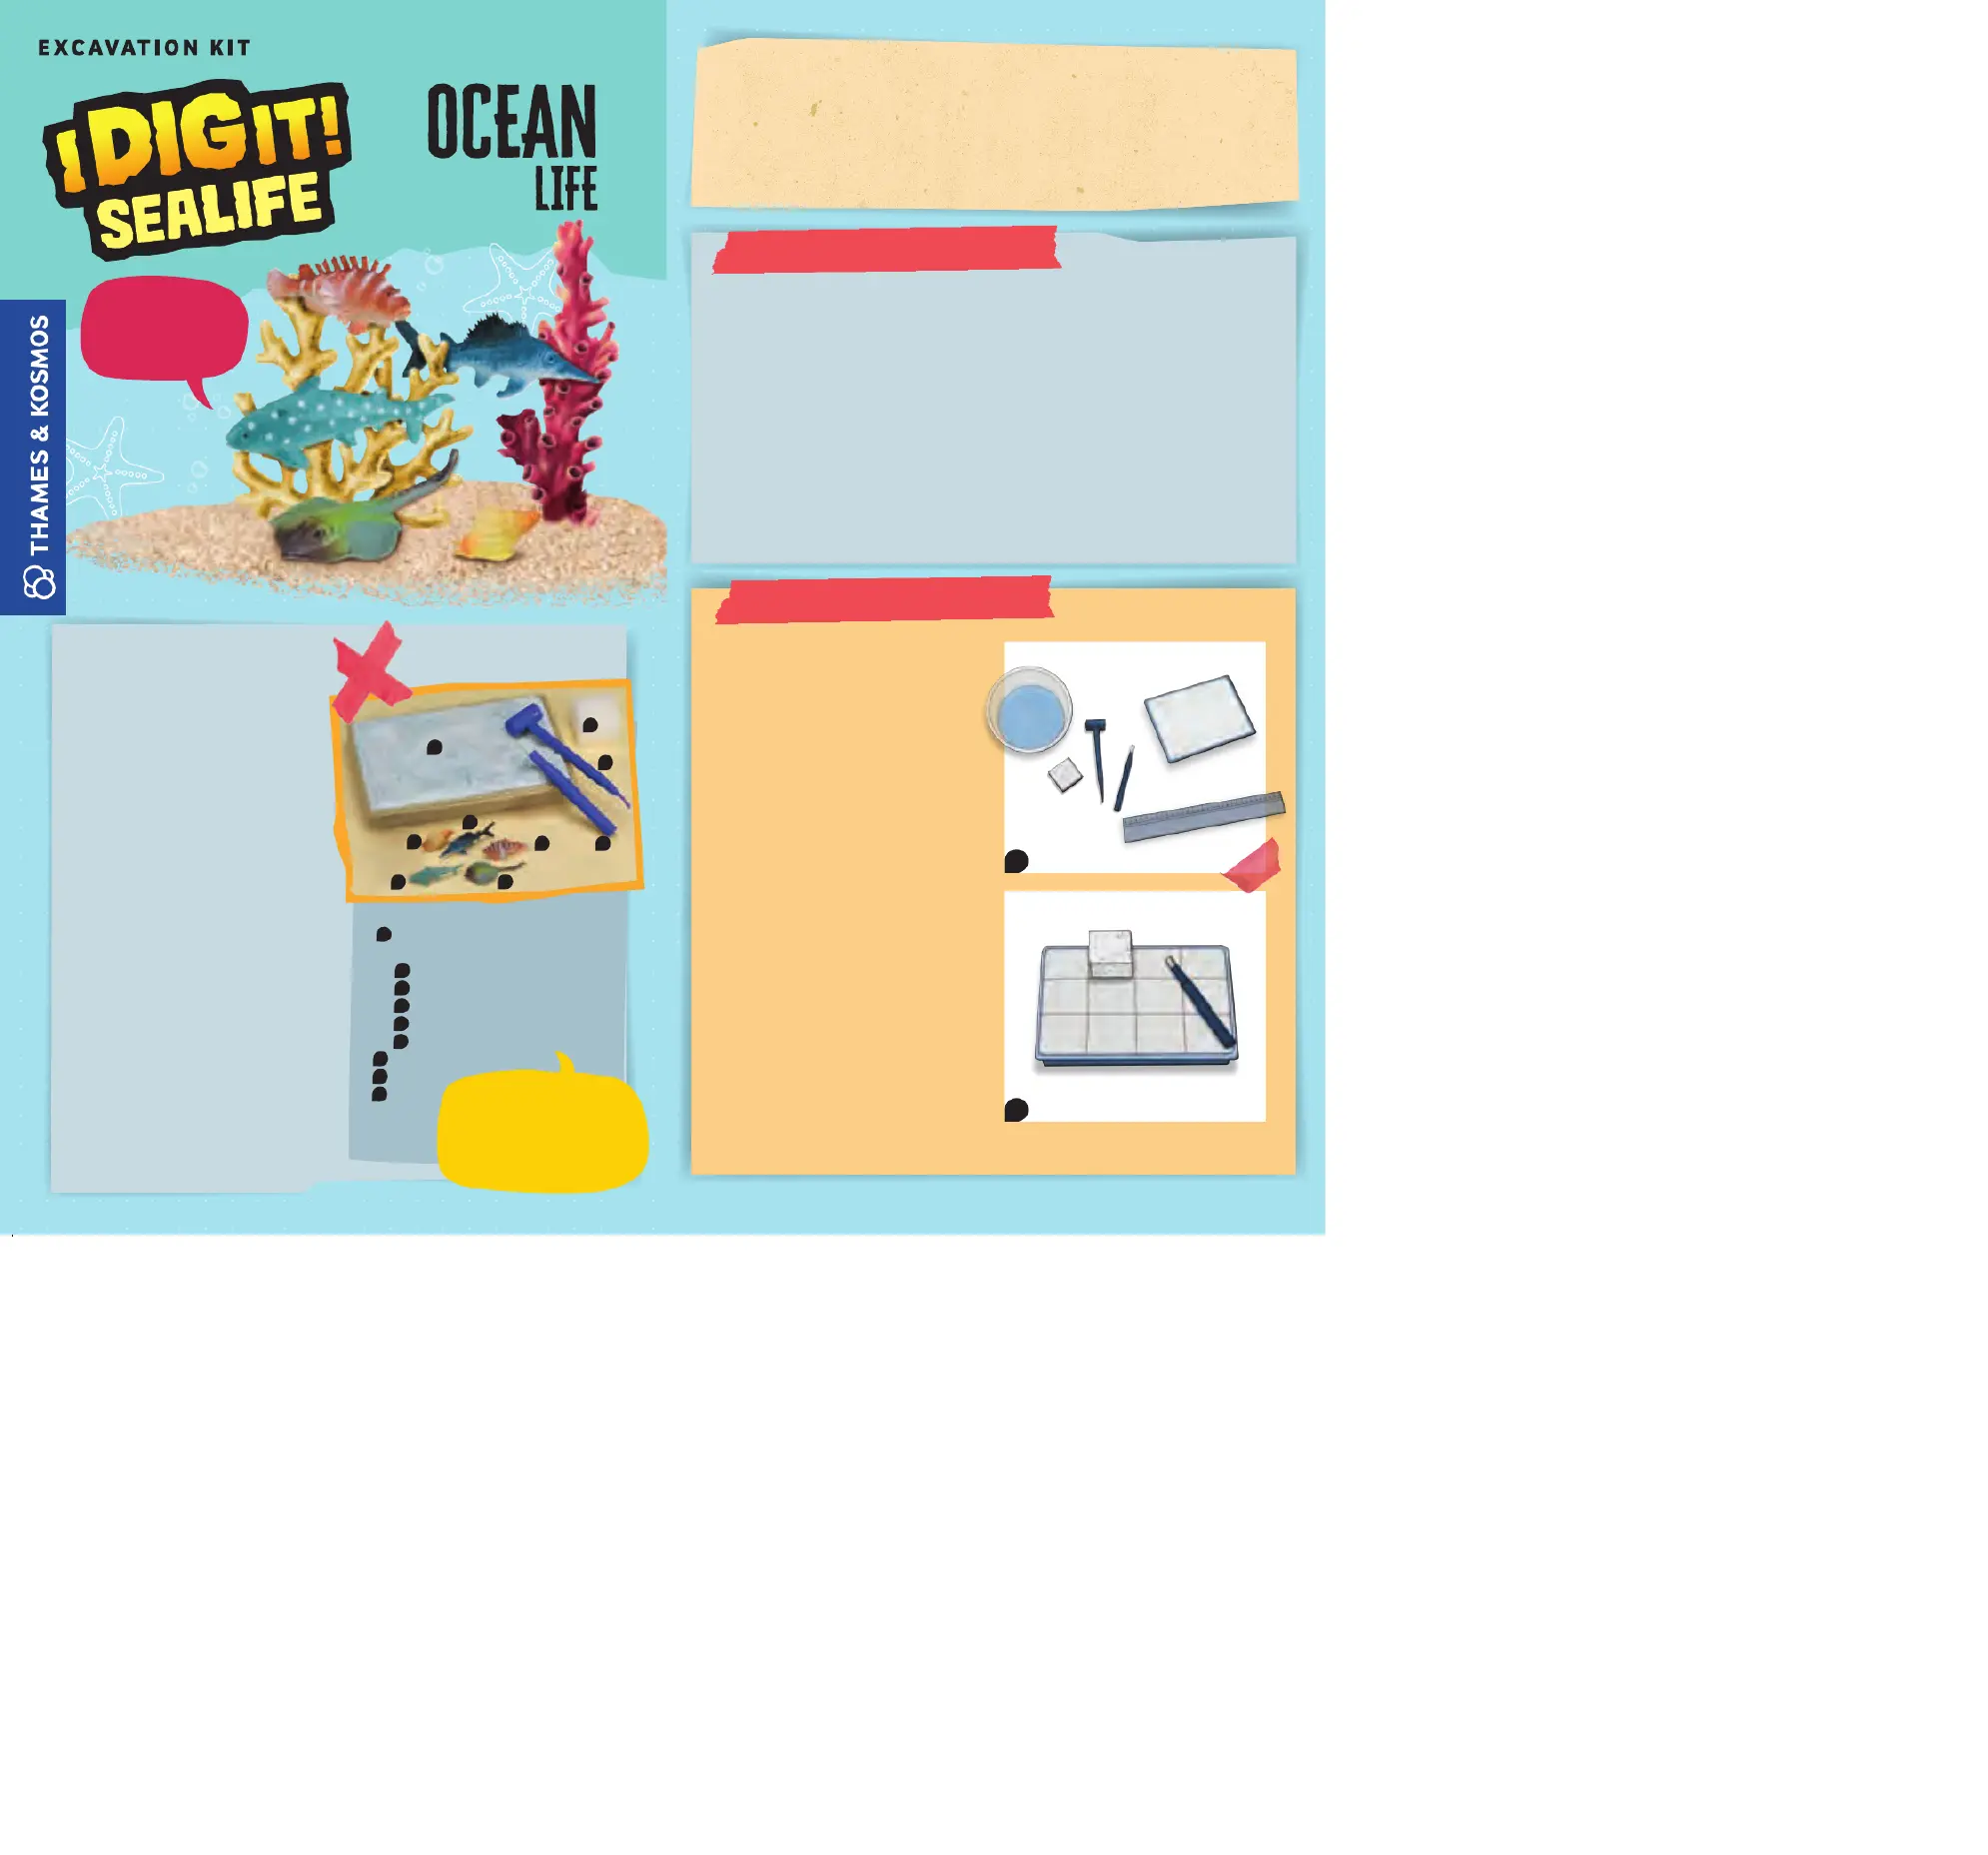
Kit Contents
Please assist, support, and accompany your child while excavating the ocean creatures.
Read the manual together before starting the experiment and follow it. Also, please be
sure not to allow any of the pieces to get into the hands of small children, especially the
plaster pieces that are left over after excavating the figurines. These can be disposed of in
the household trash.
© 2021 Franckh-Kosmos Verlags-GmbH & Co. KG Stuttgart
This work, including all parts, is copyright protected.
Any use outside of the specific limits of the copyright
law without consent of the publisher is prohibited and
punishable by law. This applies specifically to reproductions,
translations, microfilming, and storage and processing
in electronic systems and networks. We do not guarantee
that all material in this work is free from copyright or other
protection.
Project management: Christina Wirtz; Text: Ruth
Schildhauer, Dr. Rainer Köthe, Christina Wirtz; Technical
product development: Björn Stolpmann
Packaging design: Peter Schmidt Group, Hamburg, Germany
Manual design: Atelier Bea Klenk
Layout of packaging and manual: Design & Feinschliff
Studio, Stuttgart
Excavation illustrations: Tanja Donner
Additional illustrations: Mariela Schwerdt
Photos: Michael Flaig, pro-studios, Stuttgart (overview of
parts), Matthias Kaiser, Stuttgart (cover picture) Jaimie
Duplass & beror (all adhesive strips © fotolia); Viktoria Janis
(coral cover), Pixelbuddha (pink coral cover), Mariyna M
(sand), Microgen (archaeologist), Romolo Tavani (magnifying
glass), Marques (search squares) ASE (sea background),
Mireille Mobley (cowrie jewelry), Kletr (lionfish), Ruslan
Salikhov (ray), Krzysztof Odziomek (whale shark), Happy
Author (salt), Peter Hermes Furian (cowrie shell), Poogie
(whelk) (all previous © shutterstock); (wikipedia CC-BY-SA
3.0, public domain)
1st English Edition © 2021 Thames & Kosmos, LLC,
Providence, RI, USA
Thames & Kosmos® is a registered trademark of Thames
& Kosmos, LLC.
English text editing: Hannah Mintz, Ted McGuire; Additional
Graphics and packaging: Dan Freitas
Distributed in North America by Thames & Kosmos, LLC.
Providence, RI 02903; Phone: 800-587-2872; Web: www.
thamesandkosmos.com
Distributed in United Kingdom by Thames & Kosmos UK
LP. Cranbrook, Kent TN17 3HE; Phone: 01580 713000; Web:
www.thamesandkosmos.co.uk
We reserve the right to make technical changes.
Printed in Thailand/Imprimé en Thaïlande
WARNING! Not suitable for children under 7 years. For use under adult supervision. Read
the instructions before use, follow them and keep them for reference.
This kit contains functional sharp edges or points. Do not injure yourself!
WARNING! Not suitable for children under 3 years. Choking hazard — small parts may be
swallowed or inhaled.
Follow the instruction manual when performing the excavation. Keep small
children and animals away from the experiment area. Do not eat or drink at the
experiment area. Process the plaster block slowly and moisten it to prevent the formation
of chips and dust. Do not place the plaster material in mouth or eyes. Clean all
equipment and the work area after use. Wash your hands after the experiment.
Keep the packaging and instructions as they contain important information.
1. Start by preparing a suitable workplace.
Ideally, find a room where it won’t
matter if a few pieces of plaster or a
few drops of water fall here and there.
You should have enough room available
on a level table surface that can risk
getting a little messy. Spread out some
old newspaper to protect the surface.
Get the excavation block, sponge,
hammer, chisel, and a bowl of water
ready. You will also need a small ruler.
1
3
2
D
B
A
C
1
Excavation block containing hidden
ocean creatures:
A
Whale shark
B
Swordfish
C
Ray
D
Whelk
E
Lionfish
2
Hammer
3
Chisel
4
Sponge
4
E
Do you have any questions?
Our tech support team will be glad to
help you!
USA: support@thamesandkosmos.com
or 1-800-587-2872
UK: support@thamesandkosmos.co.uk
or 01580 713000
657537-02-181121
Find all the sea
creatures!
Wow!
Produktspecifikationer
| Varumärke: | Thames & Kosmos |
| Kategori: | ej kategoriserat |
| Modell: | I Dig It! Sealife - Ocean Life |
| Vikt: | 590 g |
| Bredd: | 206 mm |
| Djup: | 56 mm |
| Höjd: | 130 mm |
| Rekommenderad ålder (min): | 7 År |
| Ursprungsland: | Thailand |
| Rekommenderad användning: | inomhus |
| Batterier krävs: | Nej |
| Tema: | Geologi |
| Minsta antal spelare: | 1 |
| Produktens färg: | Multifärg |
| bruksanvisning: | Ja |
| Antal per förpackning: | 1 styck |
| Språkstöd: | Engelska |
| Antal: | 9 styck |
| Föreslagen målgrupp: | Pojke/flicka |
| Djur: | Fisk |
Behöver du hjälp?
Om du behöver hjälp med Thames & Kosmos I Dig It! Sealife - Ocean Life ställ en fråga nedan och andra användare kommer att svara dig
ej kategoriserat Thames & Kosmos Manualer

5 Februari 2026
3 Februari 2026
Thames & Kosmos Crystal Growing: Glow-in-the-Dark Bruksanvisning
3 Februari 2026 Thames & Kosmos Dragonkeepers Companion Booklet Bruksanvisning
2 Februari 2026 1 Februari 2026
1 Februari 2026
1 Februari 2026
1 Februari 2026
ej kategoriserat Manualer
Nyaste ej kategoriserat Manualer
3 April 2026
3 April 2026
3 April 2026
3 April 2026
3 April 2026
3 April 2026
3 April 2026
3 April 2026
3 April 2026