Thermaltake Pacific V-RTX 4090 Plus Bruksanvisning
Thermaltake Hårdvarakylning Pacific V-RTX 4090 Plus
Läs gratis den bruksanvisning för Thermaltake Pacific V-RTX 4090 Plus (2 sidor) i kategorin Hårdvarakylning. Guiden har ansetts hjälpsam av 27 personer och har ett genomsnittsbetyg på 4.4 stjärnor baserat på 5 recensioner. Har du en fråga om Thermaltake Pacific V-RTX 4090 Plus eller vill du ställa frågor till andra användare av produkten? Ställ en fråga
Sida 1/2
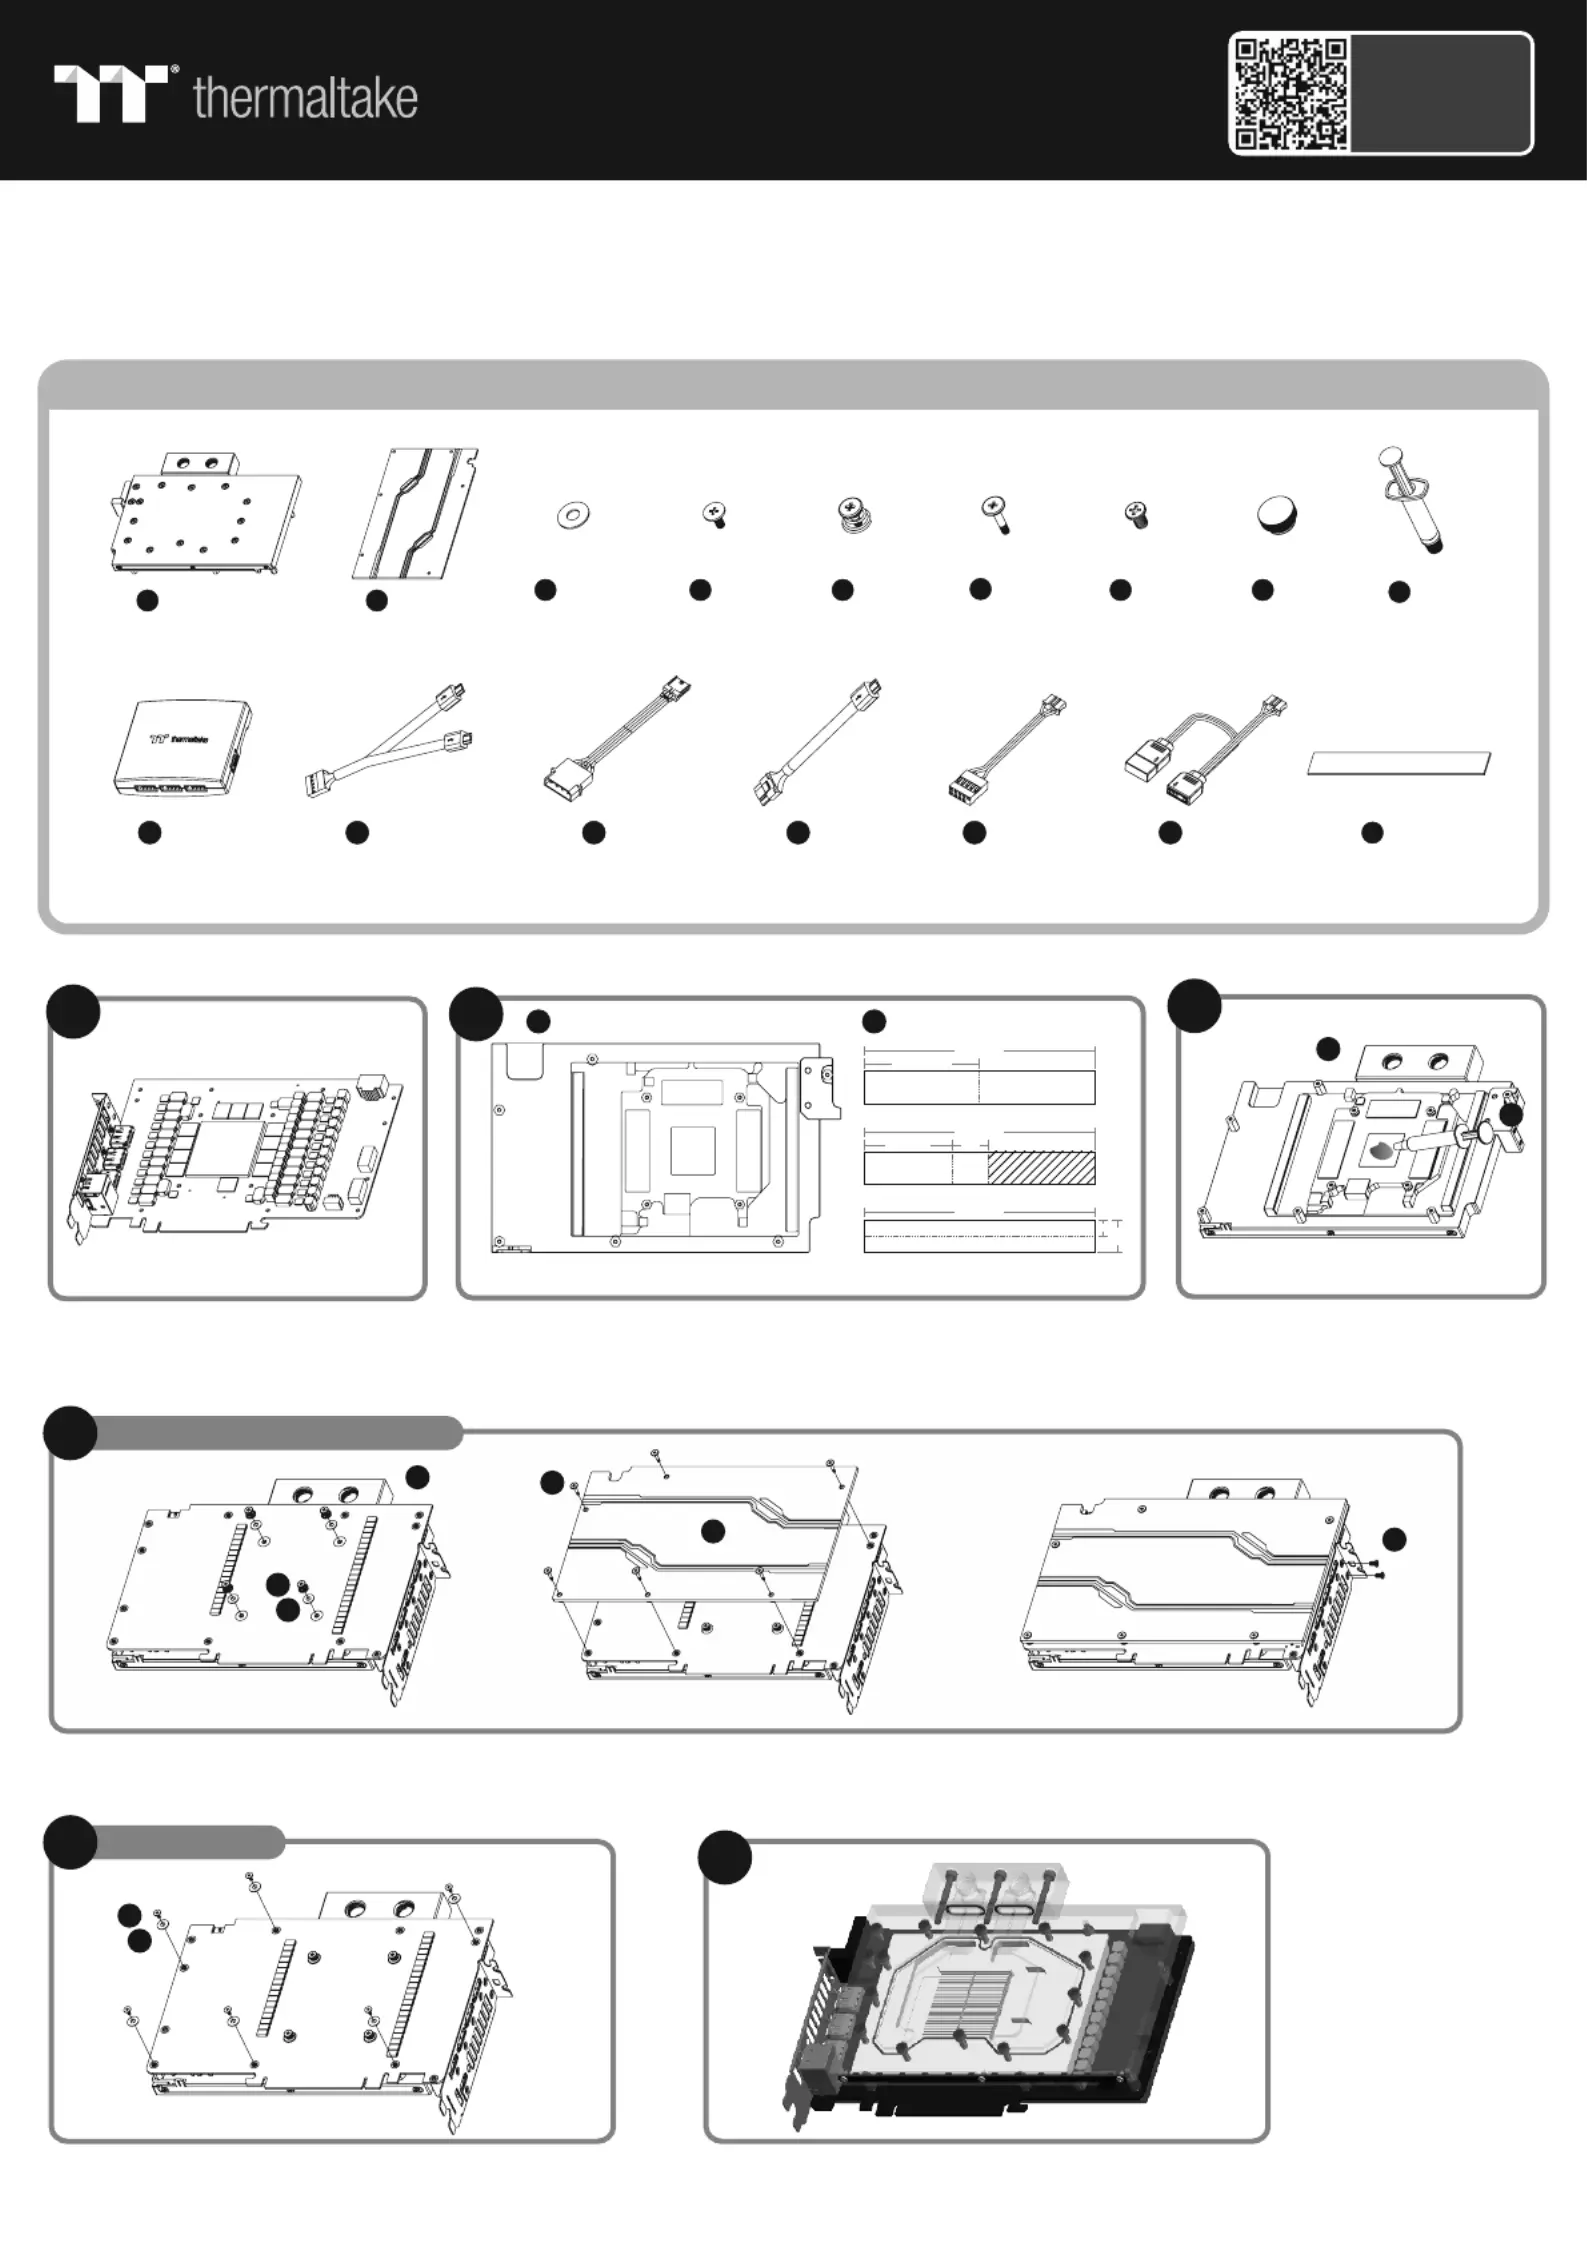
Ax1
Bx1
C D E F H x 10 x 6 x4 x 6 x 2
I x 1
Q x 10
G x 2
2
Cut the thermal pads to the dimensions listed and place them
on the spots shown on the diagram.
Disassemble the thermal module (cooler)
of the graphics card and clean the thermal
paste from the GPU
When installing the water block, carefully position the water block with the preinstalled standoffs on the graphics card.
Parts List
Apply thermal compound
Caution: Please remove the backplate if the ITX MB interferes with
the product during the installation process
Finish
1
This product is intended for installation only by expert users. Please consult with a qualified technician for installation. Improper installation may result in damage to your equipment.
Before you start using this product please follow these basic guidelines:
1. Please carefully read through the instruction manual before beginning the installation process.
2. Please remove your graphics card from your motherboard to insure the safest process and in order to prevent any possible damages to your CPU and motherboard.
3. It is strongly recommended to use market proven pre-mix coolant, such as Thermaltake Coolant 1000.
Q
I
3
A
AA
A
B
BC
C
DD
50
3816
100
100
100
14
7
unit : mm
5
G
F
B
A
A
A
D
D
Scan Here
Installation Guide
GPU Water Block
Pacific V-RTX 4090 Plus
JKLMNOx 1x 1x 1x 1x 1x 1
ControllerPower CableController Cable
Bridge Cable
LED CableMB SYNC Cable
E
D
C
C
For E-ATX / ATX / M-ATX MB
For ITX MB
4-1
4-2
Produktspecifikationer
| Varumärke: | Thermaltake |
| Kategori: | Hårdvarakylning |
| Modell: | Pacific V-RTX 4090 Plus |
Behöver du hjälp?
Om du behöver hjälp med Thermaltake Pacific V-RTX 4090 Plus ställ en fråga nedan och andra användare kommer att svara dig
Hårdvarakylning Thermaltake Manualer

8 April 2025
8 April 2025
8 April 2025
8 April 2025
8 April 2025
8 April 2025
8 April 2025
1 April 2025
1 April 2025
Hårdvarakylning Manualer
Nyaste Hårdvarakylning Manualer
9 April 2025
9 April 2025
9 April 2025
8 April 2025
3 April 2025
3 April 2025
2 April 2025
2 April 2025
30 Mars 2025
30 Mars 2025