V-Zug Combair Bruksanvisning

V-Zug Ugn Combair

Läs gratis den bruksanvisning för V-Zug Combair (48 sidor) i kategorin Ugn. Guiden har ansetts hjälpsam av 6 personer och har ett genomsnittsbetyg på 3.5 stjärnor baserat på 3.5 recensioner. Har du en fråga om V-Zug Combair eller vill du ställa frågor till andra användare av produkten? Ställ en fråga

Sida 1/48
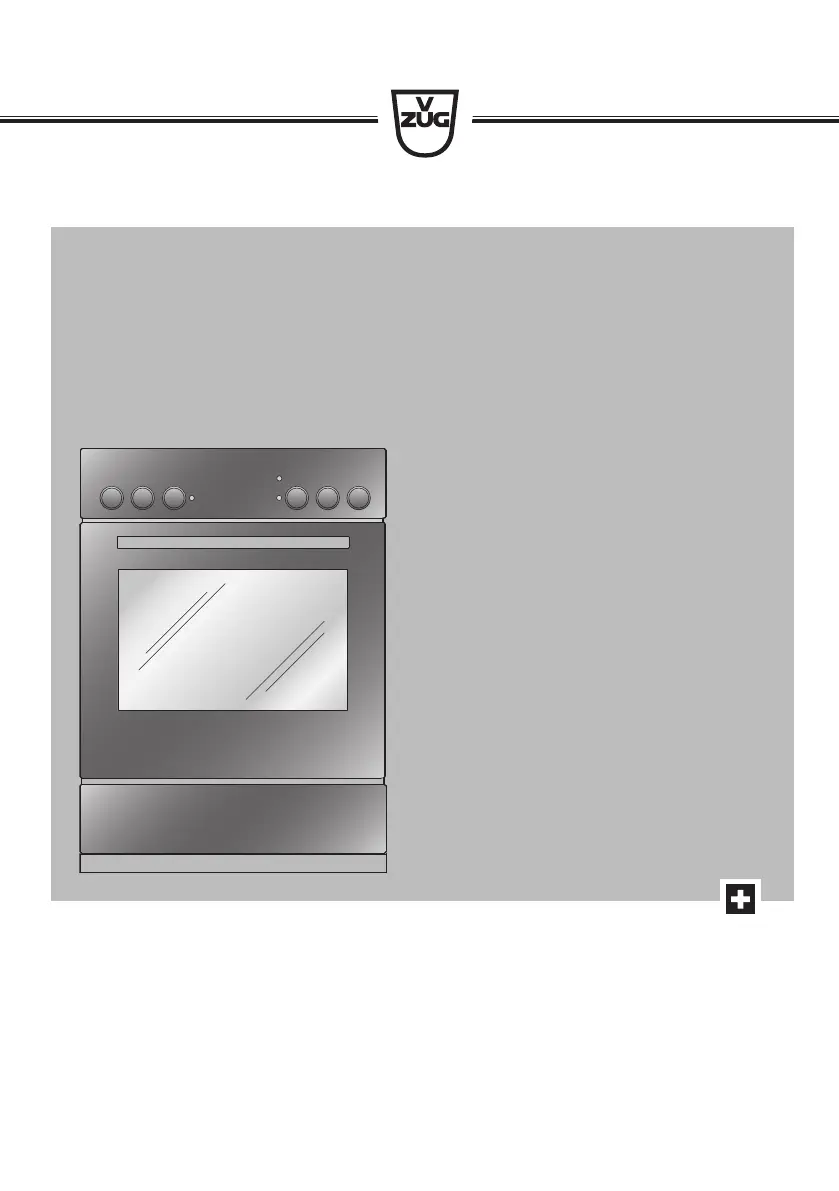
Operating instructions
Combair
Oven • Hob
Thank you for choosing to buy one of our products. Your appliance is made to
high standards and is easy to use. Nevertheless, please take the time to read
these operating instructions in order to familiarise yourself with the appliance
and get the best use out of it.
Please follow the safety precautions.
Modifications
Text, diagrams and data correspond to the technical standard of the appliance
at the time these operating instructions went to press. The right to make tech-
nical modifications for the purpose of the further development of the appliance
is reserved.
Validity
The product family (model number) corresponds to the first alphanumerics on
the identification plate. These operating instructions apply to:
Type Product family Size system
BC 21007 55-762
BC60 21008 60-600
EC 22007 55-762
EC60 22008 60-600
Variations depending on the model are noted in the text.
© V-ZUG Ltd, CH-6301 Zug, 2015
2
Contents
1 Safety precautions 5
1.1 Symbols used..............................................................................................5
1.2 General safety precautions.......................................................................6
1.3 Appliance-specific safety precautions ...................................................7
1.4 Instructions for use.....................................................................................8
2 Disposal 12
3 Appliance description 13
3.1 Construction..............................................................................................13
3.2 Operating and display elements ...........................................................14
3.3 Cooking space .........................................................................................15
3.4 Accessories...............................................................................................16
4 Operating the appliance 18
4.1 Before using for the first time ................................................................18
4.2 Selecting the operating mode ...............................................................18
4.3 Selecting the cooking space temperature ..........................................18
4.4 Switching off..............................................................................................19
5 Operating modes 20
5.1 Overview of operating modes................................................................20
5.2 Top/Bottom heat ......................................................................................20
5.3 Top/Bottom heat humid..........................................................................21
5.4 Bottom heat...............................................................................................21
5.5 Hot air.........................................................................................................22
5.6 Hot air humid ............................................................................................22
5.7 PizzaPlus....................................................................................................23
5.8 Grill..............................................................................................................23
5.9 Grill-forced convection ............................................................................24
6 Tips and tricks 25
6.1 Baking and roasting ................................................................................25
6.2 Cakes ........................................................................................................25
6.3 Uneven browning .....................................................................................26
6.4 Saving energy...........................................................................................26
7 Care and maintenance 27
7.1 Cleaning the exterior ...............................................................................27
7.2 Cleaning the door seal............................................................................27
7.3 Cleaning the appliance door .................................................................27
7.4 Cleaning the accessories and shelf guides........................................28
3
7.5 Cleaning the cooking space..................................................................29
7.6 Catalytic self-cleaning..............................................................................30
7.7 Replacing the halogen light bulb..........................................................31
8 Trouble-shooting 32
8.1 Procedure ..................................................................................................32
8.2 What to do if … .........................................................................................32
9 Hob 34
9.1 Operating and display elements ...........................................................34
9.2 Cookware...................................................................................................35
9.3 Operating the appliance .........................................................................36
9.4 Care and maintenance............................................................................37
10 Accessories and spare parts 38
10.1 Accessories...............................................................................................38
10.2 Special accessories.................................................................................38
10.3 Spare parts................................................................................................39
11 Technical data 40
11.1 Note for testing institutes........................................................................40
11.2 Temperature measurement....................................................................40
11.3 Product data sheet...................................................................................41
12 Index 42
13 Notes 44
14 Service & Support 47
4
1 Safety precautions
1.1 Symbols used
Denotes important safety precautions.
Failure to observe said precautions can result in injury or in damage
to the appliance or fittings!
Information and precautions that should be observed.
Information on disposal
Information about the operating instructions
Indicates step-by-step instructions.
Describes how the appliance reacts to the steps taken.
Indicates a list.
5
1 Safety precautions
1.3 Appliance-specific safety precautions
READ THE IMPORTANT SAFETY PRECAUTIONS CAREFULLY
AND RETAIN FOR FUTURE USE.
WARNING: The appliance and its accessible parts get hot
during use. Be careful not to touch the heating elements. Chil-
dren under 8 years of age must be kept away from the appli-
ance unless they are constantly supervised.
WARNING: Accessible parts can get hot during use. Keep
young children away from the appliance.
This appliance is intended for use in the home and similar set-
tings such as: in staff kitchens in shops, offices and other
commercial establishments; in agricultural establishments; by
guests in hotels, motels and other accommodation establish-
ments; in bed and breakfast establishments.
A heatable appliance drawer and its contents get hot.
Do not use aggressive or abrasive cleaning agents or sharp
metal scrapers for cleaning the glass in the oven door as they
could scratch the surface. This can destroy the glass.
For appliances with pyrolytic self-cleaning: Excessive soiling
and any and all accessories (tableware, baking trays, runners,
shelf guides) must be removed before carrying out pyrolytic
self-cleaning.
Only use the food probe recommended for this oven.
Under no circumstances use a steam cleaner to clean this ap-
pliance.
WARNING: Before replacing the light bulb, ensure the appli-
ance is switched off and disconnected from the mains power
supply to avoid possible electric shock.
7
1 Safety precautions
The appliance corresponds to recognised technology standards and the rel-
evant safety regulations. Proper use of the appliance is essential to avoid
damage and accidents. Please therefore follow the precautions given in
these operating instructions.
9
1 Safety precautions
Note on use
Use the childproof locking facility.
If the appliance is visibly damaged, do not use it. Contact our Customer
Services.
If the appliance is not operating properly, disconnect it from the power sup-
ply immediately.
Ensure there are no foreign bodies or pets in the cooking space before
closing the appliance door.
Objects that could pose a danger if the appliance were accidentally
switched on should not be stored in the cooking space or the heatable ap-
pliance drawer. Do not store food or any temperature-sensitive or inflam-
mable materials, e.g. cleaning agents, oven sprays, etc., in the cooking
space or the heatable appliance drawer.
For appliances with grill: Leave the appliance door closed when grilling. The
heat could otherwise damage the operating and display elements or the fit-
ted units above.
Caution: Risk of burns!
The appliance gets very hot when in use. The appliance door also gets hot.
Steam and/or hot air may escape from the cooking space when the appli-
ance door is opened.
The appliance will remain hot for some time after it is switched off and will
only cool down slowly to room temperature. Allow sufficient time for the ap-
pliance to cool down before, for instance, cleaning it.
Overheated fat and oil can easily catch fire. Heating oil in the cooking
space to sear meat is dangerous and should not be done. Never attempt to
extinguish burning oil or fat with water. Danger of explosion! Smother the
flames with a fire blanket. Keep doors and windows closed.
Do not pour spirits (brandy, whisky, schnapps, etc.) over hot food. Danger
of explosion!
Do not leave the appliance unattended when drying herbs, bread, mush-
rooms, etc. If the foodstuff dries out too much, it can pose a fire hazard.
If you notice smoke possibly coming from the appliance itself or from inside
the cooking space, keep the appliance door closed. Disconnect the appli-
ance from the power supply.
Accessories get hot in the cooking space. Use protective gloves or oven
cloths.
10
1 Safety precautions
Caution: Risk of injury!
Be careful not to put fingers in the door hinges, there is otherwise a risk of
injury if the appliance door is moved. Particular care should be taken when
children are around.
Only leave the appliance door open in the at-rest position. An open appli-
ance door poses a danger of tripping or injury! Do not sit or rest on the ap-
pliance door or use it as a storage surface.
For hobs: A hob guard can be fitted to protect small children. Hob guards
are available from specialist retailers.
Caution: Risk to life!
Danger of suffocation! Keep packaging material, e.g. plastic film and poly-
styrene, away from children. Packaging material can be dangerous for chil-
dren.
How to avoid damaging the appliance
Close the appliance door carefully.
For appliances with visible bottom heating element: Do not place any ob-
jects directly on the bottom heating element.
Do not use protective aluminium inserts with appliances with no visible bot-
tom heating element.
Do not use objects that can rust in the cooking space.
Using knives or cutting wheels on the baking tray will visibly damage the
surface.
To prevent corrosion, leave the appliance door open in the at-rest position
until the cooking space has cooled down.
When cleaning the appliance, make sure no water gets inside it. Use a
moderately damp cloth. Do not spray the outside or the inside of the appli-
ance with water. If water gets inside the appliance, it will cause damage.
11
2 Disposal
Packaging
All packaging materials (cardboard, plastic film (PE) and polystyrene (EPS))
are marked and should, if possible, be collected for recycling and disposed
of in an environmentally friendly way.
Disconnection
Disconnect the appliance from the mains. With a fixed appliance, this is to
be carried out by a qualified electrician!
Safety
Disable the appliance to prevent accidents caused by improper use, espe-
cially through children playing.
Pull the plug out of the mains socket or have the appliance disconnected
from the mains by an electrician. Then cut the mains cable off flush with the
appliance.
Remove or disable the lock on the appliance door.
Disposal
The old appliance should not be discarded as worthless rubbish. If dis-
posed of correctly, the raw materials can be recovered for recycling.
The symbol on the identification plate warns that the appliance may not
be disposed of in normal household waste.
The appliance must be disposed of in accordance with local regulations on
waste disposal. For more information on the handling, disposal and recyc-
ling of the product, please contact the local authorities, the local recycling
facilities for household waste or the retailer from whom you purchased the
appliance.
12
3 Appliance description
3.1 Construction
1
2
3
4
5
6
1
Operating and display elements
2
Dials
3
Ventilation opening
4
Door handle
5
Appliance door
6
Appliance drawer *
* Depending on model
13
3 Appliance description
3.2 Operating and display elements
A
B
Dials
Cooking space temperature Operating mode
The symbols for the different operating modes and the temperature values are
located on the retractable dials and are visible when extended.
To extend the dial, press it in the middle.
To retract the dial, first set it to «0» and then press it in the middle.
Operating mode symbols
Top/Bottom heat Top/Bottom heat humid
Bottom heat Hot air humid
Grill PizzaPlus
Grill-forced convection Hot air
Button
Illumination
Indicator lights
A
Heating
B
In operation
14
3 Appliance description
3.3 Cooking space
1
2
3
4
7
8
4
5
3
2
1
6
10
9
11
1
Appliance door
7
Grill/Top heat guard
2
Door seal
8
Cooking space ventilation
3
Bottom heat
9
Grill/Top heat
4
Illumination
10
Levels (labelled)
5
Hot air fan
11
Protective foil
6
Cooking space temperature
sensor
15
3 Appliance description
Special accessories
Place any accessories not included in the scope of delivery on the
wire shelf.
Special accessories can be found at: www.vzug.-
com
17
4 Operating the appliance
4.1 Before using for the first time
Before operating the newly installed appliance for the first time, the following
steps should be taken:
Remove packaging and transport materials from out of the cooking space.
Clean the cooking space and the accessories.
Heat the empty cooking space (without wire shelves, baking trays, etc.) us-
ing the operating mode at the maximum cooking space temperature for
approximately 1 hour.
If your appliance comes with hotplates, heat each hotplate individually
(without cookware) at full power for about 5minutes.
There is likely to be some smoke and odour given off, we therefore re-
commend ventilating the room well during this phase.
See separate operating instructions on using a glass ceramic hob for the first
time and its operation and follow the instructions given.
4.2 Selecting the operating mode
Set the dial to the desired operating mode.
The «In operation» indicator light illuminates.
4.3 Selecting the cooking space temperature
Select the cooking space temperature.
The «Heating» indicator light illuminates.
The cooking space is heated up.
As soon as the set temperature has been reached,
the «Heating» indicator light goes out.
18
4 Operating the appliance
4.4 Switching off
Set the and dials to «0».
The «In operation» indicator light goes out.
Removing food from cooking space
Risk of burns!
Hot air may escape from the cooking space when the appliance
door is opened.
The accessories get hot. Use protective gloves or oven cloths.
Take the food out of the cooking space when done.
To prevent corrosion, leave the appliance door open in the at-rest position
until the cooking space has cooled down.
19
5 Operating modes
5.1 Overview of operating modes
All operating modes along with Fast heating are described below.
Place tins, moulds, etc. on the wire shelf.
Ensure that the «sloped» side of the baking tray is facing the back of the
cooking space.
Turn the dial to select the desired operating mode.
Follow the advice in 'Tips and tricks' and in the separate 'Tips on set-
tings'.
5.2 Top/Bottom heat
Temperature range 50–270 °C
Recommended value 200 °C
Level 2 (or 1)
The cooking space is heated by the top and bottom heating elements.
Uses
Classic operating mode for cooking and baking on onelevel
Cakes, biscuits, bread and roasts
Use a dark enamelled tray or a black tray or tin for crispy results.
20
5 Operating modes
5.3 Top/Bottom heat humid
Temperature range 50–270 °C
Recommended value 200 °C
Level 2 (or 1)
The cooking space is heated by the top and bottom heating elements. The
steam produced is largely retained in the cooking space. The food retains its
moisture.
Uses
Bread, plaited bread, roasts and gratins on one level
Low-temperature cooking
5.4 Bottom heat
Temperature range 50–270 °C
Recommended value 200 °C
Level 2 (or 1)
The cooking space is heated by the bottom heating element.
Uses
Baking flan bases
Preserving
Use a dark enamelled tray or a black tray or tin for crispy results.
21
5 Operating modes
5.7 PizzaPlus
Temperature range 50–270 °C
Recommended value 200 °C
Level 2 (or 1)
The cooking space is heated by hot air and bottom heat. The base of the food
is baked particularly intensively.
Use
Pizza
Flans and quiches
Use a dark enamelled tray or a black tray or tin without baking paper
for very crispy results.
5.8 Grill
Temperature range 50–270 °C
Recommended value 250 °C
Level 3 or 4
The cooking space is heated by the grill element.
Use
Flat food for grilling, e.g. steaks, chops, chicken parts, fish and sausages
Gratinating
Toast
Place the food to be grilled directly on the wire shelf.
Line the baking tray with aluminium foil and then place it underneath the
wire shelf.
23
5 Operating modes
5.9 Grill-forced convection
Temperature range 50-270 °C
Recommended value 200 °C
Level 2 or 3
The cooking space is heated by the grill element. The hot air fan distributes
the air evenly in the cooking space.
Use
Particularly suitable for a whole chicken
Large, bulky food for grilling
Gratins and baked dishes
Put food for grilling in a porcelain or glass dish or directly on the wire shelf.
Line the baking tray with aluminium foil and then place it underneath the
wire shelf.
24
6 Tips and tricks
6.1 Baking and roasting
Result Solution
The baking or roast looks
good on the outside but is
still doughy or raw on the
inside.
Next time, set a lower temperature and ex-
tend the operating time.
6.2 Cakes
Result Solution
The cake collapses.
Check the settings with those given in the
separate «Tips on settings».
Next time, set a lower cooking space tem-
perature and lengthen the operating time.
Stir the cake mixture well. When finished,
bake immediately.
For whisked sponges, beat the egg yolks/
egg whites to a foam a little longer and then
carefully fold into the mixture. When finished,
bake immediately.
Follow the instructions on how much baking
powder to add.
25
6 Tips and tricks
6.3 Uneven browning
Result Solution
The baking has browned
unevenly.
Next time, set a lower cooking space tem-
perature and adjust the operating time.
If using , or , check that the levels
selected are as recommended in the separ-
ate 'Tips on settings'.
Select if baking on one level.
Do not push baking tins or large, bulky food-
stuff right to the back of the cooking space.
The baking has come out
lighter on one baking tray
than on the other.
Check the settings with those given in the
separate 'Tips on settings'.
Some uneven browning is normal. More even browning is generally
achieved at lower cooking space temperatures.
6.4 Saving energy
The and operating modes consume less energy than the and
operating modes.
Avoid opening the appliance door frequently.
Only switch the illumination on when needed.
Use residual heat: for longer cooking times, i.e. over 30minutes, switch the
appliance off 5–10minutes before the end of the cooking time. Exceptions:
soufflé, sponge, choux pastry and puff pastry.
Minimize preheating.
Only preheat the cooking space if the baking results depend on it.
26
7 Care and maintenance
Risk of burns from hot surfaces!
Allow the appliance and the accessories to cool down before clean-
ing.
Incorrect handling can result in damage to the appliance!
Do not use any abrasive or caustic cleaning agents, metal scrapers
that are sharp or scratch, steel wool, abrasive scouring pads, etc.
Such products will damage the surface. Glass surfaces that are
scratched can crack.
Never use a steam cleaner to clean the appliance.
7.1 Cleaning the exterior
Remove any soiling or excess cleaning solution immediately.
Clean the surfaces with a soft cloth dampened with water and a little wash-
ing-up liquid – for metallic surfaces rub in the direction of the original polish
lines.
Wipe dry with a soft cloth.
Appliance drawer
The drawer can be removed for ease of cleaning.
Pull out the drawer as far as the stopper will allow, lift slightly and remove
from the front.
7.2 Cleaning the door seal
Clean the door seal with a soft cloth dampened with water, but do not use
any cleaning agent.
Wipe dry with a soft cloth.
Removing the door seal
Pull the seal slightly out at the corners and unhook.
7.3 Cleaning the appliance door
Clean the appliance door with a soft cloth dampened with water and a little
washing-up liquid.
27
7 Care and maintenance
Wipe dry with a soft cloth.
Removing the appliance door
Risk of injury from moving parts!
Be careful not to put fingers in the door hinges.
The appliance door is heavy. When removing and reassembling the
appliance door, hold it firmly at the sides with both hands.
Open the appliance door as far as it will
go.
Fold the clips2 on both door hinges1 for-
ward.
2
3
1
Close the appliance door as far as its at-
rest position (about 30°).
Lift the appliance door out at an angle.
30°
Reassembling the appliance door
From the front, push both hinges 1 into the opening 3.
Open the appliance door as far as it will go and close back the clips 2.
7.4 Cleaning the accessories and shelf guides
The wire shelf and shelf guides can be cleaned in the dishwasher.
The baking tray can be cleaned in the dishwasher; however, this will affect
its non-stick properties.
28
7 Care and maintenance
Removing and reassembling the shelf guides
Push the shelf guides at the top
backwards and take out of the
opening.
Swing the shelf guide into the
middle of the cooking space and re-
move from the opening at the bot-
tom.
Put back in reverse order.
Removing grill/top heat safety guard
Hold both sides and pull forwards.
7.5 Cleaning the cooking space
Damage to the appliance from incorrect treatment!
Do not bend the temperature sensor or heating elements.
Do not scour the surface. Scouring will damage the surface.
Remove any soiling from the cooking space while still hand warm using a
soft cloth dampened with water and a little washing-up liquid. Wipe dry with
a soft cloth.
The bottom heating element can be raised to make it easier to clean the
cooking space floor. Clean the heating elements with a damp cloth.
29
7 Care and maintenance
7.6 Catalytic self-cleaning
Incorrect handling can result in damage to the appliance!
Do not scour the cooking space. Do not use oven sprays, pastes or
household cleaning agents, as these can destroy the self-cleaning
properties!
Depending on the model, the cooking space may have a catalytic self-cleaning
coating. The coating is matt and rough.
The catalytic cleaning process breaks down soiling during normal use at tem-
peratures of over 200°C.
The self-cleaning process requires oxygen. A soiled catalytic coating
should therefore not be covered over.
Preventing crusty deposits
Crusty deposits, e.g. burned-on sauces or sugar, impair the cleaning effect.
When grilling: line the original baking tray with aluminium foil and then place
it underneath the wire shelf.
Use porcelain or glassware for grilling large, bulky food.
Wipe away food spills as soon as possible when still in a liquid form.
Place protective foil between the cooking space floor and the bottom heat-
ing element.
Removing crusty deposits
If a crusty deposit forms:
soften crusty deposit with a damp cloth and then dab away.
Use a plastic or wooden spatula to carefully remove any thick, crusty de-
posits. Soften any stubborn residue with a damp cloth and then dab away.
Only remove crusty deposits. Any remaining soiling will eventually dis-
appear after going through the baking and cleaning process a num-
ber of times. In the case of a heavily soiled appliance or after being in
use for several years, some stains may remain.
30
8 Trouble-shooting
8.1 Procedure
This section lists faults that can be solved simply by following the instructions
given. If another fault is displayed or the fault cannot be remedied, please call
Customer Services.
Before calling Customer Services:
Please note down the serial number (FN) (see 'Technical data' for the identi-
fication plate).
8.2 What to do if …
… the appliance is not working
Possible cause Solution
A household fuse or circuit
breaker has tripped.
Set all the dials to «0».
Change the fuse.
Reset the circuit breaker.
The fuse or circuit breaker
keeps blowing.
Call Customer Services.
An interruption in the
mains power supply.
Check the mains power supply.
… just the illumination is not working
Possible cause Solution
The halogen light is defect-
ive.
Set all the dials to «0».
Disconnect the appliance from the electricity
supply.
Replace the halogen light bulb.
32
8 Trouble-shooting
… when grilling, thick smoke is given off
Possible cause Solution
The food is too near to the
heating elements.
Check that the level selected is as recom-
mended in the separate 'Tips on settings'.
The cooking space tem-
perature is too high.
Reduce the cooking space temperature.
… when heating up, thick smoke is given off
Possible cause Solution
When roasting with ,
and , fat may drip
on to the bottom heating
element. The next time ,
or is used,the fat
on the bottom heating ele-
ment will be burned off.
Clean the heating elements when they have
cooled down.
Under no circumstances use strong detergent
or abrasive scouring pads. as they could dam-
age the heating elements.
33
9 Hob
Dials
The numbers for the different power levels are located on the retractable dials
and are visible when extended.
To extend the dial, press it in the middle.
To retract the dial, first set it to «0» and then press it in the middle.
9.2 Cookware
Suitable cookware
Cookware should have a stable bottom. When heated, the base of the cook-
ware must lie flat on the surface of the cooking zone.
Cookware made of metal is more suitable than that made of glass or ceramic
as with metal the heat is distributed evenly quicker.
Cookware bases made of aluminium or aluminium alloys can leave stubborn
abrasion marks on the glass ceramic surface that are very difficult to remove.
Energy-efficient cooking
Note the following for maximum energy efficiency and even heat distribution:
The base of the cookware must be clean, dry and smooth.
The diameter of the base of the cookware should correspond to the dia-
meter of the cooking zone.
Centre the cookware in the middle of the cooking zone.
Use a well-fitting lid.
Match the diameter of the cookware to the quantity of food to be cooked.
35
9 Hob
9.3 Operating the appliance
The individual cooking zones are all operated in the same way.
Selecting a cooking zone
If the dials are retracted, press in the middle of the dial of the desired cook-
ing zone.
The dial springs out.
Set the dial to the desired power level.
The power indicator light illuminates.
For normal cooking zones, the dial can be turned past the «0» power
level in both directions.
For dual ring cooking/frying zones, the dial has an end stop. It can
only be turned in a clockwise direction and back in an anti-clockwise
direction.
To switch on the outer cooking zone of a dual ring cooking/frying zone, first
turn the dial all the way round and then set to the desired power level.
Overview of power levels
Power level Cooking method Use
1
Melting, gentle warming Butter, chocolate, gelatine, sauces
2
Swelling Rice
3
Simmering, reducing,
steaming
Vegetables, potatoes, sauces, fruit,
fish
4
Simmering, braising Pasta, soup, braised meat
5
Gentle frying Rösti (hash browns), omelettes,
breaded fried foods, sausages
6
Frying, deep frying, fast
heating
Meat, chips, boiling water
Switching a cooking zone off
Set the dial for the desired cooking zone to power level «0».
If the other cooking zones are switched off, the in-operation indicator
light goes out.
36
9 Hob
The dial can now be retracted.
9.4 Care and maintenance
Risk of burns! Allow the appliance to cool down before cleaning.
Always clean the hotplates after use. This prevents food residue from burning
on. Dried-on or burned-on food residue is harder to clean off.
Use a soft cloth or sponge with water to clean everyday soiling.
Dry hotplates with a soft cloth.
Use of a protective care agent is recommended.
Over time, the strong heat will cause the stainless steel ring around
the hotplates to become discoloured, turning yellow. Discolouration
is normal and cannot be removed by cleaning.
37
11 Technical data
Dimensions
See installation instructions
Electrical connection
See identification plate 1
1
11.1 Note for testing institutes
The energy efficiency class according to EN 50304/EN 60350 is determined
using the and operating modes.
Placing thermocouples between the appliance door and the seal can cause
lack of leak-tightness and thus measuring errors.
The usable volume as defined by EN 50304/EN 60350 is obtained with the
shelf guides disassembled.
11.2 Temperature measurement
The temperature of the cooking space is measured when the cooking space is
empty according to an internationally accepted standard. Own measurements
can be imprecise and are not suitable for checking the accuracy of the tem-
perature.
40
11 Technical data
11.3 Product data sheet
In accordance with EU Regulation No.: 66/2014
Type of appliance - Oven | Hob
Model designation - BC | EC
Mass of SMS 55 appliance kg 44
Mass of EURO 60 appliance kg 44
Number of cavities - 1
Heat source per cavity - Electric
Volume per cavity l 52
Energy consumption in conventional mode
1
) kWh/
cycle
0.78
Energy consumption in hot air / forced con-
vection mode
2
)
kWh/
cycle
0.85
Energy-efficiency index per cavity
3
) - 102.6
Measurement and calculation methods used IEC 60350
1
)
required to heat a standardised load in cavity
2
)
required to heat a standardised load in cavity
3
)
Measurement methods:Ssee EU Regulation No. 66/2014, Annex II, Chapter 1
Saving energy while cooking
Avoid opening the appliance door frequently.
For gratins, use the residual heat: after a duration of 30minutes, turn the
appliance off 5–10minutes before end of baking.
Minimize preheating.
Only preheat the cooking space if the baking results depend on it.
41
12 Index
A
Accessories........................................ 16, 38
Cleaning...............................................28
Appliance door
Cleaning...............................................27
Removing ............................................28
Appliance drawer
Cleaning...............................................27
B
Baking tray................................................. 16
Before using for the first time................... 8
Bottom heat........................................ 15, 21
Button ......................................................... 14
C
Care ............................................................ 27
Catalytic self-cleaning.............................. 30
Cleaning ..................................................... 27
Accessories.........................................28
Catalytic self-cleaning .......................30
Cooking space ...................................29
Door seal.............................................27
Shelf guides ........................................28
Cleaning the exterior................................ 27
Cooking space
Cleaning...............................................29
Temperature measurement..............40
Cooking zone
Selecting..............................................36
Switching off........................................36
Cookware................................................... 35
D
Dials..................................................... 14, 34
Dimensions................................................ 40
Disconnection............................................ 12
Display elements ...................................... 14
Displays...................................................... 34
Disposal...................................................... 12
Door seal
Cleaning...............................................27
Removing ............................................27
E
Electrical connection................................ 40
Energy-efficient cooking.......................... 35
G
Grill.............................................................. 23
Grill-forced convection............................. 24
H
Halogen light bulb.................................... 31
Heating element
Cleaning...............................................29
Hob.............................................................. 34
Care and maintenance .....................37
Cookware ............................................35
Operating.............................................36
Operating and display elements.....34
Hot air ......................................................... 22
Hot air humid............................................. 22
I
Identification plate .................................... 40
Illumination................................................. 32
Indicator lights........................................... 14
Initial set-up.................................................. 8
Instructions for use ..................................... 8
L
Levels.......................................................... 15
M
Model number ............................................. 2
N
Notes........................................................... 44
O
Operating elements.................................. 14
Operating modes .............................. 14, 20
Selecting..............................................18
42
12 Index
P
Packaging.................................................. 12
PizzaPlus .................................................... 23
Preheating........................................... 26, 41
Product family.............................................. 2
Protective foil ................................... 15, <R>
Q
Queries....................................................... 47
R
Removing food from cooking space .... 19
S
Safety .......................................................... 12
Safety guard .............................................. 29
Safety precautions
Appliance-specific ................................7
Before using for the first time ............8
Correct use............................................8
General...................................................6
Saving energy .................................... 26, 41
Self-cleaning .............................................. 30
Service & Support .................................... 47
Service agreement ................................... 47
Shelf guides
Cleaning...............................................28
Removing ............................................29
Spare parts ................................................ 39
Special accessories.......................... 17, 38
Switching off .............................................. 19
Switching the appliance off .................... 19
Symbols........................................................ 5
T
Technical data........................................... 40
Temperature sensor................................. 15
Testing institutes....................................... 40
Tips and tricks........................................... 25
Tips on settings......................................... 38
Top/bottom heat....................................... 20
Top/bottom heat humid .......................... 21
Trouble-shooting....................................... 32
Type............................................................... 2
U
Uneven browning...................................... 26
Using for the first time ............................. 18
V
Validity........................................................... 2
W
Wire shelf ................................................... 16
43


Produktspecifikationer

Varumärke: V-Zug
Kategori: Ugn
Modell: Combair
Inbyggd display: Ja
Vikt: 44000 g
Bredd: 596 mm
Djup: 569 mm
Höjd: 598 mm
Grill: Ja
Konvektionsmatlagning: Ja
Antal lampor: 2 lamp(or)
Antal ugnar: 1
Energiförbrukning (konventionell): 0.78 kWh
Energieffektivitetsindex (EEI): 102.6
Ugnsstorlek: Medium
Självrengörande: Ja
Bakplåt: Ja
Produktens färg: Vit
Skärmtyp: LED
Kontrolltyp: Rotations-
Ugnstyp: Elektrisk ugn
Ugnens nettokapacitet: 52 l
Rengöringstyp: Katalytisk
Djup med öppen dörr: 440 mm
AC-inspänning: 400 V
Lamptyp: halogen
Apparatens placering: Inbyggd
Växelström Frekvens: 50 hz
Gångjärnssida: Ned
Ström: 10 A
Installationsfack, bredd: 600 mm
Installationsfack, djup: 605 mm
Installationsfack, höjd: 600 mm
Ansluten effekt: 3400 W
Inbyggd lampa: Ja
Manöverplats: Framsida
Totalt ugn (er) invändig kapacitet: 52 l
Totalt ugn: - W
Topp och undervärme: Ja
Normalkokning: Ja
Energiförbrukning (påtvingad konvektion): 0.84 kWh
På/av-lampa: Ja
Infällbara vred: Ja

Behöver du hjälp?

Om du behöver hjälp med V-Zug Combair ställ en fråga nedan och andra användare kommer att svara dig