Air King R120 Bruksanvisning
Läs gratis den bruksanvisning för Air King R120 (1 sidor) i kategorin Inte kategoriserad. Guiden har ansetts hjälpsam av 31 personer och har ett genomsnittsbetyg på 4.0 stjärnor baserat på 3 recensioner. Har du en fråga om Air King R120 eller vill du ställa frågor till andra användare av produkten? Ställ en fråga
Sida 1/1
SAVE THESE INSTRUCTIONS
R120 Rev. A 7-18
INSTRUCTION SUPPLEMENTAL
Air King Model R120
NOTE: Make sure to read all instructions included with this unit before starting installation.
Preparing the Fan
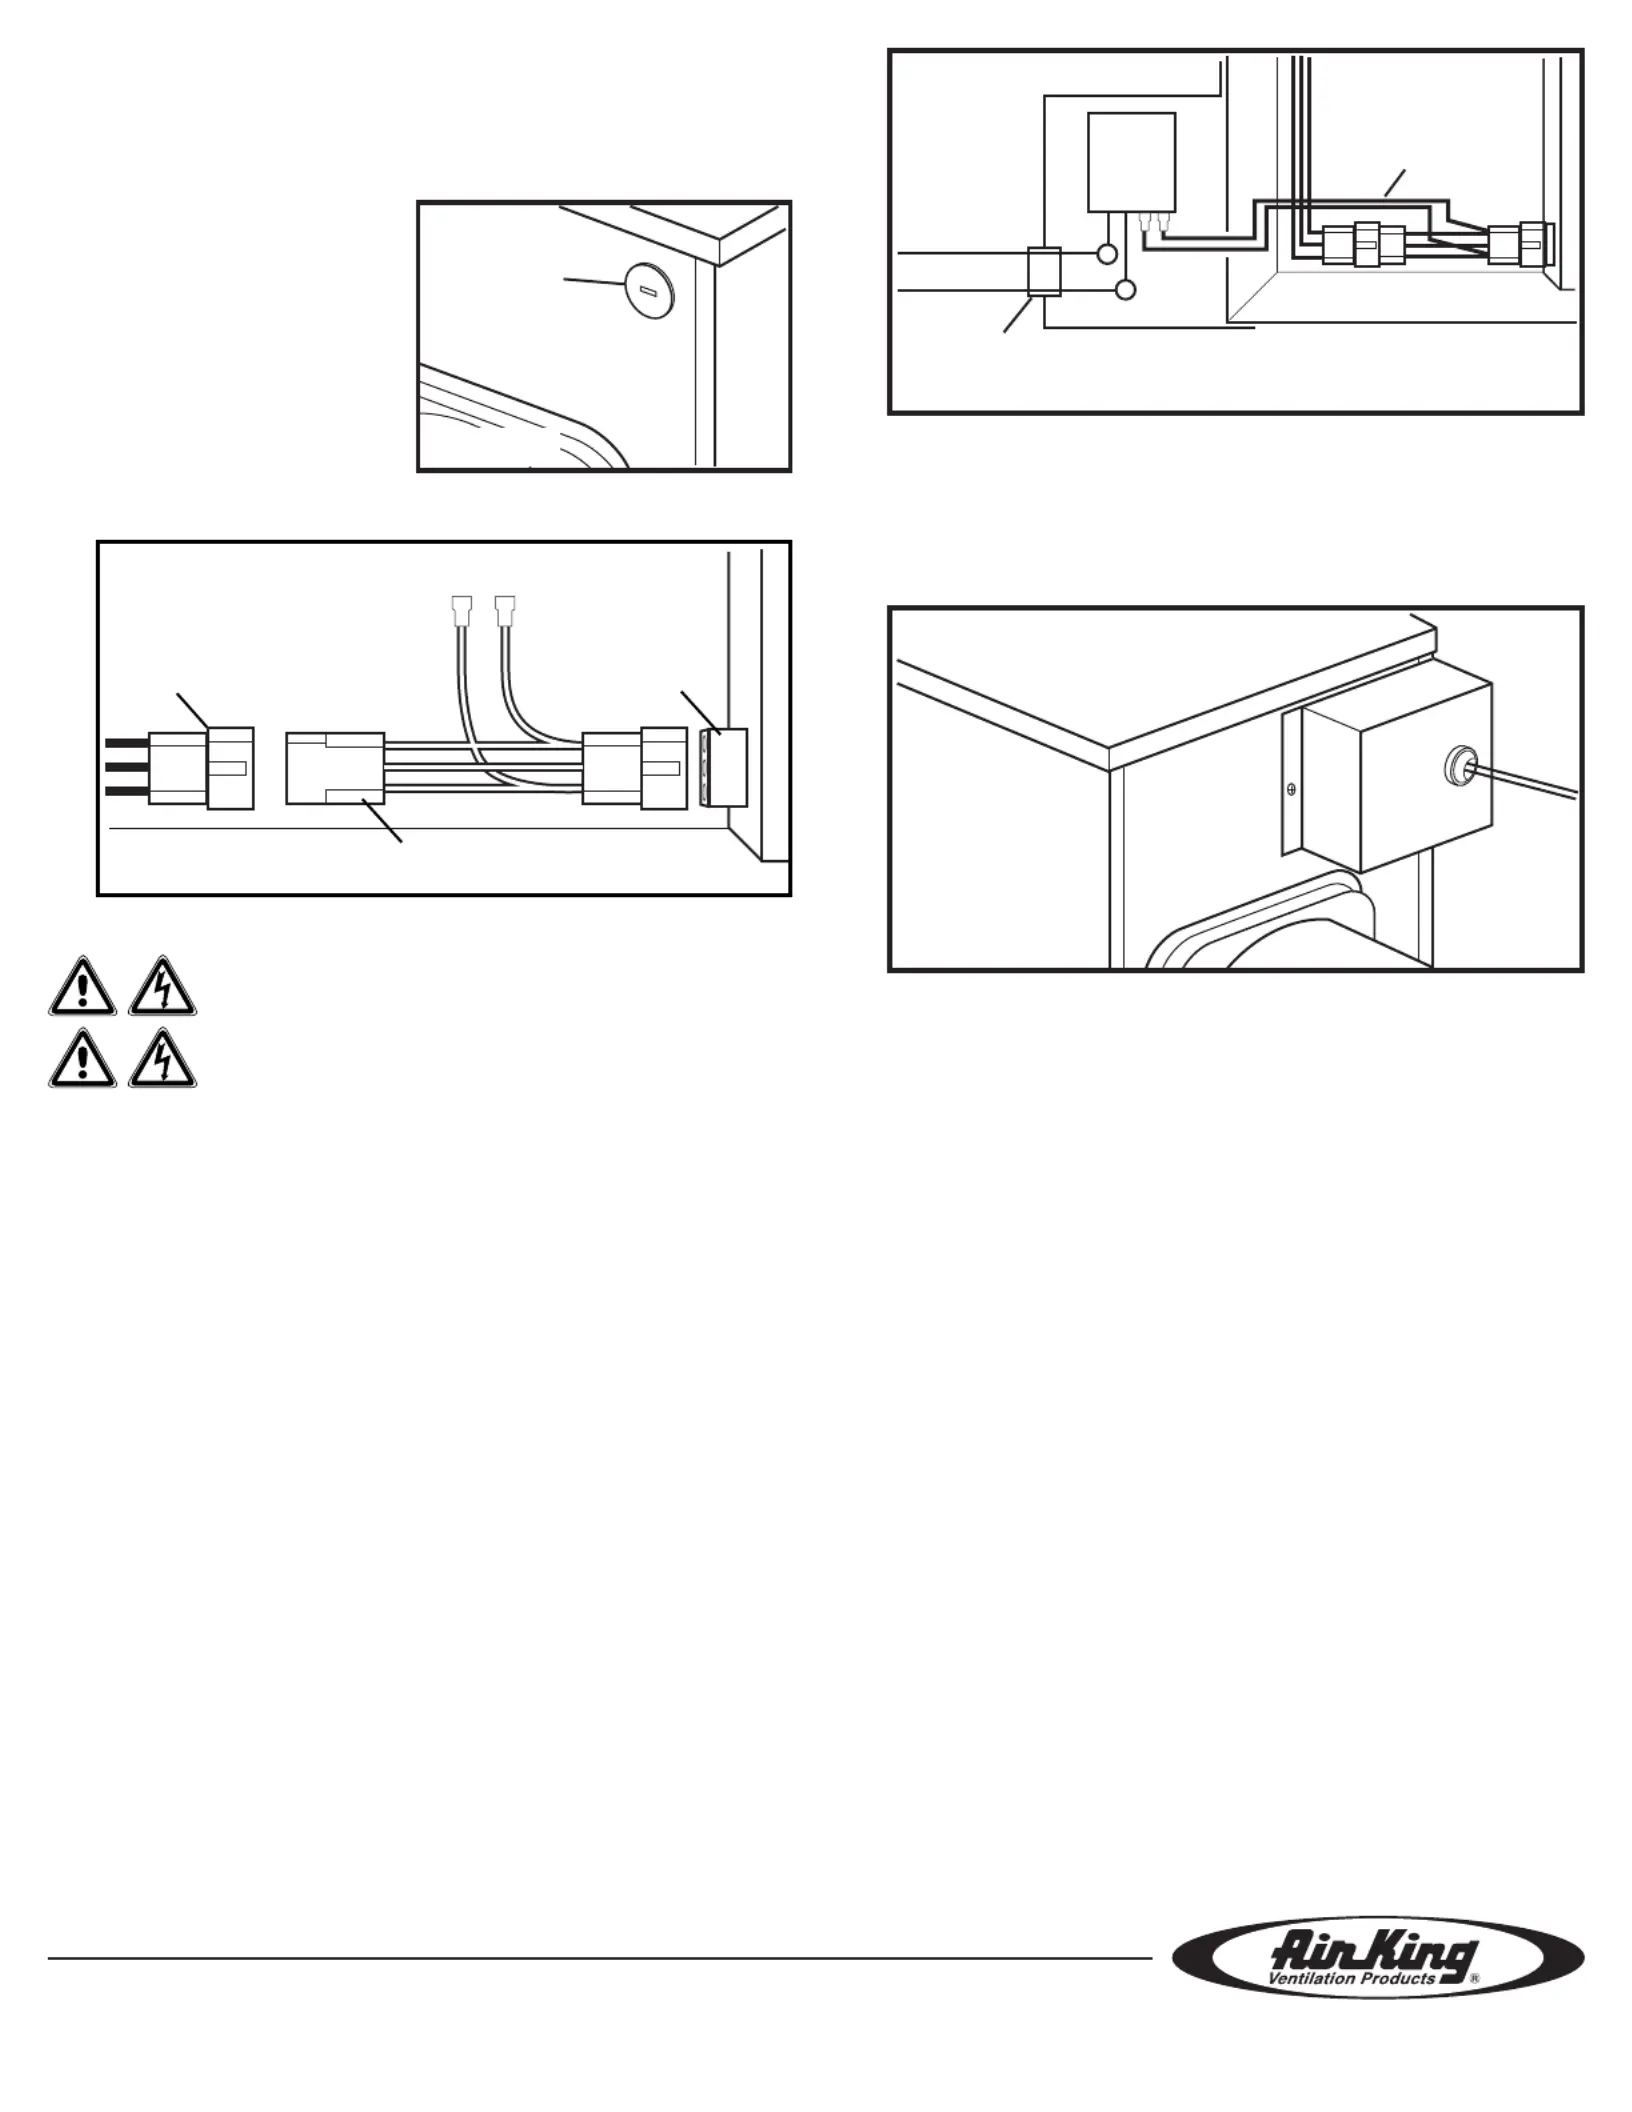
1. Locate the knock-out on the front side
of the fan and remove using a straight-
blade screw driver (Figure 1).
2. Install the included bushing into the
knock-out hole.
3. Open the top access panel of the fan.
On the wire compartment there is a 3
pin molex cable attached to the 3 pin
connector towards the bottom of the
wire compartment. Remove this cable
from the wire compartment and attach
the included new wire harness. Connect the end of the cable you just removed to the
other end of the newly installed wire harness .(Figure 2)
Wiring
CAUTION: MAKE SURE POWER IS SWITCHED OFF AT
SERVICE PANEL BEFORE STARTING INSTALLATION.
CAUTION: ALL ELECTRICAL CONNECTIONS MUST BE
MADE IN ACCORDANCE WITH LOCAL CODES, ORDINANCES, OR
NATIONAL ELECTRICAL CODE. IF YOU ARE UNFAMILIAR WITH METHODS OF INSTALLING
ELECTRICAL WIRING, SECURE THE SERVICES OF A QUALIFIED ELECTRICIAN.
1. Install an appropriate strain relief cable clamp to the relay box. Run two wires carrying
the appropriate rating from the remote location through the strain relief into the relay box.
Connect one of the wires to the yellow wire from the relay marked “NO”. Connect the
other wire to the yellow wire from the relay marked “C”. Use approved methods for all
connections (Figure 3).
Knock-out
Figure 1
2. Feed the two terminals from the wire harness through the bushing that was installed
earlier and connect to the contacts on the relay coill (#7 and #8) .(Figure 3)
Completing the Installation
1. Re-install the access panel of the fan. Carefully tuck all the wires into the relay box and
install onto the fan using the two supplied screws .(Figure 3)
2. Restore power and test the unit.
NOTE: The remotely powered fan will turn on when the controller turns on the local
blower fan.
Figure 4
Relay Box
Screw
West Chester, PA / Brampton ON
www.airkinglimited.com
Original Cable
Figure 2
New Harness
3-Pin
Connector
Figure 3
Fan
Relay Box
Yellow
Black
Yellow
Strain Relief
Terminals
Produktspecifikationer
| Varumärke: | Air King |
| Kategori: | Inte kategoriserad |
| Modell: | R120 |
| Färg på produkten: | Grey, Yellow |
| Bredd: | 410 mm |
| Djup: | 180 mm |
| Höjd: | 460 mm |
| Snäll: | Fietstas |
| Maximal viktbelastning: | 10 kg |
| Monteringsmetod: | Achter |
| Material: | Polyester, Tarpaulin |
| Innehåll: | 48 l |
| Axelband: | Nee |
| Vattentålig: | Ja |
| Reflekterande element: | Ja |
| Innerficka: | Nee |
Behöver du hjälp?
Om du behöver hjälp med Air King R120 ställ en fråga nedan och andra användare kommer att svara dig
Inte kategoriserad Air King Manualer

22 September 2024
2 September 2024
28 Augusti 2024
27 Augusti 2024
25 Augusti 2024
24 Augusti 2024
20 Augusti 2024
20 Augusti 2024
19 Augusti 2024
18 Augusti 2024
Inte kategoriserad Manualer
Nyaste Inte kategoriserad Manualer
9 April 2025
9 April 2025
9 April 2025
9 April 2025
9 April 2025
9 April 2025
9 April 2025
9 April 2025
9 April 2025
9 April 2025