Ambient Weather RG100-B Bruksanvisning


Läs gratis den bruksanvisning för Ambient Weather RG100-B (4 sidor) i kategorin ej kategoriserat. Guiden har ansetts hjälpsam av 4 personer och har ett genomsnittsbetyg på 4.6 stjärnor baserat på 2.5 recensioner. Har du en fråga om Ambient Weather RG100-B eller vill du ställa frågor till andra användare av produkten? Ställ en fråga

Sida 1/4
Rain Gauge Mounting Shelf Manual Product RG100-A and RG100-B Page 1
WMR- / WMR-112A Weather Station Rain Gauge Shelf Manual 968
This instruction manual will take you step- -step through the process of assembling and mounting your Universal Rain Gauge Mounting Shelf. by
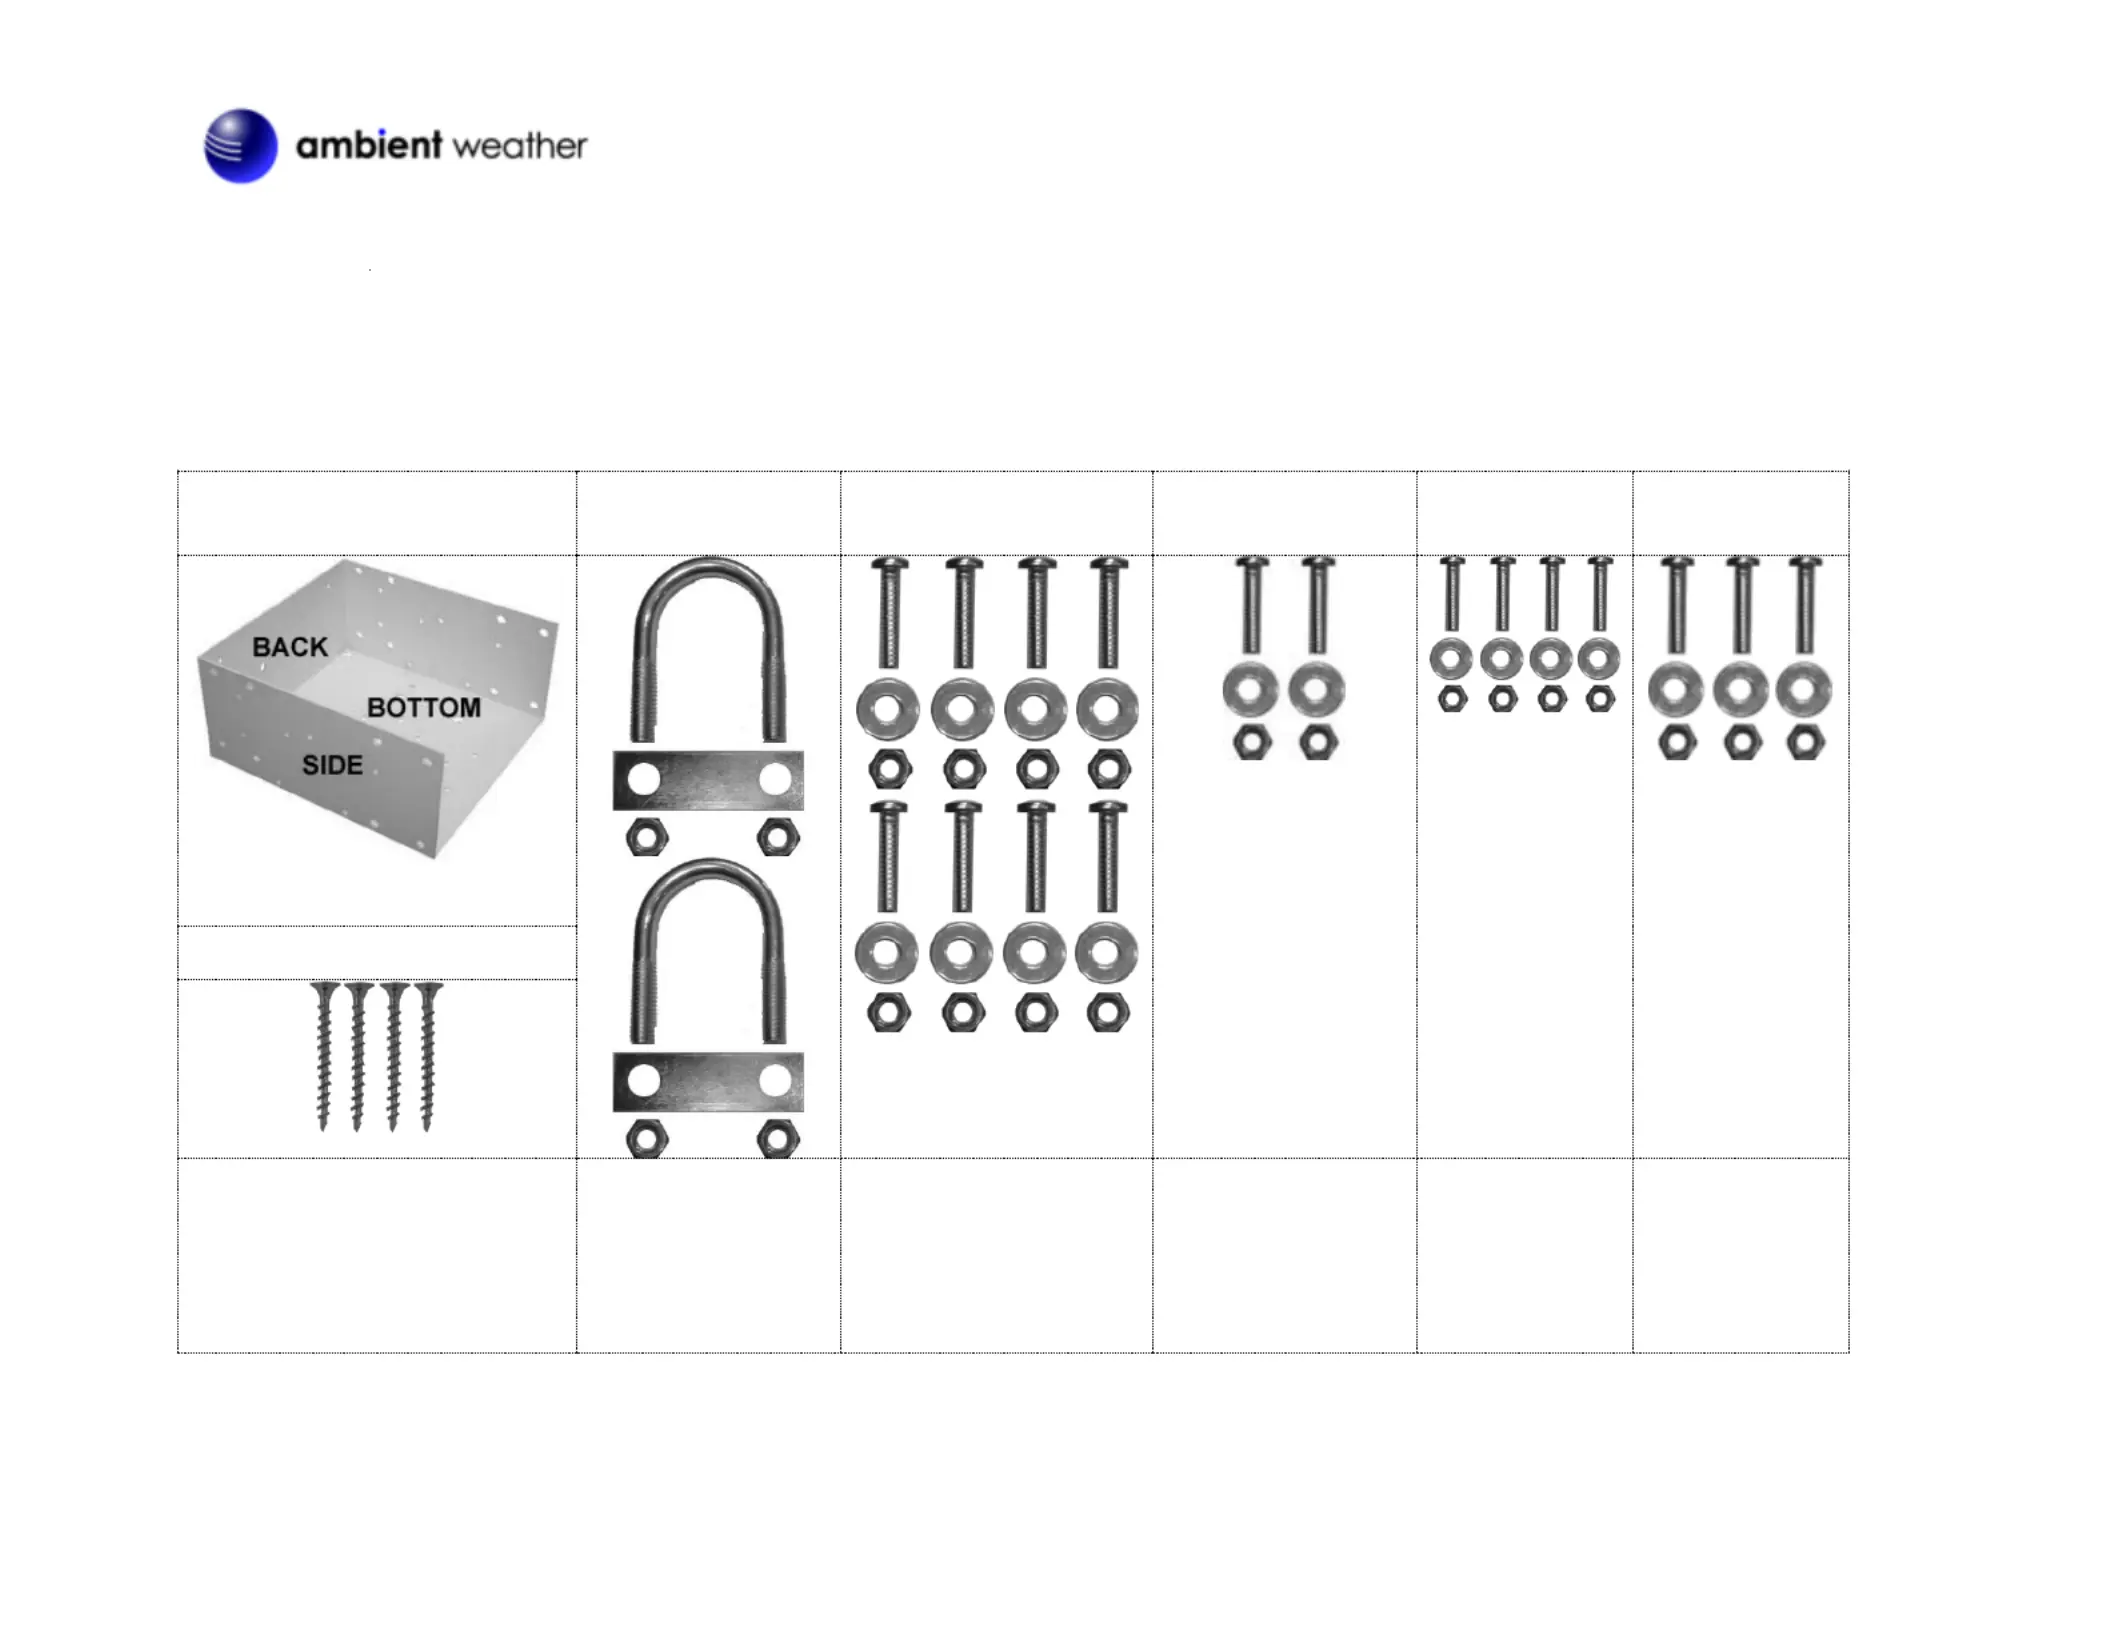
Components
The Universal Rain Gauge Shelf includes the following components:
Mounting Shelf
bolt, plate and nuts
Mounting Hardware (two
units)
Thermo-
Hygrometer
Mounting Hardware
Rain Gauge
Mounting
Hardware
Radiation
Shield Mounting
Hardware
9 1/16" x 8 5/8" x 4 5/16"
Fence Post Mounting Screws
4 x 1-5/8” Deck Screws for
mounting to vertical surface
2x 1 -Bolt ” U
3 U-Bolt washer x
8 x 1 ” Pan Screws
8 x 1/4 ” Flat Washers
2 x 1/2” Pan Screws
2 x Flat Washers #6
2 x 5/16” Locking Hex
Nuts
4 x 3/8” Pan
Screws
4 #4 Flat x
Washers
4 1/4x ” Locking
Hex Nuts
3 x 1/2” Pan
Screws
3 x #8 Flat
Washers
3 x 11/32”
Locking Hex
Nuts
Rain Gauge Mounting Shelf Manual Product RG100-A and RG100-B Page 2
Tools and Materials Needed
In addition to the materials above, you may need some of the following tools
and materials:
Small Phi -Head Screwdriver and Medium Phillips-Head llips
Screwdriver
or 5/16 7/16 1/4Adjustable Wrench ” Wrench, ” Wrench, ” Wrench
and 3211/ ” Wrench
Drill with 3/16” Drill Bit
To drill pilot holes if attaching rain gauge shelf to the top of a post
Location Tips
The Rain Gauge Mounting Shelf must be placed in an open area
unobstructed by structures or trees.
Do not install over or near sprinklers. Continuous moisture may
damage the rain gauge
Make sure the rain gauge is mounted level
Installation Options
There are two dierent mounting congurations for the rain gauge shelf:
Pole or metal pipe with outside diameter between 1” and 1 ½”
On the side of a wooden post
Mounting to Wooden or Fence Post
Reference the gure above. Locate the four fence post mounting holes (1).
Using four x 1- , attach the back plate of the mounting bracket 5/8” lag screws
to the mounting surface the wooden post. Make sure that rain gauge is of
level prior to attaching the lag screws.
Mounting to Metal Pipe or Pole
(cutaway)
Reference the gure above. Locate the four U-Bolt mounting holes (1), (2),
(3) and (4) on the back panel of the rain gauge mounting shelf. Attach the U-
Bolts, U-Bolt Washers nger and 5/16” Hex Nuts as shown in the diagram. Fi
tighten the assembly around the mounting pole. With a level, make sure the
rain gauge shelf is level, and tighten the hex nuts with a wrench.
Mounting the Solar Transmitters
SIDE
2 2
2 2
Reference the gure above. Locate the four solar transmitter mounting
holes (2) on the side panel of the rain gauge mounting shelf. Attach the four
1” p , washers and 7/16” hex nan screws uts and tighten the hex nuts with a
wrench.
Repeat procedure above on the other side panel for the second solar
transmitter.
Rain Gauge Mounting Shelf Manual Product RG100-A and RG100-B Page 3
Mounting the Thermo-Hygrometer (optional, THGR-968)
SIDE
1
1
Reference the gure above. Locate the thermo-hygrometer mounting holes
(1) on the side panel of the rain gauge mounting shelf. Attach the two ½” pan
screws, washers and 5/16” hex nuts and tighten the hex nuts with a wrench.
Mounting the Rain Gauge Bucket
(cutaway)
BOTTOM
1
1 1
1
Reference the gure above. Locate the four rain gauge mounting holes (1)
on the bottom panel of the rain gauge mounting shelf. Attach the 3/8” pan
s hex nuts with a wrench. crews, washers and 1/4” hex nuts and tighten the
The additional holes are used as proper drainage to prevent damage to the
electronic circuitry in the rain gauge.
Mounting the Radiation Shield (optional)
SIDE
3
3 3
Reference the gure above. Locate the three radiation shield mounting
holes (3) on the side panel of the rain gauge mounting shelf. Attach the three
½” pan screws, washers and 11/32” hex nuts and tighten the hex nuts with a
wrench.
Radiation Shield
When assembling the pogata shield, place the thermo/hygro sensor at into
the bottom of the pogata shield as shown in the gure below. Run the
sensor wire outside one of the plates as shown. For further instructions,
please reference the installation guide included with the radiation shield.


Produktspecifikationer

Varumärke: Ambient Weather
Kategori: ej kategoriserat
Modell: RG100-B

Behöver du hjälp?

Om du behöver hjälp med Ambient Weather RG100-B ställ en fråga nedan och andra användare kommer att svara dig