Ambient Weather WeatherMount2 Bruksanvisning
Ambient Weather ej kategoriserat WeatherMount2
Läs gratis den bruksanvisning för Ambient Weather WeatherMount2 (7 sidor) i kategorin ej kategoriserat. Guiden har ansetts hjälpsam av 15 personer och har ett genomsnittsbetyg på 4.6 stjärnor baserat på 5 recensioner. Har du en fråga om Ambient Weather WeatherMount2 eller vill du ställa frågor till andra användare av produkten? Ställ en fråga
Sida 1/7
Page 1
Ambient Weather
6845 W. Frye Road
Chandler, AZ 85226
TEL 480-346-3380 FAX 480-346-3381
www.AmbientWeather.com
Ambient Weather WeatherMount2 Installation Manual
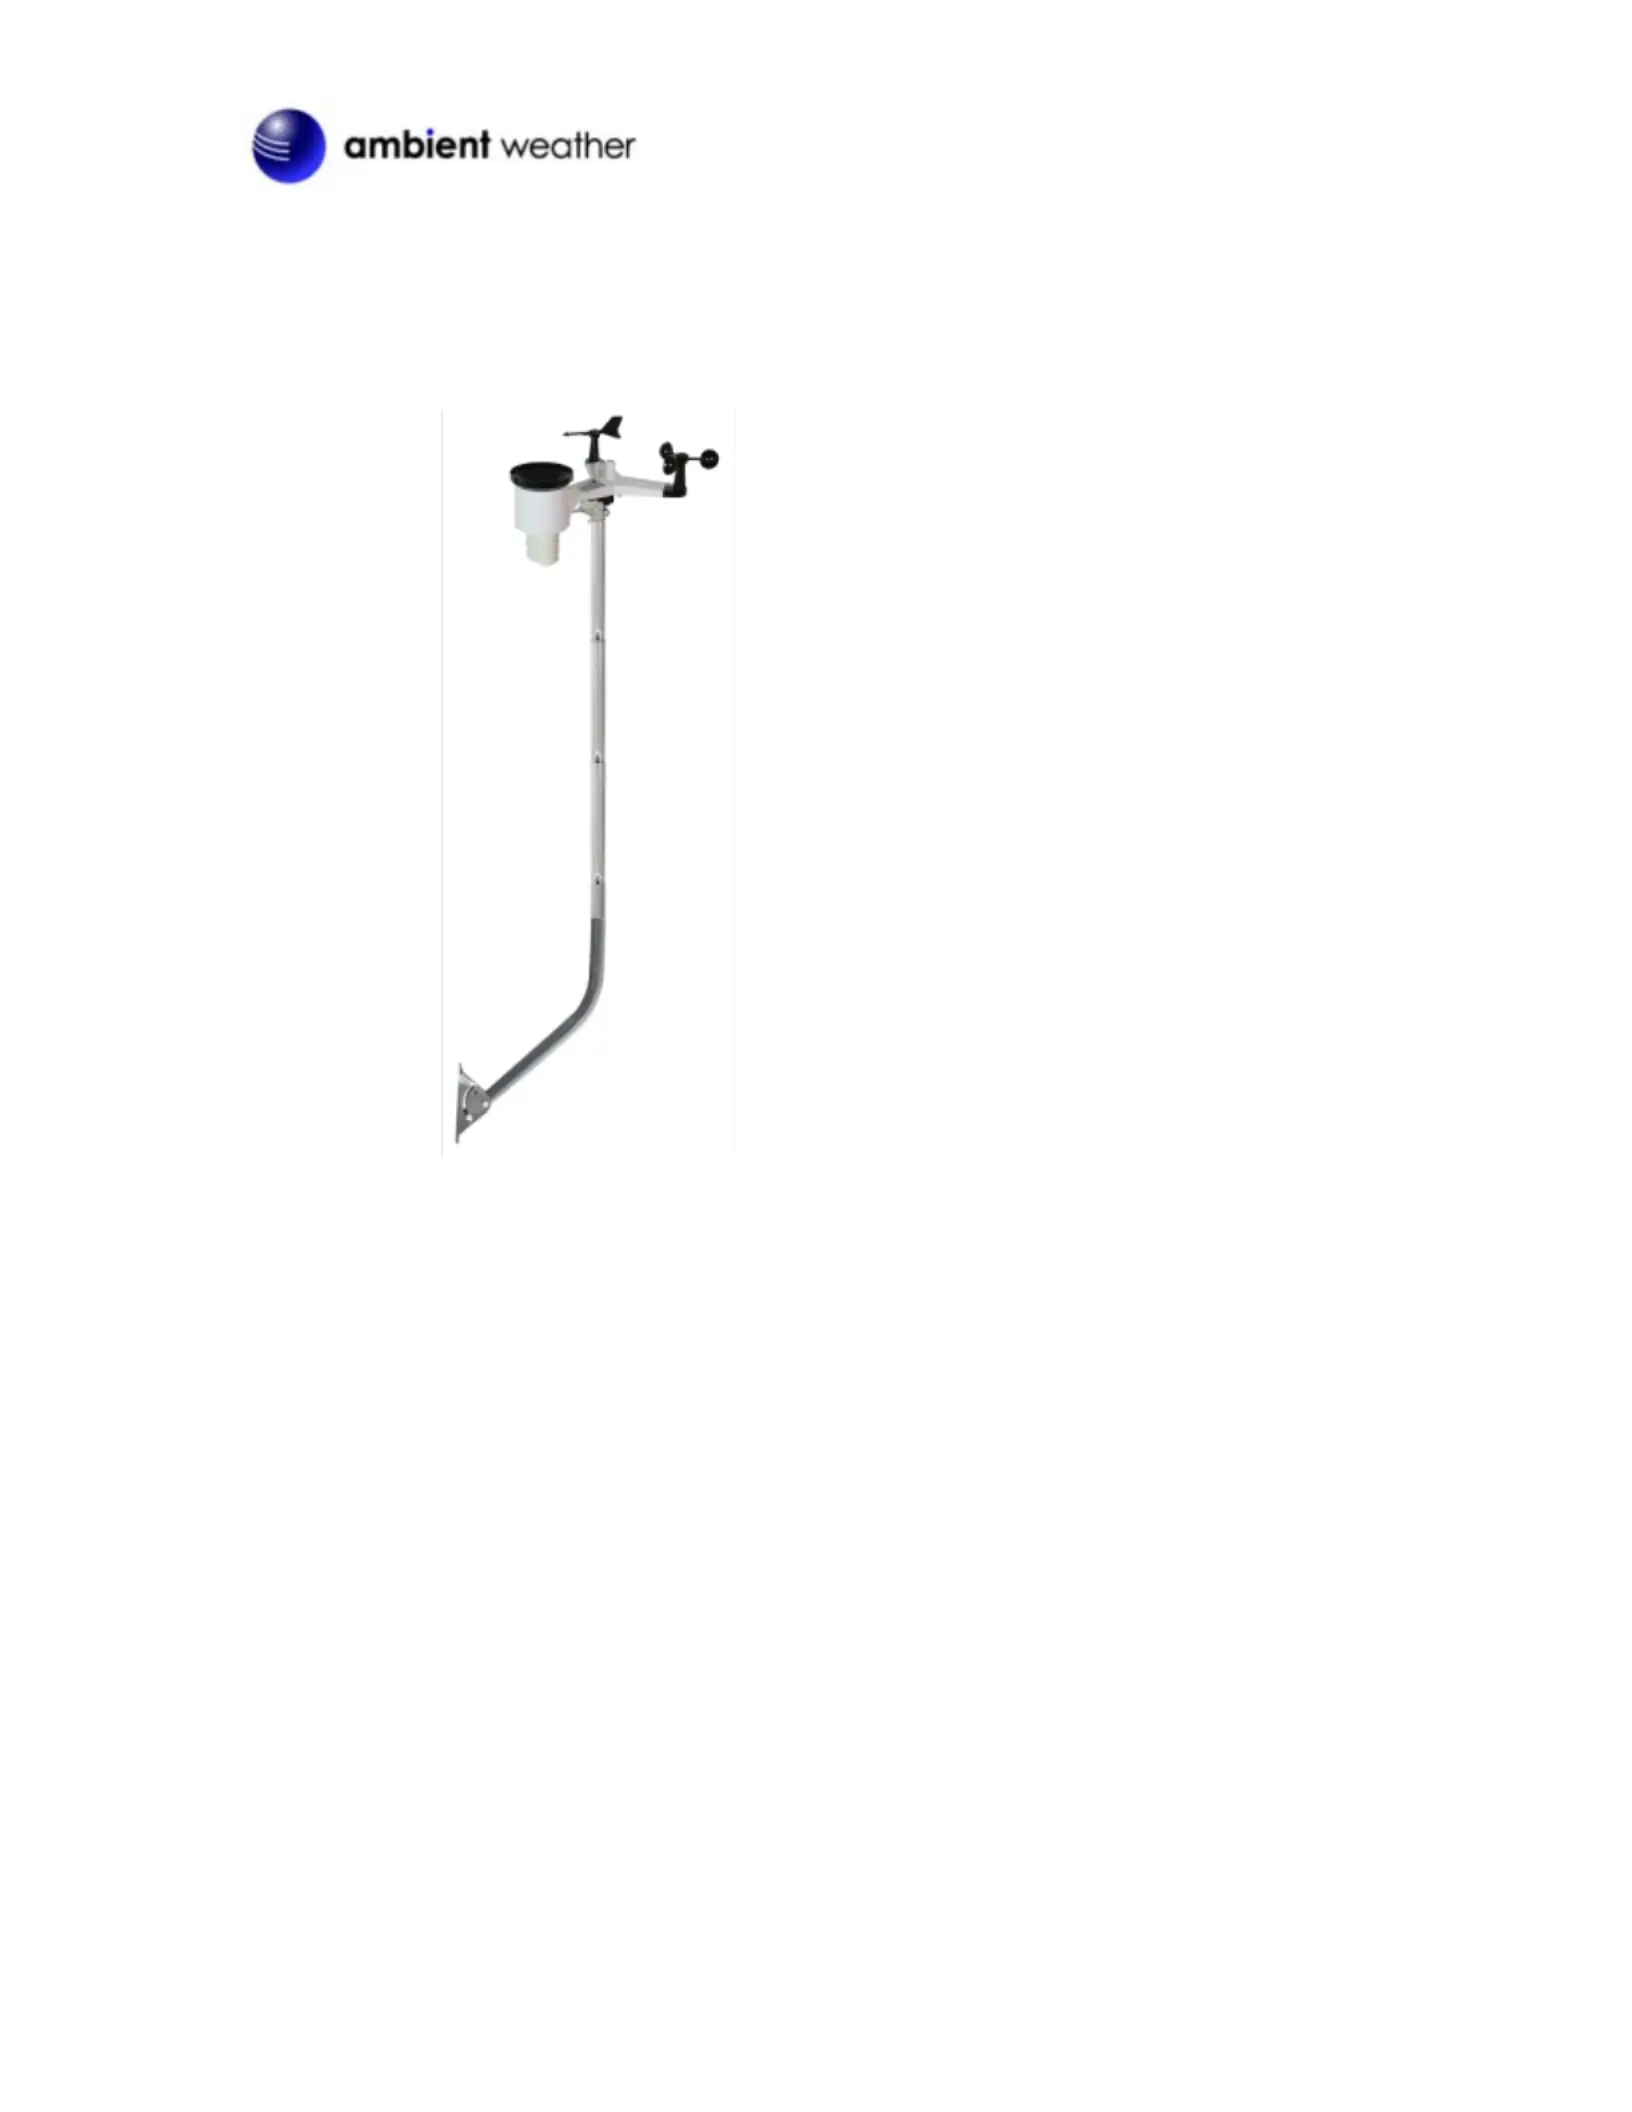
The Ambient Weather WeatherMount2
is a flexible mounting alternative to a
mounting pole or tripod. The mounting
plate provides a fast and easy
installation, and can be mounted on a
pitched surface, flat roof or vertical
surface, such as a gable.
The WeatherMount2 is constructed
from powder coated steel and includes
a galvanized aluminum mast. This
mounting system is strong, durable and
stable. The slender design is simple,
unobtrusive and aesthetically pleasing.
The base can be adjusted to mount on
any pitched roof. Works great with any
weather station.
The small base footprint 4-3/4" x 7"
(mounting footprint 3.75" x 6") allows
four lag screws (included) to be easily
mounted at the apex of your gable. The
mount angles 11" in the horizontal
direction to allow clearance of eve or
roof overhangs.
Includes a galvanized 1-1/4 inch (3.25
cm) O.D., 35 inch (89 cm) long steel
mast with one end crimped for
insertion into the WeatherMount2
bracket. Made of 18 gauge 1008-10
steel tubing, galvanized using the Flo-
Coat (zinc-chromate-polymer) process
for excellent corrosion protection. The
total height of the WeatherMount2 and
mast is approximately 52".
Add one or more mast extensions (EZ-
125-35M) to increase the height of the
mounting assembly by 35" per mast
(reference the "May we also suggest"
section below).
The weather station pictured is not
included.
Figure 1
Components
The WeatherMount2 assembly includes the following components:
Produktspecifikationer
| Varumärke: | Ambient Weather |
| Kategori: | ej kategoriserat |
| Modell: | WeatherMount2 |
Behöver du hjälp?
Om du behöver hjälp med Ambient Weather WeatherMount2 ställ en fråga nedan och andra användare kommer att svara dig
ej kategoriserat Ambient Weather Manualer

19 Augusti 2025
19 Augusti 2025
19 Augusti 2025
18 Augusti 2025
18 Augusti 2025
18 Augusti 2025
18 Augusti 2025
18 Augusti 2025
18 Augusti 2025
18 Augusti 2025
ej kategoriserat Manualer
Nyaste ej kategoriserat Manualer
12 Mars 2026
12 Mars 2026
12 Mars 2026
12 Mars 2026
12 Mars 2026
12 Mars 2026
12 Mars 2026
12 Mars 2026
12 Mars 2026
12 Mars 2026