Artillery Sidewinder X1 Bruksanvisning
Artillery
3D-skrivare
Sidewinder X1
Läs gratis den bruksanvisning för Artillery Sidewinder X1 (2 sidor) i kategorin 3D-skrivare. Guiden har ansetts hjälpsam av 12 personer och har ett genomsnittsbetyg på 4.4 stjärnor baserat på 6.5 recensioner. Har du en fråga om Artillery Sidewinder X1 eller vill du ställa frågor till andra användare av produkten? Ställ en fråga
Sida 1/2

Arllery 3D Printer
Sidewinder X1
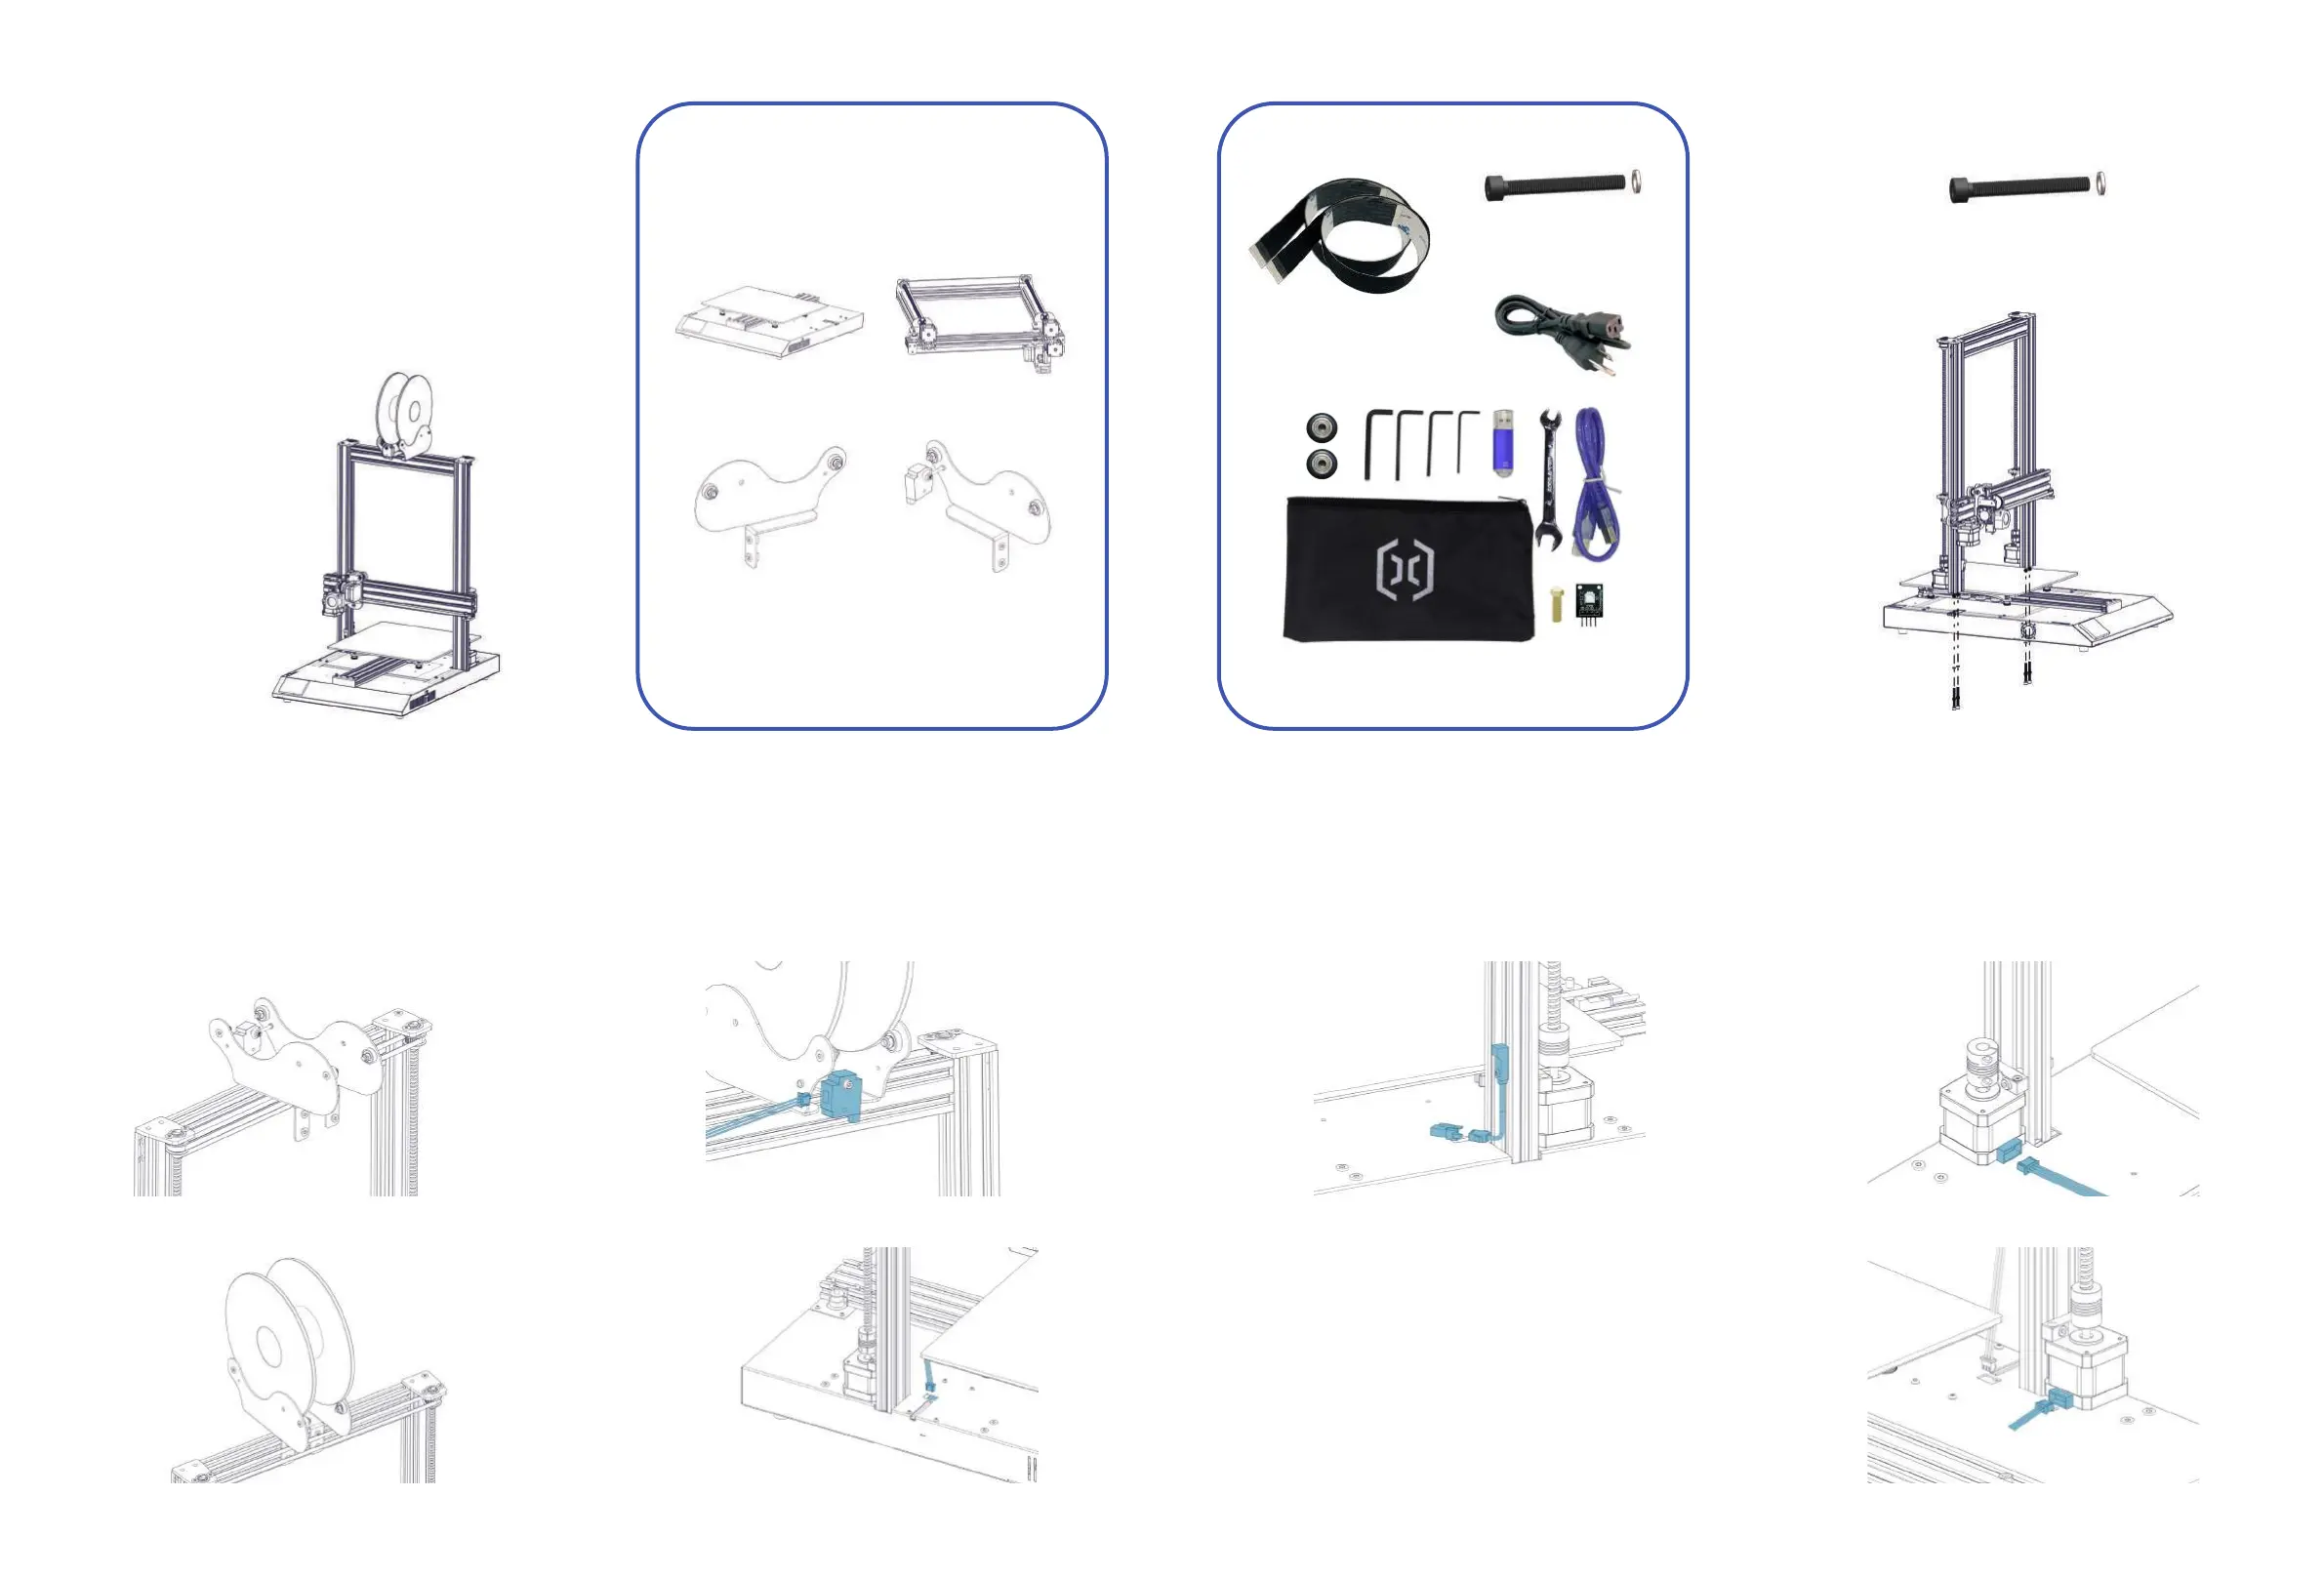
List 1 - Main Modules List 2 - Tools & Spares
M4x45 (5pcs)
Step 1
M4x45 (4pcs)
Fix the XZ gantry to the base with 4pcs of M4x45
screws as shown in the picture below.
Step 2
Fix the spool holder to the top of the printer, adjust
the width to fit the size of your filament spool. Make
sure the filament sensor is facing forward.
Step 3
Connect the filament runout sensor as shown in
pictures below:
Step 4
Connect the Z endstop to the cable.
Step 5
Connect the Z Stepper Motors as shown in the
pictures below:
Front
30pin (1pc)
20pin (1pc)

With this reset buon, it will reset the machine and
cannot resume prinng aer pressed, so be careful
not to press it accidentally.
TipsReset Buon
During prinng, the LED near the nozzle shows the
current prinng status:
- gradually change from blue to violet as the heated
bed gets to target temp.
- gradually change from violet to red as the hotend
gets to temperature.
- change to white to illuminate work surface.
- change to green once print has finished.
- turn off aer the print has finished.
Also, you can change the LED color or turn it off
through the TFT touch screen.
Step 6
Connect the X carriage and filament runout sensor as
shown in picture to the base. Cauon: Please handle
the flexible flat cable (FFC) with care, make sure it
goes straight in when plugging them in, and make
sure they’re sing flush inside the connectors.
Step 7
Connect the FFC to the board on X gantry.
Step 8
Adjust the tension of all the wheels on the machine. Try
to turn the wheels without forcing them. If the wheel
turns freely or without much effort, then it is too loose.
To ghten the wheels, rotate the eccentric nuts slightly
unl the wheel is snug against the frame.
Step 8
For wheels under build plate, push the wheels (on the
non-eccentric nut side) ght against the aluminum
extrusion, then adjust the front and rear wheels by
turning the eccentric nuts, adjust the middle one at
last.
Step 9
Now you can connect power and turn on the machine.
On the touch screen, go to Tools -> Heat to pre-heat
the nozzle and bed. Wait ll both heated up and
stead, go to Tools -> Level:
Move the nozzle to all four corners, adjust the height
by turning the knob below the bed. Slide an A4 paper
between the nozzle and the bed, adjust the height so
that the piece of paper slides, with just a bit of drag,
in all locaons of the bed.
You may need to do the same process twice because
an adjustment in one corner will affect others.
Last update date: 6 September, 2019
This manual is updated to the date of prinng.
Please refer to the electronic version if in doubt.
Artillery 3D Technology Co., Ltd.
For detailed warranty policy, please visit
Customer SupportFacebook Page
Produktspecifikationer
Varumärke: | Artillery |
Kategori: | 3D-skrivare |
Modell: | Sidewinder X1 |
Behöver du hjälp?
Om du behöver hjälp med Artillery Sidewinder X1 ställ en fråga nedan och andra användare kommer att svara dig
3D-skrivare Artillery Manualer
4 September 2024
3D-skrivare Manualer
- XYZprinting
- Craftbot
- BQ
- PP3DP
- Polaroid
- Wanhao
- Snapmaker
- Leap Frog
- Renkforce
- GooVer
- Anycubic
- MakerBot
- Zortrax
- Flashforge
- BFB
Nyaste 3D-skrivare Manualer
2 Mars 2025
27 Januari 2025
25 Januari 2025
17 Januari 2025
17 Januari 2025
31 December 2025
27 December 2024
27 December 2024
27 December 2024
27 December 2024