Audac CENA7 Bruksanvisning
Läs gratis den bruksanvisning för Audac CENA7 (2 sidor) i kategorin högtalare. Guiden har ansetts hjälpsam av 29 personer och har ett genomsnittsbetyg på 4.6 stjärnor baserat på 4 recensioner. Har du en fråga om Audac CENA7 eller vill du ställa frågor till andra användare av produkten? Ställ en fråga
Sida 1/2
INSTALLATION MANUAL
CENA SERIES SPRING-FIT™ CEILING SPEAKERS
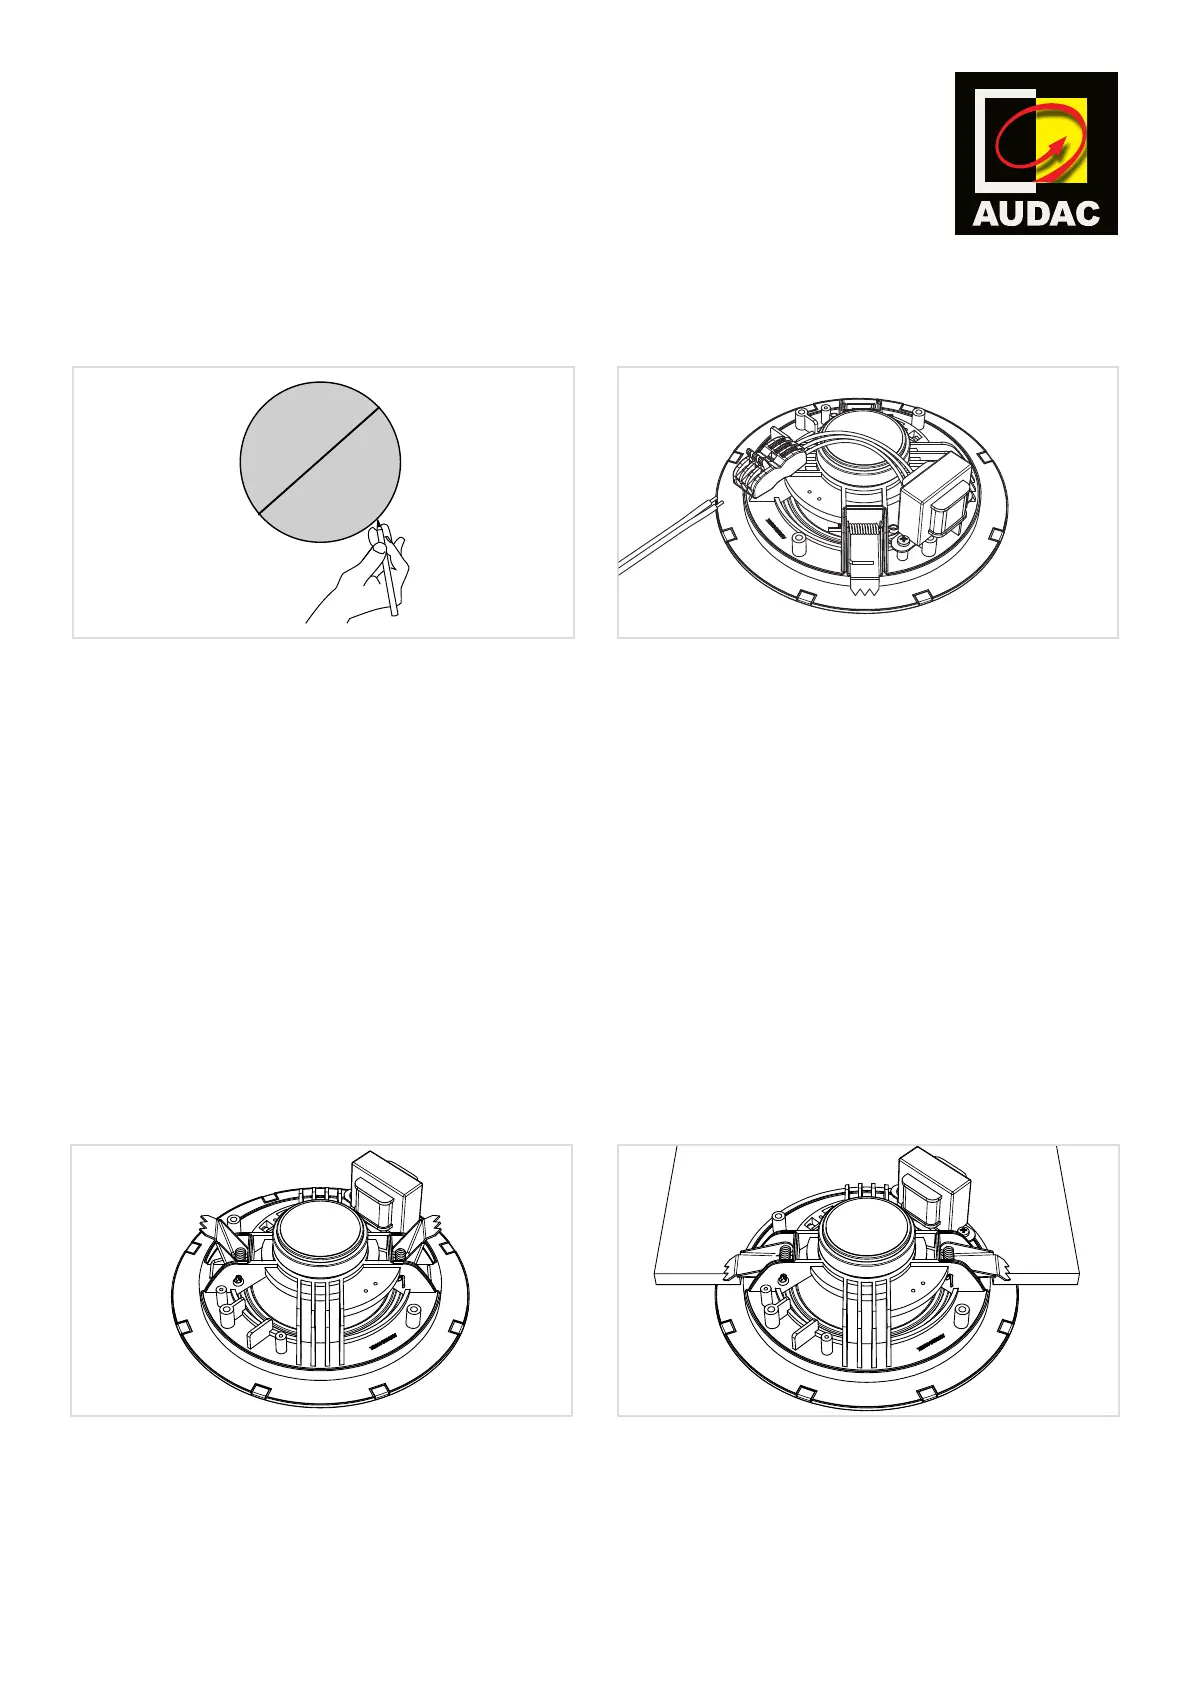
STEP 1STEP 2
Cut a hole on the desired mounting location in the
ceiling. Make sure the dimension is matching the
cut-out measurement for the installing loudspeaker
• CENA306 = Ø 80 mm
• CENA506 = Ø 150 mm
• CENA706 = Ø 167 mm
• CENA812 = Ø 207 mm
Double check if there are no cables or other
obstructions behind the mounting surface before
making the cut-out.
Connect the wires coming from the amplier to the
SnapConnect™ on the rear of the loudspeaker.
The correct power tapping is chosen by connecting the
appropriate terminals of the connector. A description
of the power tap selection is shown on the magnet
sticker on the rear side of the loudspeaker.
CENA306/506/706:
• Red: 6 Watt / 1667 Ω
• White: 3 Watt / 3333 Ω
• Black: COM
CENA812:
• Red: 12 Watt / 833 Ω
• White: 6 Watt / 1667 Ω
• Black: COM
Ø Diameter
STEP 3
Bend the spring loaded mounting arms inwards by
pushing them by ngers, making them t through the
provided ceiling cut-out.
STEP 4
Insert the speaker through the provided ceiling cut-
out, make sure the spring loaded mounting arms are
behind the clamping surface and release them. The
ceiling is clamped between the mounting arms and
the speaker bae and is installed correctly.
The speaker is now ready for use.
Produktspecifikationer
| Varumärke: | Audac |
| Kategori: | högtalare |
| Modell: | CENA7 |
Behöver du hjälp?
Om du behöver hjälp med Audac CENA7 ställ en fråga nedan och andra användare kommer att svara dig
högtalare Audac Manualer

6 Oktober 2025
31 Juli 2025
30 Juli 2025
29 Juni 2025
29 Mars 2025
29 Mars 2025
1 Mars 2025
18 December 2024
18 December 2024
6 Oktober 2024
högtalare Manualer
Nyaste högtalare Manualer
3 April 2026
3 April 2026
2 April 2026
2 April 2026
1 April 2026
1 April 2026
30 Mars 2026
30 Mars 2026
29 Mars 2026
29 Mars 2026