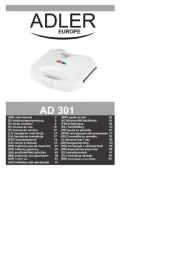
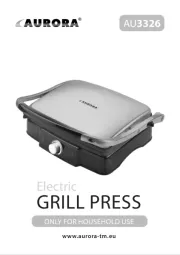
Aurora AU 3326 Bruksanvisning
Aurora
sandwich clip
AU 3326
Läs gratis den bruksanvisning för Aurora AU 3326 (14 sidor) i kategorin sandwich clip. Guiden har ansetts hjälpsam av 3 personer och har ett genomsnittsbetyg på 4.6 stjärnor baserat på 2 recensioner. Har du en fråga om Aurora AU 3326 eller vill du ställa frågor till andra användare av produkten? Ställ en fråga
Sida 1/14

AU3326
ONLY FOR HOUSEHOLD USE
ww w.aurora-tm.eu
GRILL PRESS
Electric

2
1. Pokrętło
2. Powierzchnia robocza 1
3. Blokada uchwytu
4. Drenowanie oleju i smaru
5. Powierzchnia robocza 2
6. Lampka sygnalizacyjna 1
7. Termoregulator
8. Lampka sygnalizacyjna 2
9. Obudowa
10. Łopatka
11. Pojemność na tłuszcz (2 szt.)
1. Handle
2. Working surface 1
3. Handle lock
4. Oil and grease drainage
5. Working surface 2
6. Light indicator 1
7. Thermoregulator
8. Light indicator 2
9. Body
10. Shovel
11. Capacity for fat (2 pc.)
1. Rankenėlė
2. Darbinis paviršius 1
3. Rankenos spyna
4. Alyvos ir riebalų drenažas
5. Darbinis paviršius 2
6. Kontrolinė lemputė 1
7. Temperatūros reguliatorius
8. Kontrolinė lemputė 2
9. Korpusas
10. Mentele
11. Riebalų talpa (2 Vnt.)
1. Rokturis
2. Darba virsma 1
3. Rokturis atslēga
4. Eļļas un tauku drenāža
5. Darba virsma 2
6. Gaismas indikators 1
7. Termostats
8. Gaismas indikators 2
9. Korpuss
10. Lāpstiņa
11. Tauku jauda (2 gab.)
1. Käepide
2. Tööpind 1
3. Käepide lukuga
4. Õli ja rasva kuivendamine
5. Tööpind 2
6. Märgutuli 1
7. Termoregulaator
8. Märgutuli 2
9. Korpus
10. Spaatliga
11. Rasvasisaldus (2 tk.)
1. Ручка
2. Рабочая поверхность 1
3. Фиксатор ручки
4. Канал для слива масла
5. Рабочая поверхность 2
6. Индикатор 1
7. Терморегулятор
8. Индикатор 2
9. Корпус
10. Лопатка
11. Емкость для жира (2 шт.)
1. Ручка
2. Робоча поверхня 1
3. Фіксатор ручки
4. Канал для зливу масла
5. Робоча поверхня 2
6. Світловий індикатор 1
7. Терморегулятор
8. Світловий індикатор 2
9. Корпус
10. Лопатка
11. Ємність для жиру (2 шт.)
SPECIFICATIONS
Power supply 220-240 V ~50-60 Hz
Power 1800-2000 Watt
1. Mâner
2. Suprafaţa de lucru 1
3. Mânerul de blocare
4. Drenarea uleiului și a grăsimilor
5. Suprafaţa de lucru 2
6. Indicator luminos 1
7. Regulator de temperatură
8. Indicator luminos 2
9. Carcasă
10. Spatulă
11. Capacitatea pentru grăsimi (2 buc.)
ENG
Components
identication
RUS
Описание схемы
прибора
UKR
Опис схеми
приладу
POL
Opis schematu
urządzenia
LTU
Prietaiso schemos
aprašymas
LVA
Ierīces shēmas
apraksts
1. Fogantyú
2. Munkafelület 1
3. Fogantyú zár
4. Olaj- és zsírlevezetés
5. Munkafelület 2
6. Visszajelző lámpa 1
7. Hőfok szabályozó
8. Visszajelző lámpa 2
9. Test
10. Spatula
11. A zsír kapacitása (2 db.)
HUN
Készülék
áramkörének leírása
RO/MD
Schema
descriere produs
EST
Seadme
skeemi kirjeldus
3
1
4
5
6
7
8
9
2
1. Дръжте
2. Работна повърхност 1
3. Дръжте ключалката
4. Канал за източване на маслото
5. Работна повърхност 2
6. Показател 1
7. Термостат
8. Показател 2
9. Корпус
10. Шпатула
11. Капацитет за мазнини (2 бр.)
BUL
Описание на
схемата изделия
10
11

3
ENG
Please read this manual carefully before using the product to avoid
damage during use. Before switching on the product, make sure
that the technical specications of the product shown on the label
correspond to the parameters of the electric network. Incorrect use
can lead to damage of the product, cause material damage or cause
damage to the health of the user. Use only for household purposes
in accordance with this Manual. The product is not intended for
commercial use. Use the product only for its intended purpose. Do
not use the product near the kitchen sink, outdoors and in rooms
with high humidity. Always unplug the product from the electrical
network when it is not in use, as well as before assembly, disas-
sembly and cleaning. The product must not be unattended while
it is connected to the electric network. Make sure that the power
cord does not touch the sharp edges of furniture and hot surfaces.
To avoid electric shock, do not attempt to disassemble or repair
the product by yourself. When disconnecting the product from the
electric network, do not pull on the power cord, hold the plug. Do
not twist or wind the cord. The product is not designed to be oper-
ated by an external timer or a separate remote control system. The
product is not intended for use by persons with reduced physical,
sensory or mental abilities, or if they have no experience or knowl-
edge, if they are not controlled or instructed about the use of the
device by the person responsible for their safety Do not allow chil-
dren to use the product as a toy. Do not use accessories that are not
included in the delivery suite. ATTENTION! Do not allow children to
play with plastic bags or wrapping lm. THREAT OF SUFFOCATION!
ATTENTION! ATTENTION!Do not use this product outdoors. Be es-
pecially careful if children under 8 years or people with disabilities
are close to the product in use. ATTENTION! Do not use this product
near combustible materials, explosives, or self-igniting gases. Do not
install this product near a gas or electric stove, or other heat sources.
Do not expose the product to direct sunlight. ATTENTION! Do not
allow children under 8 years to touch the body, the power cord and
the plug of the power cord while the product is in operation. If the
product has been kept for a while at a temperature below 0ºC, it
must be left at room temperature for at least 2 hours before switch-
ing it on. ATTENTION! Do not handle the power cord and the power
cord plug with wet hands. ATTENTION! Unplug the product from
the electric network every time before cleaning, and also if you do
not use it. ATTENTION! When connecting the product to an elec-
trical network do not use an adapter. ATTENTION! The power cord
plug has a wire and a grounding prong. Connect the product only
to a properly grounded socket. ATTENTION! To avoid overloading
the electric network, do not connect the product with other power-
ful electrical appliances to the same electric network. ATTENTION!
Remove food immediately after preparation. A very long time of
its presence in the switched on device can lead to their ignition.
ATTENTION! During operation, the metal parts become very hot.
ATTENTION! Never remove products with sharp objects, they can
damage the non-stick coating. Do not place the product in the im-
mediate vicinity of the wall and furniture, the distance from the de-
vice to any surfaces should be at least 30-40 cm. ATTENTION! Do
not cover the appliance with towels or other objects while using the
appliance. ATTENTION! Install the appliance on a at and stable sur-
face, and away from the edge of the table. ATTENTION! When pre-
paring, do not use aluminum foil, paper packaging or other items, as
they can cause a re. ATTENTION! For additional protection in the
power circuit, it is advisable to install a residual current device with
a rated operating current not exceeding 30 mA. To install the device,
contact a specialist.
SECURITY MEASURES
Remove the device from its packaging, remove all packaging materials. Wipe the case with a damp cloth and wipe dry. Install the appliance
on a at, heat-resistant surface, away from kitchen heat sources.
BEFORE FIRST USE
Always unplug the product from the wall outlet before cleaning. Al-
low the appliance to cool completely. Remove the product residues,
wipe the non-stick surface with a damp cloth, using a mild detergent,
and then wipe dry. Do not use abrasive cleaners or metal scourers for
cleaning, as they can damage the internal non-stick surface or the
appearance of the product. Do not immerse the appliance in water!
CLEANING AND CARE
Before storage, make sure that the product is disconnected from electric network. Complete all the requirements of the CLEANING AND
MAINTENANCE section. Keep the product in a dry, cool place and out of the reach of children
STORAGE
Connect the product to the mains and the indicator light (1) will
light up. Using the thermostat knob, set the desired heating tem-
perature. After approximately 5-7 minutes the working surfaces
have reached the required temperature, the indicator light (2) will
light up. The product is ready for use. After sliding the latch on the
handle, open the product. Under the drain of the liquid and grease,
install a heat-resistant container. Be careful when installing products
on a work surface, beware of burns splashes of fat or juice, the prod-
uct is isolated. If it is necessary to fry the food on both sides (contact
method), use the handle to close the top working surface (1). Use
the grill as an open (non-contact method) surface. Grasp the handle
and fully open the grill. Under the drain gutters of liquid and grease,
install heat-resistant containers. Follow the above recommenda-
tions for switching on and setting the temperature. After complet-
ing the cooking process, turn the thermostat knob to the extreme
position counter-clockwise. Disconnect the grill from the mains.
Before cleaning the product, allow it to cool completely.
PREPARING
Before using the device for the rst time, apply a small amount of
vegetable oil to the non-stick coating of the work surfaces and dis-
tribute it. Remove excess oil with a paper towel, close the product,
switch it on for 5-10 minutes, then turn it o. At the initial start-up,
new heating elements can emit a specic odor and a small amount
of smoke. This is not a malfunction.
EXPLOITATION
This symbol on the product and packaging means that used electrical and electronic products, as well as batteries, should not be disposed of with
household waste. They need to be taken to specialized reception points. For more information on existing waste collection systems, contact your local
authorities. Correct disposal will help to save valuable resources and prevent possible negative impact on human health and the state of the environ-
ment that may result from improper handling of waste.
Produktspecifikationer
Varumärke: | Aurora |
Kategori: | sandwich clip |
Modell: | AU 3326 |
Behöver du hjälp?
Om du behöver hjälp med Aurora AU 3326 ställ en fråga nedan och andra användare kommer att svara dig
sandwich clip Aurora Manualer
28 Juli 2025
27 Juli 2025
27 Juli 2025
sandwich clip Manualer
Nyaste sandwich clip Manualer
24 Juli 2025
24 Juli 2025
23 Juli 2025
19 Juli 2025
18 Juli 2025
17 Juli 2025
17 Juli 2025
16 Juli 2025
29 Juni 2025
25 Juni 2025