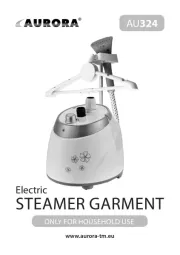
Aurora AU324 Bruksanvisning
Läs gratis den bruksanvisning för Aurora AU324 (13 sidor) i kategorin ångtvätt. Guiden har ansetts hjälpsam av 3 personer och har ett genomsnittsbetyg på 4.9 stjärnor baserat på 2 recensioner. Har du en fråga om Aurora AU324 eller vill du ställa frågor till andra användare av produkten? Ställ en fråga
Sida 1/13

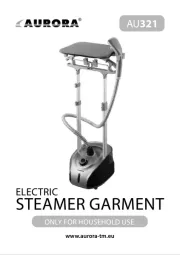
AU324
ONLY FOR HOUSEHOLD USE
STEAMER GARMENT
Electric
www.aurora-tm.eu

2
SPECIFICATIONS
Power supply 220-240V ~50-60 Hz
Max. power 1700 W
1.Розпилювач
2. Тримач
3. Складний вішак
4. Телескопічна стійка
5. Паровий шланг
6. Кріплення стійки
7. Кріплення шланга
8. Регулятор ступеня відпарювання
9. Світловий індикатор
10. Ємність для води
11. Корпус
12. Зливна пробка
13. Зажим для брюк
14. Щітка для видалення ворсу
15. Зажим (2 шт.)
16. Термічна рукавиця
UKR
Опис схеми
приладу
RUS
Описание схемы
прибора
1. Распылитель
2. Держатель
3. Складная вешалка
4. Телескопическая стойка
5. Паровой шланг
6. Крепление стойки
7. Крепление шланга
8. Регулятор степени отпаривания
9. Световой индикатор
10. Емкость для воды
11. Корпус
12. Сливная пробка
13. Зажим для брюк
14. Щетка для удаления ворса
15. Зажим (2 шт.)
16. Термическая рукавица
POL
Opis schematu
urządzenia
1. Spryskiwacz
2. Posiadacz
3. Składany wieszak
4. Stojak teleskopowy
5. Wąż parowy
6. Zamontuj stojak
7. Mocowanie węża
8. Regulator stopnia parowania
9. Lampka sygnalizacyjna
10. Pojemnik na wodę
11. Obudowa
12. Korek spustowy
13. Klips do spodni
14. Szczotka do usuwania włosków
15. Klips (2 szt.)
16. Rękawica termiczna do prasowania
ENG
Components
identication
1. Sprinkler
2. Holder
3. Foldable Hanger
4. Telescopic stand
5. Steam hose
6. Mount the rack
7. Hose xing
8. Steaming regulator
9. Light indicator
10. Water tank
11. Body
12. Drain plug
13. Clamp for trousers
14. Brush for removing lint
15. Clamp (2 pc.)
16. Thermal mitt
LTU
Prietaiso schemos
aprašymas
1. Purkštuvas
2. Turėtojas
3. Sulankstoma pakaba
4. Teleskopinis stovas
5. Garų žarna
6. Sumontuokite stelažą
7. Žarnų laikiklis
8. Garų tiekimo lygio
reguliatorius
9. Kontrolinė lemputė
10. Vandens talpykla
11. Korpusas
12. Išleidimo kamštis
13. Spaustukas kelnėms
14. Šepetėlis pūkų šalinimui
15. Spaustukas (2 Vnt.)
16. Apsauginė pirštinė garinimui
LVA
Ierīces shēmas
apraksts
1. Izsmidzinātājs
2. Turētājs
3. Saliekams pakaramais
4. Teleskopisks statīvs
5. Tvaika šļūtene
6. Uzstādiet plauktu
7. Šļūteņu stiprinājums
8. Tvaicēšanas pakāpes regulators
9. Gaismas indikators
10. Ūdens tvertne
11. Korpuss
12. Noslēdziet aizbāzni
13. Bikšu klipsis
14. Plūksnu noņemšanas suka
15. Klipsis (2 gab.)
16. Gludināšanas termiskais
aizsargcimds
EST
Seadme
skeemi kirjeldus
1. Pihusti
2. Omanik
3. Kokkupandav riputi
4. Teleskoopvars
5. Auruvoolik
6. Paigaldage hammas
7. Vooliku kinnitus
8. Aurutamise taseme regulaator
9. Märgutuli
10. Veenõu
11. Korpus
12. Tühjendage kork
13. Viikija
14. Hari riidekiudude
eemaldamiseks
15. Klamber (2 tk.)
16. Kaitsekinnas
RO/MD
Schema
descriere produs
1. Pulverizator
2. Deținător
3. Cuier pliabil
4. Suport telescopic
5. Furtun pentru aburi
6. Montați rackul
7. Suport pentru furtun
8. Regulatorul debitului de aburi
9. Indicator luminos
10. Rezervor pentru apă
11. Carcasă
12. Scoateți dopul
13. Clemă pentru pantaloni
14. Perie pentru înlăturarea
scamelor
15. Clemă (2 buc.)
16. Mănuşă termică pentru călcat
HUN
Készülék
áramkörének leírása
1. Permetező
2. Tartó
3. Összecsukható akasztó
4. Teleszkópos állvány
5. Gőz vezeték
6. Szerelje fel a racket
7. Tömlő tartó
8. Páramennyiég szabályozó
9. Visszajelző lámpa
10. Víztartály
11. Test
12. Drain dugó
13. Nadrág csipesz
14. Szösz eltávolító kefe
15. Bilincs (2 db.)
16. Thermo kesztyű
vasaláshoz
1
13
14
15
4
5
6
7
8
9
10
11
Pic. 1:
2
3
12
16
1. Спрей бутилка
2. Държач
3. Сгъваема закачалка
4. Телескопичен прът
5. Маркуч за пара
6. Стойка за монтаж
7. Монтиране на маркуч
8. Контрол на нивото на парата
9. Светлинен индикатор
10. Резервоар за вода
11. Корпус
12. Пробка за източване
13. Щипки за панталони
14. Косместа четка
15. Щипки (2 бр.)
16. Термо ръкавица за гладене
BUL
Описание на
схемата изделия

3
ENG
Please read this manual carefully before using the product to avoid dam-
age during use. Before switching on the product, make sure that the
technical specications of the product shown on the label correspond to
the parameters of the electric network. Incorrect use can lead to damage
of the product, cause material damage or cause damage to the health
of the user. Use only for household purposes in accordance with this
Manual. The product is not intended for commercial use. Use the product
only for its intended purpose. Do not use the product outdoors and in
rooms with high humidity. Always unplug the product from the electri-
cal network when it is not in use, as well as before assembly, disassembly
and cleaning. The product must not be unattended while it is connected
to the electric network. Make sure that the power cord does not touch
the sharp edges of furniture and hot surfaces. To avoid electric shock,
do not attempt to disassemble or repair the product by yourself. When
disconnecting the product from the electric network, do not pull on the
power cord, hold the plug. Do not twist or wind the cord. The product is
not designed to be operated by an external timer or a separate remote
control system. The product is not intended for use by persons with re-
duced physical, sensory or mental abilities, or if they have no experience
or knowledge, if they are not controlled or instructed about the use of the
device by the person responsible for their safety. Do not allow children
to use the product as a toy. Do not use accessories that are not included
in the delivery suite. ATTENTION! Do not allow children to play with
plastic bags or wrapping lm. THREAT OF SUFFOCATION! ATTENTION!
Do not use this product outdoors. ATTENTION! Be especially careful if
children under 8 years or people with disabilities are close to the product
in use. ATTENTION! Do not use this product near combustible materi-
als, explosives, or self-igniting gases. Do not install this product near a
gas or electric stove, or other heat sources. Do not expose the product
to direct sunlight. ATTENTION! Do not allow children under 8 years to
touch the body, the power cord and the plug of the power cord while
the product is in operation. If the product has been kept for a while at a
temperature below 0 ºC, it must be left at room temperature for at least 2
hours before switching it on. ATTENTION! Unplug the product from the
electric network every time before cleaning, and also if you do not use it.
ATTENTION! Do not ll the container with hot water as it can lead to de-
formation of the container. Do not place the steam hose on the oor and
make sure that the hose is not twisted. Do not use the product without
the steam hose. Do not operate the product without water. Do not move
or tilt the product during operation. Do not use perfume additives and
starch solution. During the work of the product, the working surface of
the steam hose heats up, take care not to get burned. Do not direct the
sprayer nozzle on furniture, electrical appliances, books, or objects that
may be damaged by moisture or hot steam. ATTENTION! Never steam
o clothes on a person, the temperature of the steam is very high,
use a foldable hanger. Regularly (at least once a month) clean the prod-
uct from scale. Attention! Do not remove the brush while the product is in
operation. Do not immerse the product and power cord in water or other
liquids. Use distilled or demineralized water. Do not block the spraying
holes of the sprayer and do not allow external objects to get into them.
Each time, before operating, carefully inspect the power cord and steam
hose for damage. ATTENTION! The time of one operation should not ex-
ceed more than 30 minutes. Break between operations should be not less
than 10 minutes. ATTENTION! For additional protection in the power cir-
cuit, it is advisable to install a residual current device with a rated operat-
ing current not exceeding 30 mA. To install the device, contact a specialist.
SECURITY MEASURES
The body of the steamer should be installed on a smooth, at and
waterproof surface. Make sure the product is disconnected from the
mains. Fill the container with water. Assemble the telescopic pillar
(Pic.1). Install the base of the stand and steam hose in the steamer
body. Fix them by turning the latches clockwise. Attach the foldable
hanger to the rack and xate the steam atomizer on it.
FOLDABLE HANGER
Install the foldable hanger on the telescopic rack. After nishing
the steaming fold up the hanger for storage. Note! Be careful when
putting on clothes on the hanger. Too much pressure can cause the
breaking of the hanger.
ASSEMBLY
In the process of operation, a scale is formed on the heating element. Depending on the hardness of the water, add the recommended des-
caler (exactly follow the instructions on the package) to the tank and ll it with water. Connect the product to the mains. Fixate the sprayer on
the hanger. Use the knob to set the maximum steam ow. After about 20 minutes of operation, disconnect the steamer. Before draining the
water, allow the heating element to cool completely. Rinse the container several times with running water.
CLEANING FROM SCALE
Make sure the product is disconnected from the mains. Let the product cool down. Disconnect the steam hose and telescopic rack from the
steamer body. Remove the tank, unscrew the drain plug. Remove the water. Rinse the container with running water. Drain the water from the
body. Install the steam hose and telescopic rack in the steamer housing. Place the steam hose around the rack and xate the spray gun on the
hanger. Keep the product in a cool and inaccessible for children place.
STORAGE
This symbol on the product and packaging means that used electrical and electronic products, as well as batteries, should not be disposed of with household waste. They
need to be taken to specialized reception points. For more information on existing waste collection systems, contact your local authorities. Correct disposal will help to save
valuable resources and prevent possible negative impact on human health and the state of the environment that may result from improper handling of waste.
Connect the product to the mains. Select the desired operating mode
using the power control. Wait for a uniform and stable release of steam
from the sprayer. Take the sprayer by the handle, bring the sprayer to the
product. Slowly move the sprayer vertically upward from the bottom.
SMOOTHING
To achieve a good result of steaming, do not make sharp move-
ments with the spray gun during ironing. This may cause the con-
densate to leak from the spray gun. Slowly move the spray gun
along the cloth. In places that require more thorough handling (col-
lar, cus etc.), hold the steam sprayer longer. When you steam o the
sleeves of clothing, pull the lower edge of the sleeve and continue to
move the steam nozzle. Each time, after nishing the ironing, lay the
spray gun on the hanger. This will prevent the hose from bending
and draining condensate from the nozzle holes.
CREATING CREASES ON TROUSERS
Fixate the trouser clip on the steam diuser. Stretch the trouser cloth on
the hanger. Slowly move the sprayer over the trouser belt up and down.
On the reverse side, hold the cloth by hand, covered with thermal gusset.
FLEECY BRUSH
The eecy brush serves to remove dust, small villi, pet hair from
clothes. To do this, attach the eecy brush to the steam atomizer.
EXPLOITATION
Produktspecifikationer
Varumärke: | Aurora |
Kategori: | ångtvätt |
Modell: | AU324 |
Sladdlängd: | 1.8 m |
Vattentankens kapacitet: | 1.9 l |
Sladdförvaring: | Ja |
Mjukt grepp: | Ja |
Ergonomisk design: | Ja |
Överhettningsskydd: | Ja |
Uppvärmningstid: | - min |
Produktens färg: | Blue, White |
Kontrolltyp: | Rotations- |
Effekt: | 1700 W |
Enhetstyp: | Ångborste |
Klar-indikator: | Ja |
På / av-knapp: | Ja |
Kontrollampa: | Ja |
Flera ånginställningar för att passa varje klädesplagg: | Ja |
Strykjärnet kan användas med kranvatten: | Ja |
Kan användas på alla tyger: | Ja |
Vertikal och horisontell ångfunktion: | Ja |
Typ av på/av-knapp: | Handströmbrytare |
Behöver du hjälp?
Om du behöver hjälp med Aurora AU324 ställ en fråga nedan och andra användare kommer att svara dig
ångtvätt Aurora Manualer
28 Juli 2025
28 Juli 2025
ångtvätt Manualer
- Bissell
- Concept
- Rowenta
- Calor
- Braun
- Morphy Richards
- Hoover
- Livington
- Electrolux
- Tefal
- Clatronic
- Shark
- Wertheim
- Princess
- Philips
Nyaste ångtvätt Manualer
29 Juli 2025
29 Juli 2025
24 Juli 2025
24 Juli 2025
23 Juli 2025
22 Juli 2025
22 Juli 2025
21 Juli 2025
21 Juli 2025
21 Juli 2025