Black Decker BDL260S Bruksanvisning
Black Decker Laserpekare BDL260S
Läs gratis den bruksanvisning för Black Decker BDL260S (4 sidor) i kategorin Laserpekare. Guiden har ansetts hjälpsam av 31 personer och har ett genomsnittsbetyg på 4.5 stjärnor baserat på 9 recensioner. Har du en fråga om Black Decker BDL260S eller vill du ställa frågor till andra användare av produkten? Ställ en fråga
Sida 1/4
PRESS -ENFONCER- PRESIONE
WARNING:Read and understand all instructions.Failure to follow all instructions
listed below may result in electric shock, fire and/or serious personal injury.
SAVE THESE INSTRUCTIONS
Safety Instructions
•Do not operate the laser in explosive atmospheres, such as in the presence of flammable
liquids, gases, or dust.
•Use the laser only with the specifically designated batteries. Use of any other batteries
may create a risk of fire.
•Store idle laser out of reach of children and other untrained persons. Lasers are dangerous
in the hands of untrained users.
•Use only accessories that are recommended by the manufacturer for your model.
Accessories that may be suitable for one laser, may create a risk of injury when used on
another laser.
•Do not use optical tools such as a telescope or transit to view the laser beam. Serious eye
injury could result.
•Do not place the laser in a position which may cause anyone to intentionally or
unintentionally stare into the laser beam. Serious eye injury could result.
•Turn the laser off when it is not in use. Leaving the laser on increases the risk of staring
into the laser beam.
•Repairs and servicing MUSTbe performed by a qualified repair facility. Repairs performed
by unqualified personnel could result in serious injury.
•WARNING:DO NOT DISASSEMBLE THE LASER. There are no user serviceable
parts inside. Disassembling the Laser will void all warranties on the product. Do not modify
the product in any way. Modifying the tool may result in Hazardous Laser Radiation
Exposure.
•Do not operate the laser around children or allow children to operate the laser. Serious eye
injury may result.
•Do not remove or deface warning labels. Removing labels increases the risk of exposure
to radiation.
•Position the laser securely. Damage to the laser or serious injury could result if the laser
falls.
•CAUTION:Use caution when drilling, nailing or cutting into walls, floors and ceilings
which may contain electrical wiring or pipes.Always turn off the power when working
near electrical wires.
CAUTION:Use of controls or adjustments or performance of procedures other than
those specified in this manual may result in hazardous laser radiation exposure.
The label on your tool may include the following symbols.
V..........................voltsmW......................milliwatts
nm........................wavelength in nanometersIIIa......................Class IIIa Laser
For your convenience and safety, the following labels are on your laser.
VEA EL ESPAÑOL EN LA CONTRAPORTADA.
SAVE THIS MANUAL FOR FUTURE REFERENCE.
INSTRUCTIVO DE OPERACIÓN, CENTROS DE SERVICIO YPÓLIZADE GARANTÍA.
ADVERTENCIA: LÉASE ESTE INSTRUCTIVO ANTES DE USAR ELPRODUCTO.
INSTRUCTION MANUAL
LL
LL
aa
aa
ss
ss
ee
ee
rr
rr
LL
LL
ee
ee
vv
vv
ee
ee
ll
ll
Cat No. BDL260S Form # 620408-00 (SEP-03) Copyright ©2003 Black & Decker Printed in Taiwan
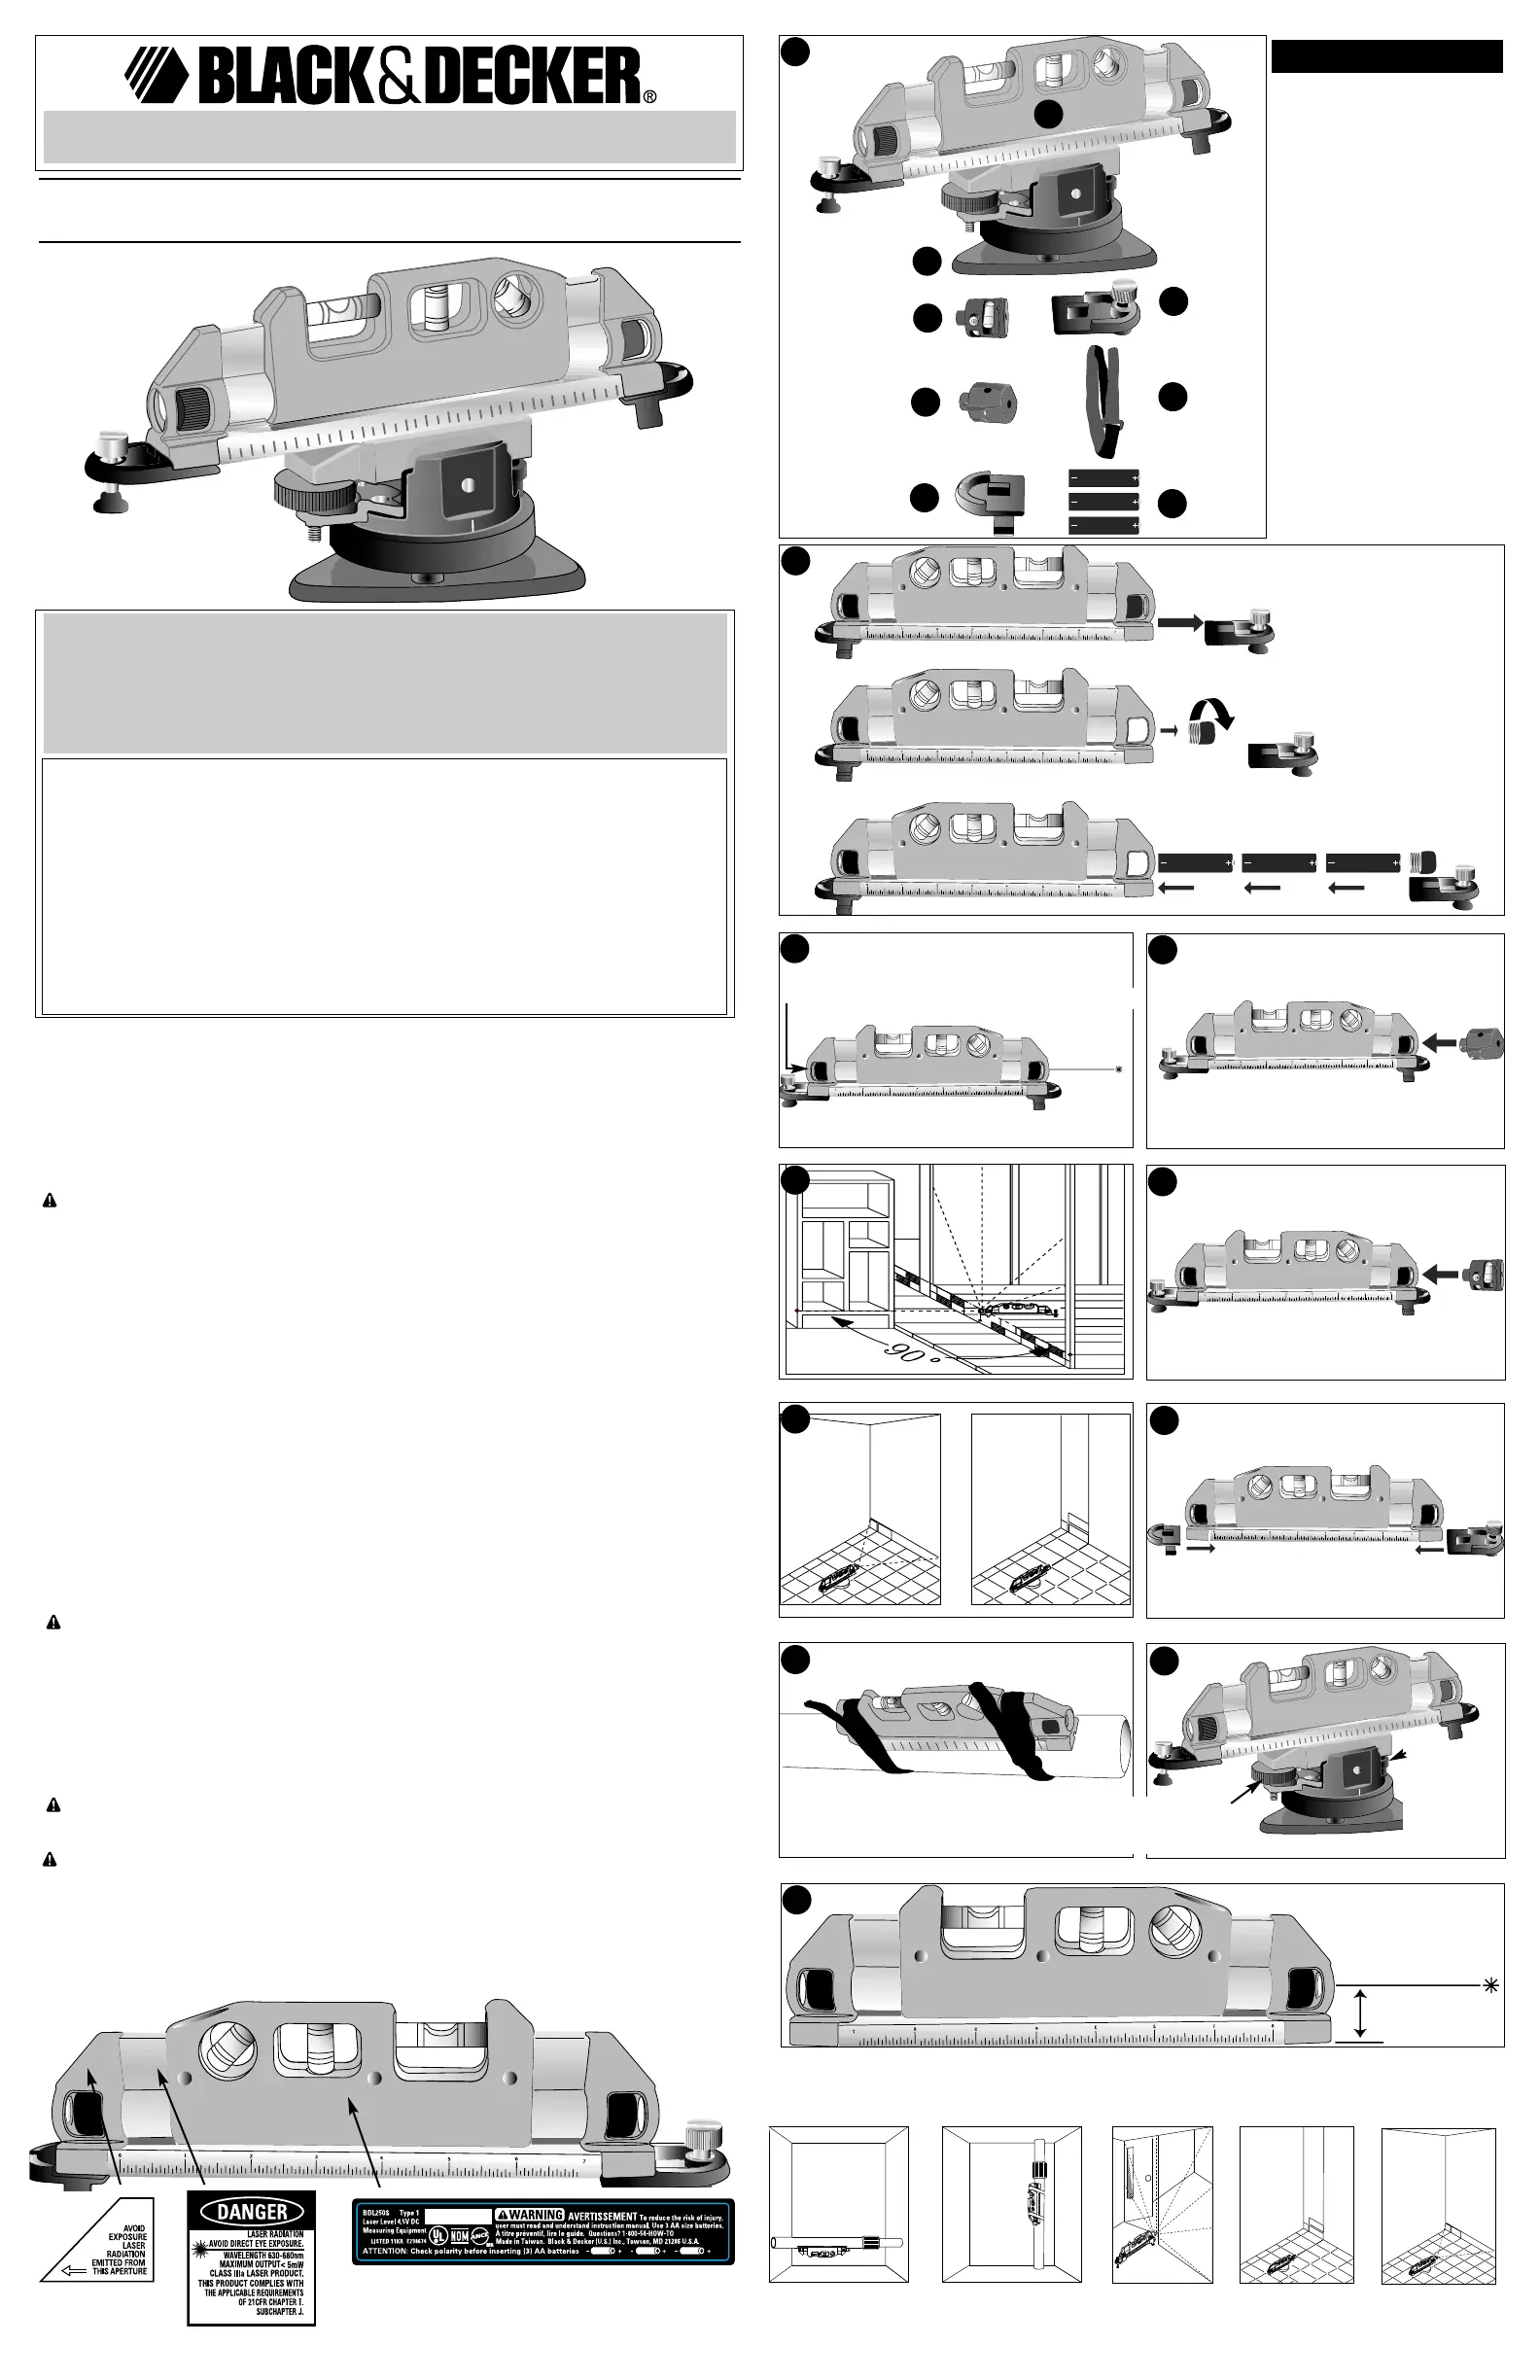
FEATURES
A.) LASER
B.) ROTARYBASE
C.) MAGNETIC LINE LENS
D.) 90˚ MAGNETIC BEAM
SPLITTER
E.) FIXEDFOOT (RIGHT)
F.) ADJUSTABLEFOOT
(LEFT)
G.) HOOKANDLOOP
STRAP (2)
H.) AAALKALINE
BATTERIES (3)
2
A
B
C
E
F
4
BEFORE RETURNING THIS PRODUCT
FOR ANY REASON PLEASE CALL
1-800-544-6986
IF YOU SHOULD HAVE AQUESTION OR EXPERIENCE A
PROBLEM WITH YOUR BLACK &DECKER PRODUCT,
CALL 1-800-544-6986
BEFORE YOU CALL, HAVE THE FOLLOWING INFORMATION AVAILABLE, CATALOG No., TYPE No., AND
DATE CODE (e.g. 20000130M). IN MOSTCASES, ABLACK & DECKER REPRESENTATIVE CAN
RESOLVE YOUR PROBLEM OVER THE PHONE. IF YOU HAVE ASUGGESTION OR COMMENT, GIVE
US ACALL. YOUR FEEDBACK IS VITALTO BLACK & DECKER.
3
D
Catalog No. BDL260S
1
0.87” (22mm)
H
G
5
6
7
8
9
10
Rotation knob
Bouton de
rotation
Botón de
rotación
Adjusting knob
Bouton de réglage
Botón de ajuste
11
Applications -
Piping-ferrous sur Piping-non ferrous Door framing Tiling-vertical line Tiling-horizontal
faces surfaces line
Produktspecifikationer
| Varumärke: | Black Decker |
| Kategori: | Laserpekare |
| Modell: | BDL260S |
Behöver du hjälp?
Om du behöver hjälp med Black Decker BDL260S ställ en fråga nedan och andra användare kommer att svara dig
Laserpekare Black Decker Manualer

3 September 2025
3 September 2025
2 September 2025
2 September 2025
2 September 2025
2 September 2025
2 September 2025
2 September 2025
2 September 2025
2 September 2025
Laserpekare Manualer
Nyaste Laserpekare Manualer
17 Mars 2026
15 Februari 2026
12 Februari 2026
18 Oktober 2025
3 Oktober 2025
2 Oktober 2025
12 September 2025
20 Augusti 2025
20 Augusti 2025
17 Augusti 2025