CRUX RVCHN-76C Bruksanvisning
CRUX Inte kategoriserad RVCHN-76C
Läs gratis den bruksanvisning för CRUX RVCHN-76C (2 sidor) i kategorin Inte kategoriserad. Guiden har ansetts hjälpsam av 22 personer och har ett genomsnittsbetyg på 4.6 stjärnor baserat på 2 recensioner. Har du en fråga om CRUX RVCHN-76C eller vill du ställa frågor till andra användare av produkten? Ställ en fråga
Sida 1/2
RVCHN-76C
Rear View Integration with Lip Mount Camera for
Select Honda Civic Vehicles without Navigation 2012-2013
R
INTERFACING SOLUTIONS
Sightline
Multi View Integration
Crux Interfacing Solutions • Chatsworth, CA 91311
phone: (818) 609-9299 • fax: (818) 996-8188 • www.cruxinterfacing.com
rev.102120
1 of 2
- Automacally switches to rear-view when vehicle is in reverse gear.
- Aermarket lip mount rear view camera included.
- Plug & Play Installaon.
PRODUCT FEATURES:
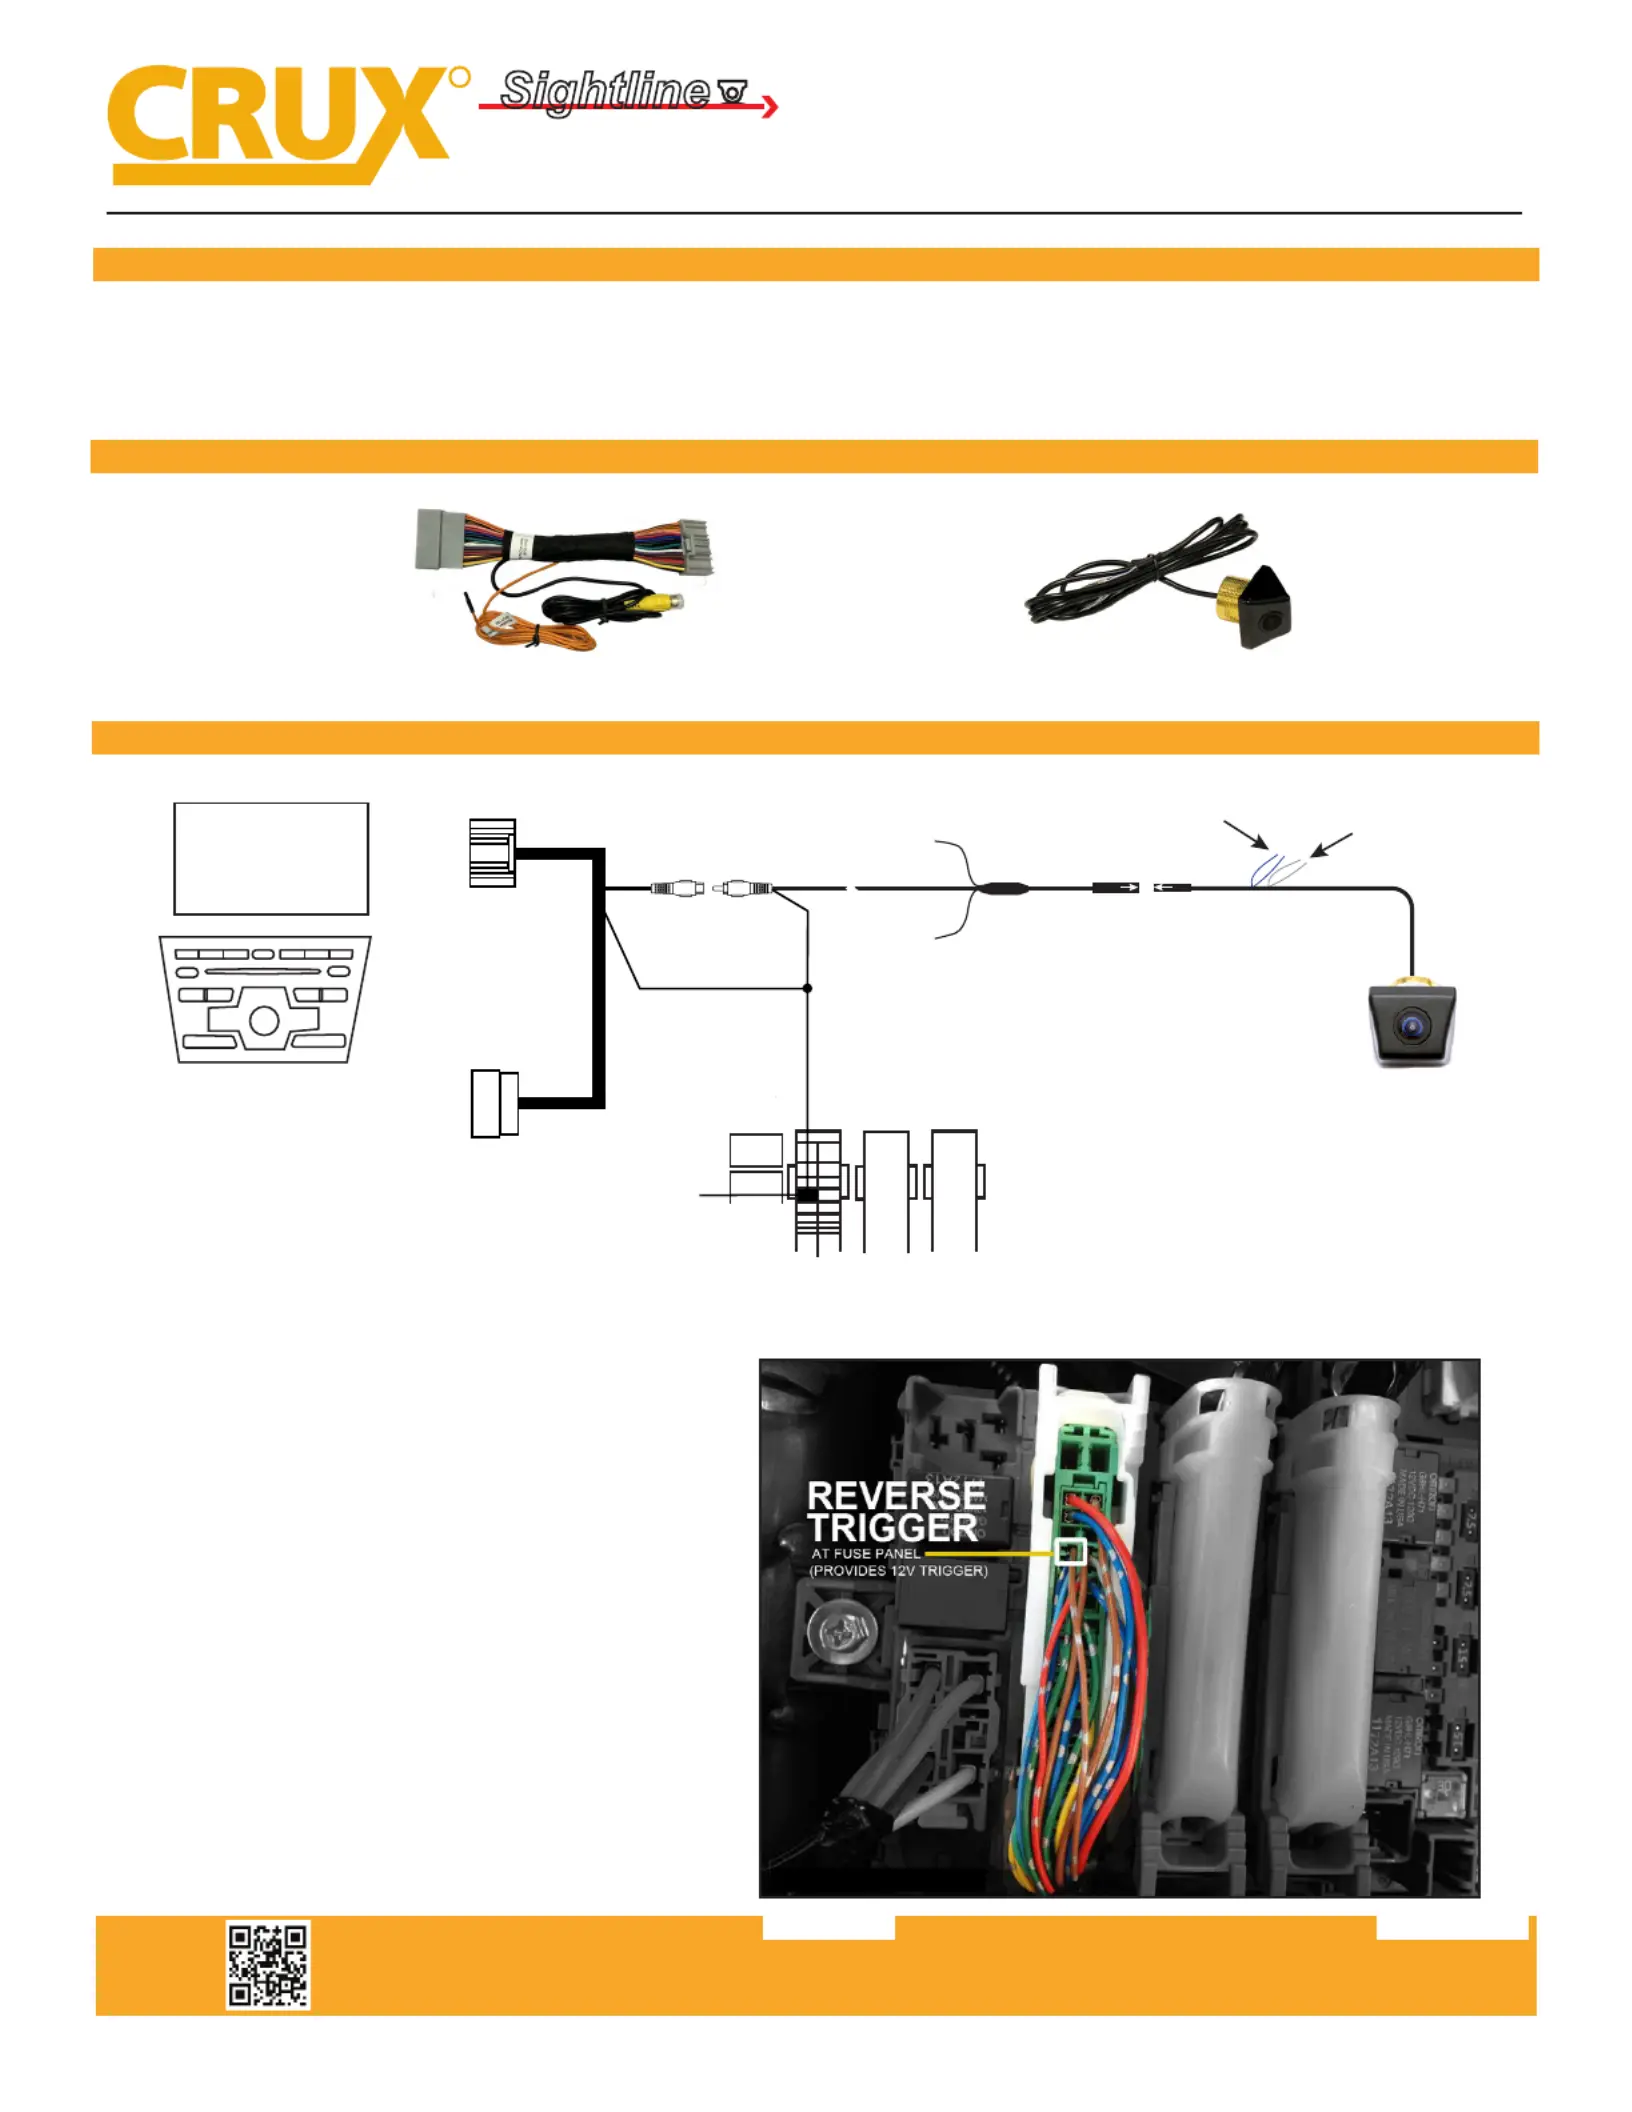
INSTALLATION DIAGRAM:
Video
Connection
WHITE**
Parking Line
Cut = OFF / Connect = ON
BLUE
(not used
keep connected)
**NOTE: Changes to the parking line option
will take eect after a power cycle.
Camera Power
Regulator
*Camera Ground
(to chassis)
Red wire
Not Used (Insulate)
Make sure the arrows
line up and push in
the connectors well.
Factory
Screen
Radio
To factory
screen
To factory
harness
Green Connector at fuse Panel
(Driver’s left kick panel)
Pin 4
Brown/Silver dots wire
(Reverse Camera Trigger)
Orange Wire
(reverse trigger)
Use a length of 18 gauge wire (not included)
and tap the RED camera power wire from the
Yellow RCA and ORANGE reverse trigger wire to
pin# 4 (BROWN/SILVER dots) wire on the Green
connector in the fuse panel. This is the factory
reverse trigger wire.
PARTS INCLUDED:
RVCHN-76C HarnessCUL-03 Lip Mount Camera
Produktspecifikationer
| Varumärke: | CRUX |
| Kategori: | Inte kategoriserad |
| Modell: | RVCHN-76C |
Behöver du hjälp?
Om du behöver hjälp med CRUX RVCHN-76C ställ en fråga nedan och andra användare kommer att svara dig
Inte kategoriserad CRUX Manualer

10 Mars 2025
10 Mars 2025
10 Mars 2025
10 Mars 2025
10 Mars 2025
10 Mars 2025
10 Mars 2025
10 Mars 2025
10 Mars 2025
10 Mars 2025
Inte kategoriserad Manualer
Nyaste Inte kategoriserad Manualer
9 April 2025
9 April 2025
9 April 2025
9 April 2025
9 April 2025
9 April 2025
9 April 2025
9 April 2025
9 April 2025
9 April 2025