CTA Digital PAD-SCGS9 Bruksanvisning
CTA Digital Inte kategoriserad PAD-SCGS9
Läs gratis den bruksanvisning för CTA Digital PAD-SCGS9 (1 sidor) i kategorin Inte kategoriserad. Guiden har ansetts hjälpsam av 29 personer och har ett genomsnittsbetyg på 4.7 stjärnor baserat på 4 recensioner. Har du en fråga om CTA Digital PAD-SCGS9 eller vill du ställa frågor till andra användare av produkten? Ställ en fråga
Sida 1/1
loosen completely and remove from top
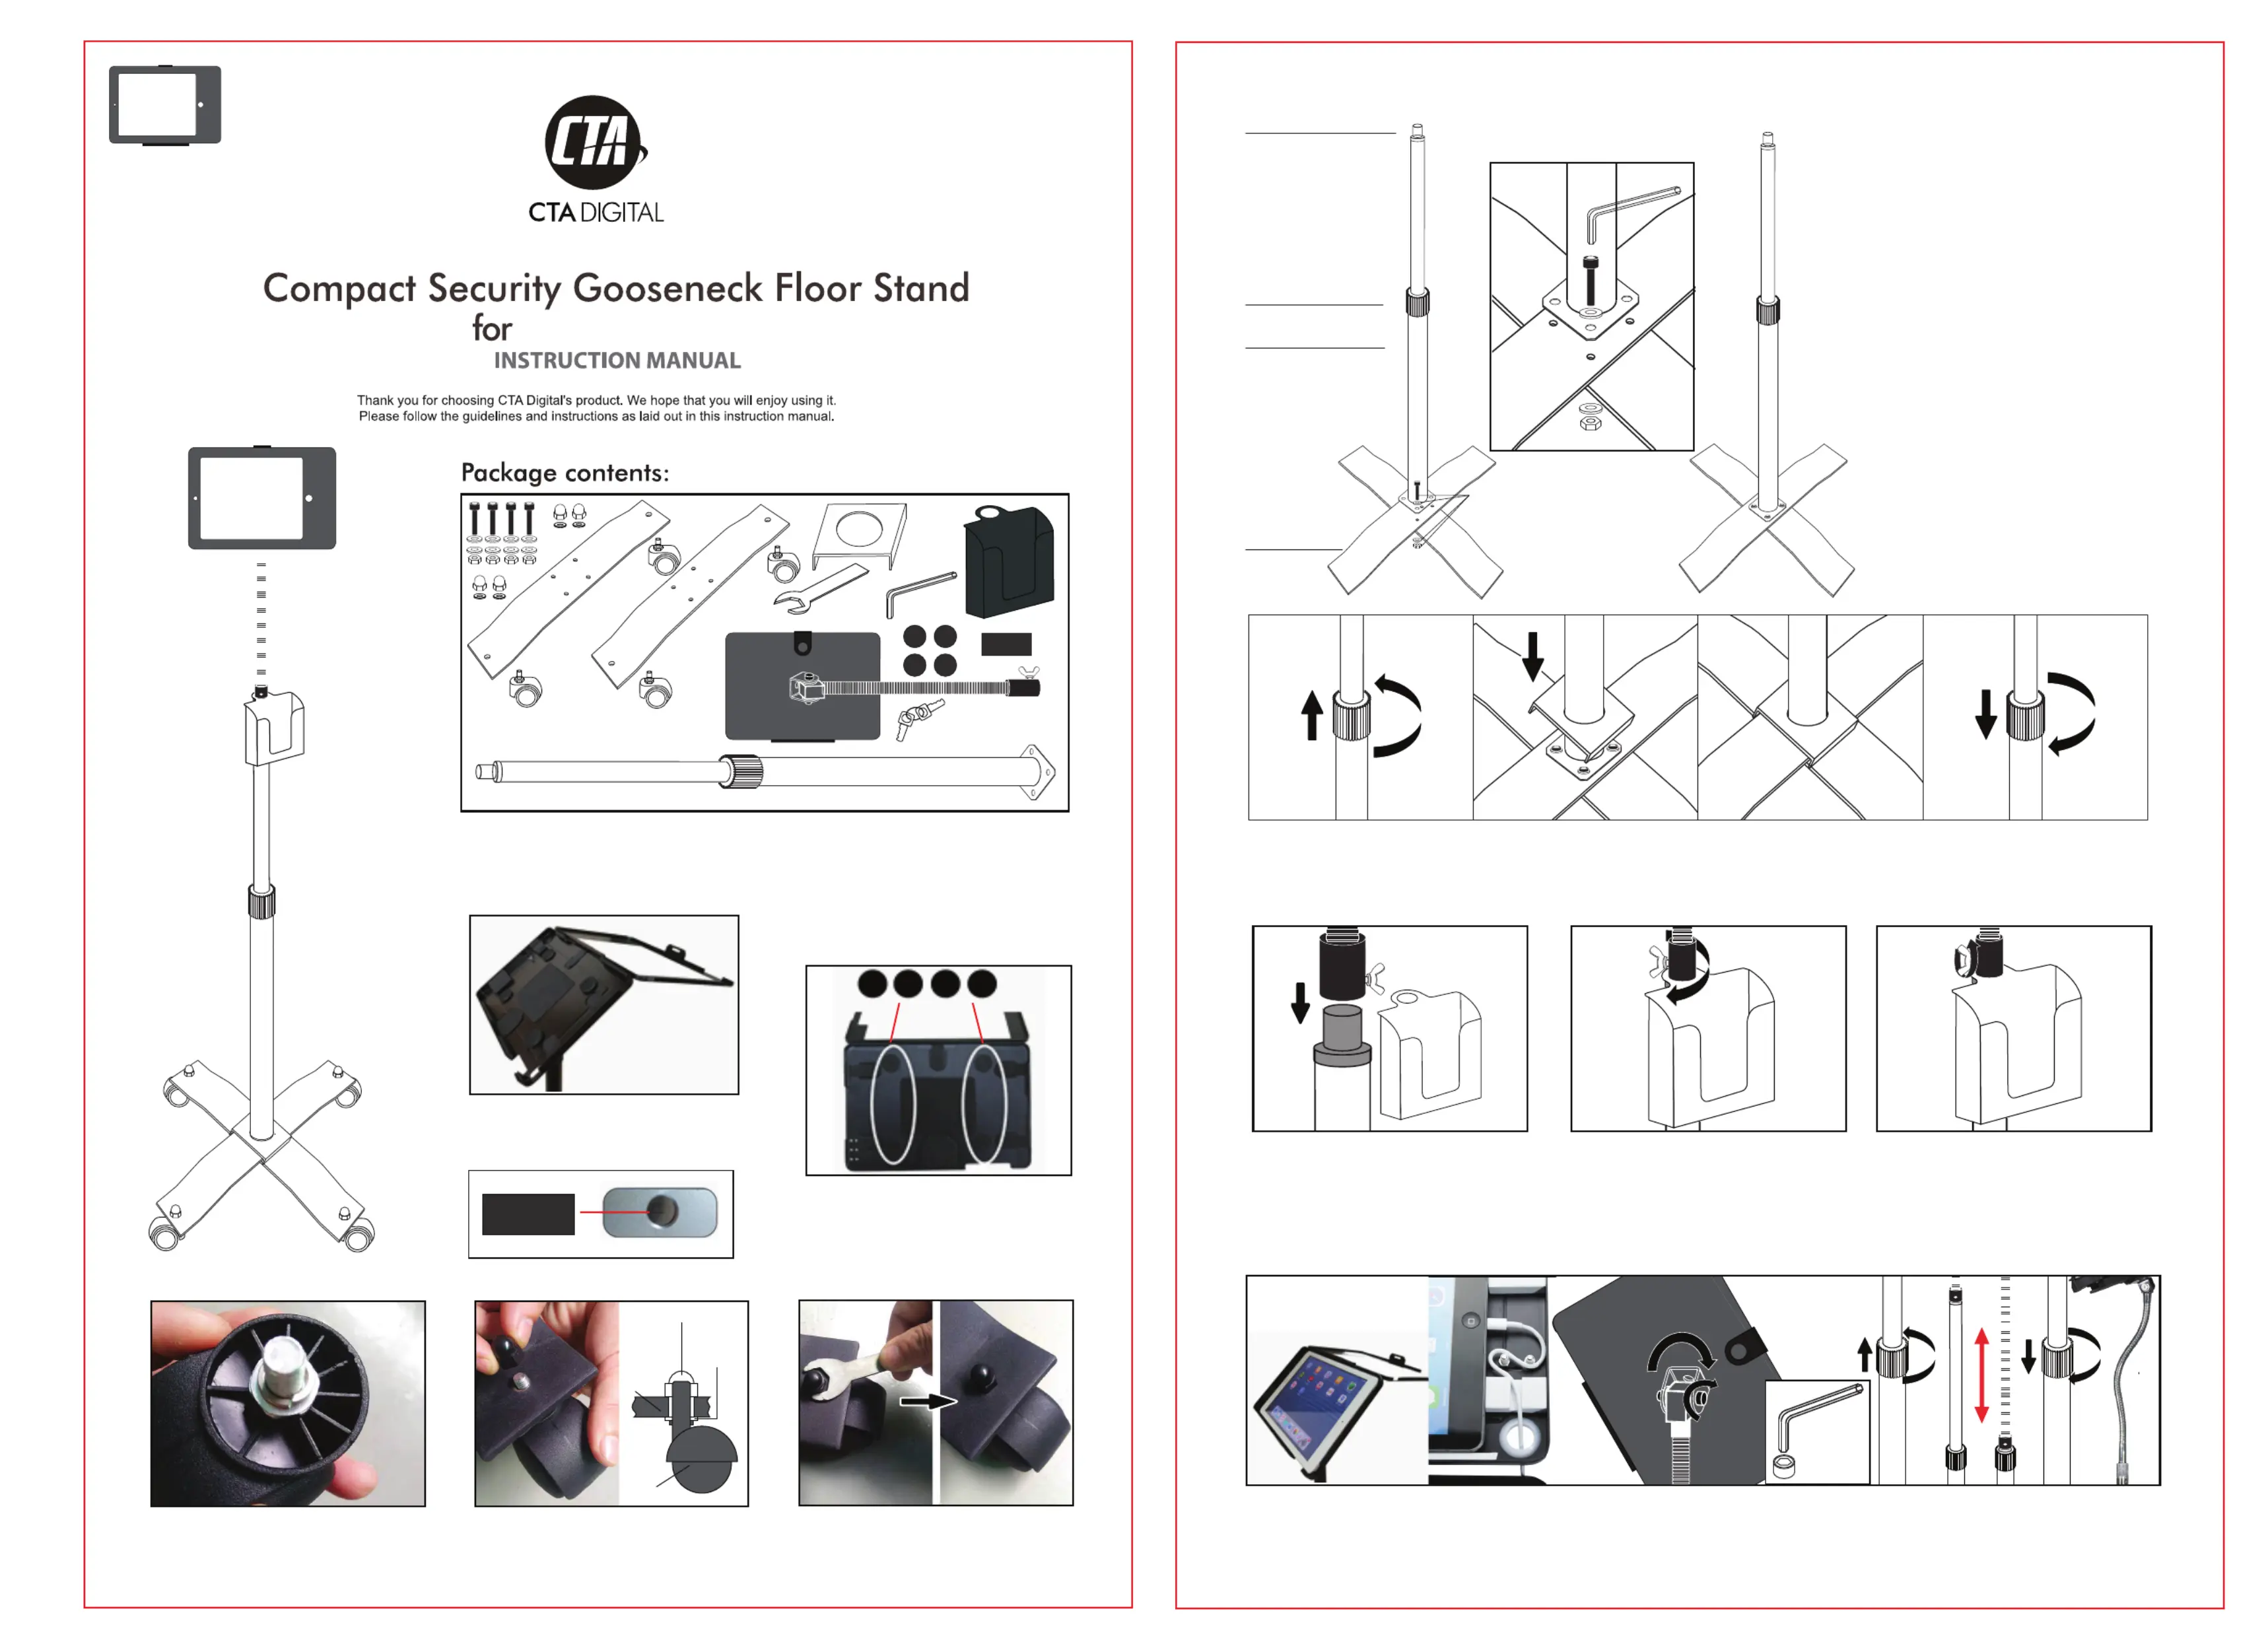
PAD-SCGS9
3. Base Assembly and Connecting the Metal Cover:
METAL CONNECTION
HEIGHT
ADJUSTMENT
KNOB
POLE
METAL
CROSS BASE X 2
CONNECTION SCREW BOLT,
WASHERS AND NUT
Pole Assembly and Pole Nut
Cross Base Sections (2)
Allen Key
2. Installing the Wheels
Wheel
Place a spring washer over the screw
bolt on the wheel.
Place the screw bolt from each wheel through the metal base, then place a nut cover
over the top of each. Screw down clockwise by hand, then use wrench to tighten
further.
Screw Nut Cover
Spring
Washer
Metal
Base
1)Place the metal base pieces with the higher
piece on top of the cross base. Align the holes
at the bottom of the pole with the holes on the
cross base.
2)Insert a screw bolt with a washer into each
of 4 holes. Place another washer on the
underside of each screw bolts.
3)Grip the nut on the underside with one hand,
and use the other to tighten each screw with
the Allen key. Repeat to tighten all four
screw bolts.
4.Rotate the grip counter clockwise to
of pole.
5.Place the square metal cover over
the top of the pole and slide down to
stand base.
6.Place grip back over stand pole
and tighten.
4. Connecting the Tablet gooseneck holder & Battery Case
5. Installing your Device and Adjusting the Floor Stand:
3. Turn the Y screw clockwise to
tighten the connection.
Gooseneck
Metal
Connection
Y Screw
Battery Case
1. Place battery case over top of
metal connection.
Note: if Y screw is already in,
unscrew before attaching gooseneck.
2. Screw the gooseneck onto the
metal connection of the pole by
turning clockwise. Be sure that the
battery case is on the opposite side
of the pole as the Y screw.
iPad 9.7”
iPad Air
iPad Air 2
iPad Pro 9.7
iPad Gen. 5 (2017)
iPad Gen. 6 (2018)
iPad 9.7”
Instructions:
1. Attaching EVA Pads to
Tablet Enclosure
For iPad Air and iPad 9.7 Gen 5,use the
casing holder directly.
Use keys to open and
lock tablet enclosure.
Clockwise for locking,
counter-clockwise for
unlocking.
Attach included metal home button cover if desired.
For iPad Air 2 and iPad Pro 9.7,label with
the included adhesive EVA pads inside
case for a snug fit as the following:
3. Rotate plastic grip to adjust pole
to desired height.
Flex the gooseneck freely to adjust
your favorite view angle.
2.Use included Allen key to tighten and
loosen the gooseneck to holder
connection screw to adjust ease of
rotation.
1.Unlock the enclosure,insert tablet, attach
charge cable,then thread charge cable
through the cutout at the rear of the tablet.
Close and lock the enclosure.
270
rotation
o
360 rotation
o
Allen Key
SUPPORT@CTADIGITAL.COMSUPPORT@CTADIGITAL.COM
Produktspecifikationer
| Varumärke: | CTA Digital |
| Kategori: | Inte kategoriserad |
| Modell: | PAD-SCGS9 |
Behöver du hjälp?
Om du behöver hjälp med CTA Digital PAD-SCGS9 ställ en fråga nedan och andra användare kommer att svara dig
Inte kategoriserad CTA Digital Manualer

6 Februari 2025
6 Januari 2025
28 December 2024
12 December 2024
11 December 2024
11 December 2024
11 December 2024
11 December 2024
11 December 2024
11 December 2024
Inte kategoriserad Manualer
Nyaste Inte kategoriserad Manualer
9 April 2025
9 April 2025
9 April 2025
9 April 2025
9 April 2025
9 April 2025
9 April 2025
9 April 2025
9 April 2025
9 April 2025