CTA Digital PAD-SICCB Bruksanvisning
CTA Digital Inte kategoriserad PAD-SICCB
Läs gratis den bruksanvisning för CTA Digital PAD-SICCB (3 sidor) i kategorin Inte kategoriserad. Guiden har ansetts hjälpsam av 22 personer och har ett genomsnittsbetyg på 4.7 stjärnor baserat på 9 recensioner. Har du en fråga om CTA Digital PAD-SICCB eller vill du ställa frågor till andra användare av produkten? Ställ en fråga
Sida 1/3
888-733-4448
PAD-SICCB
INSTALLATION - MANUAL
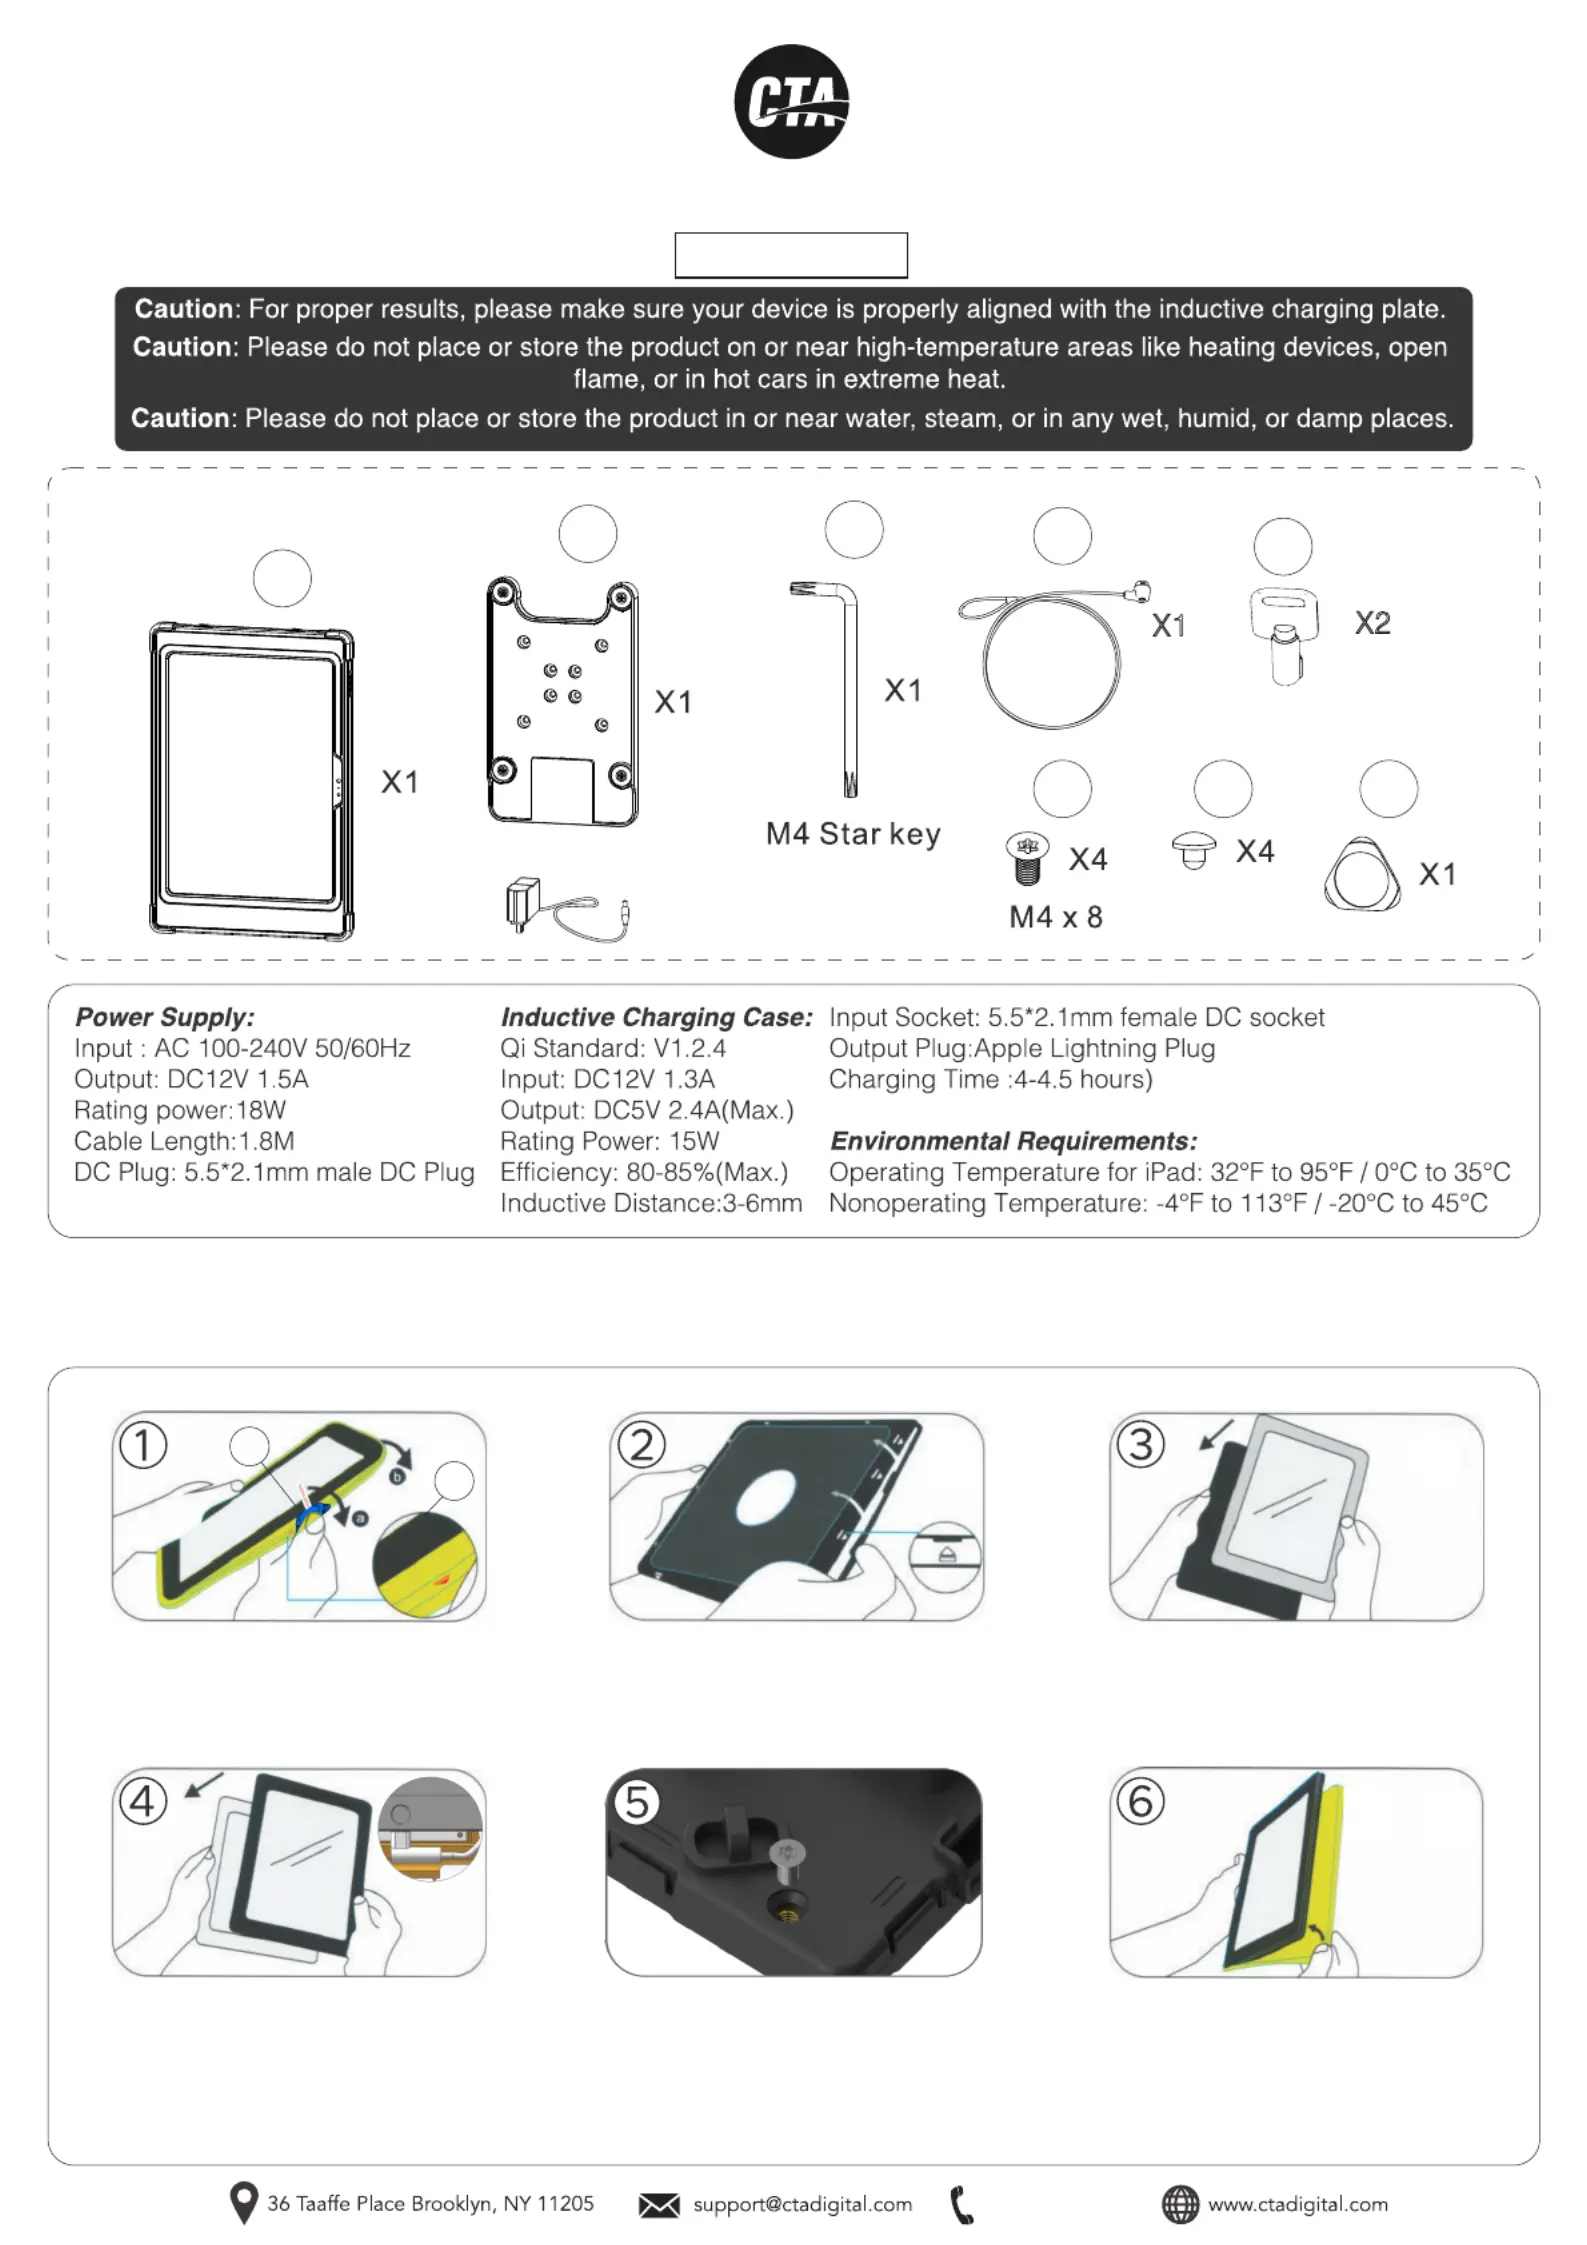
INSTALLATION:
1. Inserting Tablet into Enclosure
Wireless Inductive Charging Case w/ Security Lock
A
B
EF
C
D
E
X2
D
X1
CONTENTS:
Once the tablet device is inside, plug
the charging cable into the power
socket. Then place the internal front
(hard) cover on top of the case, and
gently clip all four sides shut.
Tighten the anti-theft screw with
the included star key (C) if you
want the case security.
Reinstall the external silicone
rubber sleeve.
Peel the external silicone sleeve
from the internal hard case using
component (F).
To open case, apply gentle pressure to
the small clips (noted on the diagram by
arrows). The internal hard case will
open when all four sides are unclipped.
Insert the iPad into the back
portion of the hard cover.
A
F
Produktspecifikationer
| Varumärke: | CTA Digital |
| Kategori: | Inte kategoriserad |
| Modell: | PAD-SICCB |
| Vikt: | 680.389 g |
| Bredd: | 193.04 mm |
| Djup: | 292.1 mm |
| Höjd: | 43.18 mm |
| Trådlös laddning: | Ja |
| Kompatibilitet: | iPad 10th Gen |
| Maximal skärmstorlek: | 10.9 " |
| Produktens färg: | Svart |
| Brand kompatibilitet: | Apple |
Behöver du hjälp?
Om du behöver hjälp med CTA Digital PAD-SICCB ställ en fråga nedan och andra användare kommer att svara dig
Inte kategoriserad CTA Digital Manualer

6 Februari 2025
6 Januari 2025
28 December 2024
12 December 2024
11 December 2024
11 December 2024
11 December 2024
11 December 2024
11 December 2024
11 December 2024
Inte kategoriserad Manualer
Nyaste Inte kategoriserad Manualer
9 April 2025
9 April 2025
9 April 2025
9 April 2025
9 April 2025
9 April 2025
9 April 2025
9 April 2025
9 April 2025
9 April 2025