Denver EC-420NR Bruksanvisning
Denver Väckarklockor EC-420NR
Läs gratis den bruksanvisning för Denver EC-420NR (3 sidor) i kategorin Väckarklockor. Guiden har ansetts hjälpsam av 52 personer och har ett genomsnittsbetyg på 4.1 stjärnor baserat på 5 recensioner. Har du en fråga om Denver EC-420NR eller vill du ställa frågor till andra användare av produkten? Ställ en fråga
Sida 1/3
LED Dual-alarm Clock
Instructions Manual
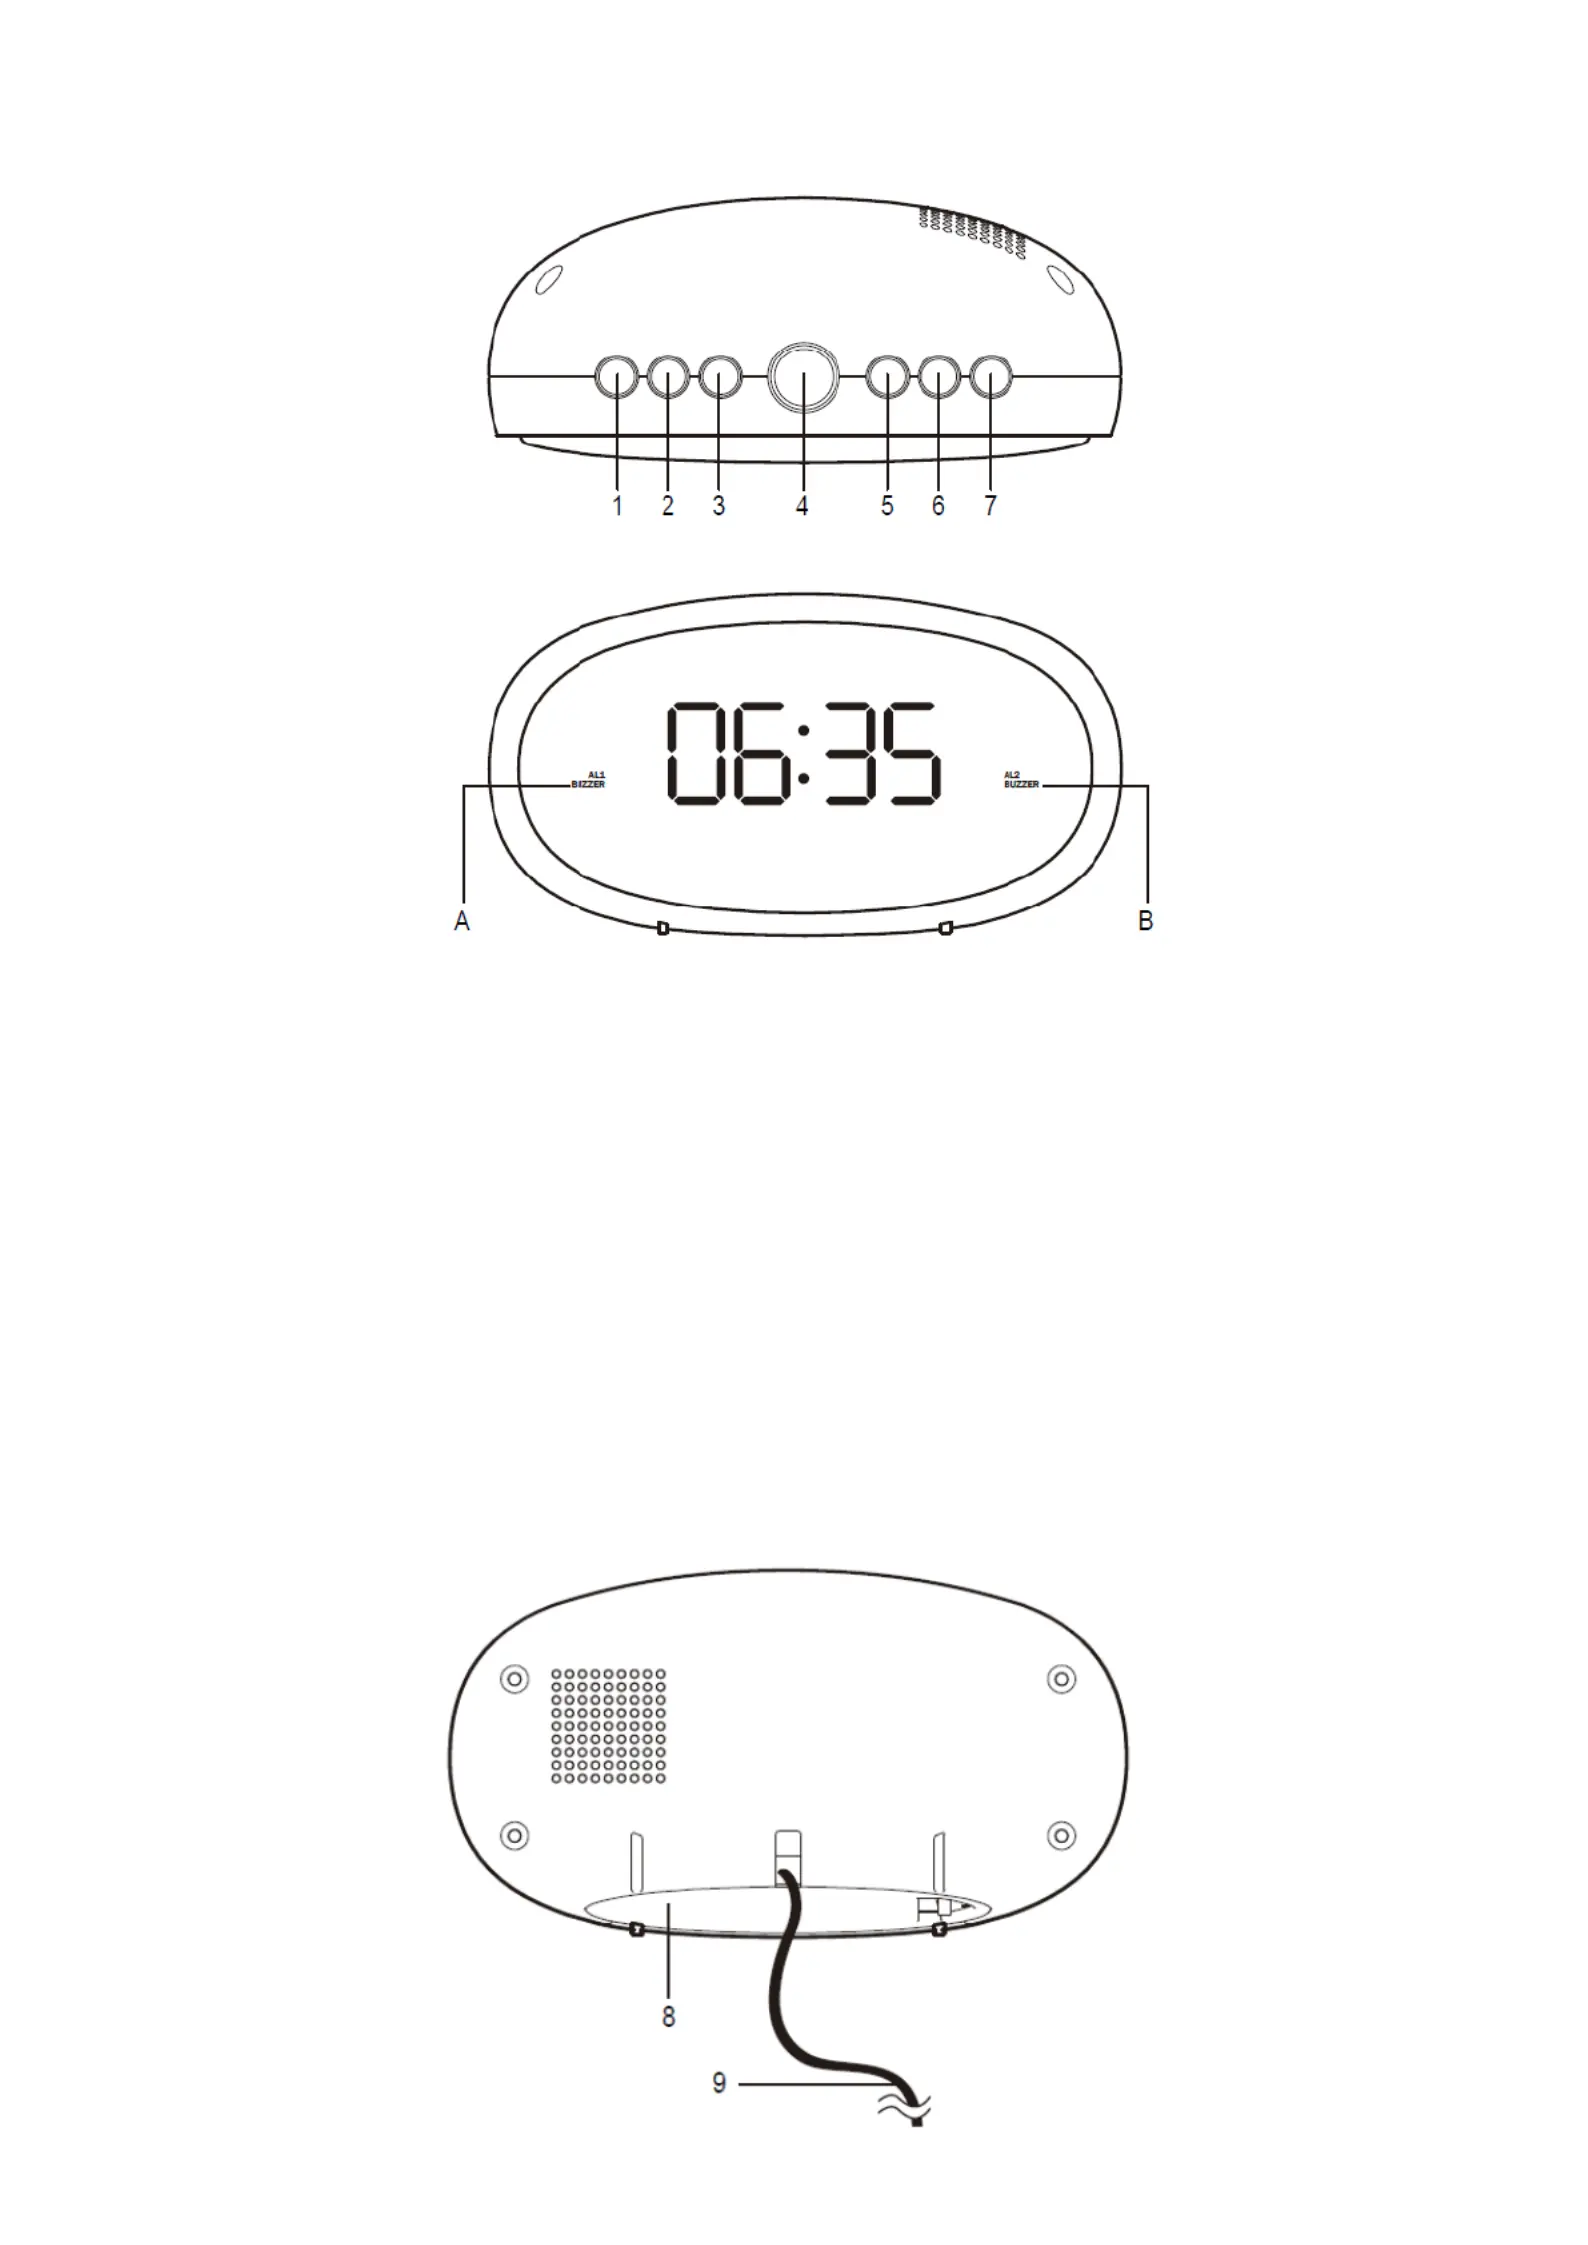
CONTROLS
1. “AL/OFFbutton”
2. “HOURbutton”
3. “buttonMIN”
4. “DIMMER HI/LOW SNOOZEbutton”
5. “ALARM 1” button
6. “ALARM 2” button
7. “TIME” button
8. Battery compartment
9. Power cable
INDICATORS
A. AL1 BUZZER
B. AL2 BUZZER
Produktspecifikationer
| Varumärke: | Denver |
| Kategori: | Väckarklockor |
| Modell: | EC-420NR |
| Vikt: | 300 g |
| Bredd: | 130 mm |
| Djup: | 55 mm |
| Höjd: | 69 mm |
| Förpackningens bredd: | 137 mm |
| Modell: | Digitalt bordsur |
| Väckarklocka: | Ja |
| Batterityp: | AAA |
| Antal batterier: | 2 |
| Produktens färg: | Svart |
| Snooze funktion: | Ja |
| Skärmtyp: | LED |
| Låddjup: | 80 mm |
| Formfaktor: | Oval |
| Strömkälla: | Batteri |
Behöver du hjälp?
Om du behöver hjälp med Denver EC-420NR ställ en fråga nedan och andra användare kommer att svara dig
Väckarklockor Denver Manualer

7 Oktober 2024
Väckarklockor Manualer
Nyaste Väckarklockor Manualer
3 April 2025
21 Oktober 2024
18 Oktober 2024
1 Augusti 2024
31 Juli 2024
31 Juli 2024
30 Juli 2024
29 Juli 2024
27 Juli 2024
27 Juli 2024