Eliminator Lighting Electro Swarm Bruksanvisning
Eliminator Lighting Inte kategoriserad Electro Swarm
Läs gratis den bruksanvisning för Eliminator Lighting Electro Swarm (2 sidor) i kategorin Inte kategoriserad. Guiden har ansetts hjälpsam av 40 personer och har ett genomsnittsbetyg på 4.6 stjärnor baserat på 5 recensioner. Har du en fråga om Eliminator Lighting Electro Swarm eller vill du ställa frågor till andra användare av produkten? Ställ en fråga
Sida 1/2
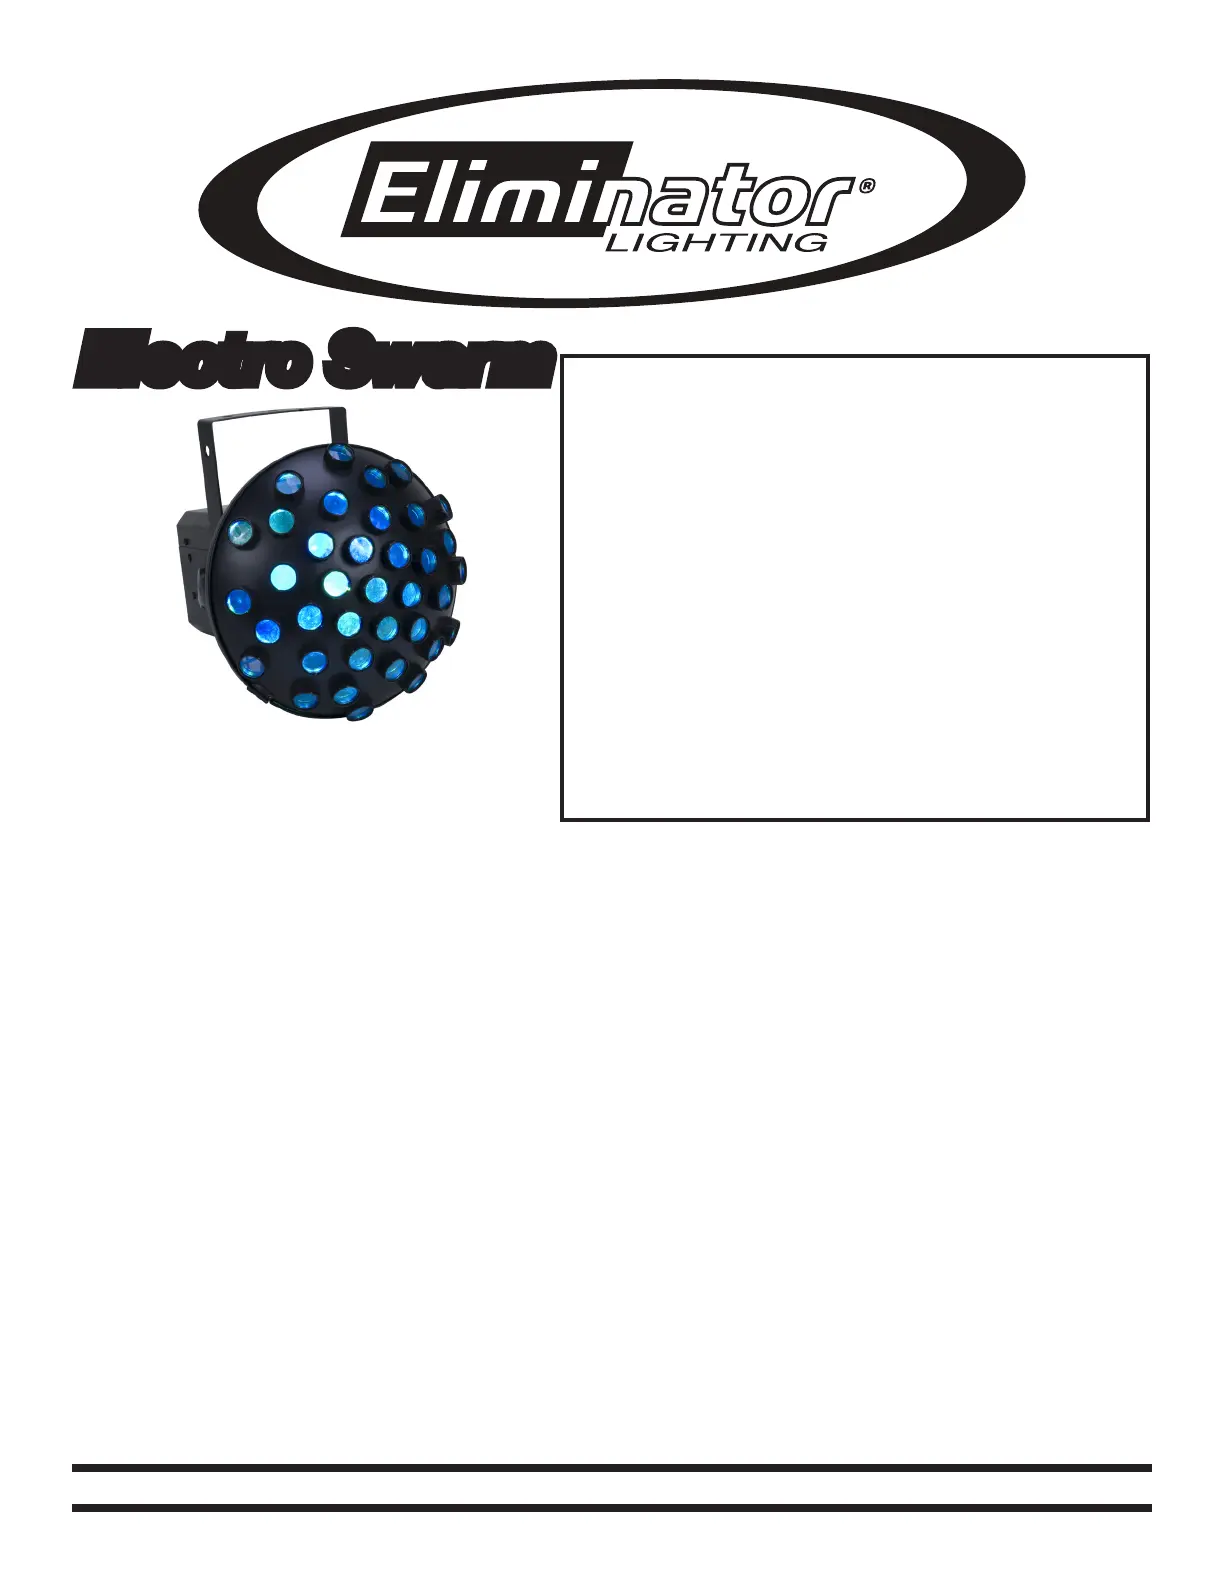
Electro Swarm
SPECIFICATIONS:
Model: Electro Swarm
Supply Voltage: 90V ~ 240V 60Hz/50Hz
LEDs: 6 x 1W (2 Red, 2 Green, &
2 Blue)
Power Consumption: 15W
Beam Angle: 90 Degrees
Weight: 5.3 lbs./ 2.5kgs
Size: 14.5”(L) x 10.6”(H) x
10.6”(W)
Fuse: 2 Amp
Working Position: Any Safe position
Duty Cycle: None
Colors: Multiple Colored Lenses
Warranty: 1 Year
CAUTION! Please read and
understand these instructions
before installing or operating
this unit.
Operating Instructions:
The Electro Swarm is a powerful effect for clubs and dj’s. The Electro Swarm creates a dramatic
cluster of stobing, multi-colored beams. This unit features an internal microphone that allows the
beams to be triggered by sound. The Electro Swarm is ready to be hung or set on the ground in a
safe position. When mounting this unit to truss be sure to use a clamp. Plug the unit in to a stan-
dard wall outlet. After plugging the unit in, the fixture will react to the beat of the music via the sound
active internal microphone. The unit has a sensitivity knob on the rear of the unit that makes more or
less sensitive to sound. Turning the knob in clockwise direction will make the unit more sensitive to
sound. The unit requires sound to activate the movement.
Master-Slave Operation:This function will allow you to link up to 16 units together and operate. The
units will be sound activated. In Master-Slave operation one unit will act as the controlling unit and the
others will react to the controlling unit. Any unit can act as a Master or as a Slave. See set up below.
1. Using standard XLR microphone cables, daisy chain your units together via the XLR connector
on the rear of the units. Remember the Male XLR connector is the input and the Female XLR con
nector is the output. For longer cable runs we suggest a terminator at the last fixture.
2.The dipswitch settings for Master/Slave mode is as follows. On the Master unit flip dipswitch #1
and #2 to the “OFF” position. On the Slave unit set dipswitch #1 and #2 to the “ON” position.
3. Use the sensitivity knob on the rear of the master unit to make it more or less sensative to sound.
©Eliminator® Bell, CA. - wwwEliminatorLighting.com
Caution! Never open unit when in use.
Produktspecifikationer
| Varumärke: | Eliminator Lighting |
| Kategori: | Inte kategoriserad |
| Modell: | Electro Swarm |
Behöver du hjälp?
Om du behöver hjälp med Eliminator Lighting Electro Swarm ställ en fråga nedan och andra användare kommer att svara dig
Inte kategoriserad Eliminator Lighting Manualer

29 December 2024
28 December 2024
24 September 2024
23 September 2024
23 September 2024
23 September 2024
23 September 2024
23 September 2024
23 September 2024
23 September 2024
Inte kategoriserad Manualer
Nyaste Inte kategoriserad Manualer
9 April 2025
9 April 2025
9 April 2025
9 April 2025
9 April 2025
9 April 2025
9 April 2025
9 April 2025
9 April 2025
9 April 2025