ErgoAV ERTSX2-01B Bruksanvisning
Läs gratis den bruksanvisning för ErgoAV ERTSX2-01B (18 sidor) i kategorin TV-bänk. Guiden har ansetts hjälpsam av 40 personer och har ett genomsnittsbetyg på 4.9 stjärnor baserat på 4 recensioner. Har du en fråga om ErgoAV ERTSX2-01B eller vill du ställa frågor till andra användare av produkten? Ställ en fråga
Sida 1/18
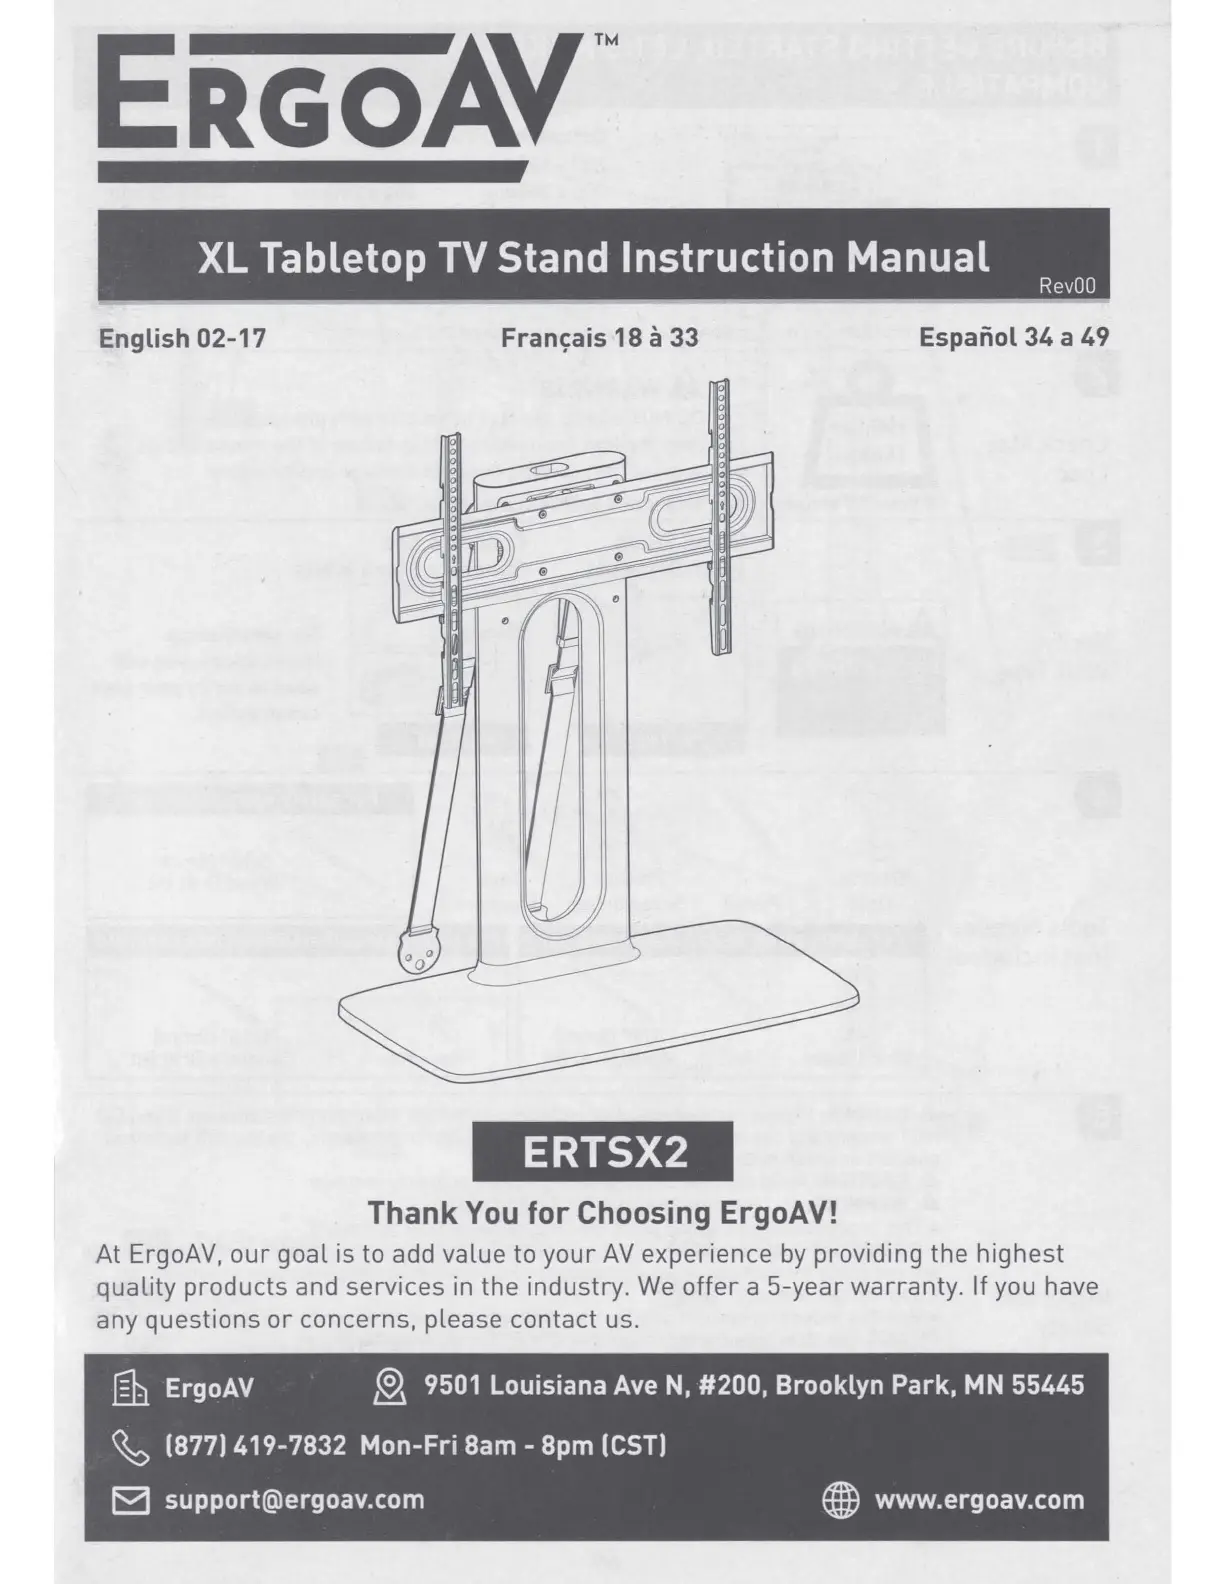
XL Tabletop TV Stand Instruction Manual
RevOO
English 02-17 Fran~ais 18 a 33
Espanol 34 a 49
ERTSX2
Thank
You
for
Choosing
ErgoAV!
At ErgoAV,
our
goal is to add value to
your
AV
experience
by
providing the highest
quality products and services in the industry.
We
offer
a 5-year warranty. If you have
any questions
or
concerns, please contact us .
.@1
ErgoAV
~
9501 Louisiana
Ave
N,
#200, Brooklyn Park, MN 55445
~
(877) 419-7832 Mon-Fri 8am -8pm (CST)
@)
www.ergoav.com
Enso/
RevOO
I
Thank You for Choosing ErgoAV!
@
Produktspecifikationer
| Varumärke: | ErgoAV |
| Kategori: | TV-bänk |
| Modell: | ERTSX2-01B |
Behöver du hjälp?
Om du behöver hjälp med ErgoAV ERTSX2-01B ställ en fråga nedan och andra användare kommer att svara dig
TV-bänk ErgoAV Manualer

12 September 2025
10 September 2025
10 September 2025
10 September 2025
10 September 2025
10 September 2025
9 September 2025
9 September 2025
9 September 2025
9 September 2025
TV-bänk Manualer
Nyaste TV-bänk Manualer
23 Mars 2026
22 Mars 2026
14 Mars 2026
12 Mars 2026
28 Januari 2026
14 Oktober 2025
15 September 2025
15 September 2025
15 September 2025
15 September 2025