Flir Oryx Bruksanvisning
Flir Inte kategoriserad Oryx
Läs gratis den bruksanvisning för Flir Oryx (2 sidor) i kategorin Inte kategoriserad. Guiden har ansetts hjälpsam av 34 personer och har ett genomsnittsbetyg på 4.6 stjärnor baserat på 8 recensioner. Har du en fråga om Flir Oryx eller vill du ställa frågor till andra användare av produkten? Ställ en fråga
Sida 1/2
GETTING
GETTING
GETTING
GETTINGGETTING
STARTED
STARTED
STARTED
STARTEDSTARTED
ORYX®
GigEVision
Will
Will
Will
WillWillyour
your
your
youryoursystem
system
system
systemsystemsupport
support
support
supportsupportthe
the
the
thethecamera?
camera?
camera?
camera?camera?
RecommendedSystemConfiguration:
n
OS—WindowsorLinux(32-or64-bit)
n
CPU—Inteli7orgreater
n
RAM—8GBdualchannel
n
Ports—10GBASE-Tnetworkadapter
n
Software—MicrosoftVisualStudio2010,VisualStudio2013,orVisualStudio
2015(torunandcompileexamplecode)
Do
Do
Do
DoDoyou
you
you
youyouhave
have
have
havehavea
a
a
aadownloads
downloads
downloads
downloadsdownloadsaccount?
account?
account?
account?account?
Adownloadsaccountisrequiredtodownloadsoftwareandfirmware.
1.Goto.www.flir.com/account
2.EnteryouremailaddressandclickContinue.
3.CompletetheCreateanaccountformandclickContinue.
4.Youwillreceiveanemailwithalinktoactivateyouraccount.
5.Onceactivated,youcanloginusingthecredentialsyou'vecreated.
ThehasmanyresourcestohelpyouoperateyourcameraOryxresourcespage
effectively,including:
n
Spinnaker
®
SDKsoftware,includingdrivers(loginrequired)
n
Firmwareupdatesandreleasenotes(loginrequired)
n
DimensionaldrawingsandCADmodels
n
Documentation
Do
Do
Do
DoDoyou
you
you
youyouhave
have
have
havehaveall
all
all
allallthe
the
the
thetheparts
parts
parts
partspartsyou
you
you
youyouneed?
need?
need?
need?need?
Toinstallyourcamerayouneedthefollowingcomponents:
n
Ethernetcable
n
GPIOcable
n
Lens
n
Tripodadapter(optional)
n
Interfacecard
TeledyneFLIRsellsanumberoftheadditionalpartsrequiredforinstallation.To
purchase,visitthe.Accessoriespage
Camera
Camera
Camera
CameraCameraCare
Care
Care
CareCare
Tocleantheimagingsurfaceofyourcamera,followthestepsoutlinedinCleaning
theimagingsurfaceofyourcamera.
Extendedexposuretobrightsunlight,rain,dustyenvironments,etc.maycause
problemswiththeelectronicsandopticsofthesystem.
Avoidexcessiveshaking,dropping,ormishandlingofthedevice.
Warning!Avoidelectrostaticcharging.
Installing
Installing
Installing
InstallingInstallingYour
Your
Your
YourYourInterface
Interface
Interface
InterfaceInterfaceCard
Card
Card
CardCardand
and
and
andandSoftware
Software
Software
SoftwareSoftware
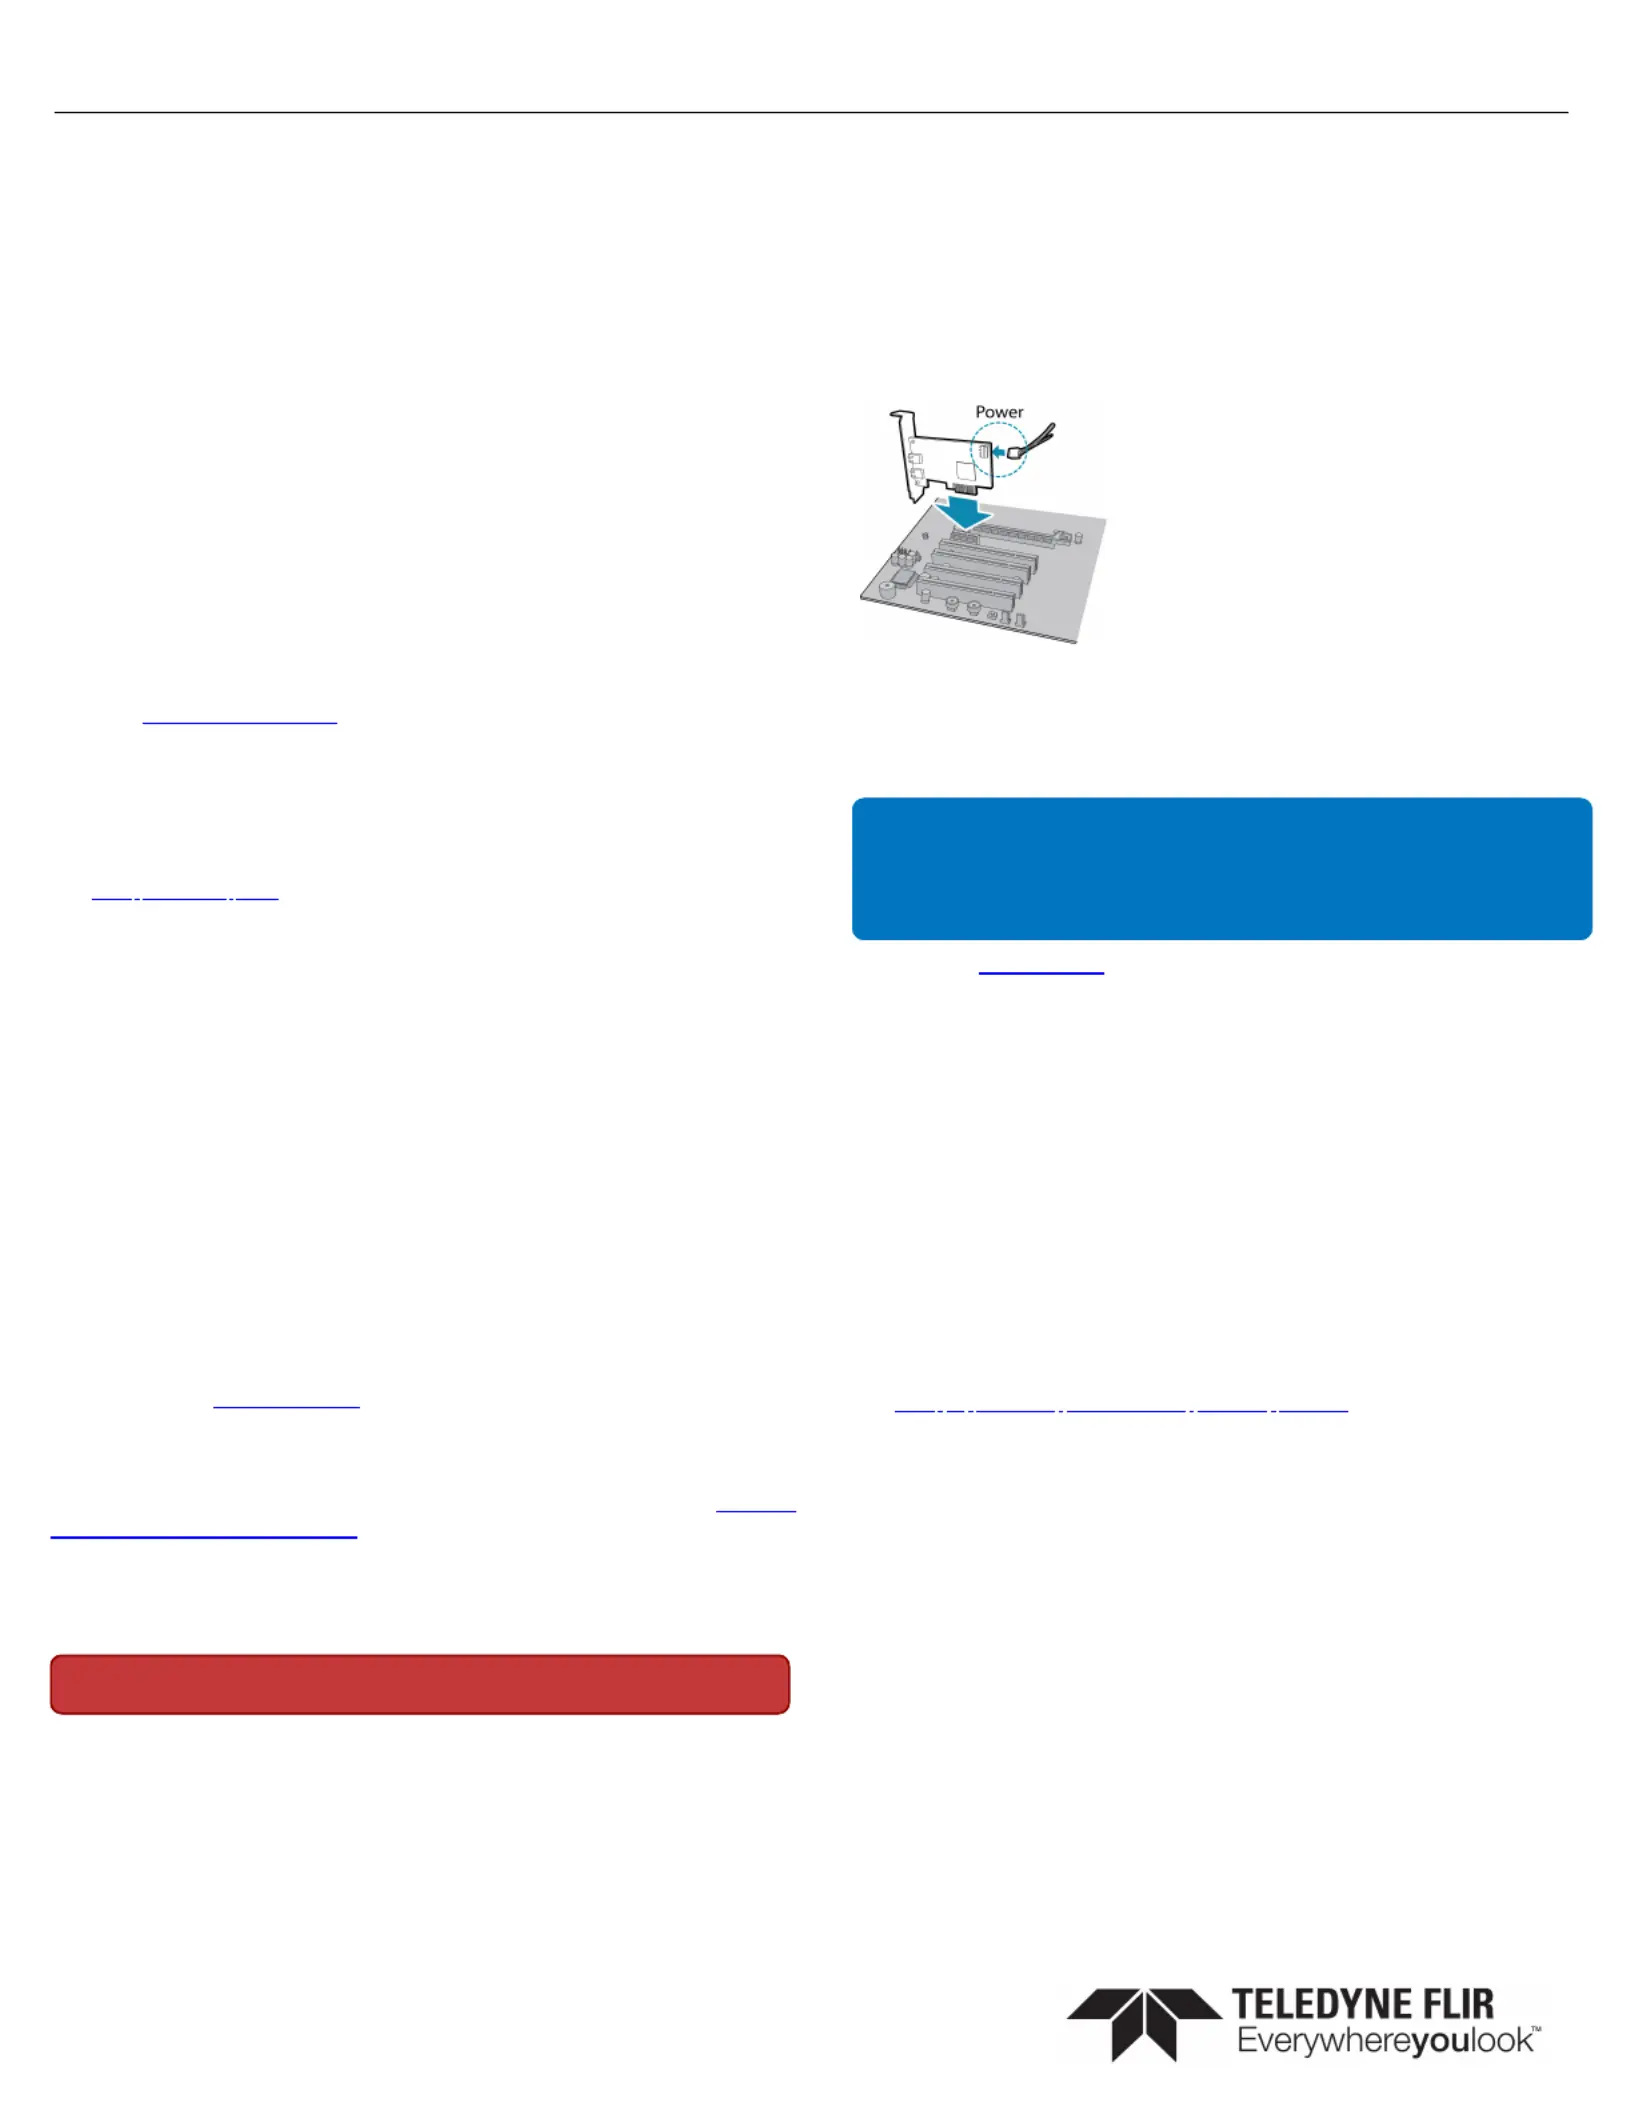
1.InstallyourInterfaceCard
Ensurethecardisinstalledperthe
manufacturer'sinstructions.
ConnecttheinternalIDEorSATApower
connectoronthecardtothecomputerpower
supply.
Alternatively,useyourPC'sbuilt-inhost
controller,ifequipped.
OpentheWindowsDeviceManager.Ensurethecardisproperlyinstalled.Ethernet
cardsappearunder.Anexclamationpoint(!)nexttothecardNetworkAdapters
indicatesthedriverhasnotyetbeeninstalled.
2.InstalltheSpinnaker®Software
Note:ForexistinguserswhoalreadyhaveSpinnakerinstalled,werecommend
ensuringyouhavethelatestversionforoptimalperformanceofyourcamera.If
youdonotneedtoinstallSpinnaker,useSpinViewtoinstallandenabledrivers
foryourcard.
a.Gotothepage.SpinnakerSDK
b.ClicktheDownloadbutton.Youarepromptedtologin,ifnotalready.
c.Selectyouroperatingsystem.Dependingonyourselectiontheremaybeother
versionstoselect.
d.Afterdownloadiscomplete,openthefiletostarttheSpinnakersetupwizard.
e.Followthestepsineachsetupdialog.
3.EnablejumboframesontheEthernetcard
a.In,rightclickontheNetworkStart->AllPrograms->SpinnakerSDK->SpinView
AdapterandselectAdapterConfiguration,thenselectIPConfiguration.
b.ClickOpenNetworkConnections.
c.ClickChangeSettings.
d.ClickontheAdvancedtabandfromtheSettingslistselectJumboPacket.
e.SettheValueto9014BytesandclickOK.
SeeformoreinformationonHowtoOptimizeGigENetworkAdapterSettings
configuringforbestperformance.
Using
Using
Using
UsingUsingthe
the
the
thetheSpinnaker
Spinnaker
Spinnaker
SpinnakerSpinnaker
®
®
®
®®
SDK
SDK
SDK
SDKSDK
YoucanmonitororcontrolfeaturesofthecamerathroughSpinnakerAPIexamples
providedintheSpinnakerSDK,orthroughtheSpinViewcameraevaluation
application.Aisincludedintheinstallation.Programmer'sGuideandAPIReference
11/29/2022
Namesandmarksappearingontheproductshereinareeither
registeredtrademarksortrademarksofFLIRSystems,Inc.and/orits
subsidiaries.
©2015-2022FLIRIntegratedImagingSolutionsInc.Allrights
reserved.
Produktspecifikationer
| Varumärke: | Flir |
| Kategori: | Inte kategoriserad |
| Modell: | Oryx |
Behöver du hjälp?
Om du behöver hjälp med Flir Oryx ställ en fråga nedan och andra användare kommer att svara dig
Inte kategoriserad Flir Manualer

30 Januari 2025
23 September 2024
23 September 2024
18 September 2024
17 September 2024
16 September 2024
16 September 2024
16 September 2024
16 September 2024
16 September 2024
Inte kategoriserad Manualer
Nyaste Inte kategoriserad Manualer
9 April 2025
9 April 2025
9 April 2025
9 April 2025
9 April 2025
9 April 2025
9 April 2025
9 April 2025
9 April 2025
9 April 2025