Fluke C101 Bruksanvisning
Fluke ej kategoriserat C101
Läs gratis den bruksanvisning för Fluke C101 (1 sidor) i kategorin ej kategoriserat. Guiden har ansetts hjälpsam av 47 personer och har ett genomsnittsbetyg på 4.7 stjärnor baserat på 9 recensioner. Har du en fråga om Fluke C101 eller vill du ställa frågor till andra användare av produkten? Ställ en fråga
Sida 1/1
®
C101
Hard Case
Hoja de instrucciones
El estuche C101 deFluke viene con dos capas de espuma precortada que se puede adaptar para guardar el
contenido desu juego. Si desea adaptarel estuche para accesorios:
1.Coloque el contenido del juego sobre la espuma precortada. Acomode los artículos hasta que entren
todos los componentes del juego. Asegúrese de dejar suficiente espacio entre cada uno.
Nota
Para obtener la máxima proteccióndelcontenido del juego, guarde todos loscompo-nentes dentro del
área precortada. Esto protegerá todos los lados de cada componente.
2.Inserte un mondadientes en las cuatro esquinas de cada área que desee quitar. Con un cuchillo
afilado y puntiagudo, corte cuidadosamente cada tapón de espuma de acuerdo con su diseño.
3.Quite cada tapón en una sola pieza y sepárelo.
4.Inserte el contenido del juego en los bolsillos recortados que creó. Para los artículos más delgados
puede cortar los tapones de espuma que separó y utilizarlos para ajustar la altura del bolsillo según
sea necesario.
bdq03f.eps
(Spanish)
®
C101
Hard Case
Instruction Sheet
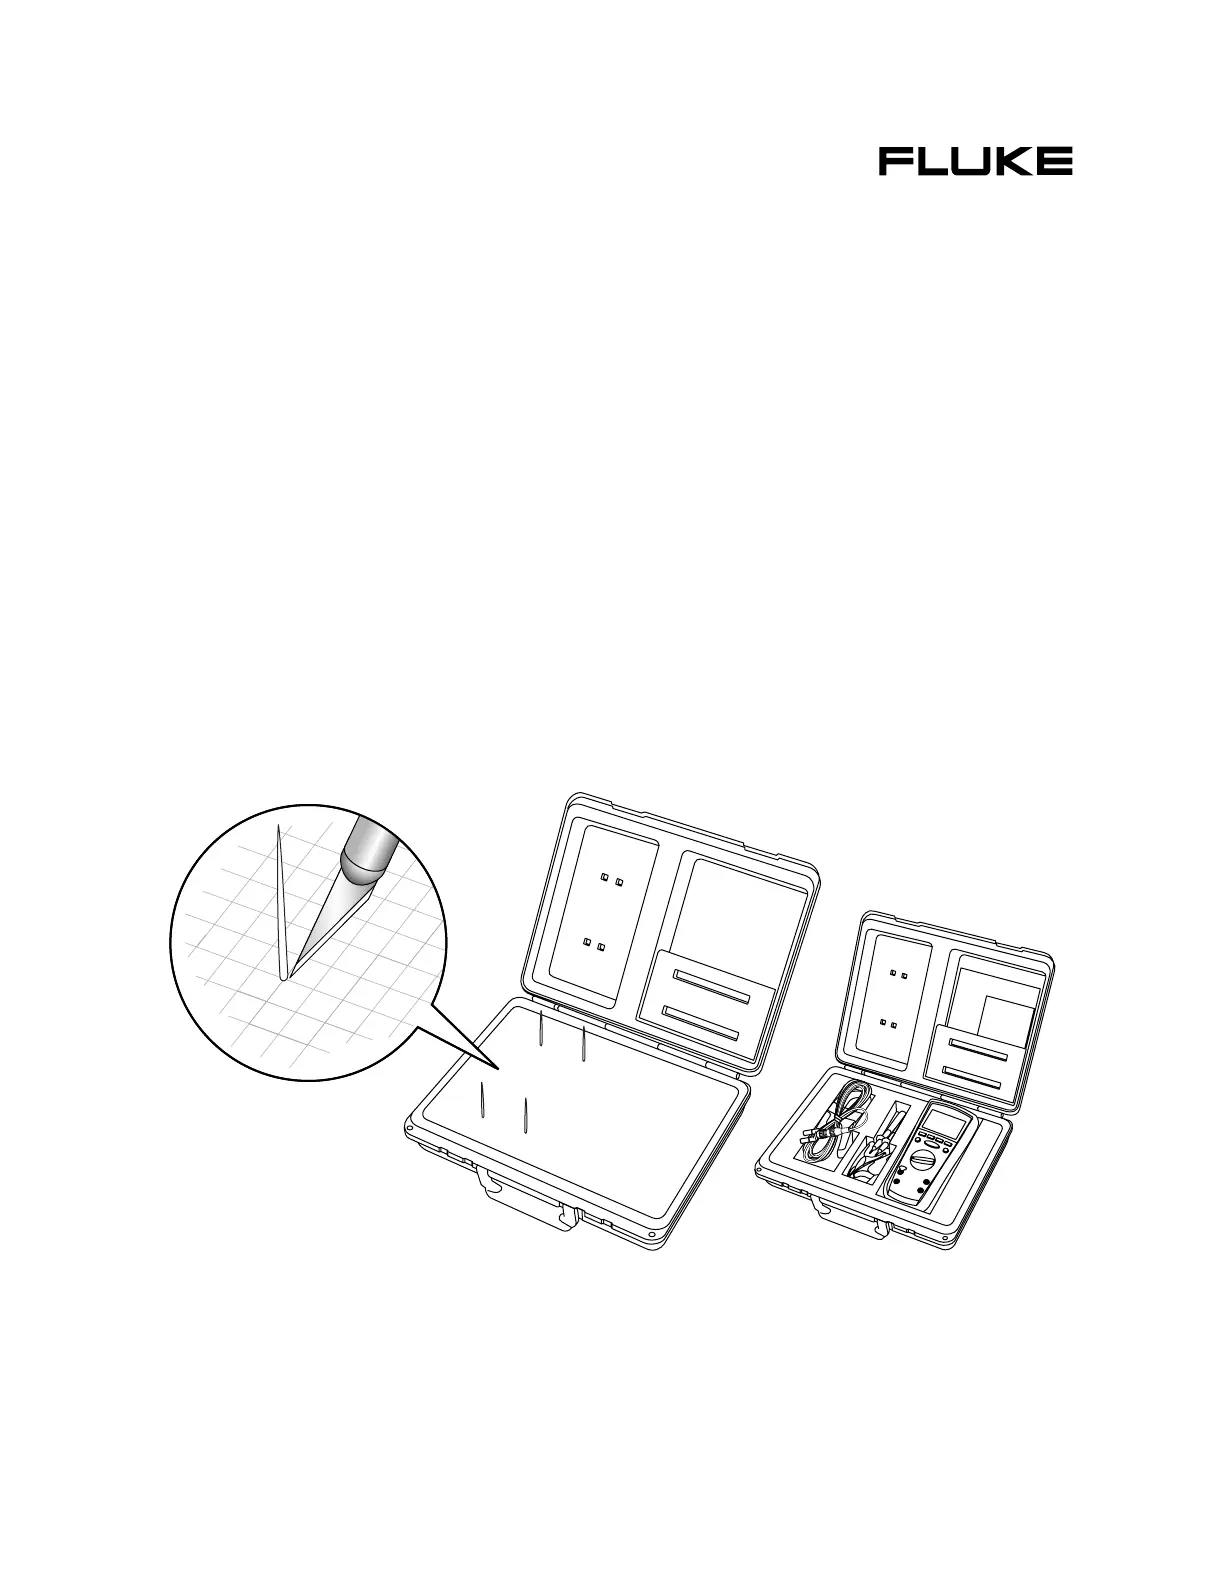
The Fluke C101 Hard Case comes with two layers of pre-cut foam that can be customized to
accommodate the contents of your kit. To customize the accessory case:
1.Place the kit contents on top of the pre-cut form pad. Arrange the articles until you have a layout that
accommodates your kit contents. Be sure to leave adequate space between each item in the kit.
Note
For maximum protection of the kit contents, keep all items inside the pre-cut area. This will
protect each item on all sides.
2.Insert toothpick at all four corners of each area you want to remove. With a sharp, pointed knife,
carefully cut each foam plug according to your layout.
3.Remove each plug in one piece and set aside.
4.Insert the kit contents in the cut out pockets you created. For thinner items, you can cut the saved
foam plugs to adjust the height of the cutout pocket as needed.
bdq03f.eps
PN 2437523
April 2005
© 2005 Fluke Corporation, All rights reserved. Printed in U.S.A.
All product names are trademarks of their respective companies.
Produktspecifikationer
| Varumärke: | Fluke |
| Kategori: | ej kategoriserat |
| Modell: | C101 |
| Bredd: | 305 mm |
| Djup: | 360 mm |
| Höjd: | 105 mm |
| Material: | Polypropylen (PP) |
| Innermått (B x D x H): | 230 x 290 x 65 mm |
| Antal fack: | 1 |
| Produktens färg: | Svart |
| Interiör material: | Skum |
| Blixtlås: | Nej |
| Fickor med blixtlås: | Nej |
Behöver du hjälp?
Om du behöver hjälp med Fluke C101 ställ en fråga nedan och andra användare kommer att svara dig
ej kategoriserat Fluke Manualer

27 September 2025
26 September 2025
26 September 2025
26 September 2025
26 September 2025
26 September 2025
25 September 2025
25 September 2025
25 September 2025
25 September 2025
ej kategoriserat Manualer
Nyaste ej kategoriserat Manualer
3 April 2026
3 April 2026
3 April 2026
3 April 2026
3 April 2026
3 April 2026
3 April 2026
3 April 2026
3 April 2026