Freestyle Condition Bruksanvisning
Läs gratis den bruksanvisning för Freestyle Condition (7 sidor) i kategorin klocka. Guiden har ansetts hjälpsam av 3 personer och har ett genomsnittsbetyg på 3.8 stjärnor baserat på 2 recensioner. Har du en fråga om Freestyle Condition eller vill du ställa frågor till andra användare av produkten? Ställ en fråga
Sida 1/7

To reduce carbon foot print, these
Freestyle instructions are printed with
soy inks on recycled paper.
ENGLISH
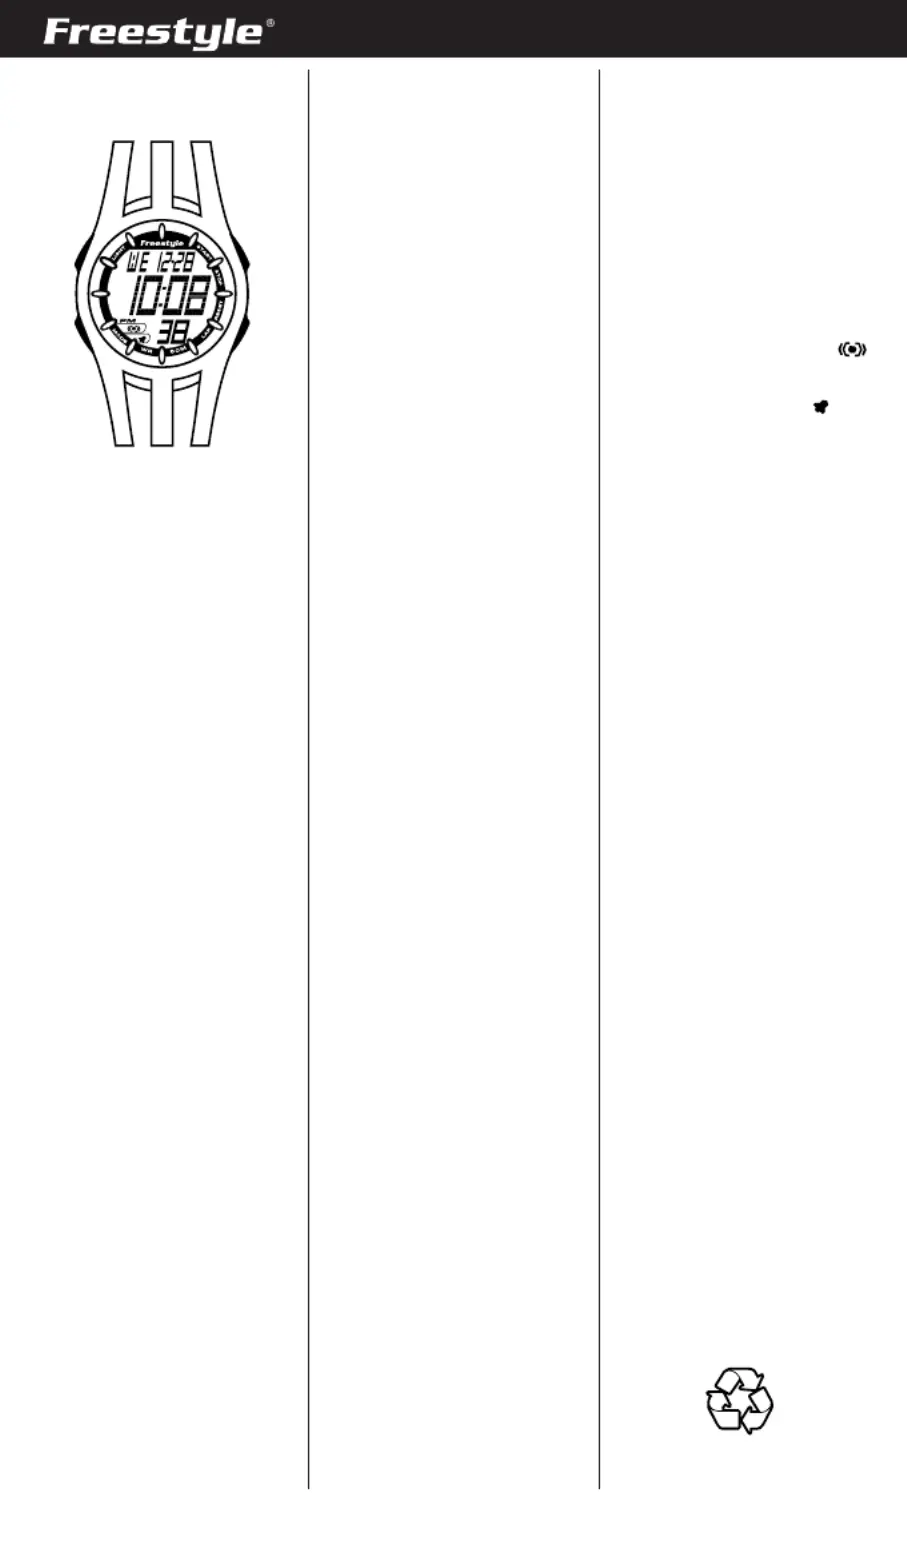
S1. Start/stop Button
S2. Lap/reset Button
S3. Mode Button
S4. Light Button
DISPLAY MODES
The watch has four display modes:
NORMAL TIME, STOPWATCH,
ALARM and TIME SETTING.
To change from one display mode to
another, press S3 button once.
NOTE: In any setting mode, if there
is no key manipulation for a few
minutes, the watch will automati-
cally save the entered data and exit
the setting procedure.
TO SET THE TIME AND CALENDAR
1. Press S3 button to select TIME
SETTING mode.
2. Press S1 button to reset the
second digits to zero. This will
increase the time by 1 minute if
the original setting is at 30 to 59
seconds.
3. Press S2 button, the hour digits
will blink.
4. Press S1 button to set the hour
digits. Holding down the button
will speed up the process.
5. Press S2 button once, the minute
digits will blink.
6. Press S1 button to set the minute
digits. Holding down the button
will speed up the process.
7. Follow the same pattern to set the
month, date and day (of the week).
8. When nished making all the set-
tings, press S3 button to conrm.
TO SET THE HOUR FORMAT
In TIME SETTING mode, when
adjusting the hour digits, the hour
digits are displayed in the 12-hour
format, then in the 24-hour format
and then again in the 12-hour
format. Therefore, please press S1
button so many times that the hour
digits are displayed in the required
format. In the 12-hour format, the
hour digits are identied by “A” for
00:00-12:00 and with “P” for 12:00-
00:00. Whereas in the 24-hour
format, the hour digits are identied
by “H”.
TO USE THE STOPWATCH
1. Press S3 button to select STOP-
WATCH mode.
2. The stopwatch will then be dis-
played in its current state – reset,
running, or stopped.
3. To resume a counting, press S1
button to resume from where it
left off.
4. To start a new counting, reset the
stopwatch to zero rst.
Press S1 button to stop counting,
then press S2 button to reset
counter to zero.
For the measurement of elapsed
time:
In STOPWATCH mode,
1. Press S1 button to start counting.
2. To stop counting, press S1 button
once. Press S1 button again to
resume from where if left off.
3. To reset to zero, press S1 button
to stop counting and then press
S2 button.
For the measurement of split time:
In STOPWATCH mode,
1. Press S1 button to start counting.
2. While the stopwatch is running,
press S2 button once to register
a lap. The split time of the
registered lap will be displayed.
The stopwatch is still running in
the background. To display the
currently accumulated time, press
S2 button again.
3. Repeat the last step until all the
laps have been registered.
4. To reset to zero, press S1 button
to stop counting and then press
S2 button.
For the measurement of two
nishes:
In STOPWATCH mode,
1. Press S1 button to start counting.
2. While the stopwatch is running,
press S2 button to register and
display the time of the rst run-
ner. The stopwatch is still running
in the background.
3. Press S1 button to stop and regis-
ter the time of the second runner.
4. Press S2 button to display the
time of the second runner.
5. To reset to zero, press S2 button
again.
NOTE: The stopwatch can count
up to a maximum of 23 hours, 59
minutes and 59.99 seconds.
NOTE: You can leave the stopwatch
running while switching over to
other operating modes.
TO SET THE ALARM
1. Press S3 button to select ALARM
mode.
2. Press S2 button once, the hour
digits will blink.
3. Press S1 button to set the hour
digits. Holding down the button
will speed up the process.
4. Press S2 button once, the minute
digits will blink.
5. Press S1 button to set the minute
digits. Holding down the button
will speed up the process.
6. When nished making all the set-
tings, press S2 button to conrm.
NOTE: The alarm will automatically
be activated after being set.
TO TURN ON/OFF THE ALARM AND
HOURLY CHIME
In ALARM mode,
1. Press S1 button once to activate
the alarm. Alarm indicator (
)
will appear.
2. Press again to activate the hourly
chime. Chime indicator (
) will
appear.
3. Press the third time to activate
both functions. Both of the indica-
tors will appear.
4. Press the fourth time to deacti-
vate both functions. Both of the
indicators will disappear.
WHEN AN ALARM OR HOURLY
CHIME GOES OFF
A tune will be emitted by the hour
when the hourly chime function is
activated.
A 20-second alarm tune will be
emitted at designated time when
the alarm is activated. To stop the
tune, press S1, S2 or S3 button.
By pressing S3 button, the watch
will activate a snooze function.
The alarm will go off again after 5
minutes but for only once.
TO USE THE BACKLIGHT
Press S4 button to turn on the back-
light for approximately 3 seconds.
Freestyle_Condition_AG9167-R00
CONDITION
S1S4
S2S3
Freestyle_Condition-AG9167-R00.indd 2 5/23/12 3:12:12 PM

S1. Botón para iniciar/parar
S2. Botón de vuelta/puesta a cero
S3. Botón de modo
S4. Botón de luz
MODOS DE PANTALLA
El reloj cuenta con cuatro modos
de pantalla: hora normal (NORMAL
TIME), cronómetro (STOPWATCH ),
alarma (ALARM) y ajuste de hora
(TIME SETTING).
Para pasar de un modo de pantalla
a otro, pulse el botón S3 una vez.
NOTA: En cualquier modo de ajuste,
si no toca ningún botón en unos
minutos, el reloj guardará automáti-
camente los datos introducidos y
saldrá del procedimiento de ajuste.
CÓMO PONER LA HORA Y EL
CALENDARIO
1. Pulse el botón S3 para selec-
cionar el modo de ajuste de hora.
2. Pulse el botón S1 para resta-
blecer los dígitos de los segundos
a cero. Esta operación añadirá 1
minuto a la hora si los segundos
del ajuste original estaban en el
intervalo 30 a 59.
3. Pulse el botón S2; los dígitos de
la hora parpadearán.
4. Pulse el botón S1 para ajustar los
dígitos de la hora. Si mantiene el
botón pulsado, el proceso será
más rápido.
5. Pulse el botón S2 una vez; los
dígitos de los minutos par-
padearán.
6. Pulse el botón S1 para ajustar los
dígitos de los minutos. Si man-
tiene el botón pulsado, el proceso
será más rápido.
7. Siga el mismo patrón para ajustar
el mes, la fecha y el día (de la
semana).
8. Una vez nalizados todos estos
ajustes, pulse el botón S3 para
conrmar.
CÓMO AJUSTAR EL FORMATO
HORARIO
En el modo de ajuste de hora,
al ajustar los dígitos de la hora
estos se muestran en formato 12
horas primero, en formato 24 horas
después y en formato 12 horas
nuevamente. Por lo tanto, pulse
el botón S1 las veces que sean
necesarias hasta que los dígitos de
la hora se muestren en el formato
deseado. En el formato de 12 horas,
los dígitos de la hora se identican
con «A» para 00:00-12:00 y con «P»
para 12:00-00:00. En el formato de
24 horas, en cambio, los dígitos de
la hora se identican con «H».
CÓMO USAR EL CRONÓMETRO
1. Pulse el botón S3 para selec-
cionar el modo de CRONÓMETRO.
2. Aparecerá el cronómetro en el
estado en que esté: en marcha, a
cero o parado.
3. Pulse el botón S1 para retomar la
cuenta ahí donde se quedó.
4. Para iniciar una cuenta
nueva, primero hay que poner el
cronómetro a cero.
Pulse el botón S1 para interrum-
pir la cuenta y después pulse el
botón S2 para volver a cero.
Para medir el tiempo transcurrido:
En modo CRONÓMETRO,
1. Pulse el botón S1 para empezar a
contar.
2. Pulse el botón S1 para interrum-
pir la cuenta. Pulse el botón S1
otra vez para retomar la cuenta
ahí donde se quedó.
3. Pulse el botón S1 para interrum-
pir la cuenta y después pulse el
botón S2 para volver a cero.
Para medir el tiempo dividido:
En modo CRONÓMETRO,
1. Pulse el botón S1 para empezar a
contar.
2. Mientras el cronómetro está en
marcha, pulse el botón S2 para
registrar una vuelta. Verá el
número de vuelta y el tiempo de la
vuelta grabada.
El cronómetro seguirá contando
por detrás. Para mostrar el
tiempo acumulado hasta el
momento, pulse S2 otra vez.
3. Repita el último paso hasta que
se hayan guardado todas las
vueltas.
4. Pulse el botón S1 para interrum-
pir la cuenta y después pulse el
botón S2 para volver a cero.
Para medir dos marcas:
En modo CRONÓMETRO,
1. Pulse el botón S1 para empezar a
contar.
2. Mientras el cronómetro está en
marcha, pulse el botón S2 un vez
para registrar una vuelta y ver
el tiempo hecho por el primer
corredor. El cronómetro seguirá
contando por detrás.
3. Pulse el botón S1 para parar y
registrar el tiempo del segundo
corredor.
4. Pulse el botón S2 para ver el
tiempo del segundo corredor.
5. Pulse el botón S2 otra vez para
volver a cero.
NOTA: El cronómetro puede contar
hasta un máximo de 23 horas, 59
minutos y 59,99 segundos.
NOTA: Puede dejar la CUENTA
ATRÁS en marcha y cambiar a otros
modos operativos.
CÓMO AJUSTAR LA ALARMA
1. Pulse el botón S3 para selec-
cionar el modo de alarma.
2. Pulse el botón S2 una vez; los
dígitos de la hora parpadearán.
3. Pulse el botón S1 para ajustar los
dígitos de la hora. Si mantiene el
botón pulsado, el proceso será
más rápido.
4. Pulse el botón S2 una vez; los
dígitos de los minutos par-
padearán.
5. Pulse el botón S1 para ajustar los
dígitos de los minutos. Si man-
tiene el botón pulsado, el proceso
será más rápido.
6. Una vez nalizados todos estos
ajustes, pulse el botón S2 para
conrmar.
NOTA: La alarma se activará
automáticamente una vez haya sido
ajustada.
CÓMO ACTIVAR/DESACTIVAR LA
ALARMA Y EL REPIQUE HORARIO
En el modo de alarma:
1. Pulse el botón S1 una vez para
activar la alarma. Aparecerá el
indicador de alarma (
).
2. Pulse otra vez para activar el
repique horario. Aparecerá el
indicador de repique ( ).
3. Pulse el botón una tercera vez
para activar ambas funciones.
Aparecerán ambos indicadores.
4. Pulse el botón una cuarta vez
para desactivar ambas funciones.
Ambos indicadores desapare-
cerán.
CÓMO APAGAR LA ALARMA O EL
REPIQUE HORARIO CUANDO
SUENE
Si la función de repique horario
está activada, cuando llegue la hora
sonará una melodía.
Se emitirá una melodía de alarma
de 20 segundos a la hora ajustada
cuando se active la alarma. Para
detener la melodía, pulse el botón
S1, S2 o S3. Si pulsa el botón S3,
el reloj activará una función de
repetición. La alarma volverá a
sonar tras cinco minutos pero solo
una vez.
CÓMO USAR LA LUZ DE FONDO
Pulse el botón S4 para encender
la luz de fondo durante unos 3
segundos.
ESPAÑOL
Para reducir la huella del carbono,
las instrucciones de Freestyle se han
imprimido con tinta de soja en papel
reciclado.
Freestyle_Condition_AG9167-R00
CONDITION
S1S4
S2S3
Freestyle_Condition-AG9167-R00.indd 4 5/23/12 3:12:13 PM

S1 - Start/Stop-Taste
S2 - Taste Rundenzeit/Rücksetzen
S3 - Taste “Modus”
S4 - Taste für Beleuchtung
ANZEIGEMÖGLICHKEITEN
Die Uhr verfügt über vier An-
zeigemöglichkeiten: NORMALE ZEIT,
STOPPUHR, ALARM- und ZEITEIN-
STELLUNG.
Um von einem Anzeigemodus zu
einem anderen zu wechseln, drücken
Sie einmal auf den S3-Knopf.
ANMERKUNG: In jedem Einstel-
lungsmodus speichert die Uhr
automatisch die eingegebenen Daten
und beendet den Einstellungsmo-
dus, wenn für ein paar Minuten kein
anderer Knopf betätigt wurde.
ZUR EINSTELLUNG DER ZEIT UND
DES DATUMS
1. Drücken Sie auf den S3-Knopf,
um den Zeiteinstellungsmodus
auszuwählen.
2. Drücken Sie den S1-Knopf, um die
zweiten Ziffern auf Null zu stellen.
Das führt dazu, dass die Zeit um
1 Minute vorgestellt wird, wenn
die ursprüngliche Einstellung
zwischen 30 und 59 Sekunden ist.
3. Drücken Sie den S2-Knopf, die
Stunden blinken auf.
4. Drücken Sie auf den S1-Knopf, um
die Stunde einzustellen. Wenn Sie
den Knopf länger drücken, wird die
Einstellung beschleunigt.
5. Drücken Sie den S2-Knopf einmal,
die Minuten blinken auf.
6. Drücken Sie auf den S1-Knopf, um
die Minuten einzustellen. Wenn Sie
den Knopf länger drücken, wird die
Einstellung beschleunigt.
7. Gehen Sie auf die gleiche Weise
vor, um den Monat und den Tag
(der Woche) einzustellen.
8. Nachdem alle Einstellungen
beendet sind, drücken Sie zur
Bestätigung auf den S3-Knopf.
ZUR EINSTELLUNG DES
STUNDENFORMATS
Im ZEITEINSTELLUNGS-Modus
werden beim Einstellen der Stunden
diese im 12-Stunden-Format an-
gezeigt, dann im 24-Stunden-Format
und dann wieder im 12-Stunden-
Format. Deshalb drücken Sie den S1-
Knopf so lange, damit die Stunden
im gewünschten Format angezeigt
werden. Im 12-Stunden-Format
werden die Stunden mit “A” für 00:00-
12:00 gekennzeichnet und mit “P” für
12:00-00:00. Wohingegen die Stunden
im 24-Stunden-Format durch “H”
gekennzeichnet werden.
ZEITMESSUNG MIT DER STOPPUHR
1. Drücken Sie Taste S3 um den
Modus STOPPUHR zu wählen.
2. Die Stoppuhr wird dann im aktuel-
len Status - rücksetzen, zählend,
gestoppt - angezeigt.
3. Drücken Sie Taste S1 um ab der
letzten Messung weiter zu messen.
4. Um eine neue Zeitmessung zu
starten, setzen Sie die Stoppuhr
zuerst wieder auf “Null”.
Drücken Sie Taste S1 um die
Zeitmessung zu stoppen und dann
Taste S2 um den Zähler wieder auf
“Null” zurückzusetzen.
Messung der abgelaufenen Zeit:
Im Modus STOPPUHR,
1. Drücken Sie S1 um die Messung zu
starten.
2. Drücken Sie S1 um die Zeitmes-
sung zu stoppen. Drücken Sie
Taste S1 um ab der letzten Mes-
sung weiter zu messen.
3. Drücken Sie Taste S1 um die
Zeitmessung zu stoppen und dann
Taste S2 um den Zähler wieder auf
“Null” zurückzusetzen.
Messung der Zwischenzeit (Split
Time):
Im Modus STOPPUHR,
1. Drücken Sie S1 um die Messung zu
starten.
2. Während die Stoppuhr zählt,
drücken Sie Taste S2 einmal um
die Rundenzeit aufzunehmen. Die
Zwischenzeit der aktuellen Runde
wird angezeigt.
Die Stoppuhr läuft im Hintergrund
weiter. Drücken Sie nochmals
Taste S2 um die aktuelle, kumula-
tive Rundenzeit anzuzeigen.
3. Wiederholen Sie den letzten Schritt
bis alle Runden gemessen wurden.
4. Um die Stoppuhr zurückzusetzen,
drücken Sie Taste S1 um die Zeit-
messung zu stoppen und drücken
anschließend S2.
Messung von zwei Läufern:
Im STOPPUHR -Modus,
1. Drücken Sie Taste S1 um die
Zeitmessung zu starten.
2. Während die Stoppuhr zählt,
drücken Sie Taste S2 einmal um
die Rundenzeit des ersten Läufers
aufzunehmen. Die Stoppuhr läuft
im Hintergrund weiter.
3. Drücken Sie Taste S1 um die
Rundenzeit des zweiten Läufers
aufzunehmen.
4. Drücken Sie Taste S2 um die
Rundenzeit des zweiten Läufers
anzuzeigen.
5. Drücken Sie Taste S2 nochmals um
den Zähler auf „Null“ zurück-
zusetzen.
ANMERKUNG: Die Stoppuhr kann bis
maximal 23 Stunden, 59 Minuten und
59,99 Sekunden zählen.
HINWEIS: Sie können die Stoppuhr
weiter laufen lassen während Sie in
andere Modi umschalten.
ZUR EINSTELLUNG DES ALARMS
1. Drücken Sie den S3-Knopf, um den
ALARM-Modus auszuwählen.
2. Drücken Sie den S2-Knopf einmal,
die Stunden blinken auf.
3. Drücken Sie den S1-Knopf, um
die Stunden einzustellen. Wenn
Sie den Knopf länger drücken,
beschleunigt es die Einstellung.
4. Drücken Sie den S2-Knopf einmal,
die Minuten blinken auf.
5. Drücken Sie auf den S1-Knopf, um
die Minuten einzustellen. Wenn
Sie den Knopf länger drücken,
beschleunigt es die Einstellung.
6. Nachdem alle Einstellungen
beendet sind, drücken Sie zur
Bestätigung auf den S2-Knopf.
ANMERKUNG: Der Alarm wird nach
dem Einstellen automatisch aktiviert.
ZUM ANSTELLEN/ AUSSTELLEN
DES ALARMS UND DES STÜNDLI-
CHEN TONS
Im ALARM-Modus,
1. Drücken Sie den S1-Knopf, wenn
der Alarm aktiviert ist. Der Alar-
manzeiger (
) erscheint.
2. Drücken Sie noch einmal, um den
stündlichen Ton zu aktivieren. Der
Tonanzeiger
(
) erscheint.
3. Drücken Sie ein drittes Mal, um
beide Funktionen zu aktivieren.
Beide Anzeiger erscheinen.
4. Drücken Sie zum vierten Mal, um
beide Funktionen zu deaktivieren.
Beide Anzeiger erlöschen.
WENN EIN ALARM ODER EIN
STÜNDLICHER TON LOSGEHT
Ein Ton ertönt zu der Stunde, zu
der die stündliche Ton-Funktion
aktiviert ist.
Ein 20 Sekunden langer Ton ertönt
zur bestimmten Zeit, wenn der
Alarm aktiviert ist. Um diesen Ton zu
beenden, drücken Sie auf die Knöpfe
S1, S2 oder S3. Durch Drücken auf
den S3-Knopf wird an der Uhr eine
Schlummerfunktion aktiviert. Der
Alarm geht nach 5 Minuten wieder
los, aber nur einmal.
HINTERGRUNDBELEUCHTUNG
Drücken Sie Taste S4 um die
Hintergrundbeleuchtung für etwa 3
Sekunden anzuschalten.
DEUTSCH
Diese Freestyle-Gebrauchsanweisung
wurde mit Tinte auf Sojabasis auf
Recycling-Papier gedruckt um den
Kohleausstoß zu reduzieren.
Freestyle_Condition_AG9167-R00
CONDITION
S1S4
S2S3
Freestyle_Condition-AG9167-R00.indd 6 5/23/12 3:12:13 PM
Produktspecifikationer
Varumärke: | Freestyle |
Kategori: | klocka |
Modell: | Condition |
Typ av klocka: | Armbandsur |
LED-bakgrundsbelysning: | Ja |
Vattentät: | Ja |
Stoppur: | Ja |
Larmfunktion: | Ja |
Urtavlans huvudfärg: | Röd |
Produktdesign: | Sport |
Typ av urtavla: | LCD-urtavla |
Kalender: | Ja |
bandmaterial: | Polyuretan |
Mekanism typ: | Elektronisk |
Vattentäthet till ett djup på: | 50 m |
Höljefärg: | Röd |
Armbandets huvudfärg: | Svart |
Utformning: | Rund |
Typ av markeringar: | Arabiska siffror |
Behöver du hjälp?
Om du behöver hjälp med Freestyle Condition ställ en fråga nedan och andra användare kommer att svara dig
klocka Freestyle Manualer
19 Juli 2025
klocka Manualer
- Omega
- Equity
- Kogan
- Vitek
- Auriol
- CyberData Systems
- Razer
- Geemarc
- EMOS
- United Office
- Ventus
- Fisher Price
- Invicta
- Muse
- La Crosse Technology
Nyaste klocka Manualer
19 Juli 2025
19 Juli 2025
18 Juli 2025
18 Juli 2025
18 Juli 2025
18 Juli 2025
11 Juli 2025
11 Juli 2025
10 Juli 2025
10 Juli 2025