GE JXCHWW Bruksanvisning
GE ej kategoriserat JXCHWW
Läs gratis den bruksanvisning för GE JXCHWW (2 sidor) i kategorin ej kategoriserat. Guiden har ansetts hjälpsam av 16 personer och har ett genomsnittsbetyg på 4.3 stjärnor baserat på 4 recensioner. Har du en fråga om GE JXCHWW eller vill du ställa frågor till andra användare av produkten? Ställ en fråga
Sida 1/2
Installation Instructions
JXCHBB, Black
JXCHWW, White
JXCHCC, Bisque
JXCHSS, Stainless Steel
JXCHBB, JXCHWW,
JXCHCC, JXCHSS
Decorative Duct Cover
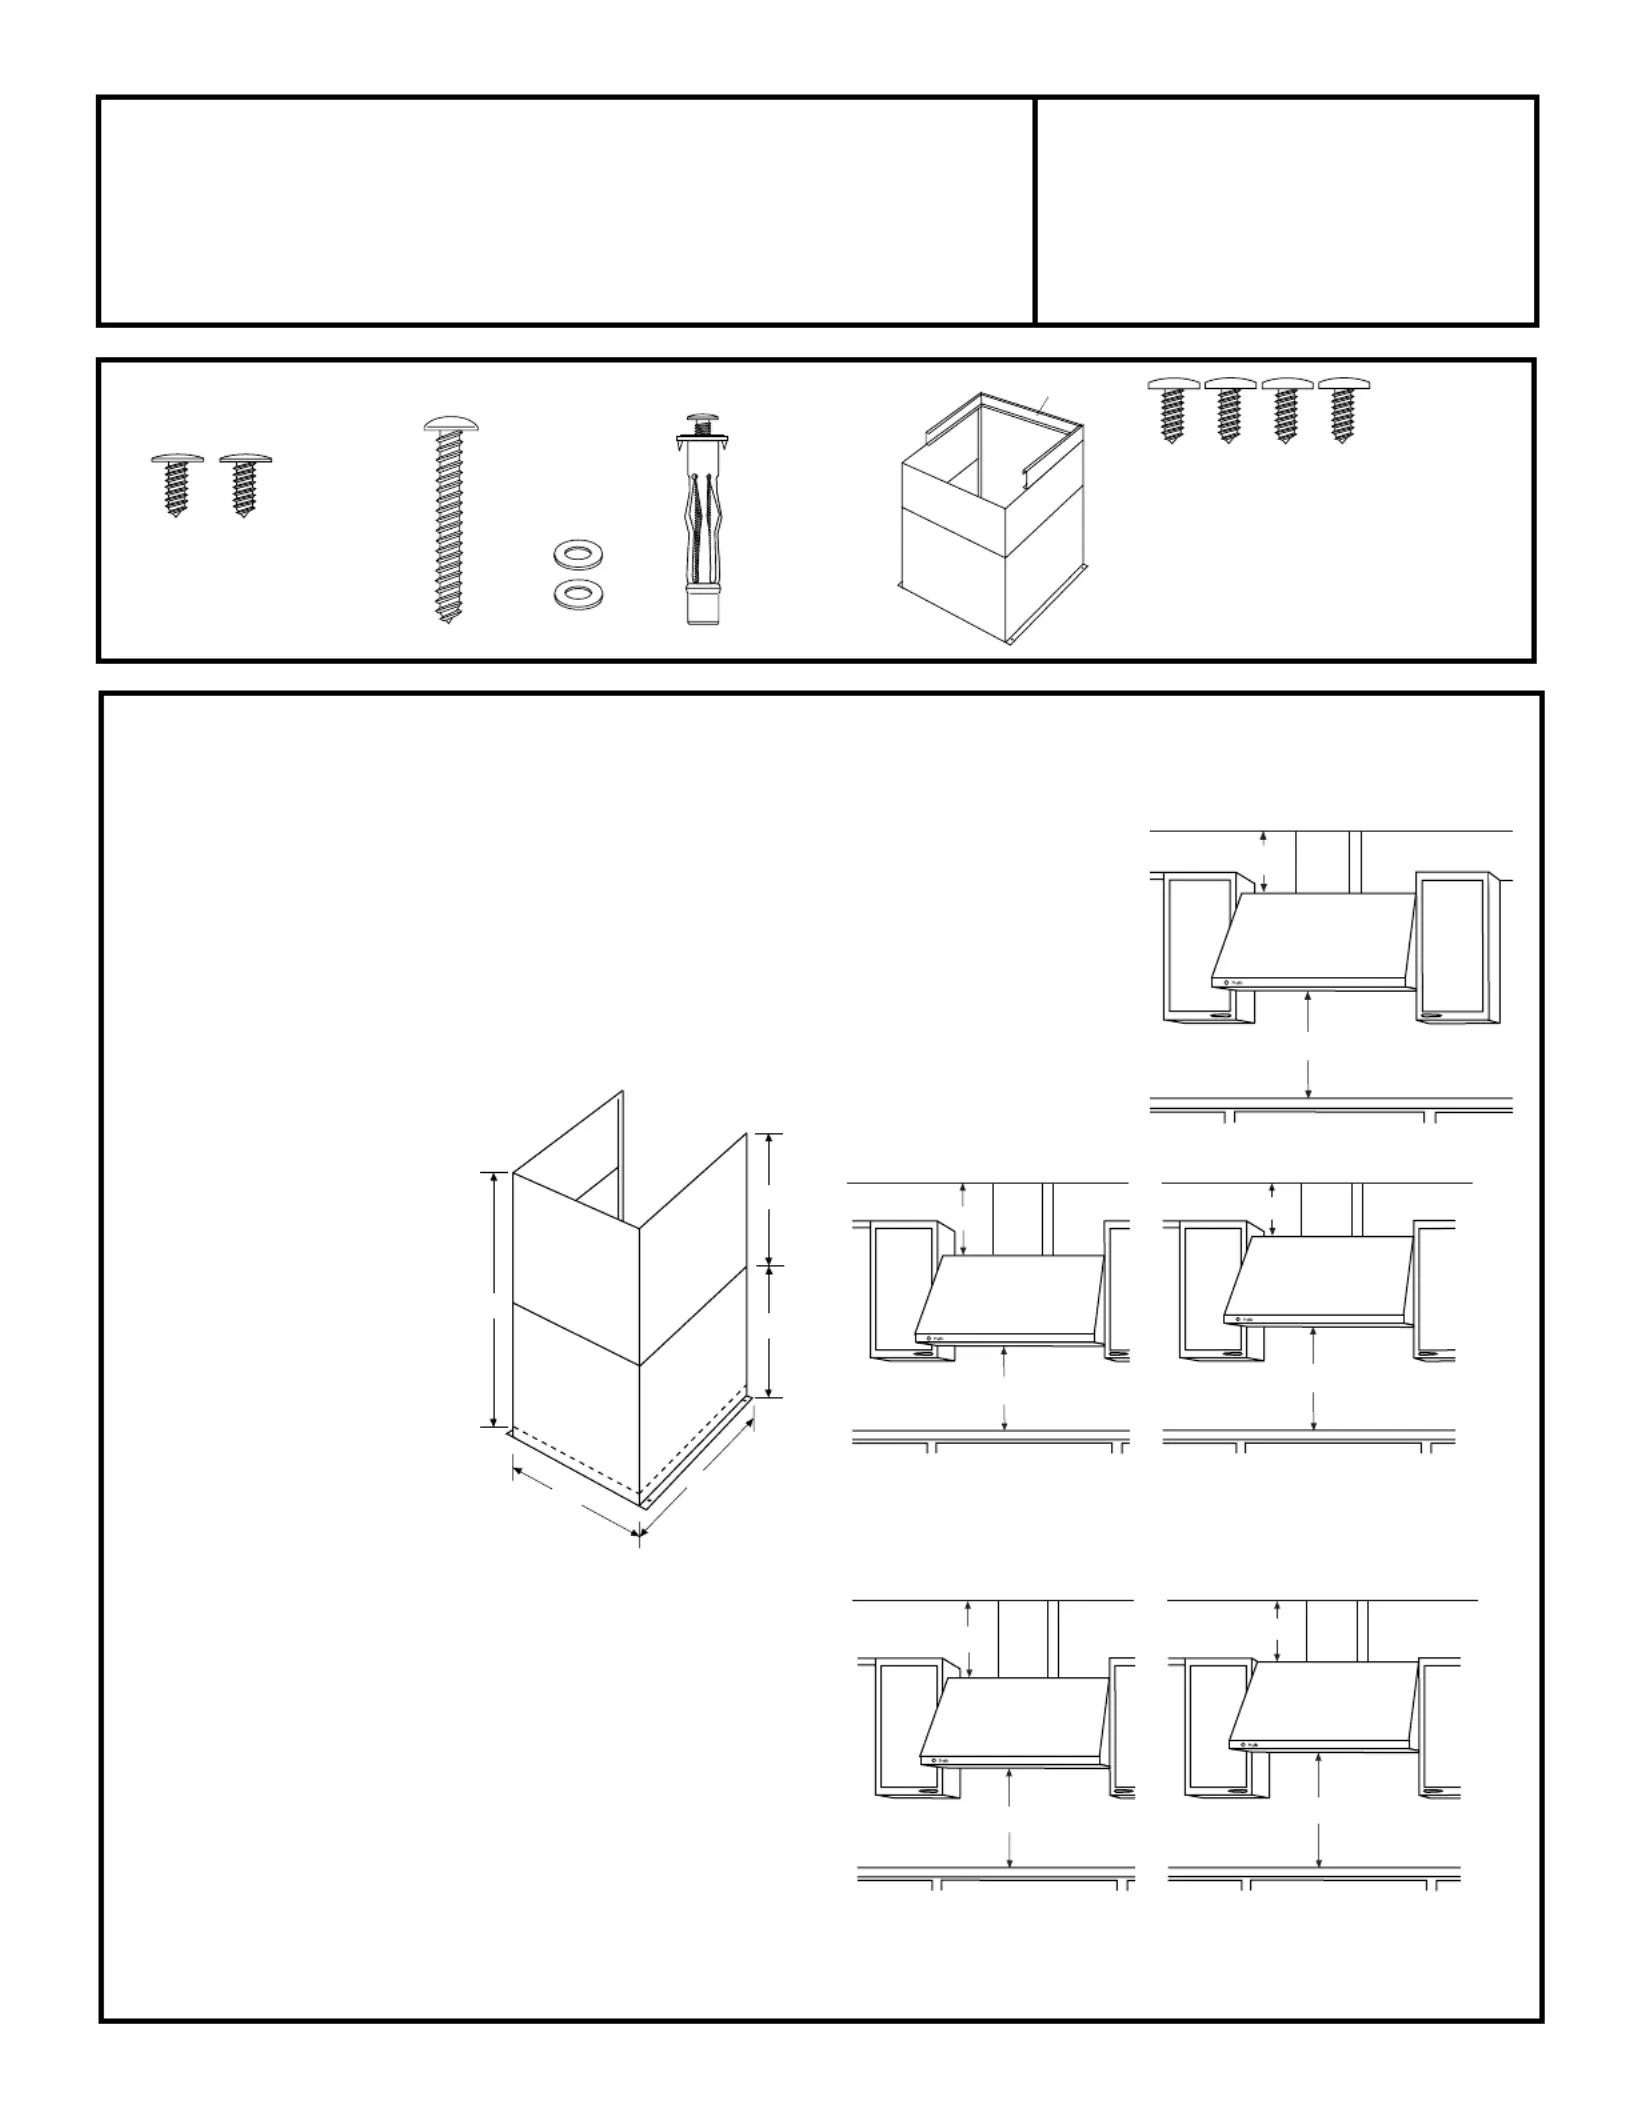
KIT CONTENTS
2-Piece
Duct Cover With
Ceiling Bracket
2 Phillips Head
Decorative Screws
2 Wood
Screws
2 Wall
Fasteners
2 Washers
4 Torx Head
Screws
Ceiling Bracket
DUCT COVER REQUIREMENTS
These decorative duct covers are designed to conceal
the ductwork running from the top of the hood to the
ceiling. The duct cover can be used to fill a 12" space by
using the outer piece alone, or using both pieces it will
expand from 24" to 34" heights. Read this page to be
sure the duct cover accessory fits your installation
situation.
Duct Cover Accessory:
• Use the decorative duct
cover to conceal ductwork
running from the top of
the hood to the ceiling.
• The duct cover accessory
consists of 2 pieces. The
outside piece is 12 high,″
the inside piece is 22.″
Nested together they are
24″ min., expanding to
a total maximum height
of 34.″
• The outside piece can be
used alone to fill a 12″
height.
• For heights over 12, the″
ceiling bracket must be
installed to secure the cover at the top.
To avoid unsightly gaps, plan the hood installation height
for duct cover use.
• The cover will fit a 12 min. height from the top of the″
hood to the ceiling,
– or 24 min. and expanding up to 34 from the top of″″
the hood to the ceiling.
THE DUCT COVER CANNOT BE USED WHEN THE
DISTANCE ABOVE THE TOP OF THE HOOD IS
BETWEEN 12 AND 24.″″
Review the following examples to ensure a trouble free
installation using the duct cover accessory.
8 ft. Ceilings: The hood must
be installed at 30 above the″
cooking surface (or 66 above″
the floor). The duct cover will
not fit if the hood is installed at
a lower or higher height. Use
the outside 12 section, discard″
the inside section.
8 ft. Ceiling
30"
12"
9 ft. Ceilings: Install the hood 24 min. and up to a maximum of 30″″
above the cooking surface. The duct cover will expand to reach
ceiling height.
10 ft. Ceilings: Install the hood 32 min. to 36 max. above the cooking″″
surface. The duct cover will expand to a maximum of 34 above the″
top of the hood to meet the ceiling.
24"
30"
9 ft. Ceiling
30"
24"
32"
34"
10 ft. Ceiling
36" Max.
30"
12"
12"
12"
11"
22"
Produktspecifikationer
| Varumärke: | GE |
| Kategori: | ej kategoriserat |
| Modell: | JXCHWW |
Behöver du hjälp?
Om du behöver hjälp med GE JXCHWW ställ en fråga nedan och andra användare kommer att svara dig
ej kategoriserat GE Manualer

9 Augusti 2025
9 Augusti 2025
8 Augusti 2025
8 Augusti 2025
ej kategoriserat Manualer
Nyaste ej kategoriserat Manualer
3 April 2026
3 April 2026
3 April 2026
3 April 2026
3 April 2026
3 April 2026
3 April 2026
3 April 2026
3 April 2026