Hoshizaki HS-5246 Bruksanvisning
Hoshizaki
ej kategoriserat
HS-5246
Läs gratis den bruksanvisning för Hoshizaki HS-5246 (2 sidor) i kategorin ej kategoriserat. Guiden har ansetts hjälpsam av 26 personer och har ett genomsnittsbetyg på 3.7 stjärnor baserat på 13.5 recensioner. Har du en fråga om Hoshizaki HS-5246 eller vill du ställa frågor till andra användare av produkten? Ställ en fråga
Sida 1/2

1
2A8478-013
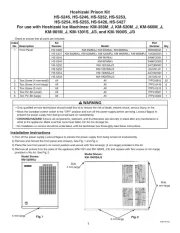
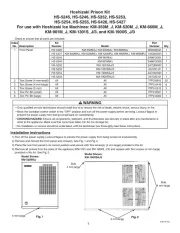
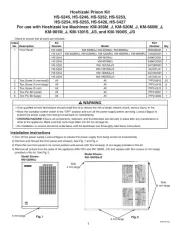
Hoshizaki Prison Kit
HS-5245, HS-5246, HS-5252, HS-5253,
HS-5254, HS-5255, HS-5426, HS-5427
For use with Hoshizaki Ice Machines: KM-350M_J, KM-520M_J, KM-660M_J,
KM-901M_J, KM-1301S_J/3, and KM-1900S_J/3
Check to ensure that all parts are included:
Index
No. Description
Kit
Number Model
Part
Number Qty
1 Front Panel HS-5426 KM-350MAJ, KM-520MAJ, KM-660MAJ 3B0020G01 1
HS-5427 KM-350MWJ, KM-520MWJ, KM-520MRJ, KM-660MWJ, KM-660MRJ 1A5320G01 1
HS-5245 KM-901MAJ 2A8612G01 1
HS-5246 KM-901MWJ 2A8612G02 1
HS-5252 KM-1301SAJ/3 2A7289G01 1
HS-5253 KM-1301SWJ/3 2A7251-01 1
HS-5254 KM-1900SAJ/3 2A7292G01 1
HS-5255 KM-1900SWJ/3 2A7252-01 1
2 Torx Screw (4 mm-small) All All 7PP2I0812 20
3 Torx Screw (4 mm-large) All All 7PP2-0410 6
4 Torx Screw (5 mm) All All 7PP2-0512 3
5 Torx Pin Bit (small) All All 7PP2-0001 1
6 Torx Pin Bit (large) All All 7PP2-0002 1
WARNING
• Only qualied service technicians should install this kit to reduce the risk of death, electric shock, serious injury, or re.
• Move the icemaker control switch to the "OFF" position and turn off the power supply before servicing. Lockout/Tagout to
prevent the power supply from being turned back on inadvertently.
• CHOKING HAZARD: Ensure all components, fasteners, and thumbscrews are securely in place after any maintenance is
done to the appliance. Make sure that none have fallen into the ice storage bin.
• No installation or service should be undertaken until the technician has thoroughly read these instructions.
Installation Instructions
1) Turn off the power supply. Lockout/Tagout to prevent the power supply from being turned on inadvertently.
2) Remove and discard the front panel and screw(s). See Fig. 1 and Fig. 2.
3) Place the new front panel in its correct position and secure with Torx screw(s) (4 mm-large) provided in this kit.
4) Remove all screws from the sides of the appliance (KM-1301 and KM-1900S_J/3) and replace with Torx screws (4 mm-large)
provided in this kit. See Fig. 2.
Fig. 2
Model Shown:
KM-520MAJ
Fig. 1
4 mm-large
Model Shown:
KM-1900SAJ3
4 mm-large
4 mm-large
4 mm-large
Side
Side
Produktspecifikationer
| Varumärke: | Hoshizaki |
| Kategori: | ej kategoriserat |
| Modell: | HS-5246 |
Behöver du hjälp?
Om du behöver hjälp med Hoshizaki HS-5246 ställ en fråga nedan och andra användare kommer att svara dig
ej kategoriserat Hoshizaki Manualer

18 Oktober 2025
10 September 2025
10 September 2025
10 September 2025
10 September 2025
10 September 2025
9 September 2025
9 September 2025
9 September 2025
9 September 2025
ej kategoriserat Manualer
- ENDURA
- Polyend
- NGS
- MXR
- Servend
- Neff
- Andersson
- DeepCool
- Varytec
- Blizzard
- Auralex
- E-Image
- Yadea
- Speakman
- Life On Products
Nyaste ej kategoriserat Manualer

23 Oktober 2025
23 Oktober 2025
23 Oktober 2025
23 Oktober 2025

23 Oktober 2025
23 Oktober 2025
23 Oktober 2025

23 Oktober 2025
23 Oktober 2025
23 Oktober 2025