Hoshizaki HS-5255 Bruksanvisning
Hoshizaki ej kategoriserat HS-5255
Läs gratis den bruksanvisning för Hoshizaki HS-5255 (2 sidor) i kategorin ej kategoriserat. Guiden har ansetts hjälpsam av 27 personer och har ett genomsnittsbetyg på 4.4 stjärnor baserat på 8 recensioner. Har du en fråga om Hoshizaki HS-5255 eller vill du ställa frågor till andra användare av produkten? Ställ en fråga
Sida 1/2
1
2A8478-013
Hoshizaki Prison Kit
HS-5245, HS-5246, HS-5252, HS-5253,
HS-5254, HS-5255, HS-5426, HS-5427
For use with Hoshizaki Ice Machines: KM-350M_J, KM-520M_J, KM-660M_J,
KM-901M_J, KM-1301S_J/3, and KM-1900S_J/3
Check to ensure that all parts are included:
Index
No.Description
Kit
NumberModel
Part
NumberQty
1Front PanelHS-5426KM-350MAJ, KM-520MAJ, KM-660MAJ3B0020G011
HS-5427KM-350MWJ, KM-520MWJ, KM-520MRJ, KM-660MWJ, KM-660MRJ1A5320G011
HS-5245KM-901MAJ2A8612G011
HS-5246KM-901MWJ2A8612G021
HS-5252KM-1301SAJ/32A7289G011
HS-5253KM-1301SWJ/32A7251-011
HS-5254KM-1900SAJ/32A7292G011
HS-5255KM-1900SWJ/32A7252-011
2Torx Screw (4 mm-small)AllAll7PP2I081220
3Torx Screw (4 mm-large)AllAll7PP2-04106
4Torx Screw (5 mm)AllAll7PP2-05123
5Torx Pin Bit (small)AllAll7PP2-00011
6Torx Pin Bit (large)AllAll7PP2-00021
WARNING
• Only qualied service technicians should install this kit to reduce the risk of death, electric shock, serious injury, or re.
• Move the icemaker control switch to the "OFF" position and turn off the power supply before servicing. Lockout/Tagout to
prevent the power supply from being turned back on inadvertently.
• CHOKING HAZARD: Ensure all components, fasteners, and thumbscrews are securely in place after any maintenance is
done to the appliance. Make sure that none have fallen into the ice storage bin.
• No installation or service should be undertaken until the technician has thoroughly read these instructions.
Installation Instructions
1) Turn off the power supply. Lockout/Tagout to prevent the power supply from being turned on inadvertently.
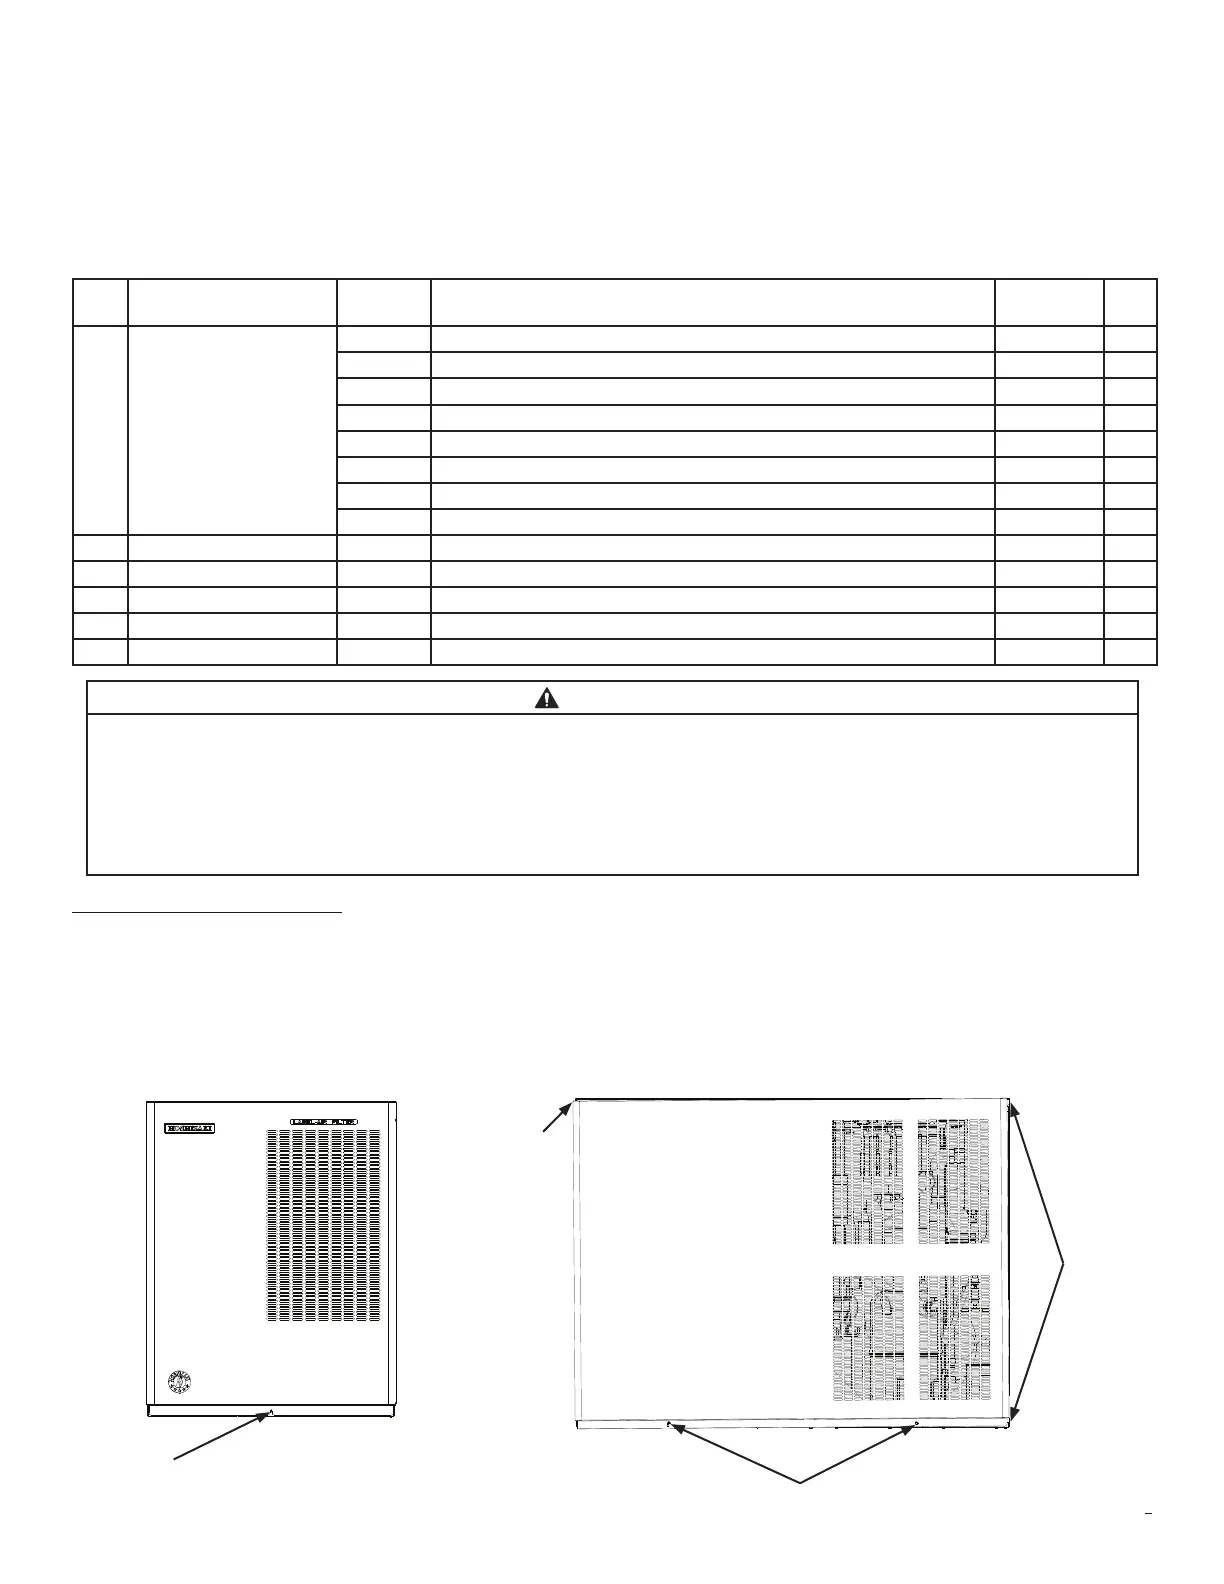
2) Remove and discard the front panel and screw(s). See Fig. 1 and Fig. 2.
3) Place the new front panel in its correct position and secure with Torx screw(s) (4 mm-large) provided in this kit.
4) Remove all screws from the sides of the appliance (KM-1301 and KM-1900S_J/3) and replace with Torx screws (4 mm-large)
provided in this kit. See Fig. 2.
Fig. 2
Model Shown:
KM-520MAJ
Fig. 1
4 mm-large
Model Shown:
KM-1900SAJ3
4 mm-large
4 mm-large
4 mm-large
Side
Side
Produktspecifikationer
| Varumärke: | Hoshizaki |
| Kategori: | ej kategoriserat |
| Modell: | HS-5255 |
Behöver du hjälp?
Om du behöver hjälp med Hoshizaki HS-5255 ställ en fråga nedan och andra användare kommer att svara dig
ej kategoriserat Hoshizaki Manualer

1 April 2026
1 April 2026
18 Oktober 2025
10 September 2025
10 September 2025
10 September 2025
10 September 2025
10 September 2025
9 September 2025
9 September 2025
ej kategoriserat Manualer
Nyaste ej kategoriserat Manualer
3 April 2026
3 April 2026
3 April 2026
3 April 2026
3 April 2026
3 April 2026
3 April 2026
3 April 2026
3 April 2026