Hotpoint SI9 S8C1 SH IX H Bruksanvisning
Läs gratis den bruksanvisning för Hotpoint SI9 S8C1 SH IX H (16 sidor) i kategorin Ugn. Guiden har ansetts hjälpsam av 26 personer och har ett genomsnittsbetyg på 4.0 stjärnor baserat på 7 recensioner. Har du en fråga om Hotpoint SI9 S8C1 SH IX H eller vill du ställa frågor till andra användare av produkten? Ställ en fråga
Sida 1/16
EN
Quick guide
1
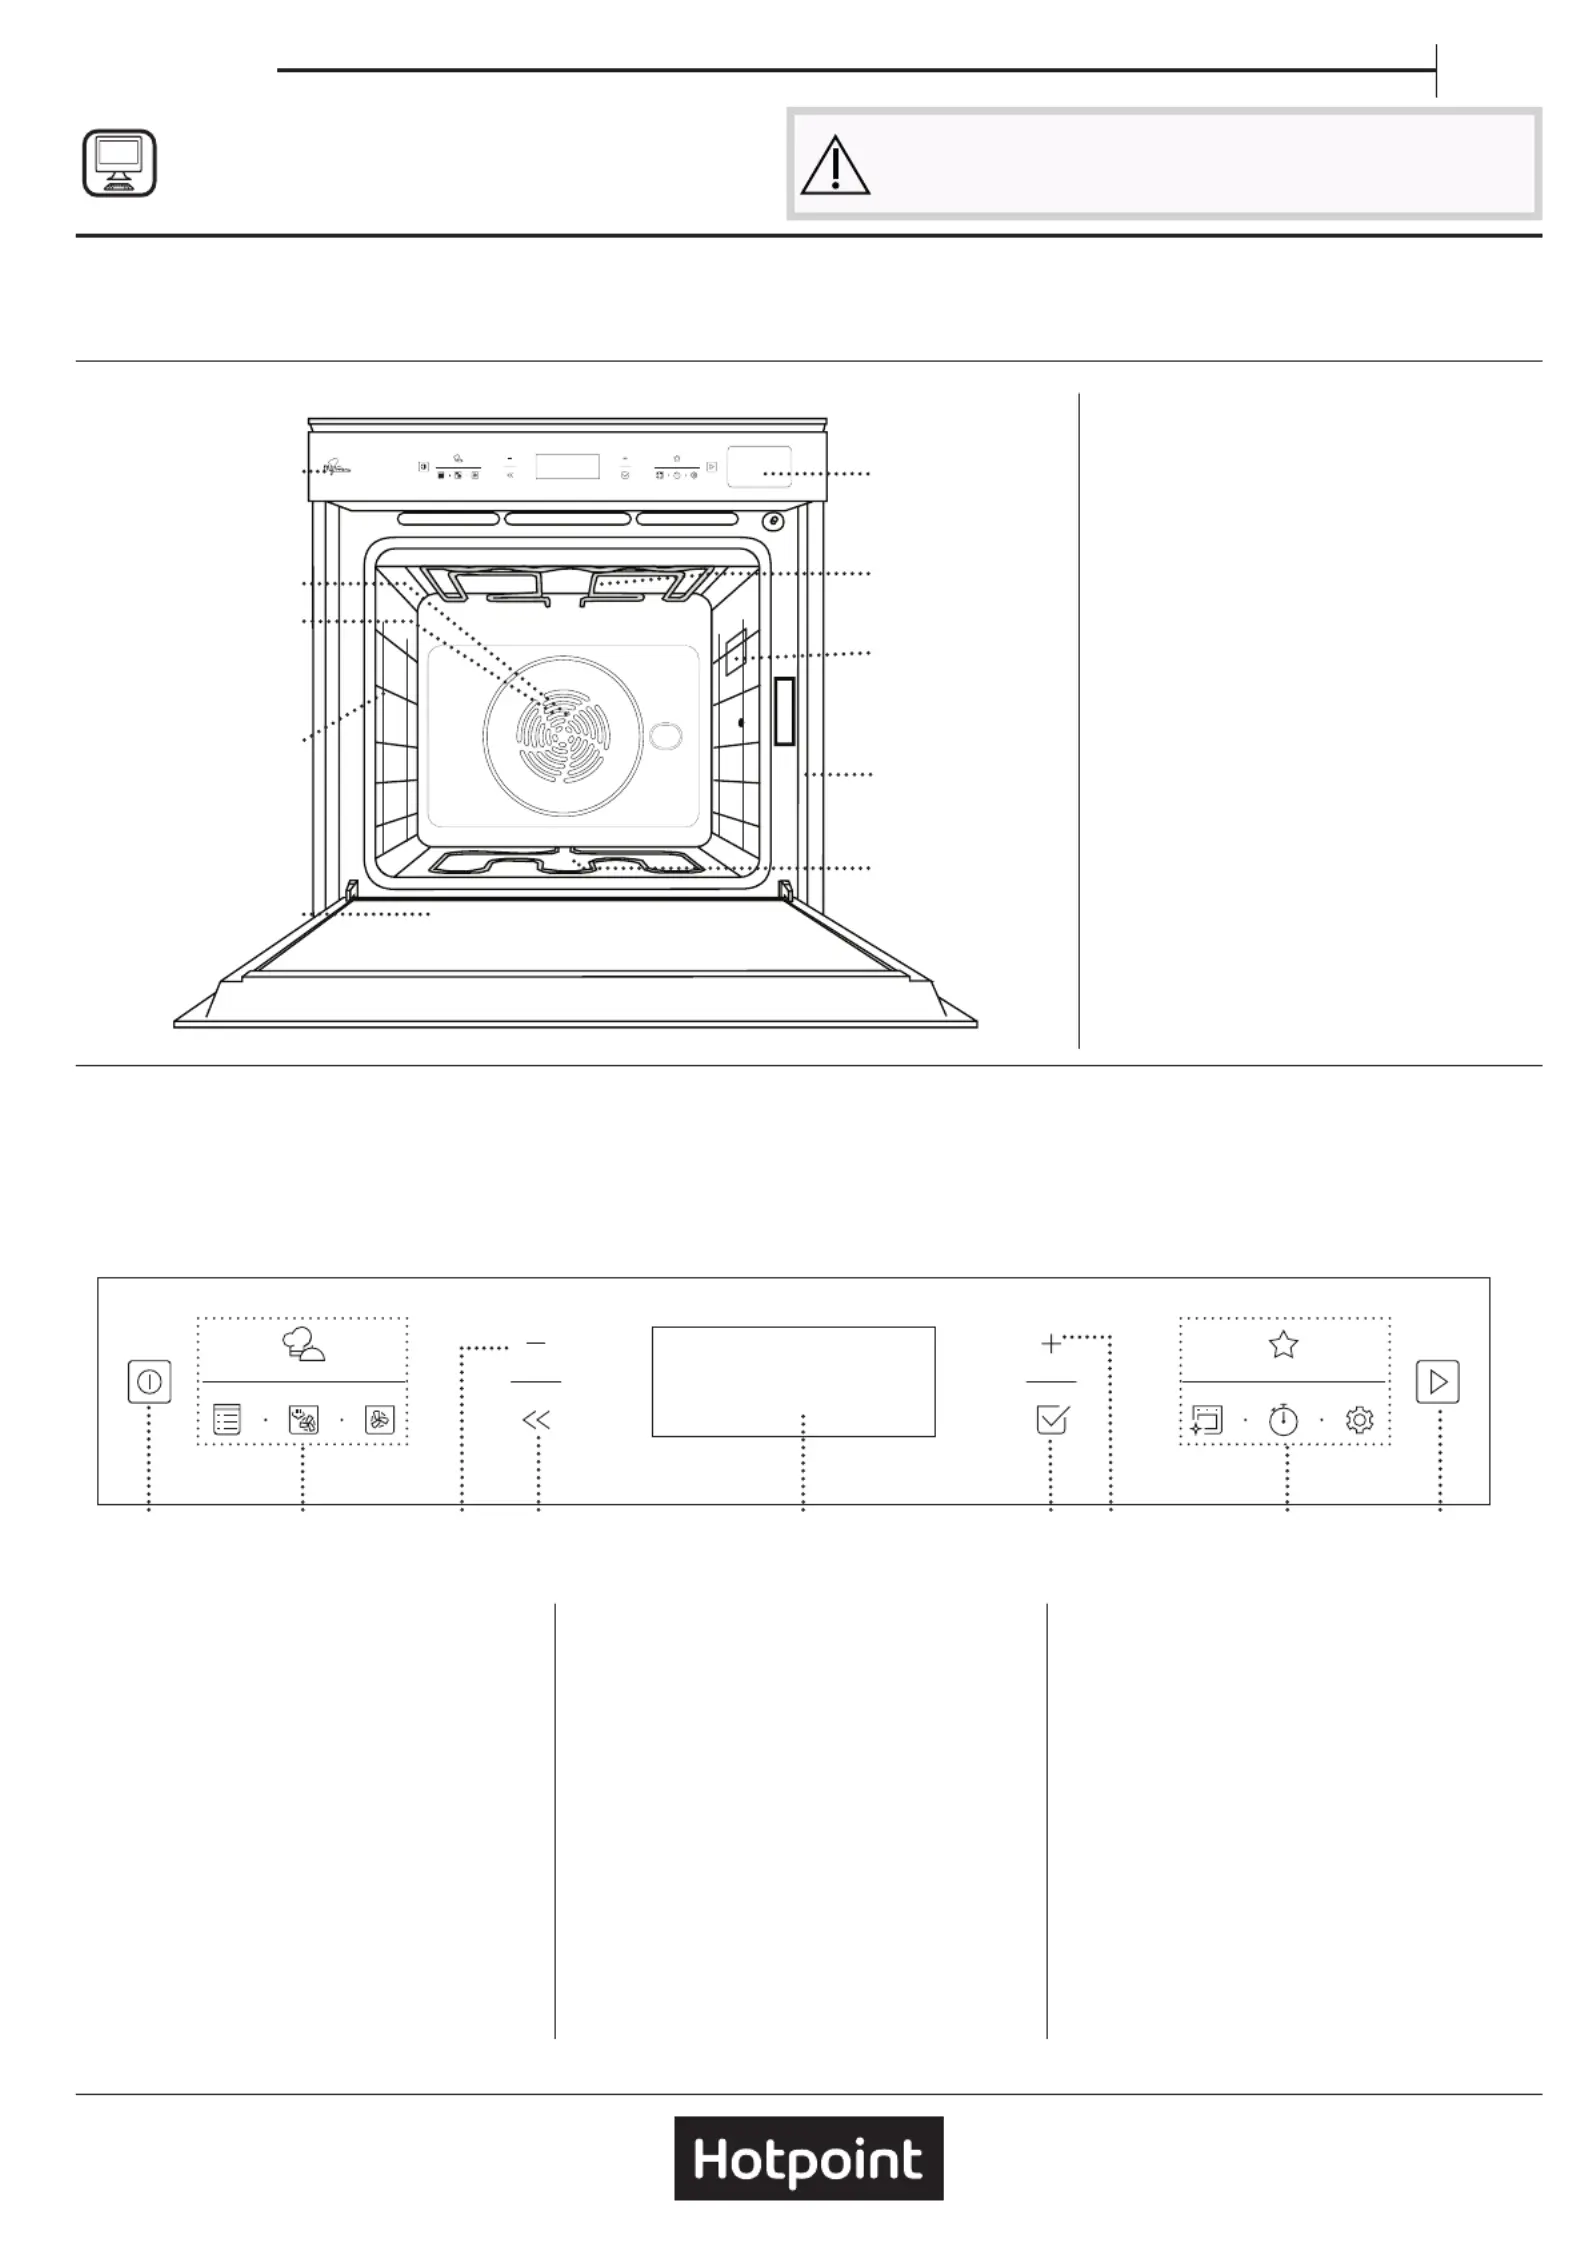
PRODUCT DESCRIPTION
CONTROL PANEL DESCRIPTION
1. Control panel
2. Fan
3. Circular heating element
(not visible)
4. Shelf guides
(the level is indicated on the
front of the oven)
5. Door
6. Water drawer
7. Upper heating element/grill
8. Lamp
9. Identification plate
(do not remove)
10. Lower heating element
(not visible)
1. ON / OFF
For switching the oven on and
off and for stopping an active
function.
2. FUNCTIONS DIRECT ACCESS
For quick access to the functions
and menu.
3. NAVIGATION BUTTON MINUS
For scrolling through a menu and
decrease the settings or values of a
function.
4. BACK
For returning to the previous
screen.
During cooking allows to change
settings.
5. DISPLAY
6. CONFIRM
For confirming a selected function
or a set value.
7. NAVIGATION BUTTON PLUS
For scrolling through a menu and
increasing the settings or values of
a function.
8. OPTIONS / FUNCTIONS DIRECT
ACCESS
For quick access to the functions,
duration, settings and favorites.
9. START
For starting a function using the
specified or basic settings.
1
2
3
4
8
9
10
5
7
6
1
2
3457689
THANK YOU FOR BUYING A HOTPOINT PRODUCT
In order to receive a more complete assistance, please
register your product on www . hotpoint . eu/ register
Before using the appliance carefully read the Safety
Instruction.
Produktspecifikationer
| Varumärke: | Hotpoint |
| Kategori: | Ugn |
| Modell: | SI9 S8C1 SH IX H |
Behöver du hjälp?
Om du behöver hjälp med Hotpoint SI9 S8C1 SH IX H ställ en fråga nedan och andra användare kommer att svara dig
Ugn Hotpoint Manualer

2 April 2026
1 April 2026
31 Mars 2026
31 Mars 2026
30 Mars 2026
30 Mars 2026
29 Mars 2026
29 Mars 2026
29 Mars 2026
29 Mars 2026
Ugn Manualer
Nyaste Ugn Manualer
3 April 2026
2 April 2026
2 April 2026
2 April 2026
2 April 2026
2 April 2026
2 April 2026
1 April 2026
1 April 2026
1 April 2026