Joy-it RB-StromPi3-Case Bruksanvisning
Joy-it Computerbehuizing RB-StromPi3-Case
Läs gratis den bruksanvisning för Joy-it RB-StromPi3-Case (11 sidor) i kategorin Computerbehuizing. Guiden har ansetts hjälpsam av 26 personer och har ett genomsnittsbetyg på 4.9 stjärnor baserat på 5 recensioner. Har du en fråga om Joy-it RB-StromPi3-Case eller vill du ställa frågor till andra användare av produkten? Ställ en fråga
Sida 1/11
www.joy-it.net
Pascalstr. 8 47506 Neukirchen-Vluyn
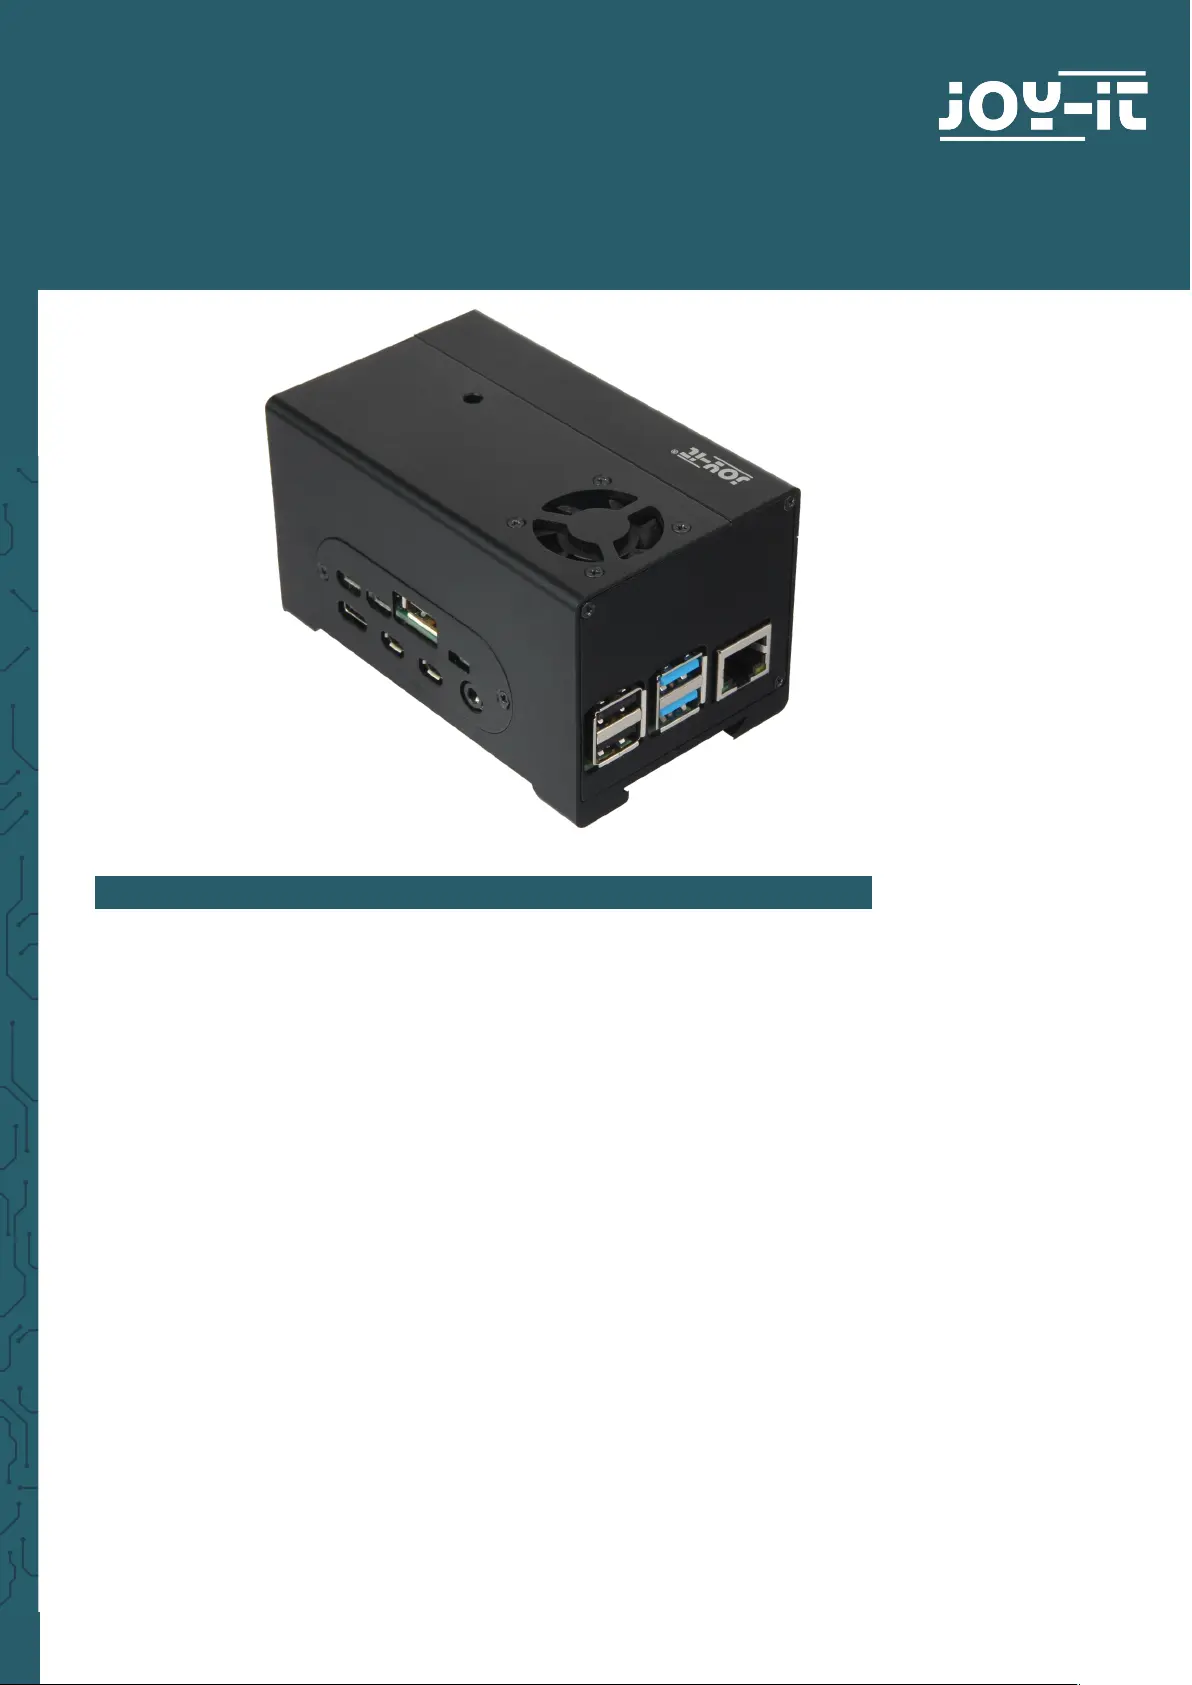
STROMPI 3 CASE
RB-StromPi3-Case
1. GENERAL INFORMATION
Dear costumer,
Thank you for buying our product. The structure and functions of the
StromPi3 are explained in the following chapters. We show you which
settings must be adjusted that the Raspberry Pi will work with the Strom-
Pi perfectly.
If you get any diiculties with the usage with the device, do not hesitate
to conact us.
This high-quality aluminium case oers space for your Raspberry Pi incl.
StromPi 3 and Battery Hat (-XL also). A removable cover above the GPIO bar
keeps it easily accessible.
The RB-StromPi3-PCB allows the use of the power button function. In additi-
on, the fan can be operated with this board and optionally controlled.
Produktspecifikationer
| Varumärke: | Joy-it |
| Kategori: | Computerbehuizing |
| Modell: | RB-StromPi3-Case |
Behöver du hjälp?
Om du behöver hjälp med Joy-it RB-StromPi3-Case ställ en fråga nedan och andra användare kommer att svara dig
Computerbehuizing Joy-it Manualer

28 December 2024
Computerbehuizing Manualer
Nyaste Computerbehuizing Manualer
9 April 2025
7 April 2025
5 April 2025
3 April 2025
1 April 2025
1 April 2025
1 April 2025
30 Mars 2025
30 Mars 2025
29 Mars 2025