Juno JB126D5 Bruksanvisning

Juno Ugn JB126D5

Läs gratis den bruksanvisning för Juno JB126D5 (72 sidor) i kategorin Ugn. Guiden har ansetts hjälpsam av 23 personer och har ett genomsnittsbetyg på 4.7 stjärnor baserat på 12 recensioner. Har du en fråga om Juno JB126D5 eller vill du ställa frågor till andra användare av produkten? Ställ en fråga

Sida 1/72
JB126D5
User Manual
Oven
Benutzerin‐
formation
Backofen
CONTENTS
Safety information 2
Safety instructions 3
Product description 6
Control panel 7
Before first use 9
Daily use 9
Clock functions 11
Automatic programmes 13
Additional functions 14
Hints and tips 16
Care and cleaning 26
Troubleshooting 30
Installation 32
Energy efficiency 33
Subject to change without notice.
SAFETY INFORMATION
Before the installation and use of the appliance, carefully read
the supplied instructions. The manufacturer is not responsible
if an incorrect installation and use causes injuries and
damages. Always keep the instructions with the appliance for
future reference.
Children and vulnerable people safety
This appliance can be used by children aged from 8 years
and above and persons with reduced physical, sensory or
mental capabilities or lack of experience and knowledge if
they have been given supervision or instruction concerning
use of the appliance in a safe way and understand the
hazards involved.
Do not let children play with the appliance.
Keep all packaging away from children.
Keep children and pets away from the appliance when it
operates or when it cools down. Accessible parts are hot.
If the appliance has a child safety device, we recommend
you activate it.
Cleaning and user maintenance shall not be made by
children without supervision.
Children of less than 3 years should be kept away unless
continuously supervised.
2
General Safety
Only a qualified person must install this appliance and
replace the cable.
Internally the appliance becomes hot when in operation. Do
not touch the heating elements that are in the appliance.
Always use oven gloves to remove or put in accessories or
ovenware.
Before maintenance cut the power supply.
Ensure that the appliance is switched off before replacing
the lamp to avoid the possibility of electric shock.
Do not use a steam cleaner to clean the appliance.
Do not use harsh abrasive cleaners or sharp metal scrapers
to clean the glass door since they can scratch the surface,
which may result in shattering of the glass.
If the supply cord is damaged, it must be replaced by the
manufacturer, its Authorised Service Centre or similarly
qualified persons in order to avoid a hazard.
Excess spillage must be removed before the pyrolytic
cleaning. Remove all parts from the oven.
To remove the shelf supports first pull the front of the shelf
support and then the rear end away from the side walls.
Install the shelf supports in the opposite sequence.
SAFETY INSTRUCTIONS
Installation
WARNING! Only a qualified
person must install this
appliance.
Remove all the packaging.
Do not install or use a damaged
appliance.
Obey the installation instruction supplied
with the appliance.
Always be careful when you move the
appliance because it is heavy. Always
wear safety gloves.
Do not pull the appliance by the handle.
Keep the minimum distance from the
other appliances and units.
Make sure that the appliance is installed
below and adjacent safe structures.
The sides of the appliance must stay
adjacent to appliances or to units with
the same height.
Electrical connection
WARNING! Risk of fire and
electrical shock.
All electrical connections should be
made by a qualified electrician.
The appliance must be earthed.
Make sure that the electrical information
on the rating plate agrees with the
power supply. If not, contact an
electrician.
3
appliance is in operation. Heat and
moisture can build up behind a closed
furniture panel and cause subsequent
damage to the appliance, the housing
unit or the floor. Do not close the
furniture panel until the appliance has
cooled down completely after use.
Care and cleaning
WARNING! Risk of injury, fire,
or damage to the appliance.
Before maintenance, deactivate the
appliance and disconnect the mains
plug from the mains socket.
Make sure the appliance is cold. There is
the risk that the glass panels can break.
Replace immediately the door glass
panels when they are damaged. Contact
the Authorised Service Centre.
Be careful when you remove the door
from the appliance. The door is heavy!
Clean regularly the appliance to prevent
the deterioration of the surface material.
Remaining fat or food in the appliance
can cause fire.
Clean the appliance with a moist soft
cloth. Only use neutral detergents. Do
not use abrasive products, abrasive
cleaning pads, solvents or metal objects.
If you use an oven spray, obey the safety
instructions on the packaging.
Do not clean the catalytic enamel (if
applicable) with any kind of detergent.
Pyrolytic cleaning
Risk of Injury / Fires / Chemical
Emissions (Fumes) in Pyrolitic
Mode.
Before carrying out a Pyrolitic self-
cleaning function or the First Use please
remove from the oven cavity:
any excess food residues, oil or
grease spills / deposits.
any removable objects (including
shelves, side rails etc., provided with
the product) particularly any non-
stick pots, pans, trays, utensils etc.
Read carefully all the instructions for
Pyrolytic cleaning.
Keep children away from the appliance
while the Pyrolytic cleaning is in
operation.
The appliance becomes very hot and hot
air is released from the front cooling
vents.
Pyrolytic cleaning is a high temperature
operation that can release fumes from
cooking residues and construction
materials, as such consumers are
strongly advised to:
provide good ventilation during and
after each Pyrolytic cleaning.
provide good ventilation during and
after the first use at maximum
temperature operation.
Unlike all humans, some birds and
reptiles can be extremely sensitive to
potential fumes emitted during the
cleaning process of all Pyrolytic Ovens.
Remove any pets (especially birds)
from the vicinity of the appliance
location during and after the
Pyrolytic cleaning and first use
maximum temperature operation to
a well ventilated area.
Small pets can also be highly sensitive to
the localized temperature changes in the
vicinity of all Pyrolytic Ovens when the
Pyrolytic self cleaning program is in
operation.
Non-stick surfaces on pots, pans, trays,
utensils etc., can be damaged by the
high temperature Pyrolytic cleaning
operation of all Pyrolytic Ovens and can
be also a source for low level harmful
fumes.
Fumes released from all Pyrolytic
Ovens / Cooking Residues as described
are not harmful to humans, including
infants or persons with medical
conditions.
Internal light
The type of light bulb or halogen lamp
used for this appliance is only for
household appliances. Do not use it for
house lighting.
WARNING! Risk of electrical
shock.
5
CONTROL PANEL
Electronic programmer
21 3 4 5 6 7 8 9 10
Use the sensor fields to operate the appliance.
Sensor
Field
Function Description
1 - DISPLAY Shows the current settings of the appliance.
2 ON / OFF To activate and deactivate the appliance.
3 OPTIONS To set an oven function or an automatic pro-
gramme.
4
MY FAVOURITE
PROGRAMME
To store your favourite programme. Use it to have
access to your favourite programme directly or
when the appliance is deactivated.
5
TEMPERATURE /
FAST HEAT UP
To set and see the cavity temperature or the core
temperature sensor temperature (if present). If you
press and hold it for three seconds, it turns the Fast
heat up function ON or OFF. Straight access to the
temperature setting of the first oven function when
the appliance is off.
6
UP, DOWN To move up or down in the menu.
7 OK To confirm a selection or setting.
8 OVEN LIGHT To activate or deactivate the lamp.
9 CLOCK To set the clock functions.
7
Sensor
Field
Function Description
10 MINUTE MINDER To set the Minute Minder.
Display
A B C
DEFG
A) Oven function symbol
B) Temperature / time of day display
C) Clock / Residual heat display / Minute Minder
D) Residual heat indicator
E) Indicators for the clock functions
F) Heat-up indicator / Fast Heat Up indicator
G) Number of an oven function / programme
Other indicators of the display:
Symbol Name Description
Functions You can choose an oven function.
Automatic programme You can choose an automatic programme.
My favourite programme The favourite programme operates.
/ kg / g An automatic programme with a weight in-
put operates.
/ h / min A clock function operates.
Temperature / Fast heat up The function operates.
Temperature The current temperature is indicated.
Temperature You can change the temperature.
Door lock The door lock function operates.
Light You deactivated the light.
Minute minder The minute minder function operates.
Heat up indicator
If you activate an oven function, the bars
come on in the display. The bars show that
the temperature in the appliance increases
or decreases.
When the appliance is at the set
temperature, the bars go off the display.
8
BEFORE FIRST USE
WARNING! Refer to Safety
chapters.
Initial Cleaning
Remove all accessories and removable
shelf supports from the appliance.
Refer to "Care and cleaning"
chapter.
Clean the appliance before first use.
Put the accessories and the removable
shelf supports back to their initial position.
Setting the time
After the first connection to the mains, all
symbols in the display are on for some
seconds. For the subsequent few seconds
the display shows the software version.
After the software version goes off, the
display shows h and 12:00. "12" flashes.
1. Touch or to set the hours.
2. Touch or .
3. Touch or to set the minutes.
4. Touch or .
The Temperature / Time display shows the
new time.
Changing the time
You can change the time of day only when
the appliance is off.
Touch .
flashes in the display.
To set the new time of day, refer to "Setting
the time".
Preheating
Preheat the empty appliance to burn off the
remaining grease.
1. Set the function and the maximum
temperature.
2. Let the appliance operate for 1 hour.
3. Set the function and the maximum
temperature.
4. Let the appliance operate for 15
minutes.
Accessories can become hotter than usual.
The appliance can emit an odour and
smoke. This is normal. Make sure that the
airflow in the room is sufficient.
DAILY USE
WARNING! Refer to Safety
chapters.
Operating the appliance
To operate the appliance you can use:
the manual mode
automatic programmes
Oven functions
Oven function Application
True Fan Cook-
ing
To bake on up to 3 shelf positions at the same time and to
dry food. Set the temperature 20 - 40 °C lower than for
Conventional Cooking.
Pizza Setting To bake food on 1 shelf position for a more intensive
browning and a crispy bottom. Set the temperature 20 -
40 °C lower than for Conventional Cooking.
9
Oven function Application
Slow Cooking To prepare tender, succulent roasts.
Conventional
Cooking
To bake and roast food on 1 shelf position.
Frozen Foods To make your convenience food like e.g. French Fries,
Wedges, spring rolls crispy.
Turbo Grilling To roast larger meat joints or poultry with bones on 1 shelf
position. Also to make gratins and to brown.
Fast Grilling To grill flat food in large quantities and to toast bread.
Grilling To grill flat food and to toast bread.
Keep Warm To keep food warm.
Defrost To defrost frozen food.
Bottom Heat To bake cakes with crispy bottom and to preserve food.
ECO Roasting The ECO functions let you optimize the energy consump-
tion during cooking. It is necessary to set the cooking time
first. To get more information about the recommended set-
tings, refer to the cooking tables with the equivalent func-
tion.
Pyrolysis To activate the automatic pyrolytic cleaning of the oven.
This function burns off residual dirt in the oven.
Setting the oven function
1. Activate the appliance with or .
The display shows the set temperature, the
symbol and the number of the oven
function.
2. Touch or to set an oven
function.
3. Touch or the appliance starts
automatically after five seconds.
If you activate the appliance and
do not set an oven function or
programme, the appliance
deactivates automatically after
20 seconds.
Changing the temperature
Touch or to change the temperature
in steps of 5 °C.
When the appliance is at the set
temperature, an acoustic signal sounds
10
Setting the DURATION
1. Activate the appliance and set an oven
function and temperature.
2. Touch again and again until the
display shows .
flashes in the display.
3. Use or to set the minutes for
DURATION.
4. Touch to confirm.
5. Use or to set the hours for
DURATION.
If you touch or while
you set the DURATION, the
appliance switches to the
setting of the END function.
6. When the set time ends, an acoustic
signal sounds for two minutes.
and time setting flash in the display. The
appliance deactivates.
7. Touch a sensor field or open the oven
door to stop the acoustic signal.
8. Deactivate the appliance.
Setting the END
1. Activate the appliance and set an oven
function and temperature.
2. Touch again and again until the
display shows .
flashes in the display.
3. Use or to set the END and
or to confirm. First you set the
minutes and then the hours.
When the set time ends, an acoustic signal
sounds for two minutes. symbol and the
time setting flash in the display. The
appliance deactivates.
4. Touch a sensor field or open the oven
door to stop the acoustic signal.
5. Deactivate the appliance.
Setting the SET+GO
You can use the SET+GO function only
when the DURATION is set.
1. Set an oven function (or a programme)
and temperature (refer to "Setting the
oven function" and "Changing the
temperature").
2. Set the DURATION (refer to "Setting the
DURATION").
3. Touch again and again until
flashes in the display.
4. Touch to set the SET+GO function.
The display shows and with an
indicator. This indicator shows which clock
function is activated.
5. Touch a sensor field (apart from ON /
OFF) to start the SET+GO function.
Setting the MINUTE MINDER
Use the MINUTE MINDER to set a
countdown (maximum 23 h 59 min). This
function has no effect on the operation of
the oven. You can set the MINUTE MINDER
at any time and also when the appliance is
off.
1. Touch .
and "00" flash in the display.
2. Use or to set the MINUTE
MINDER. First you set the seconds,
then the minutes and the hours.
3. Touch or the MINUTE MINDER
starts automatically after five seconds.
When the set time ends, an acoustic signal
sounds for two minutes and 00:00 and
flash in the display.
4. Touch a sensor field or open the oven
door to stop the acoustic signal.
Setting the Time delay function
The DURATION and END can be
used at the same time, if the appliance is to
be switched on and off automatically later.
In this case, first set the DURATION and
then the END function (refer to "Setting
the DURATION" and "Setting the END" ).
12
When the Time delay function is
activated, the display shows a
static symbol of the oven
function, with a dot and .
The dot shows which clock
function is on in the Clock /
residual heat display.
AUTOMATIC PROGRAMMES
WARNING! Refer to Safety
chapters.
There are 20 automatic programmes. Use
an automatic programme or recipe when
you do not have the knowledge or
experience on how to prepare a dish. The
display shows the shelf position and the
default cooking times for all automatic
programmes.
Automatic programmes
Programme number Programme name
1 BRAISED MEAT
2 ROAST PORK
3 ROAST VEAL
4 ROAST LAMB
5 ROAST GAME
6 CHICKEN, WHOLE
7 WHOLE FISH
8 PIZZA
9 QUICHE LORRAINE
10 LEMON SPONGE CAKE
11 CHEESE CAKE
12 ROLLS
13 FARMER BREAD
14 DOUGH PROVING
15 POTATO GRATIN
16 LASAGNE
17 CANNELLONI
18 CONVENIENCE CAKE
13
Programme number Programme name
19 CONVENIENCE PIZZA
20 CONVENIENCE POTATO TYPES
Automatic programmes
1. Activate the appliance.
2. Touch .
The display shows , a symbol and the
number of the automatic programme.
3. Touch or to choose the
automatic programme.
4. Touch or wait five seconds until the
appliance automatically starts to work.
5. When the set time ends, an acoustic
signal sounds for two minutes. The
symbol flashes.
The appliance deactivates.
6. Touch a sensor field or open the door
to stop the acoustic signal.
Automatic programmes with
weight input
If you set the weight of the meat, the
appliance calculates the roasting time.
1. Activate the appliance.
2. Touch .
3. Touch or to set the weight
programme.
The display shows: the cooking time, the
duration symbol , a default weight, a unit
of measurement (kg, g).
4. Touch or the settings save
automatically after five seconds.
The appliance activates.
5. You can change the default weight
value with or . Touch .
6. When the set time ends, an acoustic
signal sounds for two minutes.
flashes.
The appliance deactivates.
7. Touch a sensor field or open the door
to stop the acoustic signal.
ADDITIONAL FUNCTIONS
Using My Favourite Programme
function
Use this function to save your favourite
temperature and time settings for an oven
function or programme.
1. Set the temperature and time for an
oven function or programme.
2. Touch and hold for more than three
seconds. An acoustic signal sounds.
3. Deactivate the appliance.
touch To activate the function .
The appliance activates your favourite
programme.
When the function operates,
you can change the time and
temperature.
touch .To deactivate the function
The appliance deactivates your favourite
programme.
Using the Child Lock
The Child Lock prevents an accidental
operation of the appliance.
14
If the Pyrolysis function
operates, the door is locked. A
message comes on in the
display when you touch a
sensor field.
1. To activate the function deactivate the
appliance with . Do not set an oven
function.
2. Touch and hold and at the same
time for 2 seconds.
An acoustic signal sounds.
SAFE comes on in the display. The door is
locked.
To deactivate the Child Lock function
repeat step 2.
Using the Function Lock
You can activate the function only when the
appliance operates.
The Function Lock prevents an accidental
change of the oven function.
1. To activate the function activate the
appliance.
2. Activate an oven function or setting.
3. Touch and hold and at the same
time for 2 seconds.
An acoustic signal sounds.
Loc comes on in the display.
To deactivate the Function Lock repeat
step 3.
If the Pyrolysis function
operates, the door is locked. A
message comes on in the
display when you touch a
sensor field.
You can deactivate the
appliance when the Function
Lock is on. When you deactivate
the appliance, the Function Lock
deactivates.
Using the settings menu
You can set the settings menu only when
the appliance is deactivated.
The settings menu lets you activate or
deactivate functions in the main menu. The
display shows SET and the number of the
setting.
Description Value to set
1 SET+GO ON / OFF
2 RESIDUAL HEAT INDICATOR ON / OFF
3 CLEANING REMINDER ON / OFF
4KEY TONE1) CLICK / BEEP / OFF
5 FAULTY TONE ON / OFF
6 SERVICE MENU -
7 RESTORE SETTINGS YES / NO
1) It is not possible to deactivate the tone of the ON / OFF sensor field.
1. When the appliance is deactivated,
touch and hold for three seconds.
The display shows SET1 and "1" flashes.
2. Touch or to set the setting.
3. Touch .
4. Touch or to change the value of
the setting.
5. Touch .
To exit the Settings menu, touch or
touch and hold .
15
Automatic Switch-off
For safety reasons the appliance
deactivates automatically after some time if
an oven function operates and you do not
change any settings.
Temperature (°C) Switch-off time
(h)
30 - 115 12.5
120 - 195 8.5
200 - 245 5.5
250 - maximum 1.5
After the Automatic switch-off, touch a
sensor field to operate the appliance again.
The Automatic switch-off does
not work with the functions:
Light, Slow Cooking, Duration,
End, Time delay.
Brightness of the display
There are two modes of display brightness:
Night brightness - when the appliance is
deactivated, the brightness of the
display is lower between 10 PM and 6
AM.
Day brightness:
when the appliance is activated.
if you touch a sensor field during the
night brightness (apart from ON /
OFF), the display goes back to the
day brightness mode for the next 10
seconds.
if the appliance is deactivated and
you set the Minute Minder. When the
Minute Minder function ends, the
display goes back to the night
brightness.
Cooling fan
When the appliance operates, the cooling
fan activates automatically to keep the
surfaces of the appliance cool. If you
deactivate the appliance, the cooling fan
can continue to operate until the appliance
cools down.
Safety thermostat
Incorrect operation of the appliance or
defective components can cause
dangerous overheating. To prevent this, the
oven has a safety thermostat which
interrupts the power supply. The oven
activates again automatically when the
temperature drops.
HINTS AND TIPS
WARNING! Refer to Safety
chapters.
The temperature and baking
times in the tables are guidelines
only. They depend on the
recipes and the quality and
quantity of the ingredients used.
General information
The appliance has five shelf positions.
Count the shelf positions from the
bottom of the appliance floor.
The appliance has a special system
which circulates the air and constantly
recycles the steam. With this system you
can cook in a steamy environment and
keep the food soft inside and crusty
outside. It decreases the cooking time
and energy consumption to a minimum.
Moisture can condense in the appliance
or on the door glass panels. This is
normal. Always stand back from the
appliance when you open the appliance
door while cooking. To decrease the
condensation, operate the appliance for
10 minutes before cooking.
Clean the moisture after each use of the
appliance.
Do not put the objects directly on the
appliance floor and do not put aluminium
foil on the components when you cook.
This can change the baking results and
cause damage to the enamel.
16
Baking cakes
Do not open the oven door before 3/4 of
the set cooking time is up.
If you use two baking trays at the same
time, keep one empty level between
them.
Cooking meat and fish
Use a deep pan for very fatty food to
prevent the oven from stains that can be
permanent.
Leave the meat for approximately 15
minutes before carving so that the juice
does not seep out.
To prevent too much smoke in the oven
during roasting, add some water into the
deep pan. To prevent the smoke
condensation, add water each time after
it dries up.
Cooking times
Cooking times depend on the type of food,
its consistency, and volume.
Initially, monitor the performance when you
cook. Find the best settings (heat setting,
cooking time, etc.) for your cookware,
recipes and quantities when you use this
appliance.
Baking and roasting table
Cakes
Food Conventional Cooking True Fan Cooking Time
(min)
Com-
ments
Temper-
ature
(°C)
Shelf po-
sition
Temper-
ature
(°C)
Shelf po-
sition
Whisked
recipes
170 2 160 3 (2 and
4)
45 - 60 In a cake
mould
Short-
bread
dough
170 2 160 3 (2 and
4)
20 - 30 In a cake
mould
Buttermilk
cheese-
cake
170 1 165 2 80 - 100 In a 26
cm cake
mould
Apple
cake (Ap-
ple pie)1)
170 2 160 2 (left and
right)
80 - 100 In two 20
cm cake
moulds
on a wire
shelf
Strudel 175 3 150 2 60 - 80 In a bak-
ing tray
Jam-tart 170 2 165 2 (left and
right)
30 - 40 In a 26
cm cake
mould
Sponge
cake
170 2 150 2 40 - 50 In a 26
cm cake
mould
17
Food Conventional Cooking True Fan Cooking Time
(min)
Com-
ments
Temper-
ature
(°C)
Shelf po-
sition
Temper-
ature
(°C)
Shelf po-
sition
Christmas
cake /
Rich fruit
cake1)
160 2 150 2 90 - 120 In a 20
cm cake
mould
Plum
cake1)
175 1 160 2 50 - 60 In a bread
tin
Small
cakes -
one lev-
el1)
170 3 150 - 160 3 20 - 30 In a bak-
ing tray
Small
cakes -
two lev-
els1)
- - 140 - 150 2 and 4 25 - 35 In a bak-
ing tray
Small
cakes -
three lev-
els1)
- - 140 - 150 1, 3 and
5
30 - 45 In a bak-
ing tray
Biscuits /
pastry
stripes -
one level
140 3 140 - 150 3 25 - 45 In a bak-
ing tray
Biscuits /
pastry
stripes -
two levels
- - 140 - 150 2 and 4 35 - 40 In a bak-
ing tray
Biscuits /
pastry
stripes -
three lev-
els
- - 140 - 150 1, 3 and
5
35 - 45 In a bak-
ing tray
Merin-
gues -
one level
120 3 120 3 80 - 100 In a bak-
ing tray
18
Food Conventional Cooking True Fan Cooking Time
(min)
Com-
ments
Temper-
ature
(°C)
Shelf po-
sition
Temper-
ature
(°C)
Shelf po-
sition
Merin-
gues -
two lev-
els1)
- - 120 2 and 4 80 - 100 In a bak-
ing tray
Buns1) 190 3 190 3 12 - 20 In a bak-
ing tray
Eclairs -
one level
190 3 170 3 25 - 35 In a bak-
ing tray
Eclairs -
two levels
- - 170 2 and 4 35 - 45 In a bak-
ing tray
Plate tarts 180 2 170 2 45 - 70 In a 20
cm cake
mould
Rich fruit
cake
160 1 150 2 110 - 120 In a 24
cm cake
mould
Victoria
sand-
wich1)
170 1 160 2 (left and
right)
30 - 50 In a 20
cm cake
mould
1) Preheat the oven for 10 minutes.
Bread and pizza
Food Conventional Cooking True Fan Cooking Time
(min)
Com-
ments
Temper-
ature
(°C)
Shelf po-
sition
Temper-
ature
(°C)
Shelf po-
sition
White
bread1)
190 1 190 1 60 - 70 1 - 2
pieces,
500 gr
per piece
Rye bread 190 1 180 1 30 - 45 In a bread
tin
Bread
rolls1)
190 2 180 2 (2 and
4)
25 - 40 6 - 8 rolls
in a bak-
ing tray
19
Food Conventional Cooking True Fan Cooking Time
(min)
Com-
ments
Temper-
ature
(°C)
Shelf po-
sition
Temper-
ature
(°C)
Shelf po-
sition
Pizza1) 230 - 250 1 230 - 250 1 10 - 20 In a bak-
ing tray or
a deep
pan
Scones1) 200 3 190 3 10 - 20 In a bak-
ing tray
1) Preheat the oven for 10 minutes.
Flans
Food Conventional Cooking True Fan Cooking Time
(min)
Com-
ments
Temper-
ature
(°C)
Shelf po-
sition
Temper-
ature
(°C)
Shelf po-
sition
Pasta flan 200 2 180 2 40 - 50 In a
mould
Vegetable
flan
200 2 175 2 45 - 60 In a
mould
Quiches1) 180 1 180 1 50 - 60 In a
mould
Lasagne1) 180 - 190 2 180 - 190 2 25 - 40 In a
mould
Cannello-
ni1)
180 - 190 2 180 - 190 2 25 - 40 In a
mould
1) Preheat the oven for 10 minutes.
Meat
Food Conventional Cooking True Fan Cooking Time
(min)
Com-
ments
Temper-
ature
(°C)
Shelf po-
sition
Temper-
ature
(°C)
Shelf po-
sition
Beef 200 2 190 2 50 - 70 On a wire
shelf
Pork 180 2 180 2 90 - 120 On a wire
shelf
Veal 190 2 175 2 90 - 120 On a wire
shelf
20
Food Conventional Cooking True Fan Cooking Time
(min)
Com-
ments
Temper-
ature
(°C)
Shelf po-
sition
Temper-
ature
(°C)
Shelf po-
sition
English
roast
beef, rare
210 2 200 2 50 - 60 On a wire
shelf
English
roast
beef, me-
dium
210 2 200 2 60 - 70 On a wire
shelf
English
roast
beef, well
done
210 2 200 2 70 - 75 On a wire
shelf
Shoulder
of pork
180 2 170 2 120 - 150 With rind
Shin of
pork
180 2 160 2 100 - 120 2 pieces
Lamb 190 2 175 2 110 - 130 Leg
Chicken 220 2 200 2 70 - 85 Whole
Turkey 180 2 160 2 210 - 240 Whole
Duck 175 2 220 2 120 - 150 Whole
Goose 175 2 160 1 150 - 200 Whole
Rabbit 190 2 175 2 60 - 80 Cut in
pieces
Hare 190 2 175 2 150 - 200 Cut in
pieces
Pheasant 190 2 175 2 90 - 120 Whole
Fish
Food Conventional Cooking True Fan Cooking Time
(min)
Com-
ments
Temper-
ature
(°C)
Shelf po-
sition
Temper-
ature
(°C)
Shelf po-
sition
Trout /
Sea
bream
190 2 175 2 40 - 55 3 - 4 fish
21
Turbo Grilling
Beef
Food Quantity Temperature
(°C)
Time (min) Shelf posi-
tion
Roast beef or fillet,
rare1)
per cm of
thickness
190 - 200 5 - 6 1 or 2
Roast beef or fillet,
medium1)
per cm of
thickness
180 - 190 6 - 8 1 or 2
Roast beef or fillet,
well done1)
per cm of
thickness
170 - 180 8 - 10 1 or 2
1) Preheat the oven.
Pork
Food Quantity (kg) Temperature
(°C)
Time (min) Shelf posi-
tion
Shoulder, neck,
ham joint
1 - 1.5 160 - 180 90 - 120 1 or 2
Chop, spare rib 1 - 1.5 170 - 180 60 - 90 1 or 2
Meat loaf 0.75 - 1 160 - 170 50 - 60 1 or 2
Pork knuckle (pre-
cooked)
0.75 - 1 150 - 170 90 - 120 1 or 2
Veal
Food Quantity (kg) Temperature
(°C)
Time (min) Shelf position
Roast veal 1 160 - 180 90 - 120 1 or 2
Knuckle of veal 1.5 - 2 160 - 180 120 - 150 1 or 2
Lamb
Food Quantity (kg) Temperature
(°C)
Time (min) Shelf position
Leg of lamb,
roast lamb
1 - 1.5 150 - 170 100 - 120 1 or 2
Saddle of lamb 1 - 1.5 160 - 180 40 - 60 1 or 2
Poultry
Food Quantity (kg) Temperature
(°C)
Time (min) Shelf position
Poultry portions 0.2 - 0.25 each 200 - 220 30 - 50 1 or 2
23
Food Quantity (kg) Temperature
(°C)
Time (min) Shelf position
Chicken, half 0.4 - 0.5 each 190 - 210 35 - 50 1 or 2
Chicken, pou-
lard
1 - 1.5 190 - 210 50 - 70 1 or 2
Duck 1.5 - 2 180 - 200 80 - 100 1 or 2
Goose 3.5 - 5 160 - 180 120 - 180 1 or 2
Turkey 2.5 - 3.5 160 - 180 120 - 150 1 or 2
Turkey 4 - 6 140 - 160 150 - 240 1 or 2
Fish (steamed)
Food Quantity (kg) Temperature
(°C)
Time (min) Shelf position
Whole fish 1 - 1.5 210 - 220 40 - 60 1 or 2
Slow Cooking
Use this function to prepare lean, tender
pieces of meat and fish. This function is not
applicable to such recipes as pot roast or
fatty roast pork.
In the first 10 minutes you can set an oven
temperature between 80 °C and 150 °C.
The default is 90 °C. After the temperature
is set, the oven continues to cook at 80 °C.
Do not use this function for poultry.
Always cook without a lid when
you use this function.
1. Sear the meat in a pan on the hob on a
very high setting for 1 - 2 minutes on
each side.
2. Put the meat together with the hot
roasting pan into the oven on the wire
shelf.
3. Select the function Slow Cooking.
Food Quantity Temperature
(°C)
Time (min) Shelf position
Roast beef 1000 - 1500 g 120 120 - 150 1
Fillet of beef 1000 - 1500 g 120 90 - 150 3
Roast veal 1000 - 1500 g 120 120 - 150 1
Steaks 200 - 300 g 120 20 - 40 3
24
Defrost
Food Quantity
(g)
Defrosting
time (min)
Further defrost-
ing time (min)
Comments
Chicken 1000 100 - 140 20 - 30 Place the chicken on an
upturned saucer placed
on a large plate. Turn
halfway through.
Meat 1000 100 - 140 20 - 30 Turn halfway through.
Meat 500 90 - 120 20 - 30 Turn halfway through.
Trout 150 25 - 35 10 - 15 -
Strawberries 300 30 - 40 10 - 20 -
Butter 250 30 - 40 10 - 15 -
Cream 2 x 200 80 - 100 10 - 15 Cream can also be whip-
ped when still slightly fro-
zen in places.
Gateau 1400 60 60 -
Preserving - Bottom Heat
Use only preserve jars of the same
dimensions available on the market.
Do not use jars with twist-off and
bayonet type lids or metal tins.
Use the first shelf from the bottom for
this function.
Put no more than six one-litre preserve
jars on the baking tray.
Fill the jars equally and close with a
clamp.
The jars cannot touch each other.
Put approximately 1/2 litre of water into
the baking tray to give sufficient moisture
in the oven.
When the liquid in the jars starts to
simmer (after approximately 35 - 60
minutes with one-litre jars), stop the
oven or decrease the temperature to
100 °C (see the table).
Soft fruit
Food Temperature (°C) Cooking time until
simmering (min)
Continue to cook
at 100 °C (min)
Strawberries / Blue-
berries / Raspber-
ries / Ripe gooseber-
ries
160 - 170 35 - 45 -
Stone fruit
Food Temperature (°C) Cooking time until
simmering (min)
Continue to cook
at 100 °C (min)
Pears / Quinces /
Plums
160 - 170 35 - 45 10 - 15
25
Vegetables
Food Temperature (°C) Cooking time until
simmering (min)
Continue to cook
at 100 °C (min)
Carrots1) 160 - 170 50 - 60 5 - 10
Cucumbers 160 - 170 50 - 60 -
Mixed pickles 160 - 170 50 - 60 5 - 10
Kohlrabi / Peas / As-
paragus
160 - 170 50 - 60 15 - 20
1) Leave standing in the oven after it is deactivated.
Drying - True Fan Cooking
Cover trays with grease proof paper or
baking parchment.
For a better result, stop the oven halfway
through the drying time, open the door
and let it cool down for one night to
complete the drying.
Vegetables
Food Temperature
(°C)
Time (h) Shelf position
1 position 2 positions
Beans 60 - 70 6 - 8 3 1 / 4
Peppers 60 - 70 5 - 6 3 1 / 4
Vegetables for
sour
60 - 70 5 - 6 3 1 / 4
Mushrooms 50 - 60 6 - 8 3 1 / 4
Herbs 40 - 50 2 - 3 3 1 / 4
Fruit
Food Temperature
(°C)
Time (h) Shelf position
1 position 2 positions
Plums 60 - 70 8 - 10 3 1 / 4
Apricots 60 - 70 8 - 10 3 1 / 4
Apple slices 60 - 70 6 - 8 3 1 / 4
Pears 60 - 70 6 - 9 3 1 / 4
CARE AND CLEANING
WARNING! Refer to Safety
chapters.
26
Notes on cleaning
Clean the front of the appliance with a
soft cloth with warm water and a
cleaning agent.
To clean metal surfaces, use a usual
cleaning agent.
Clean the appliance interior after each
use. Fat accumulation or other food
remains may result in a fire. The risk is
higher for the grill pan.
Clean stubborn dirt with a special oven
cleaner.
Clean all accessories after each use and
let them dry. Use a soft cloth with warm
water and a cleaning agent.
If you have nonstick accessories, do not
clean them using aggressive agents,
sharp-edged objects or a dishwasher. It
can cause damage to the nonstick
coating.
Stainless steel or aluminium
appliances
Clean the oven door with a wet
sponge only. Dry it with a soft
cloth.
Do not use steel wool, acids or
abrasive materials as they can
damage the oven surface. Clean
the oven control panel with the
same precautions.
Removing the shelf supports
To clean the oven, remove the shelf
supports.
1. Pull the front of the shelf support away
from the side wall.
2. Pull the rear end of the shelf support
away from the side wall and remove it.
2
1
Install the shelf supports in the opposite
sequence.
Pyrolysis
CAUTION! Remove all
accessories and removable shelf
supports.
The pyrolytic cleaning
procedure cannot start:
if you did not fully close the
oven door. In some models,
the display shows "C3" when
this error occurs.
CAUTION! If there are other
appliances installed in the same
cabinet, do not use them at the
same time as the Pyrolysis
function. It can cause damage
to the appliance.
During the pyrolytic cleaning the door is
locked. The symbol and the bars of the
heat indicator come up, until the door
unlocks. The door unlocks when the
temperature inside the oven is under safety
conditions and the pyrolytic cleaning
finishes.
27
During the pyrolytic cleaning the lamp is
deactivated.
1. Remove the worst dirt manually.
2. Clean the inner side of the door with hot
water, so that the residues do not burn
from the hot air.
3. Activate the appliance.
4. Set the Pyrolysis function (refer to
"Oven functions").
5. Touch .
6. Touch or to set the duration of
the cleaning procedure:
Option Description
1 1:00 h for a low
degree of dirt
2 1:30 h for a usual
degree of dirt
3 2:30 h for a high
degree of dirt
You can use the End function to delay
the start of the cleaning procedure.
7. Touch to activate the Pyrolysis
function.
Cleaning reminder
To remind you that the pyrolytic cleaning is
necessary, the cleaning reminder symbol
flashes in the display after each
deactivation of the appliance for the next 10
seconds.
The cleaning reminder goes
out:
after the end of the pyrolytic
cleaning.
when you deactivate it in the
basic settings. Refer to
"Using the settings menu".
Cleaning the oven door
The oven door has four glass panels. You
can remove the oven door and the internal
glass panels to clean them.
The oven door can close if you
try to remove the glass panels
before you remove the oven
door.
CAUTION! Do not use the
appliance without the glass
panels.
1. Open the door fully and hold the two
door hinges.
2. Lift and turn the levers on the two
hinges.
3. Close the oven door halfway to the first
opening position. Then pull forward and
remove the door from its seat.
28
4. Put the door on a soft cloth on a stable
surface.
5. Release the locking system to remove
the glass panels.
6. Turn the two fasteners by 90° and
remove them from their seats.
90°
7. First lift carefully and then remove the
glass panels one by one. Start from the
top panel.
12
8. Clean the glass panels with water and
soap. Dry the glass panels carefully.
When the cleaning is completed, install the
glass panels and the oven door. Do the
above steps in the opposite sequence.
Make sure that you put the glass panels (A,
B and C) back in the correct sequence. The
middle panel (B) has a decorative frame.
The screen-printing zone must face the
inner side of the door. Make sure that after
the installation the surface of the glass
panel frame (B) on the screen-printing
zones is not rough when you touch it.
29
A B C
Make sure that you install the middle panel
of glass in the seats correctly.
Replacing the lamp
Put a cloth on the bottom of the interior of
the appliance. It prevents damage to the
lamp glass cover and the cavity.
WARNING! Danger of
electrocution! Disconnect the
fuse before you replace the
lamp.
The lamp and the lamp glass
cover can be hot.
CAUTION! Always hold the
halogen lamp with a cloth to
prevent grease residue from
burning on the lamp.
1. Deactivate the appliance.
2. Remove the fuses from the fuse box or
deactivate the circuit breaker.
The back lamp
1. Turn the lamp glass cover
counterclockwise to remove it.
2. Clean the glass cover.
3. Replace the lamp with a suitable 300 °C
heat-resistant lamp.
4. Install the glass cover.
TROUBLESHOOTING
WARNING! Refer to Safety
chapters.
What to do if...
Problem Possible cause Remedy
The oven does not heat up. The oven is deactivated. Activate the oven.
The oven does not heat up. The clock is not set. Set the clock.
The oven does not heat up. The necessary settings are
not set.
Make sure that the settings
are correct.
30
Problem Possible cause Remedy
The appliance is activated
and does not heat up. The
fan does not operate. The
display shows ."Demo"
The demo mode is activated. 1. Deactivate the oven.
2. Touch and hold until
the oven activates and
deactivates.
3. Touch and hold and
at the same time until
an acoustic signal
sounds and "Demo"
goes out.
Service data
If you cannot find a solution to the problem
yourself, contact your dealer or an
Authorised Service Centre.
The necessary data for the service centre is
on the rating plate. The rating plate is on
the front frame of the appliance cavity. Do
not remove the rating plate from the
appliance cavity.
We recommend that you write the data here:
Model (MOD.) .........................................
Product number (PNC) .........................................
Serial number (S.N.) .........................................
INSTALLATION
WARNING! Refer to Safety
chapters.
Building In
594
16
573
21548
min. 550
20
600
min. 560
558
589
114
594
3
5
558
21548
min. 550
20
589
594
114
16
573
590
min. 560
594
3
5
32
Securing the appliance to the
cabinet
AB
Electrical installation
The manufacturer is not
responsible if you do not follow
the safety precautions from the
Safety chapters.
This appliance is supplied with a main plug
and a main cable.
Cable
Cable types applicable for installation or
replacement:
H07 RN-F, H05 RN-F, H05 RRF, H05 VV-F,
H05 V2V2-F (T90), H05 BB-F
For the section of the cable refer to the total
power on the rating plate. You can also
refer to the table:
Total power (W) Section of the ca-
ble (mm²)
maximum 1380 3 x 0.75
maximum 2300 3 x 1
maximum 3680 3 x 1.5
The earth cord (green / yellow cable) must
be 2 cm longer than phase and neutral
cables (blue and brown cables).
ENERGY EFFICIENCY
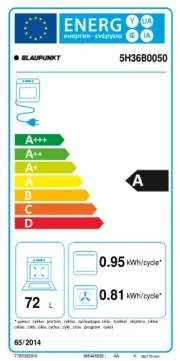
Product Fiche and information according to EU 65-66/2014
Supplier's name Juno
Model identification JB126D5
Energy Efficiency Index 99.7
Energy efficiency class A
Energy consumption with a standard load, conventional
mode
0.93 kWh/cycle
Energy consumption with a standard load, fan-forced
mode
0.85 kWh/cycle
Number of cavities 1
Heat source Electricity
Volume 72 l
Type of oven Built-In Oven
Mass 36.0 kg
EN 60350-1 - Household electric cooking
appliances - Part 1: Ranges, ovens, steam
ovens and grills - Methods for measuring
performance.
33
Energy saving
The appliance contains features which help
you save energy during everyday cooking.
General hints
Make sure that the oven door is
closed properly when the appliance
operates and keep it closed as much
as possible during the cooking.
Use metal dishes to improve the
energy saving.
When possible, put the food inside
the oven without heating it up.
When the cooking duration is longer
than 30 minutes, reduce the oven
temperature to minimum, 3 - 10
minutes before the end of the
cooking time, depending on the
duration of the cooking. The residual
heat inside the oven will continue to
cook.
Use the residual heat to warm up
other foods.
Cooking with fan - when possible, use
the cooking functions with fan to save
energy.
Residual heat
In some oven functions if a
programme with time selection
(Duration, End, Time Delay) is
activated and the cooking time is
longer than 30 minutes, the heating
elements deactivate automatically
10% earlier. The fan and lamp
continue to operate.
-Cooking with the lamp off
deactivate the lamp during the cooking
and activate only when you need it.
- if you want to useKeep food warm
the residual heat to keep the meal warm,
choose the lowest possible temperature
setting. The display shows the residual
heat temperature.
- refer to "OvenEco functions
functions".
- IfDeactivating the display
necessary, you can fully deactivate the
display. Touch and at the same
time until the display goes out. This step
also activates the appliance.
ENVIRONMENT CONCERNS
Recycle the materials with the symbol .
Put the packaging in applicable containers
to recycle it. Help protect the environment
and human health and to recycle waste of
electrical and electronic appliances. Do not
dispose appliances marked with the symbol
with the household waste. Return the
product to your local recycling facility or
contact your municipal office.
34
INHALTSVERZEICHNIS
Sicherheitsinformationen 35
Sicherheitsanweisungen 37
Gerätebeschreibung 40
Bedienfeld 40
Vor der ersten Inbetriebnahme 42
Täglicher Gebrauch 43
Uhrfunktionen 45
Automatikprogramme 47
Zusatzfunktionen 48
Tipps und Hinweise 50
Reinigung und Pflege 62
Fehlersuche 66
Montage 68
Energieeffizienz 69
Änderungen vorbehalten.
SICHERHEITSINFORMATIONEN
Lesen Sie vor der Montage und dem Gebrauch des Geräts
zuerst die Gebrauchsanleitung. Der Hersteller übernimmt keine
Verantwortung für Verletzungen und Beschädigungen durch
unsachgemäße Montage. Bewahren Sie die
Gebrauchsanleitung griffbereit auf.
Sicherheit von Kindern und schutzbedürftigen
Personen
Das Gerät kann von Kindern ab 8 Jahren und Personen mit
eingeschränkten physischen, sensorischen oder geistigen
Fähigkeiten oder mit mangelnder Erfahrung und/oder
mangelndem Wissen nur dann verwendet werden, wenn sie
durch eine für ihre Sicherheit zuständige Person
beaufsichtigt werden oder in die sichere Verwendung des
Geräts eingewiesen wurden und die mit dem Gerät
verbundenen Gefahren verstanden haben.
Kinder dürfen nicht mit dem Gerät spielen.
Alle Verpackungsmaterialien von Kindern fernhalten.
Halten Sie Kinder und Haustiere während des Betriebs oder
der Abkühlphase vom Gerät fern. Zugängliche Teile sind
heiß.
Falls Ihr Gerät mit einer Kindersicherung ausgestattet ist,
empfehlen wir, diese einzuschalten.
Wartung oder Reinigung des Geräts dürfen nicht von
Kindern ohne Aufsicht erfolgen.
35
SICHERHEITSANWEISUNGEN
Montage
WARNUNG! Nur eine
qualifizierte Fachkraft darf den
elektrischen Anschluss des
Geräts vornehmen.
Entfernen Sie das Verpackungsmaterial.
Stellen Sie ein beschädigtes Gerät nicht
auf und benutzen Sie es nicht.
Halten Sie sich an die mitgelieferte
Montageanleitung.
Seien Sie beim Umsetzen des Geräts
vorsichtig, denn es ist schwer. Tragen
Sie stets Sicherheitshandschuhe.
Ziehen Sie das Gerät nicht am Türgriff.
Die Mindestabstände zu anderen
Geräten und Küchenmöbeln sind
einzuhalten.
Stellen Sie sicher, dass das Gerät
unterhalb von bzw. zwischen sicheren
Konstruktionen montiert wird.
Die Seiten des Geräts dürfen nur an
Geräte oder Einheiten in gleicher Höhe
angrenzen.
Elektrischer Anschluss
WARNUNG! Brand- und
Stromschlaggefahr.
Alle elektrischen Anschlüsse sind von
einem geprüften Elektriker vorzunehmen.
Das Gerät muss geerdet sein.
Stellen Sie sicher, dass die elektrischen
Daten auf dem Typenschild den Daten
Ihrer Stromversorgung entsprechen.
Wenden Sie sich andernfalls an eine
Elektrofachkraft.
Schließen Sie das Gerät nur an eine
ordnungsgemäß installierte
Schutzkontaktsteckdose an.
Verwenden Sie keine
Mehrfachsteckdosen oder
Verlängerungskabel.
Achten Sie darauf, Netzstecker und
Netzkabel nicht zu beschädigen. Falls
das Netzkabel des Geräts ersetzt
werden muss, lassen Sie diese Arbeit
durch unseren autorisierten
Kundendienst durchführen.
Achten Sie darauf, dass das Netzkabel
die Gerätetür nicht berührt oder in ihre
Nähe gelangt, insbesondere wenn die
Tür heiß ist.
Alle Teile, die gegen direktes Berühren
schützen sowie die isolierten Teile
müssen so befestigt werden, dass sie
nicht ohne Werkzeug entfernt werden
können.
Stecken Sie den Netzstecker erst nach
Abschluss der Montage in die
Steckdose. Stellen Sie sicher, dass der
Netzstecker nach der Montage noch
zugänglich ist.
Falls die Steckdose lose ist, schließen
Sie den Netzstecker nicht an.
Ziehen Sie nicht am Netzkabel, wenn Sie
das Gerät von der Stromversorgung
trennen möchten. Ziehen Sie stets am
Netzstecker.
Verwenden Sie nur geeignete
Trennvorrichtungen: Überlastschalter,
Sicherungen (Schraubsicherungen
müssen aus dem Halter entfernt werden
können), Fehlerstromschutzschalter und
Schütze.
Die elektrische Installation muss eine
Trenneinrichtung aufweisen, mit der Sie
das Gerät allpolig von der
Stromversorgung trennen können. Die
Trenneinrichtung muss mit einer
Kontaktöffnungsbreite von mindestens 3
mm ausgeführt sein.
Schließen Sie die Gerätetür ganz, bevor
Sie den Netzstecker in die Steckdose
stecken.
Das Gerät entspricht den EWG-
Richtlinien.
Gebrauch
WARNUNG! Verletzungs-,
Verbrennungs-, Stromschlag-
oder Explosionsgefahr.
Das Gerät ist ausschließlich für die
Verwendung im Haushalt vorgesehen.
Nehmen Sie keine technischen
Änderungen am Gerät vor.
37
Die Lüftungsöffnungen dürfen nicht
abgedeckt werden.
Lassen Sie das Gerät bei Betrieb nicht
unbeaufsichtigt.
Schalten Sie das Gerät nach jedem
Gebrauch aus.
Gehen Sie beim Öffnen der Tür
vorsichtig vor, wenn das Gerät in Betrieb
ist. Es kann heiße Luft austreten.
Bedienen Sie das Gerät nicht mit
feuchten oder nassen Händen oder
wenn es mit Wasser in Kontakt
gekommen ist.
Üben Sie keinen Druck auf die geöffnete
Gerätetür aus.
Benutzen Sie das Gerät nicht als
Arbeits- oder Abstellfläche.
Öffnen Sie die Gerätetür vorsichtig. Bei
der Verwendung von Zutaten, die
Alkohol enthalten, kann ein Alkohol-
Luftgemisch entstehen.
Achten Sie beim Öffnen der Tür darauf,
dass keine Funken oder offenen
Flammen in das Geräts gelangen.
Platzieren Sie keine entflammbaren
Produkte oder Gegenstände, die mit
entflammbaren Produkten benetzt sind,
im Gerät, auf dem Gerät oder in der
Nähe des Geräts.
WARNUNG! Das Gerät könnte
beschädigt werden.
Um Beschädigungen oder Verfärbungen
der Emailbeschichtung zu vermeiden:
Stellen Sie feuerfestes Geschirr oder
andere Gegenstände nicht direkt auf
den Boden des Geräts.
Legen Sie keine Alufolie direkt auf
den Boden des Geräts.
Stellen Sie kein Wasser in das heiße
Gerät.
Lassen Sie nach dem Ausschalten
des Geräts kein feuchtes Geschirr
oder feuchte Speisen im
Backofeninnenraum stehen.
Gehen Sie beim Herausnehmen oder
Einsetzen der Innenausstattung
sorgfältig vor.
Verfärbungen der Emailbeschichtung
haben keine Auswirkung auf die Leistung
des Geräts. Sie stellen keinen Mangel im
Sinne des Gewährleistungsrechtes dar.
Verwenden Sie für feuchte Kuchen das
tiefe Blech. Fruchtsäfte können
bleibende Flecken verursachen.
Dieses Gerät ist nur zum Kochen
bestimmt. Jeder andere Gebrauch ist als
bestimmungsfremd anzusehen, zum
Beispiel das Beheizen eines Raums.
Die Backofentür muss bei Betrieb stets
geschlossen sein.
Ist das Gerät hinter einer Möbelfront
(z.B. einer Tür) installiert, achten Sie
darauf, dass die Tür während des
Gerätebetriebs nicht geschlossen wird.
Hinter einer geschlossenen Möbelfront
können sich Hitze und Feuchtigkeit
ansammeln und das Gerät, Gehäuse
oder den Boden beschädigen. Schließen
Sie die Möbelfront nicht, bevor das
Gerät nach dem Gebrauch vollständig
abgekühlt ist.
Reinigung und Pflege
WARNUNG! Verletzungs-,
Brandgefahr sowie Risiko von
Schäden am Gerät.
Schalten Sie das Gerät immer aus und
ziehen Sie den Netzstecker aus der
Steckdose, bevor Reinigungsarbeiten
durchgeführt werden.
Vergewissern Sie sich, dass das Gerät
abgekühlt ist. Es besteht die Gefahr,
dass die Glasscheiben brechen.
Ersetzen Sie die Türglasscheiben
umgehend, wenn sie beschädigt sind.
Wenden Sie sich an den autorisierten
Kundendienst.
Gehen Sie beim Aushängen der Tür
vorsichtig vor. Die Tür ist schwer!
Reinigen Sie das Gerät regelmäßig, um
eine Abnutzung des
Oberflächenmaterials zu verhindern.
Fett- oder Speisereste im Gerät können
einen Brand verursachen.
Reinigen Sie das Gerät mit einem
weichen, feuchten Tuch. Verwenden Sie
ausschließlich Neutralreiniger. Benutzen
Sie keine Scheuermittel, scheuernde
38
Service
Wenden Sie sich zur Reparatur des
Geräts an einen autorisierten
Kundendienst.
Verwenden Sie ausschließlich
Originalersatzteile.
GERÄTEBESCHREIBUNG
Allgemeine Übersicht
75
6
5
4
3
2
1
21
4
3
1Bedienfeld
2Elektronischer Programmspeicher
3Heizelement
4Lampe
5Ventilator
6Einhängegitter, herausnehmbar
7Einschubebenen
Zubehör
Kombirost
Für Kochgeschirr, Kuchenformen,
Braten.
Backblech
Für Kuchen und Plätzchen.
Brat- und Fettpfanne
Zum Backen und Braten oder zum
Auffangen von abtropfendem Fett.
BEDIENFELD
Elektronischer Programmspeicher
21 3 4 5 6 7 8 9 10
40
Bedienen Sie das Gerät über die Sensorfelder.
Sen-
sorfeld
Funktion Beschreibung
1 - DISPLAY Anzeige der aktuellen Geräteeinstellungen.
2 EIN/AUS Ein- und Ausschalten des Geräts.
3 OPTIONEN Einstellen einer Ofenfunktion oder eines Automatik-
programms.
4
FAVORITEN-PRO-
GRAMM
Speichern Ihres bevorzugten Programms. Über die-
ses Feld können Sie direkt auf Ihr bevorzugtes Pro-
gramm zugreifen, selbst wenn das Gerät ausge-
schaltet ist.
5
TEMPERATUR/
SCHNELLAUFHEI-
ZUNG
Einstellen und Anzeigen der Temperatur des Backo-
feninnenraums oder des KT Sensors (sofern vo-
rhanden). Halten Sie die Taste drei Sekunden lang
gedrückt, um die Schnellaufheizfunktion ein- oder
auszuschalten. Wenn das Gerät ausgeschaltet ist,
lässt sich die Temperatureinstellung der ersten
Ofenfunktion direkt auswählen.
6
NACH OBEN/
NACH UNTEN
Menünavigation nach oben oder nach unten.
7 OK Bestätigen der Auswahl oder Einstellung.
8BACKOFENBE-
LEUCHTUNG
Ein- und Ausschalten der Beleuchtung.
9 UHR Einstellen der Uhrfunktionen.
10 KURZZEIT-WECK-
ER
Einstellen des Kurzzeit-Weckers.
Display
A B C
DEFG
A) Symbol der Backofenfunktion
B) Anzeige der Temperatur/Tageszeit
C) Uhrzeit-/Restwärme-Anzeige/Kurzzeit-Wecker
D) Restwärmeanzeige
E) Anzeigen für die Uhrfunktionen
F) Aufheizanzeige/Anzeige für die
Schnellaufheizung
G) Nummer einer Ofenfunktion/eines Programms
41
Weitere Anzeigen:
Symbol Bezeichnung Beschreibung
Funktionen Auswahl einer Backofenfunktion.
Automatikprogramm Auswahl eines Automatikprogramms.
Bevorzugtes Programm Das bevorzugte Programm wird ausgeführt.
/ kg / g Ein Automatikprogramm mit Gewichtsein-
gabe ist eingeschaltet.
/ Std./Min. Es ist eine Uhrfunktion eingeschaltet.
Temperatur / Schnellaufheizung Die Funktion ist eingeschaltet.
Temperatur Anzeige der aktuellen Temperatur.
Temperatur Die Temperatur kann geändert werden.
Türverriegelung Die Türverriegelung ist eingeschaltet.
Backofenbeleuchtung Sie haben die Backofenbeleuchtung ausge-
schaltet.
Kurzzeit-Wecker Der Kurzzeit-Wecker ist eingeschaltet.
Anzeige für die
Schnellaufheizung
Wenn Sie eine Backofenfunktion
einschalten, leuchten die Balken im
Display auf. Die Balken zeigen an, ob die
Gerätetemperatur steigt oder sinkt.
Die Anzeige erlischt, sobald das Gerät die
eingestellte Temperatur erreicht hat.
VOR DER ERSTEN INBETRIEBNAHME
WARNUNG! Siehe Kapitel
Sicherheitshinweise.
Erste Reinigung
Nehmen Sie die Zubehörteile und die
herausnehmbaren Einhängegitter aus dem
Gerät.
Siehe Kapitel „Reinigung und
Pflege“.
Reinigen Sie das Gerät vor dem ersten
Gebrauch.
Setzen Sie das Zubehör und die
herausnehmbaren Einhängegitter wieder in
ihrer ursprünglichen Position ein.
Einstellen der Uhrzeit
Nach dem ersten Anschluss an das
Stromnetz leuchten alle Symbole im Display
einige Sekunden lang. In den darauf
folgenden Sekunden zeigt das Display die
Softwareversion an.
42
Nachdem die Anzeige der Softwareversion
erloschen ist, zeigt das Display h und 12:00
an, wobei „12“ blinkt.
1. Berühren Sie zum Einstellen der
Stunde(n) oder .
2. Berühren Sie oder .
3. Berühren Sie zum Einstellen der
Minuten oder .
4. Berühren Sie oder .
Die Temperatur-/Zeitanzeige zeigt die neue
Uhrzeit an.
Ändern der Uhrzeit
Sie können die Tageszeit nur ändern, wenn
das Gerät ausgeschaltet ist.
Berühren Sie .
blinkt im Display.
Zum Einstellen der neuen Tageszeit siehe
„Einstellen der Uhrzeit“.
Vorheizen
Heizen Sie das leere Gerät vor, um
Fettreste zu verbrennen.
1. Stellen Sie die Funktion und die
Höchsttemperatur ein.
2. Lassen Sie das Gerät 1 Stunde lang
eingeschaltet.
3. Stellen Sie die Funktion und die
Höchsttemperatur ein.
4. Lassen Sie das Gerät 15 Minuten lang
eingeschaltet.
Das Zubehör kann heißer werden als bei
normalem Gebrauch. Das Gerät kann
Geruch und Rauch verströmen. Das ist
normal. Sorgen Sie für eine ausreichende
Raumbelüftung.
TÄGLICHER GEBRAUCH
WARNUNG! Siehe Kapitel
Sicherheitshinweise.
Bedienung des Geräts
Sie können das Gerät wie folgt bedienen:
Im manuellen Modus
Mit Automatikprogrammen
Ofenfunktionen
Ofenfunktion Anwendung
Heißluft mit
Ringheizkörper
Zum Backen auf bis zu 3 Einschubebenen gleichzeitig und
zum Dörren.Stellen Sie eine 20 - 40 °C niedrigere Backo-
fentemperatur als bei Ober-/Unterhitze ein.
Pizzastufe Zum Backen auf einer Ebene für Gerichte mit einer stärke-
ren Bräunung und einem knusprigen Boden. Stellen Sie
eine 20 - 40 °C niedrigere Backofentemperatur als bei
Ober-/Unterhitze ein.
Bio-Garen Zum Zubereiten von besonders zarten und saftigen Braten.
Ober-/Unterhitze Zum Backen und Braten auf einer Einschubebene.
Tiefkühlgerichte Lässt Fertiggerichte wie Pommes Frites, Kroketten und
Frühlingsrollen schön knusprig werden.
43
Ofenfunktion Anwendung
Heißluftgrillen Zum Braten von größeren Fleischstücken oder Geflügel mit
Knochen auf einer Einschubebene. Auch zum Gratinieren
und Überbacken.
Grillstufe 2 Zum Grillen flacher Lebensmittel in größeren Mengen und
zum Toasten von Brot.
Grillstufe 1 Zum Grillen flacher Lebensmittel und zum Toasten von
Brot.
Warmhalten Zum Warmhalten von Gerichten
Auftauen Zum Auftauen von tiefgefrorenen Lebensmitteln.
Unterhitze Zum Backen von Kuchen mit knusprigen Böden und zum
Einkochen von Lebensmitteln.
ÖKO Braten Mit den ÖKO-Funktionen optimieren Sie den Energiever-
brauch während des Garvorgangs. Sie müssen jedoch
zuerst die Gardauer festlegen. Weitere Informationen zu
den empfohlenen Einstellungen finden Sie in den Kochta-
bellen der entsprechenden Funktion.
Pyrolyse Einschalten der pyrolytischen Selbstreinigung des Backo-
fens. Mit dieser Funktion werden Verschmutzungen im
Backofen verbrannt.
Einstellen der Backofenfunktion
1. Schalten Sie das Gerät mit oder
ein.
Das Display zeigt die voreingestellte
Temperatur, das Symbol und die Nummer
der Backofenfunktion an.
2. Berühren Sie zum Einstellen der
Backofenfunktion oder .
3. Berühren Sie , oder warten Sie fünf
Sekunden, bis sich das Gerät
automatisch einschaltet.
Haben Sie das Gerät
eingeschaltet, aber keine
Backofenfunktion und kein
Programm ausgewählt, schaltet
sich das Gerät automatisch
nach 20 Sekunden wieder aus.
Ändern der Temperatur
Berühren Sie oder , um die
Temperatur in Schritten von 5 °C zu
ändern.
Sobald das Gerät die eingestellte
Temperatur erreicht hat, ertönt drei Mal ein
Signalton, und die Aufheiz-Anzeige erlischt.
Abfragen der Temperatur
Sie können die Temperatur während einer
laufenden Funktion oder eines laufenden
Programms abfragen.
1. Berühren Sie .
Die Temperatur-/Zeit-Anzeige zeigt die
Backofentemperatur an.
2. Berühren Sie , um zur Anzeige der
eingestellten Temperatur
zurückzukehren, oder warten Sie fünf
44
Sekunden, bis diese automatisch
angezeigt wird.
Schnellaufheizung
Geben Sie kein Gargut in den
Backofen, wenn die Funktion
Schnellaufheizung eingeschaltet
ist.
Die Funktion Schnellaufheizung steht nicht
bei allen Ofenfunktionen zur Verfügung. Es
ertönt ein akustisches Signal, wenn die
Schnellaufheizung nicht für die eingestellte
Funktion verfügbar ist. Hierzu müssen aber
die Alarmsignale im Menü
„Einstellungen“ eingeschaltet worden sein.
Die Schnellaufheizfunktion verkürzt die
Aufheizzeit.
Zum Einschalten der Funktion
Schnellaufheizung berühren und halten Sie
länger als drei Sekunden lang gedrückt.
Wenn Sie die Funktion Schnellaufheizung
einschalten, blinken die Balken im Display
nacheinander und leuchtet auf, um
anzuzeigen, dass die Funktion in Betrieb ist.
UHRFUNKTIONEN
Tabelle der Uhrfunktionen
Uhrfunktion Anwendung
GARZEITMESSER Einstellen des Garzeitmessers zum Anzeigen, wie lange das
Gerät bereits in Betrieb ist. Diese Funktion hat keine Auswir-
kung auf den Gerätebetrieb.
TAGESZEIT Anzeige der Tageszeit. Zum Ändern, siehe „Einstellen der
Uhrzeit“.
DAUER Einstellen der Einschaltdauer für das Gerät.
ENDE Einstellen, wann das Gerät ausgeschaltet werden soll. Sie
können die Dauer und das Ende gleichzeitig einstellen (Zeit-
vorwahl), wenn das Gerät zu einem späteren Zeitpunkt au-
tomatisch ein- und ausgeschaltet werden soll.
SET + GO Mit dieser Funktion werden die gewünschten Einstellungen
gespeichert, damit das Gerät durch ein einmaliges Berühren
des Sensorfeldes zu einem beliebigen späteren Zeitpunkt
eingeschaltet werden kann.
Garzeitmesser
Der Garzeitmesser wird nicht
eingeschaltet, wenn Dauer und
Ende eingestellt sind.
Der Garzeitmesser beginnt zu zählen,
sobald das Gerät aufgeheizt wird.
1. Berühren Sie zum Zurücksetzen des
Garzeitmessers wiederholt, bis im
Display blinkt.
2. Berühren Sie , bis im Display
„00:00“ erscheint und der
Garzeitmesser wieder mit dem
Hochzählen beginnt.
Einstellen der DAUER
1. Schalten Sie das Gerät ein und wählen
Sie die Backofenfunktion und
Temperatur.
2. Berühren Sie wiederholt, bis das
Display anzeigt.
45
blinkt im Display.
3. Verwenden Sie zum Einstellen der
DAUER in Minuten oder .
4. Berühren Sie zur Bestätigung.
5. Berühren Sie zum Einstellen der DAUER
in Stunden oder .
Wenn Sie während des
Einstellens der DAUER die
Sensorfelder oder
berühren, schaltet das Gerät
auf die Funktion ENDE.
6. Nach Ablauf der Zeit ertönt zwei
Minuten ein akustisches Signal.
und die eingestellte Zeit blinken im
Display. Das Gerät wird ausgeschaltet.
7. Zum Ausschalten des Signaltons
drücken Sie ein Sensorfeld oder öffnen
Sie die Backofentür.
8. Schalten Sie das Gerät aus.
Einstellen von ENDE
1. Schalten Sie das Gerät ein und wählen
Sie die Backofenfunktion und
Temperatur.
2. Berühren Sie wiederholt, bis das
Display anzeigt.
blinkt im Display.
3. Verwenden Sie oder zum
Einstellen von ENDE und oder
zum Bestätigen. Stellen Sie zuerst die
Minuten und dann die Stunden ein.
Nach Ablauf der eingestellten Zeit ertönt
zwei Minuten lang ein Signalton. Das
Symbol und die eingestellte Zeit blinken
im Display. Das Gerät wird ausgeschaltet.
4. Zum Ausschalten des Signaltons
drücken Sie ein Sensorfeld oder öffnen
Sie die Backofentür.
5. Schalten Sie das Gerät aus.
Einstellen von SET + GO
Die Funktion „SET + GO“ lässt sich nur bei
eingestellter DAUER einschalten.
1. Stellen Sie eine Backofenfunktion (oder
ein Programm) sowie die Temperatur
ein (siehe „Einstellen der
Backofenfunktion“ und „Ändern der
Temperatur“).
2. Stellen Sie die DAUER ein (siehe
„Einstellen der DAUER“).
3. Berühren Sie wiederholt, bis im
Display blinkt.
4. Berühren Sie , um die Funktion SET
+ GO einzustellen.
Im Display werden die Symbole und
angezeigt sowie die Anzeige für die aktuell
eingeschaltete Uhrfunktion.
5. Starten Sie die Funktion SET + GO
durch Berühren eines Sensorfelds
(außer EIN/AUS).
Einstellen des KURZZEIT-
WECKERS
Verwenden Sie den KURZZEIT-WECKER
zum Einstellen einer Countdownzeit
(maximal 23 Std. 59 Min.).Diese Funktion
hat keine Auswirkungen auf den
Backofenbetrieb. Sie können den
KURZZEIT-WECKER jederzeit einstellen,
auch wenn das Gerät ausgeschaltet ist.
1. Berühren Sie .
und „00“ blinken im Display.
2. Stellen Sie den KURZZEIT-WECKER mit
oder ein. Stellen Sie zuerst die
Sekunden und dann die Minuten und
Stunden ein.
3. Berühren Sie . Andernfalls wird der
KURZZEIT-WECKER nach fünf
Sekunden automatisch gestartet.
Nach Ablauf der eingestellten Zeit ertönt
zwei Minuten lang ein Signalton und
„00:00“ sowie blinken im Display.
4. Zum Ausschalten des Signaltons
drücken Sie ein Sensorfeld oder öffnen
Sie die Backofentür.
Einstellen der Zeitvorwahl
Die Funktionen DAUER und ENDE
können gleichzeitig verwendet werden,
wenn das Gerät zu einem späteren
Zeitpunkt automatisch ein- und
ausgeschaltet werden soll. Stellen Sie in
46
Programmnummer Programmname
19 TIEFKÜHLPIZZA
20 TIEFKÜHL-KARTOFFELZUBEREITUNGEN
Automatikprogramme
1. Schalten Sie das Gerät ein.
2. Berühren Sie .
Im Display werden , ein Symbol und die
Nummer des Automatikprogramms
angezeigt.
3. Berühren Sie oder , um das
Automatikprogramm auszuwählen.
4. Berühren Sie oder warten Sie fünf
Sekunden, bis das Gerät automatisch
eingeschaltet wird.
5. Nach Ablauf der Zeit ertönt zwei
Minuten ein akustisches Signal. Das
Symbol blinkt.
Das Gerät wird ausgeschaltet.
6. Zum Ausschalten des Signaltons
drücken Sie ein Sensorfeld oder öffnen
Sie die Backofentür.
Automatikprogramme mit
Gewichtseingabe
Wenn Sie das Fleischgewicht eingeben,
berechnet das Gerät die Gardauer
automatisch.
1. Schalten Sie das Gerät ein.
2. Berühren Sie .
3. Berühren Sie oder , um das
Programm mit Gewichtseingabe
einzustellen.
Im Display wird folgendes angezeigt: die
Gardauer, das Symbol Dauer , ein
Standardgewicht und die Gewichtseinheit
(kg, g).
4. Berühren Sie , oder warten Sie fünf
Sekunden, bis die Einstellungen
automatisch übernommen werden.
Das Gerät wird eingeschaltet.
5. Sie können das Standardgewicht mit
oder ändern. Berühren Sie .
6. Nach Ablauf der Zeit ertönt zwei
Minuten lang ein Signalton, und
blinkt.
Das Gerät wird ausgeschaltet.
7. Zum Ausschalten des Signaltons
drücken Sie ein Sensorfeld oder öffnen
Sie die Backofentür.
ZUSATZFUNKTIONEN
Verwenden der Funktion
„Bevorzugtes Programm“:
Mit dieser Funktion können Sie Ihre
bevorzugten Einstellungen für Temperatur
und Dauer bei Backofenfunktionen oder -
programmen speichern.
1. Stellen Sie die Temperatur und die
Dauer für eine Backofenfunktion oder
ein Programm ein.
2. Berühren Sie länger als drei
Sekunden. Ein akustisches Signal
ertönt.
3. Schalten Sie das Gerät aus.
Berühren Sie , um die Funktion
einzuschalten. Das Gerät schaltet Ihr
bevorzugtes Programm ein.
Sie können die Dauer und die
Temperatur bei
eingeschalteter Funktion
ändern.
Berühren Sie , um diese Funktion
auszuschalten. Das Gerät schaltet Ihr
bevorzugtes Programm aus.
48
Verwenden der Kindersicherung
Die Kindersicherung verhindert ein
versehentliches Bedienen des Geräts.
Während der Pyrolyse ist die Tür
verriegelt. Im Display wird eine
Meldung angezeigt, wenn Sie
ein Sensorfeld berühren.
1. Schalten Sie zum Einschalten der
Funktion das Gerät mit aus. Stellen
Sie keine Ofenfunktion ein.
2. Berühren Sie 2 Sekunden lang
gleichzeitig und .
Ein akustisches Signal ertönt.
SAFE wird im Display angezeigt. Die Tür ist
verriegelt.
Zum Ausschalten der Kindersicherung
wiederholen Sie Schritt 2.
Verwenden der Tastensperre
Diese Funktion lässt sich nur bei
eingeschaltetem Gerät einschalten.
Die Tastensperre verhindert ein
versehentliches Verstellen der
Backofenfunktion.
1. Schalten Sie zum Einschalten der
Funktion das Gerät ein.
2. Schalten Sie eine Backofenfunktion ein
oder wählen Sie eine Einstellung.
3. Berühren Sie 2 Sekunden lang
gleichzeitig und .
Ein akustisches Signal ertönt.
Loc wird im Display angezeigt.
Zum Ausschalten der Funktion wiederholen
Sie Schritt 3.
Während der Pyrolyse ist die Tür
verriegelt. Im Display wird eine
Meldung angezeigt, wenn Sie
ein Sensorfeld berühren.
Sie können das Gerät bei
eingeschalteter Tastensperre
ausschalten. Wenn Sie das
Gerät ausschalten, wird auch
die Tastensperre ausgeschaltet.
Verwenden des Einstellmenüs
Das Menü Einstellungen lässt sich nur bei
ausgeschaltetem Gerät aufrufen.
Mit dem Einstellmenü können Sie
Funktionen im Hauptmenü ein- und
ausschalten. Im Display werden SET und
die Nummer der Einstellung angezeigt.
Beschreibung Mögliche Einstelloption
1 SET+GO EIN/AUS
2 RESTWÄRMEANZEIGE EIN/AUS
3 ERINNERUNGSFUNKTIONEN EIN/AUS
4TASTENTÖNE1) KLICK/BEEP/AUS
5 ALARMSIGNALE EIN/AUS
6 SERVICE-MENÜ -
7 ZURÜCK ZUM AUSLIEFERZUSTAND JA/NEIN
1) Der Ton des Sensorfelds EIN/AUS lässt sich nicht ausschalten.
1. Wenn das Gerät ausgeschaltet ist,
halten Sie drei Sekunden lang
gedrückt.
Im Display wird SET1 angezeigt, wobei die
„1“ blinkt.
2. Berühren Sie zum Einstellen oder
.
49
3. Berühren Sie .
4. Berühren Sie oder , um die
eingestellte Option zu ändern.
5. Berühren Sie .
Berühren Sie zum Beenden des
Einstellmenüs oder halten Sie
gedrückt.
Abschaltautomatik
Das Gerät wird aus Sicherheitsgründen
nach einiger Zeit automatisch
ausgeschaltet, wenn eine Backofenfunktion
eingeschaltet ist und Sie die Einstellungen
nicht ändern.
Temperatur (°C) Abschaltzeit (Std.)
30 - 115 12.5
120 - 195 8.5
200 - 245 5.5
250 - Höchststufe 1.5
Berühren Sie nach der automatischen
Abschaltung ein Sensorfeld, um das Gerät
wieder einzuschalten.
Die Abschaltautomatik
funktioniert nicht mit den
Funktionen:
Backofenbeleuchtung, Bio-
Garen, Dauer, Ende,
Zeitvorwahl.
Helligkeit des Displays
Das Displays verfügt über zwei
Helligkeitsstufen:
Nachthelligkeit - Ist das Gerät
ausgeschaltet, verringert sich die
Helligkeit des Displays zwischen 22:00
und 06:00 Uhr.
• Tageshelligkeit:
Wenn das Gerät eingeschaltet ist.
Wenn Sie eines der Sensorfelder
während der Nachthelligkeit
berühren (außer EIN/AUS), schaltet
das Display für die nächsten 10
Sekunden auf Tageshelligkeit um.
Wenn das Gerät ausgeschaltet ist
und Sie den Kurzzeit-Wecker
einstellen. Sobald der
Kurzzeitwecker abgelaufen ist,
schaltet das Display zurück auf
Nachthelligkeit.
Kühlgebläse
Wenn das Gerät in Betrieb ist, wird
automatisch das Kühlgebläse eingeschaltet,
um die Geräteflächen zu kühlen. Nach dem
Abschalten des Geräts läuft das
Kühlgebläse weiter, bis das Gerät
abgekühlt ist.
Sicherheitsthermostat
Ein unsachgemäßer Gebrauch des Geräts
oder defekte Bestandteile können zu einer
gefährlichen Überhitzung führen. Um dies
zu verhindern, ist der Backofen mit einem
Sicherheitsthermostat ausgestattet, der die
Stromzufuhr unterbrechen kann. Die
Wiedereinschaltung des Backofens erfolgt
automatisch bei Temperaturabfall.
TIPPS UND HINWEISE
WARNUNG! Siehe Kapitel
Sicherheitshinweise.
Die Temperaturen und
Backzeiten in den Tabellen sind
nur Richtwerte. Sie sind
abhängig von den Rezepten,
der Qualität und der Menge der
verwendeten Zutaten.
Allgemeine Informationen
Das Gerät hat fünf Einschubebenen. Die
Einschubebenen werden vom Boden
des Backofens aus gezählt.
Das Gerät ist mit einem exklusiven
Umluft- und Dampfsystem zur Regelung
der Luftzirkulation und des
Dampfkreislaufs ausgerüstet. Das Garen
mit Dampf macht Ihre Speisen innen
50


Produktspecifikationer

Varumärke: Juno
Kategori: Ugn
Modell: JB126D5

Behöver du hjälp?

Om du behöver hjälp med Juno JB126D5 ställ en fråga nedan och andra användare kommer att svara dig