Kramer KC-ON PREM Bruksanvisning
Kramer Inte kategoriserad KC-ON PREM
Läs gratis den bruksanvisning för Kramer KC-ON PREM (2 sidor) i kategorin Inte kategoriserad. Guiden har ansetts hjälpsam av 18 personer och har ett genomsnittsbetyg på 4.9 stjärnor baserat på 3 recensioner. Har du en fråga om Kramer KC-ON PREM eller vill du ställa frågor till andra användare av produkten? Ställ en fråga
Sida 1/2
KC-ONPREM Quick Start
P/N:
2900-301595QS
Rev:
1
Scan for full manual
KC-ONPREM Quick Start Guide
This guide helps you install and use your KC-ONPREM for the rst time.
Go to www.kramerav.com/downloads/KC-ONPREM to download the latest user manual and check if
rmware upgrades are available.
Step 1: Check what’s in the box
KC-ONPREM Hardware platform for Control On Prem
1 Power adapter and cord
1 Quick start guide
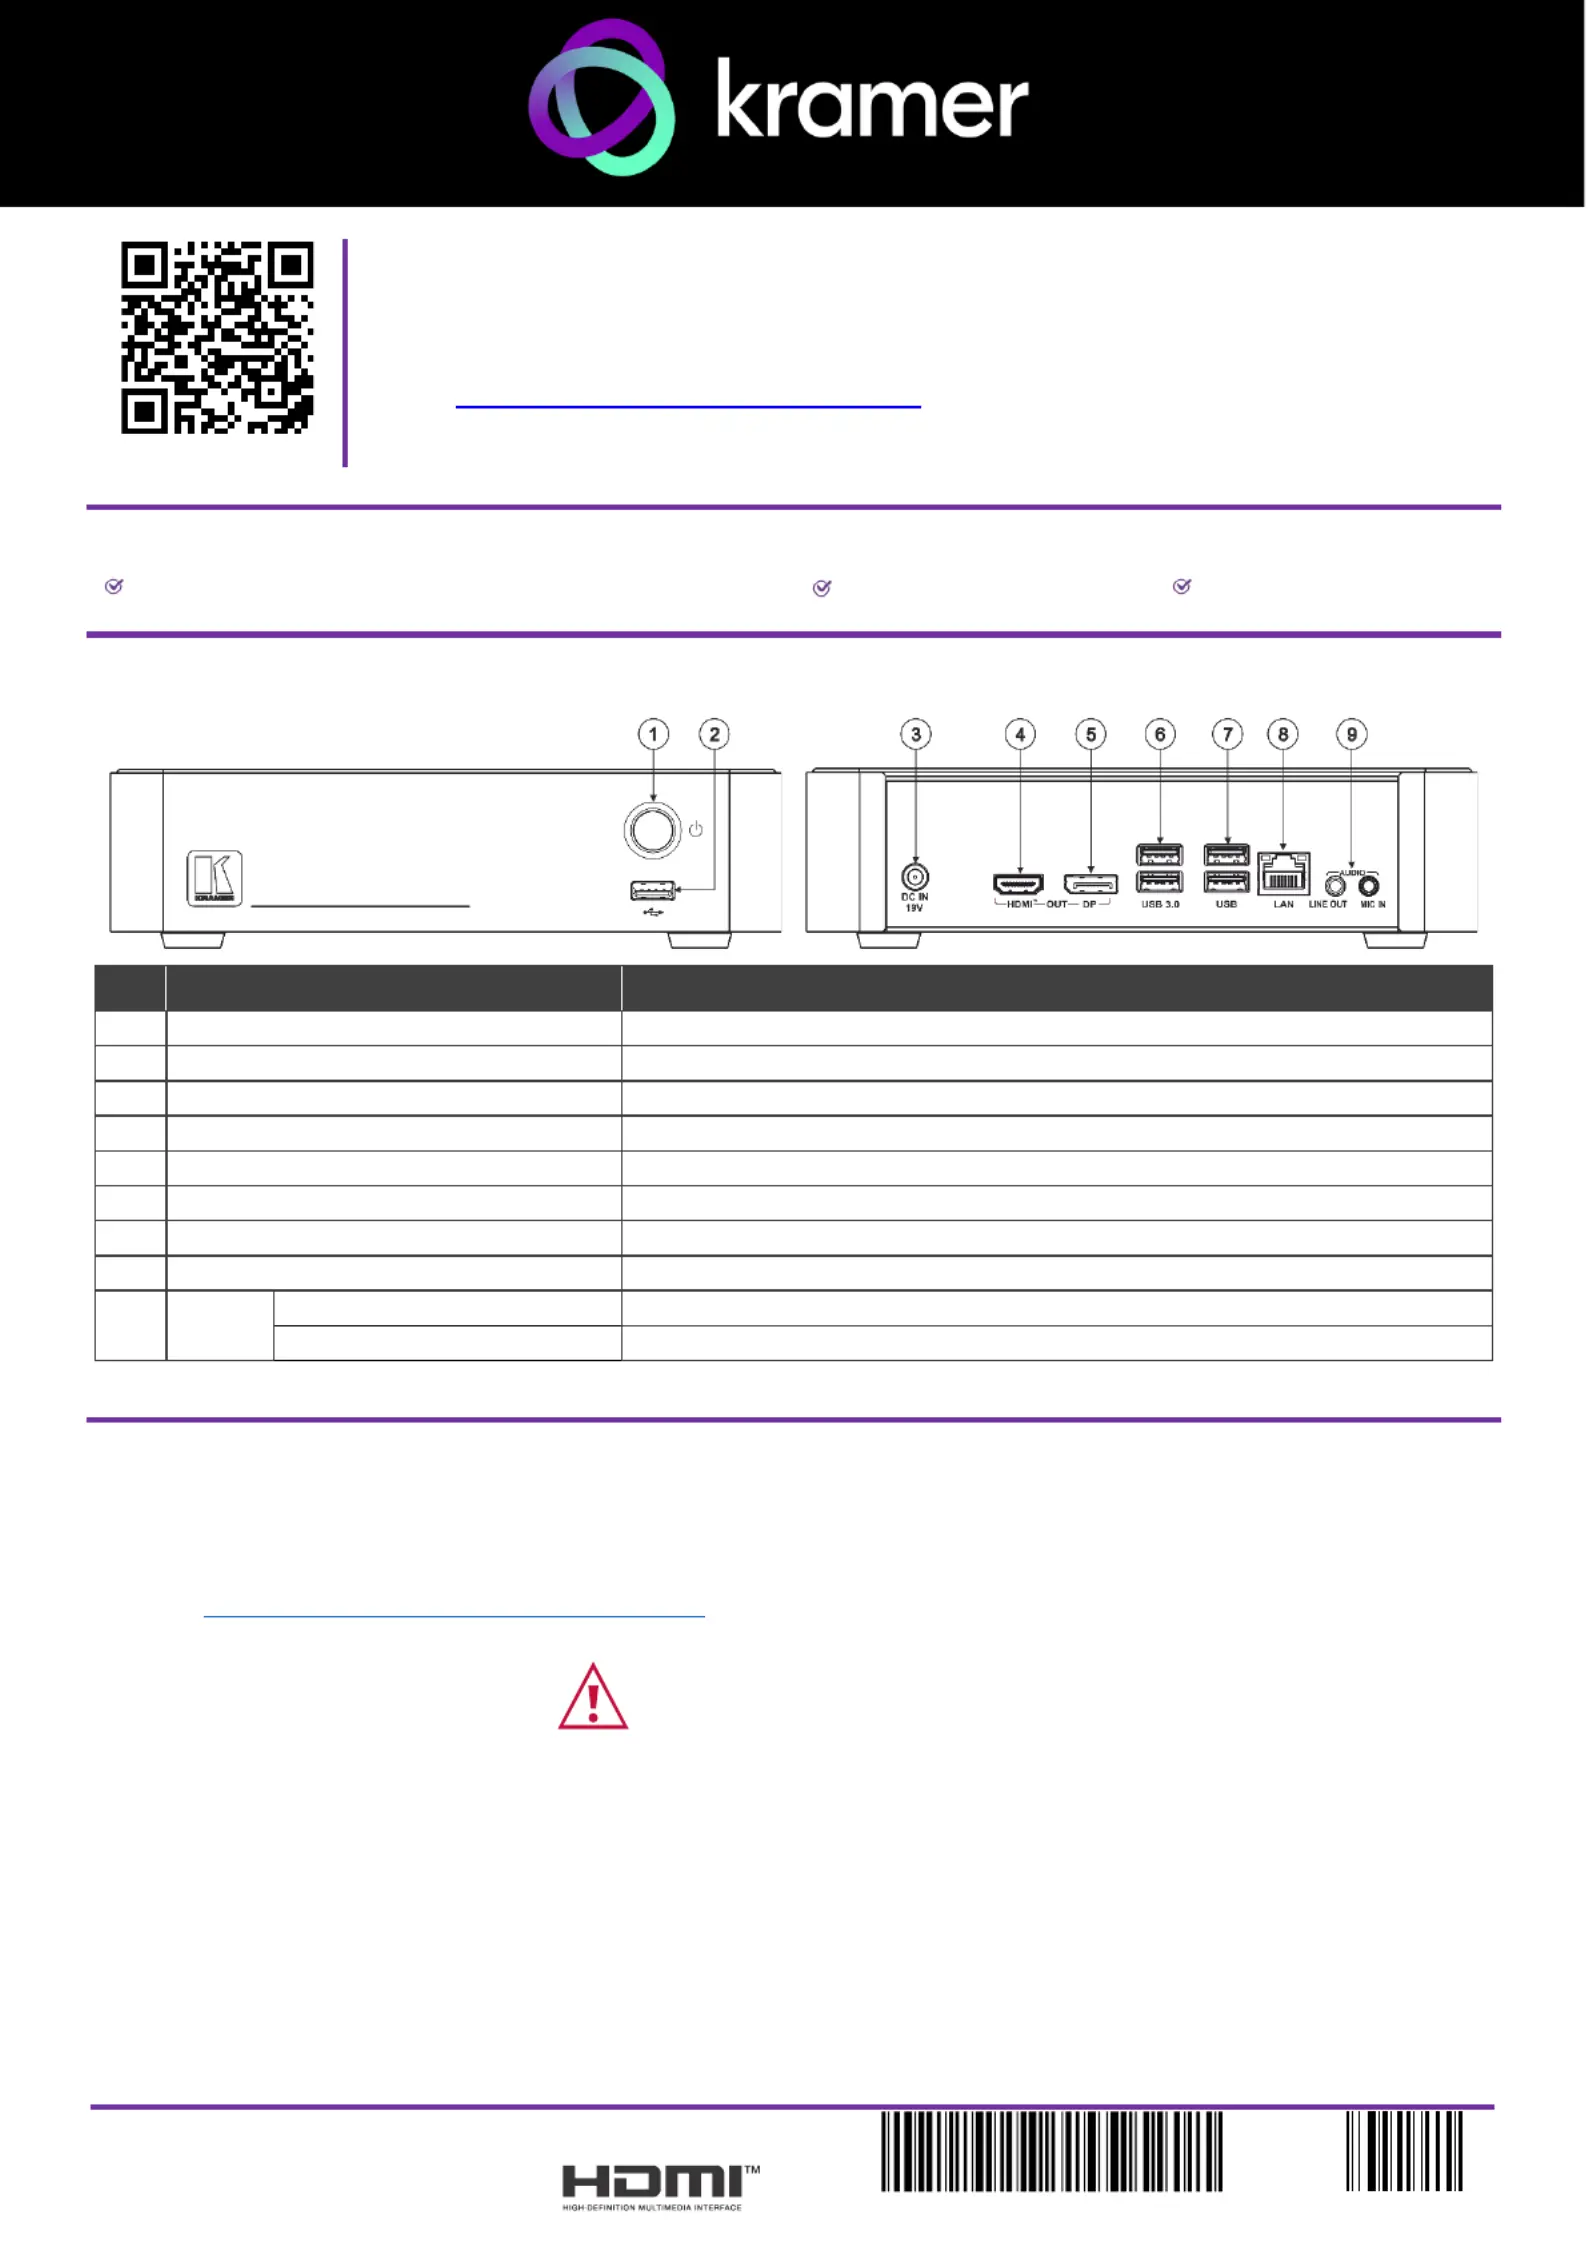
Step 2: Get to know your -ONPREM KC
#
Feature
Function
1
Power Button
Press to turn the on and o. unit
2
USB 2.0 Connector
Connect to a computer for upgrading rmware or connect a USB device. to
3
DC IN 19V Connector
Connects to the 19V DC power adapter.
4
HDMI OUT Connector ™
Connect to an HDMI display.
5
DP OUT Connector
Connect to a DisplayPort display.
6
USB 3.0 connectors
Connect to up to 2 USB devices.
7
USB 2.0 connectors
Connect to up to 2 USB devices.
8
LAN RJ-45 Connector
Connect to a Local Area Network (LAN) cable.
9
AUDIO
LINE OUT 3.5mm Mini Jack
Connect to an unbalanced stereo audio acceptor.
MIC IN 3.5mm Mini Jack
Connect to a microphone.
The terms HDMI, HDMI High-Denition Multimedia Interface, and the HDMI Logo are trademarks or registered trademarks of HDMI Licensing Administrator, Inc.
Step 3: Mount -ONPREM KC
Install using one of the following methods: KC-ONPREM
•Attach the rubber feet and place the unit on a at surface.
•Mount the unit in a rack using the recommended rack adapter
(see www.kramerav.com/product/KC-ONPREM).
•Ensure that the environment (e.g., maximum ambient temperature & air ow) is compatible for the device.
•Avoid uneven mechanical loading.
•Appropriate consideration of equipment nameplate ratings should be used for avoiding overloading of the circuits.
•Reliable earthing of rack-mounted equipment should be maintained.
•Maximum mounting height for the device is 2 meters.
Produktspecifikationer
| Varumärke: | Kramer |
| Kategori: | Inte kategoriserad |
| Modell: | KC-ON PREM |
Behöver du hjälp?
Om du behöver hjälp med Kramer KC-ON PREM ställ en fråga nedan och andra användare kommer att svara dig
Inte kategoriserad Kramer Manualer

21 Februari 2025
2 Februari 2025
4 Januari 2025
20 December 2024
20 December 2024
20 December 2024
20 December 2024
20 December 2024
20 December 2024
20 December 2024
Inte kategoriserad Manualer
Nyaste Inte kategoriserad Manualer
9 April 2025
9 April 2025
9 April 2025
9 April 2025
9 April 2025
9 April 2025
9 April 2025
9 April 2025
9 April 2025
9 April 2025