Kramer KT-107-INWL Bruksanvisning
Kramer Inte kategoriserad KT-107-INWL
Läs gratis den bruksanvisning för Kramer KT-107-INWL (4 sidor) i kategorin Inte kategoriserad. Guiden har ansetts hjälpsam av 22 personer och har ett genomsnittsbetyg på 4.2 stjärnor baserat på 8 recensioner. Har du en fråga om Kramer KT-107-INWL eller vill du ställa frågor till andra användare av produkten? Ställ en fråga
Sida 1/4
KT--INWL 107 Quick Start
P/N:
2900-301151QS
Rev:
2
Scan for full manual
KT--INWL Quick Start Guide 107
This guide helps you install and use your KT-107-INWLfor the rst time.
Go to www.kramerav.com/downloads/KT--INWL107to download the latest manual and check for updates.
Step 1: Check what’s in the box
KT--INWL 107enclosure
4 4x1/2” screws for wood (packed separately)
Outer frame
1 utCardboard c-out template
4 Inner frame M3x8 screws (packed separately
Inner frame
1 Quick start guide
Step 2: Get to know your --INWL KT107
The -Wall Kit secures ,and Touch Panels safely into a wall (drywall, wood, or KT--INWL107InKT-107 -107RB KT -107SKT
concrete).
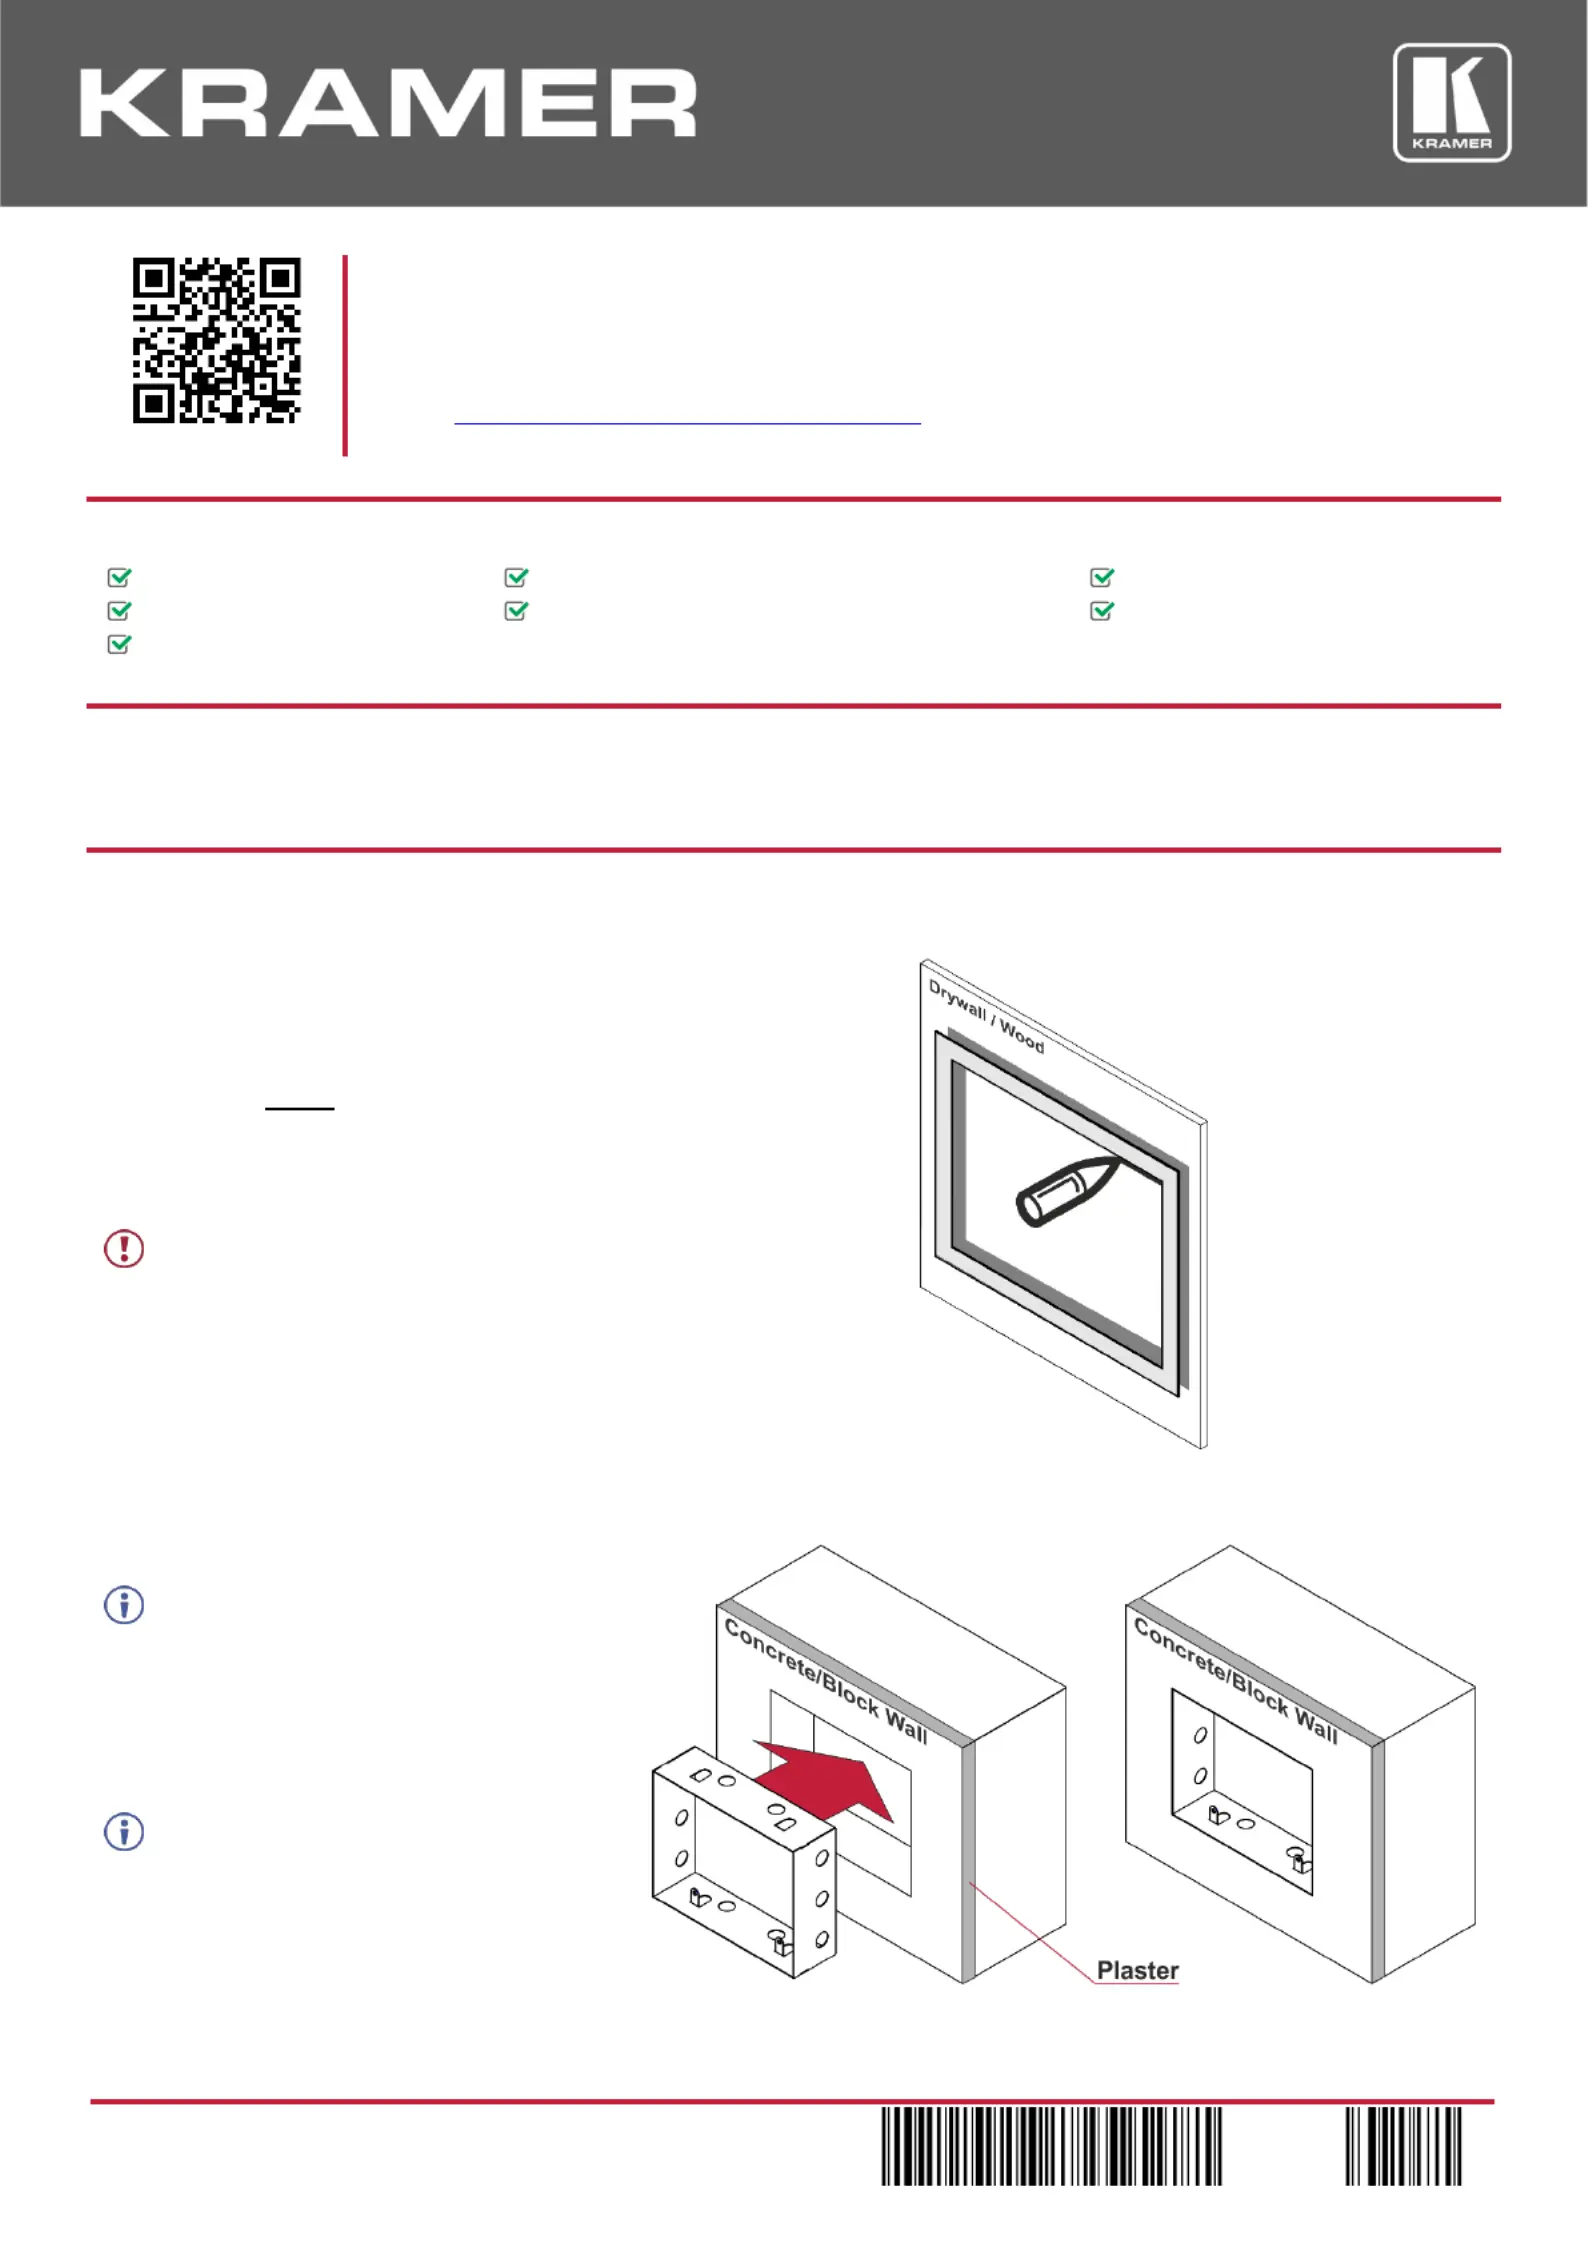
Step 3: Prepare the surface for installation
For drywall and wooden surfaces:
1. Place the cut-out template (included, use
for drywall and wood installations) over the
surface exactly where you want to install
KT--INWL107.
2. Mark the edge inside
(W, H: 19.5cm x 15cm) of the template and
cut an opening in the surface according to
the given dimensions.
Kramer is not responsible for any
damage caused to the surface.
For concrete or block wall surfaces:
Use the Kramer -wall box KT-107-INWBin
(purchased separately) for concrete
installations.
1. Make sure that the prepared opening in
the concrete ts the dimensions of the in-
wall junction box.
2. Insert the into the opening. KT--INWB107
Make sure to place the ush KT-107-INWB
with the plaster surface.
Produktspecifikationer
| Varumärke: | Kramer |
| Kategori: | Inte kategoriserad |
| Modell: | KT-107-INWL |
| Vikt: | 600 g |
| Bredd: | 225 mm |
| Höjd: | 42 mm |
| Förpackningens bredd: | 344 mm |
| Certifiering: | CE, WEEE |
| Maximal skärmstorlek: | 7 " |
| Minsta skärmstorlek: | 7 " |
| Maxvikt: | - kg |
| Produktens färg: | Svart |
| Monteringssats: | Ja |
| Låddjup: | 210 mm |
| Vikt inkl. förpackning: | 800 g |
| Hållbarhetscertifiering: | RoHS |
| Monteringssätt: | Vägg |
| Antal displayer som stöds: | 1 |
| Monteringsgränssnitt kompatibilitet (min): | - mm |
| Monteringsgränssnitt kompatibilitet (max): | - mm |
| Djup (min): | 177 mm |
Behöver du hjälp?
Om du behöver hjälp med Kramer KT-107-INWL ställ en fråga nedan och andra användare kommer att svara dig
Inte kategoriserad Kramer Manualer

21 Februari 2025
2 Februari 2025
4 Januari 2025
20 December 2024
20 December 2024
20 December 2024
20 December 2024
20 December 2024
20 December 2024
20 December 2024
Inte kategoriserad Manualer
Nyaste Inte kategoriserad Manualer
9 April 2025
9 April 2025
9 April 2025
9 April 2025
9 April 2025
9 April 2025
9 April 2025
9 April 2025
9 April 2025
9 April 2025